Oral B Smart Guide Type 3742 Teardown
Duration: 45 minutes
Steps: 4 Steps
Let’s dive into taking apart your Oral B Smart Guide (type #3742) with some simple steps and a little patience.
Ready to take apart your Oral B Smart Guide type #3742? This guide picks up where the online resources leave off, focusing on the teardown of type #3742—different from the #3741 model. We’ll walk through each step clearly and confidently, helping you get inside your device with ease. If at any point you need a hand, remember you can always schedule a repair. Let’s get started and demystify this repair together!
Step 1
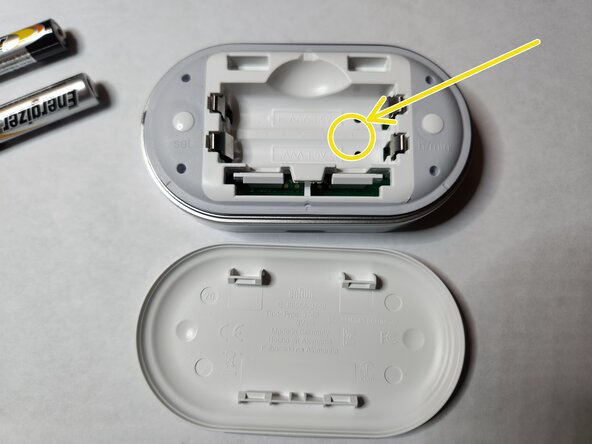

– The 3742 Smart Guide has a smooth oval shape, rounded nicely on both sides. In contrast, the 3741 features a rounded side with just a hint of an arc on the other side. Be sure to check out the guide link in the intro for more details!
– Thinking about swapping out the whole unit because it just won’t cooperate? No worries! Just look for the letter that pops up after the numbers behind the battery compartment (in that handy Yellow Circle). That’ll tell you if it’s sub-version A or B.
– Remember, if a replacement is on your agenda, the type and version of your Oral-B Toothbrush really matter!
Step 2


– The cover is secured with 2 clips (one on each side, marked in red). To remove it, simply slide a screwdriver into the small gap (highlighted in orange) and give a gentle press on the clip on either side (or both) to pop it out. Once that’s done, you can easily lift away the entire inner assembly!
Step 3
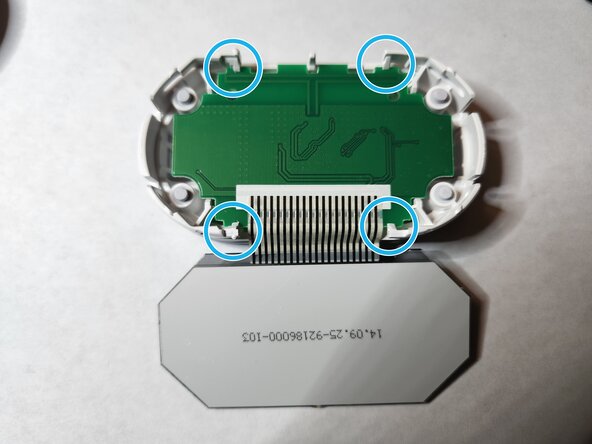
– The board is held in place against the battery terminals by four plastic clips (teal color) that are part of the assembly. To access the board, gently push these clips out of the way. If you need help, you can always schedule a repair.
Step 4
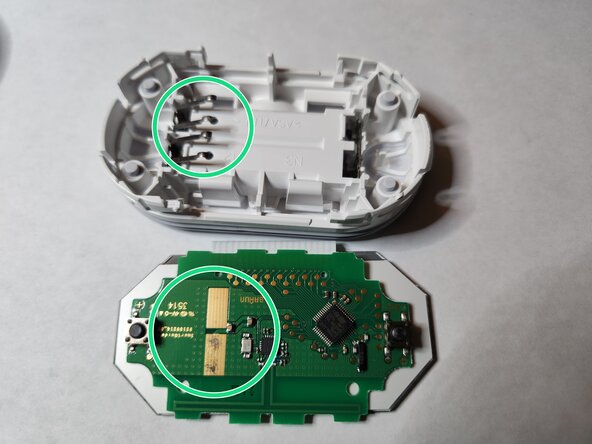
– Access the circuit board contact pad and the battery’s spring-loaded contacts, which are often the troublemakers (highlighted in green). Carefully clean off any corrosion using a knife or screwdriver, then give it a final wipe-down with 99% isopropyl alcohol and some Q-tips before reassembling. Don’t worry if a bit of discoloration remains, as shown in the picture — if it’s clean, it should work just fine. If you need a hand along the way, you can always schedule a repair.
Success!