DIY Google Pixel 8 Ultrawide Camera Replacement Guide
Duration: 45 minutes
Steps: 41 Steps
Hey there! This step-by-step guide was crafted by our awesome repair crew, so you can smoothly navigate through your device fix. Check out our cool repair how-tos right here, linked for your convenience!
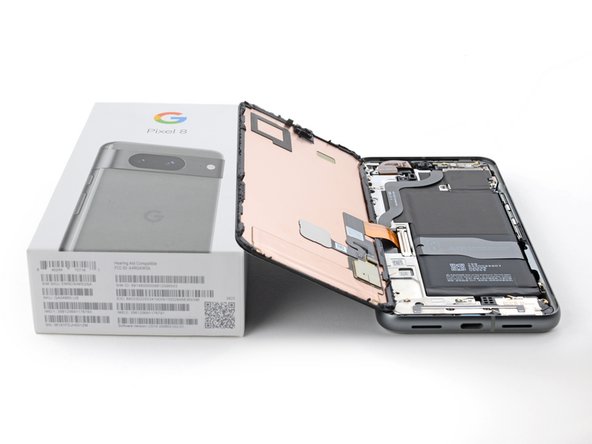
Get ready to give your Pixel 8 a brand new ultrawide rear camera. If your ultra-wide photos are coming out distorted, blurry, or the camera just isn’t working, it’s probably time for a replacement. This step-by-step guide from Salvation Repair will walk you through the process. Note that this guide is based on the 5G mmWave antenna model, but if you have the non-mmWave version, you can still follow along – just skip the steps that mention the 5G mmWave antenna. Don’t forget to pick up some replacement screen adhesive to complete the job. If you need help, you can always schedule a repair.
Step 1


Let’s give your Pixel a little timeout! Make sure the battery is below 25% before diving into this repair. A lively lithium-ion battery might throw a fit and catch fire if it gets hurt. Safety first, friends!
Ready to power down? Just hold the power and volume up buttons at the same time. That’ll bring up the shutdown menu, and you’re on your way!
– Time to get started! First, carefully unplug all cables from your phone to avoid any accidental power-ons or short circuits.
– Next, completely power off your phone – this will help you avoid any unexpected surprises during the repair process.
Step 2


To avoid any damage to your device, let’s take a quick precaution with your opening picks. We’ll show you how to mark them so you can use them with confidence.
One easy way to do this is to tape a coin to the pick, about 3 mm from the tip. This simple trick will help you get the job done safely.
– Mark the opening pick with a permanent marker, 3 mm from the tip. It’s like giving your tool a little highlight, so you don’t lose track!
Step 3

The screen is held tight to the frame with adhesive and clips. A little heat will do wonders, softening that adhesive and making it a breeze to pop the screen off.
Feel free to use a hair dryer, heat gun, or hot plate for this step—but watch out! Too much heat can be a screen’s worst enemy and might mess with the battery too.
– Give your iOpener a warm-up and then place it on the bottom edge of the screen for a cozy two minutes to loosen up that adhesive. Let’s get it ready to party!
Tools Used


Step 4


Here come the next three steps featuring the Anti-Clamp, a nifty little gadget we whipped up to make opening your device a breeze! If you’re not rocking the Anti-Clamp, no worries—just skip ahead three steps for a different approach.
Need a hand with the Anti-Clamp? We’ve got you covered! Check out this guide for all the deets on how to use it.
– Pull the blue handle back to unlock the Anti-Clamp’s arms.
– Place your phone screen side up on something level, with the bottom edge hanging off.
– Slide the arms over the left edge of your phone to access the bottom edge.
– Get those suction cups close to the center of the bottom edge.
– Squeeze the cups together to create some suction.
Step 5


– Give that handle a gentle pull forward to lock those arms in place.
– Now, twist that handle clockwise for a full 360-degree turn, or until you see those suction cups start to stretch out.
– As those cups stretch, keep an eye on their alignment. If they start to slip, just pop off the Anti-Clamp and use some tape to help the cups stick better.
Step 6


Keep that opening pick to a cool 3 mm or less—your spring contacts will thank you for it!
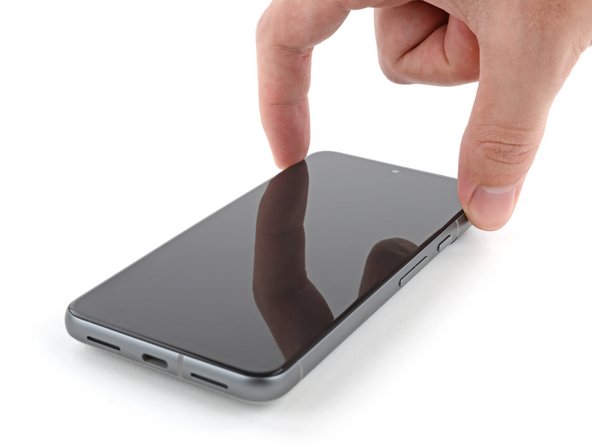
– Give it a moment—let’s wait about a minute for a little space to open up between the screen and the frame.
– Gently slide an opening pick into that delightful gap you’ve created.
– Now, pull the blue handle back to release those arms and smoothly remove the Anti-Clamp using the handy pull tabs on the suction cups.
– Feel free to skip the next two steps and keep cruising!


Step 8


Still having trouble creating a gap? Try adding a bit more heat and give it another shot!
– It’s time to put on your superhero cape and conquer this screen! Carefully pull up on the handle with a powerful yet steady grip, and you’ll see the screen start to separate from the frame. Cool, huh? Now, grab your trusty opening pick and carefully slide it into that space. You’re crushing it, buddy!
Tools Used
Step 9


– The screen cable is nestled just shy of the halfway mark along the left edge of your phone. Handle it with care to avoid any accidental rips!
– All around the edges of the phone, you’ll find a bunch of spring contacts. Tread lightly in these areas to keep them from bending out of shape.
Step 10


– Gently slide the opening pick along the bottom edge to loosen the adhesive holding it in place.
– Keep that pick snugly in the bottom right corner to ensure the adhesive doesn’t decide to stick back together.
Step 11

Heads up! If you don’t have the right tools, you can get creative with a hair dryer, heat gun, or hot plate. Just remember, too much heat can be a screen or battery killer, so proceed with caution!
– Heat things up by applying an iOpener to the right edge of your screen for a cozy two minutes.
Tools Used
Step 12


– Slide a second opening pick right under the bottom right corner of your screen.
– Carefully glide that new pick up to the top right corner to break free the adhesive holding the right edge of the screen.
– Pop that pick in the top right corner and let it keep the adhesive from sticking back together!


Step 14

Heads up! If you don’t have the right tools, you can get creative with a hair dryer, heat gun, or hot plate. Just remember, too much heat can be a screen or battery killer, so proceed with caution!
– Let’s heat up that left edge of the screen! Apply a heated iOpener for a couple of minutes.
Tools Used
Step 15


– Time to get this screen loose! Insert a fourth opening pick under the bottom left corner of the screen to start separating it from the rest of the device.
– Now, gently slide the new pick all the way to the top left corner. This will help break the adhesive that’s holding the screen’s left edge in place.
– Leave that pick right where it is, at the top left corner, to keep the adhesive from resealing itself. You’re making great progress!
Step 16

Alternatively, feel free to reach for a hair dryer, heat gun, or a trusty hot plate. Just a friendly reminder: keep the heat in check—too much can spell trouble for your screen and battery!
– Time to get this repair started! Apply a heated iOpener to the top edge of the screen for about two minutes, and let the heat do its magic.
Tools Used
Step 17


– Let’s get that screen popping! Take your fifth opening pick and gently slide it under the top edge of the screen, near the left corner.
– Now, scoot that pick over to the top right corner. We’re gonna loosen up that adhesive holding the screen in place.
Step 18

Hey, be super careful with that screen cable. You don’t want to accidentally give it a workout, right?
If the screen feels stuck, don’t worry! Just go back around the edges with an opening pick to gently loosen any remaining adhesive, and you’ll be back on track in no time.
– Grab a small box or a few books and put them to the left of your phone. This little setup will help hold up the screen while you disconnect its cable.
– Gently lift the right edge of the screen like you’re opening the front cover of a book. Easy does it!
– Now, prop up the screen so you can easily get to that screen cable. You’ve got this!
Step 19


– Grab your trusty opening pick and gently wiggle it under the top edge of the screen cable cover to lift it up.
– Now, carefully take off the cover and set it aside.
Step 20


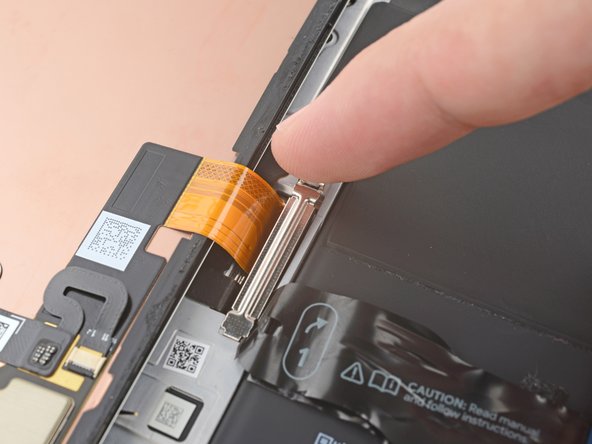
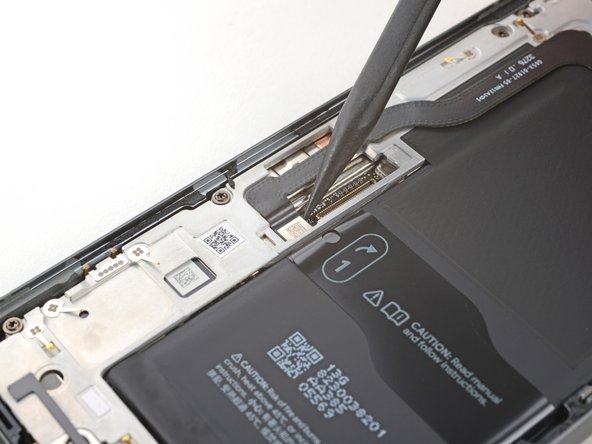
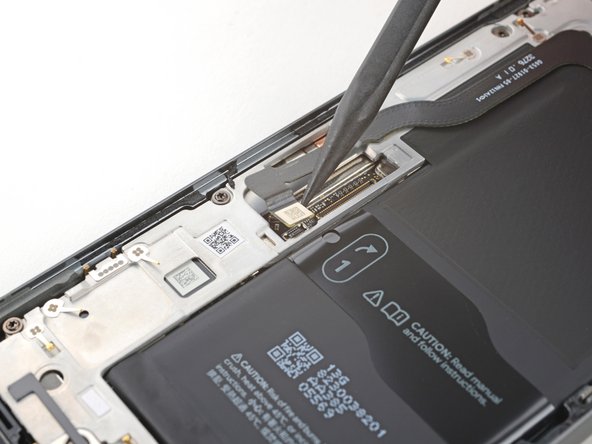
– Carefully slide the edge of a spudger under the top left corner of the screen’s press connector like you’re uncovering a secret treasure.
– Gently nudge it up and disconnect that cable with love.
– Time to say goodbye to the screen—remove it gently.
– When it’s time to reconnect that press connector, make sure to line it up with its socket and give one side a gentle press until you hear that satisfying click. Then, show the other side some love too! Avoid pressing down in the middle, as that could lead to misalignment and bent pins, which is a bummer for everyone. If things get tricky, remember you can always schedule a repair.
Tools Used

Step 21

– Let’s get started by removing the liners from the front camera cutout, rear camera pad, back of the screen, and perimeter adhesive using the pull tabs – it’s like unwrapping a present!
– Next, reconnect the screen cable and put its cover back on, making sure everything is secure and in place.
– Now’s a great time to test your phone and make sure everything is working as it should. Go ahead and power it on, check that all is well, and then power it back down before moving on.
– Carefully press the screen into place on the frame, applying gentle pressure until you feel the clips snap into position – you got this!
– To secure the screen with the new adhesive, firmly press around the perimeter, making sure it’s snug and even.
– Finally, to get your fingerprint sensor up and running, follow our calibration guide and you’ll be all set.
Step 22

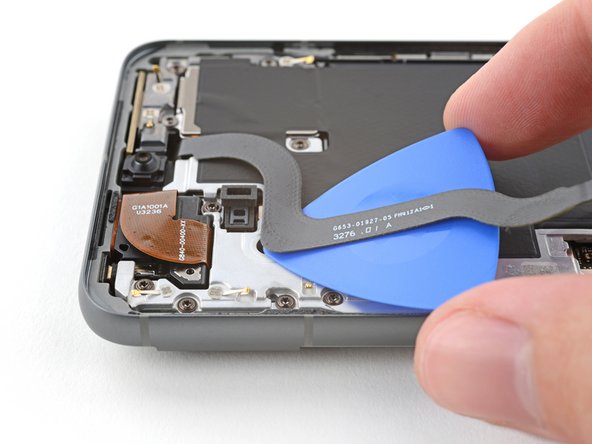
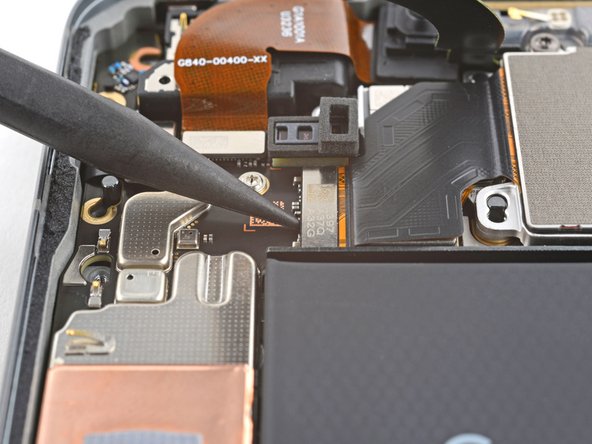
– With a gentle touch, use the tip of your trusty spudger to carefully lift and disconnect the 5G mmWave antenna cable from the logic board. You’ve got this!
Tools Used
Step 23
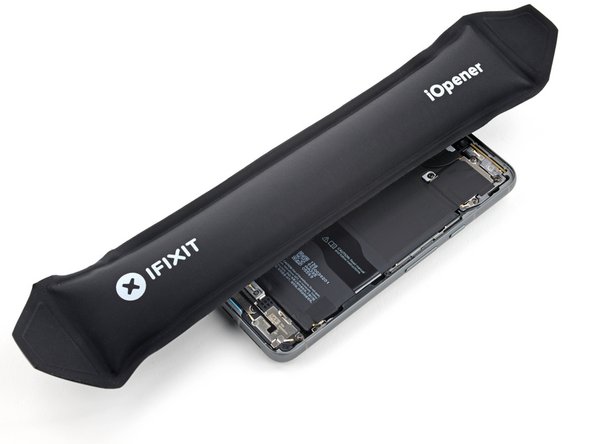

Hey there! If you’re feeling adventurous, give a hair dryer, heat gun, or hot plate a whirl. But remember, too much heat can be a battery’s worst nightmare, so keep it cool!
– The 5G mmWave antenna cable is snugly fastened to the midframe with adhesive in a couple of spots. No worries, we’ve got this!
– Let’s warm things up! Grab your iOpener and give it a nice heat for two minutes, placing it right on the left edge of the phone. This will help soften the sticky adhesive for an easier time.
Tools Used
Step 24


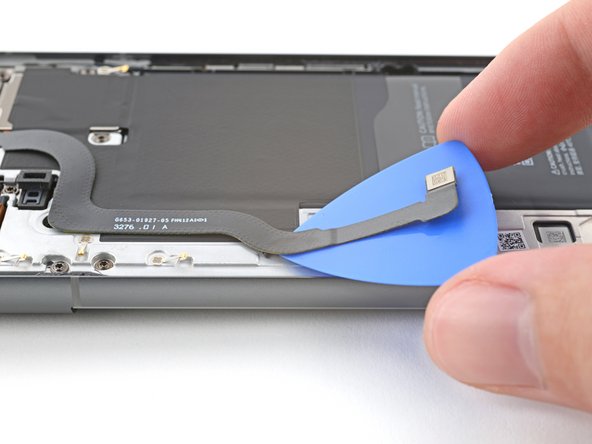
– Ready to free that 5G mmWave antenna cable? Let’s do it! Gently insert an opening pick under the bottom section of the adhesive that’s holding it down.
– Now, slide that pick towards the top edge of your phone. This will help loosen up the adhesive and give you some space to work.
Step 25

– Now, let’s tackle the upper section of adhesive – just repeat the previous step and you’ll be golden!
Step 26

Keep that cable straight—just shift it a little so it won’t get in the way while you’re taking things apart. You’ve got this!
– Gently reposition the 5G mmWave antenna cable to the top of the phone, keeping it tidy and out of the way as you work.
Step 27
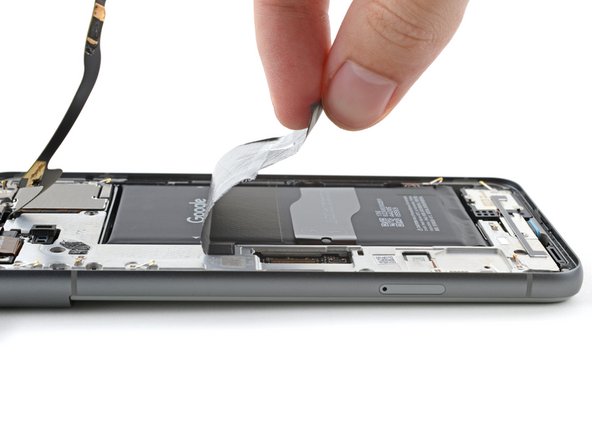
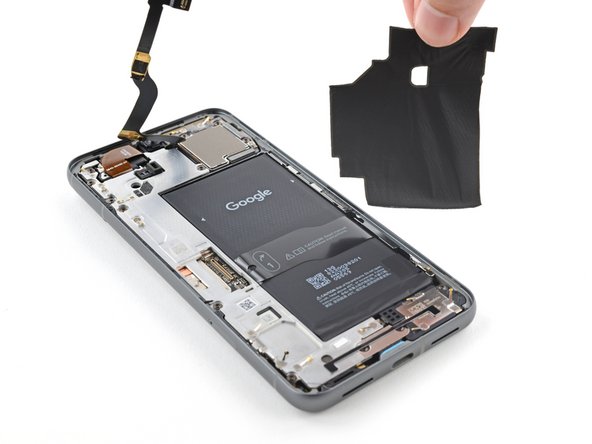

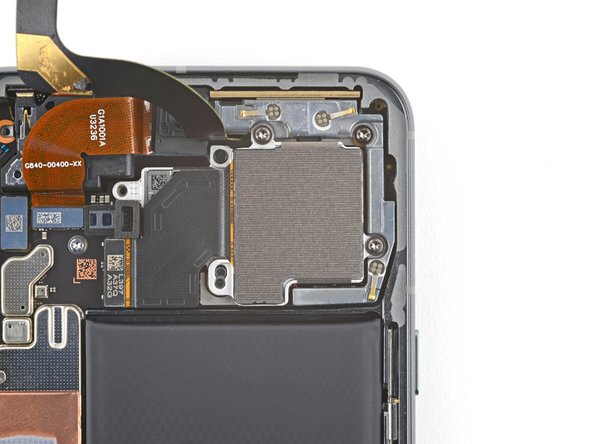
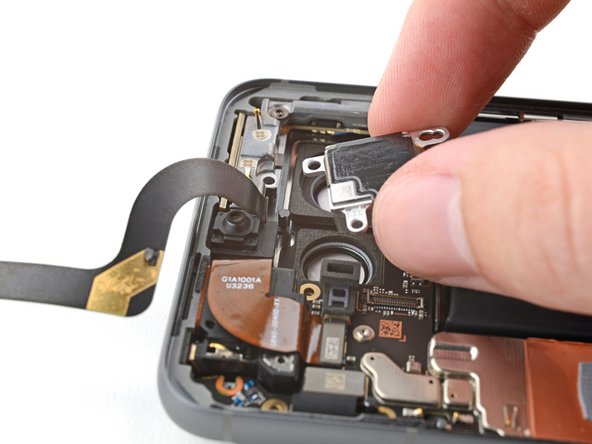
To wrap up this repair, you’ll need to take out and replace a sizable graphite sheet. This little hero bridges the upper battery, midframe, and rear cameras together.
If your sheet happens to tear, no sweat! Just grab the frayed edges and peel it off in manageable chunks.
– Let’s get started! Use your trusty spudger to carefully pry the top right corner of the graphite sheet, then lift it up until you can get a good grip on it with your fingers.
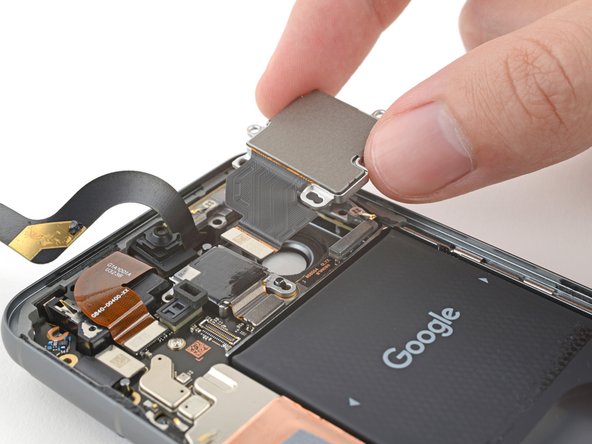
– Now it’s time to peel up and remove the entire graphite sheet – nice and easy!
– When you’re putting everything back together, remember to use a brand new graphite sheet. Don’t worry, we’ve got you covered – just follow our guide to replace it, and you’ll be all set. If you need help, you can always schedule a repair
Tools Used
Step 28


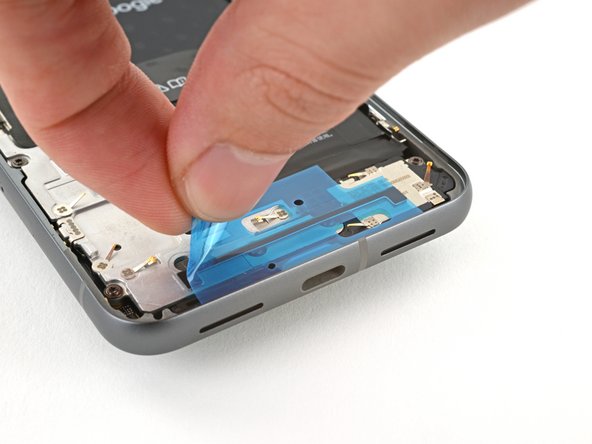
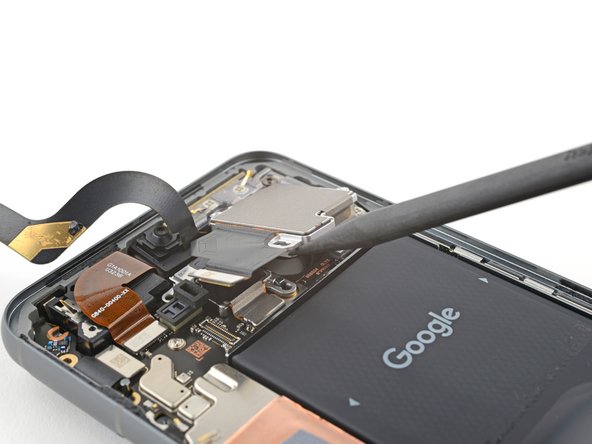
A plastic buffer is gently sticking to the midframe and the bottom speaker.
– Now, gently slide the tip of your opening pick under that plastic buffer. You’ll know you’re in the right spot when you can get a good grip on it with your tweezers or fingers. Keep it cool, you’ve got this!


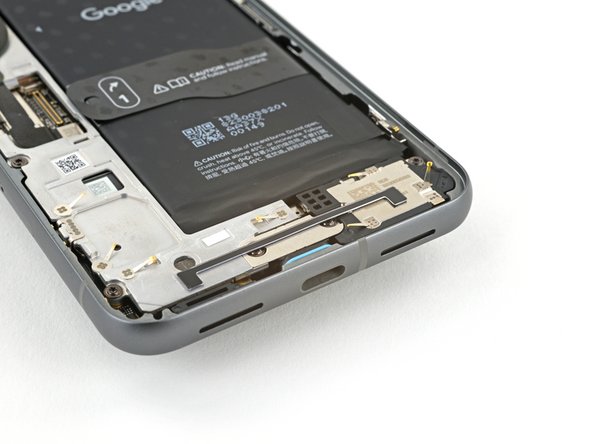
Step 30


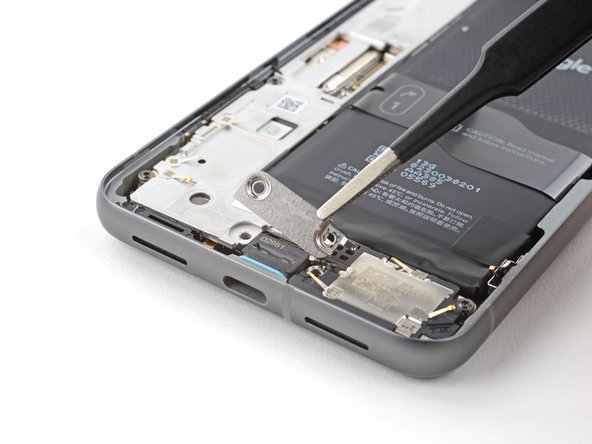
As you dive into this repair adventure, be sure to keep an eye on every single screw, making sure each one finds its way back home to the right spot.
The Pixel 8 loves its Torx Plus screws, but don’t worry if you’ve got standard Torx bits – they’ll do the job too! Just remember to apply steady, downward pressure to keep things from getting stripped.
– Grab your trusty T3 Torx driver and get ready to tackle those two 5 mm-long 3IP Torx Plus screws holding the USB-C port bracket in place. You’ve got this!
Step 31

– Grab some tweezers or just your fingers, and gently lift out the USB-C port bracket with a bit of finesse!
Step 32

– Time to put things back together! If you’ve got a replacement plastic shim for the bottom of the midframe and loudspeaker, now’s the time to put it in. If not, just press the old one back into place – it’ll do the trick.
– Next, peel off the clear liner from the shim. Easy peasy!
– Use the markings on the midframe to line up the left side of the shim, then gently press it into place. You’re doing great!
– Now, grab a spudger and use the flat end to firmly press down along the whole shim. This will make sure it’s secure and ready to go.
– Finally, remove the blue liner and you’re one step closer to having your device up and running again. Keep going, you’re almost there! If you need help, you can always schedule a repair
Tools Used
Step 33

– Grab your trusty T3 Torx screwdriver and get ready to tackle those eight 5.1 mm-long 3IP Torx Plus screws that are holding the midframe in place. You’ve got this!
Tools Used

Step 34

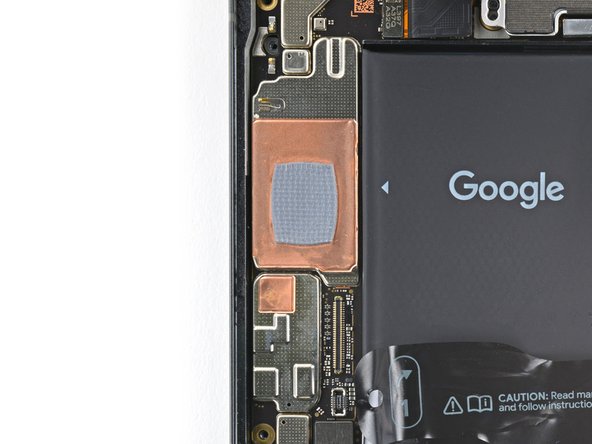
You’re making great progress – the center of the midframe is lightly attached to a thermal pad, so be gentle.
Keep going, you’ll know the midframe is fully separated when it loosens up completely.
– Let’s get this repair started! Carefully slide the flat end of a spudger under the bottom right corner of the midframe to gently separate it from the thermal pad.
Tools Used
Step 35
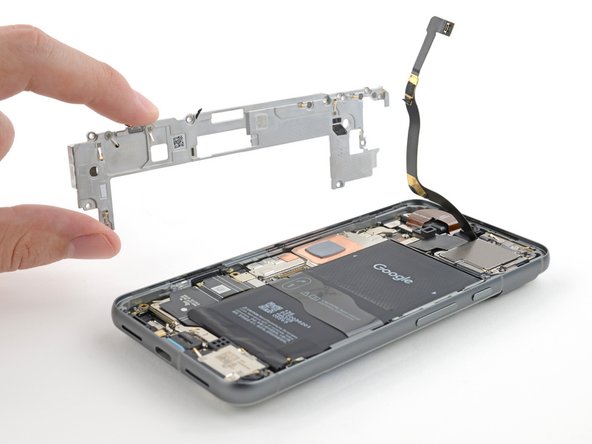

– Time to give that midframe a little lift! Gently pry it off the main frame and set it aside.
– Okay, time for a quick check-up! Take a peek at the thermal pad. If it’s looking a little worse for wear, don’t worry, we got you covered. Just remove the old pad, give the area a good clean with some high-concentration isopropyl alcohol and a microfiber cloth, and then slap on a fresh thermal pad. You got this!

Step 37

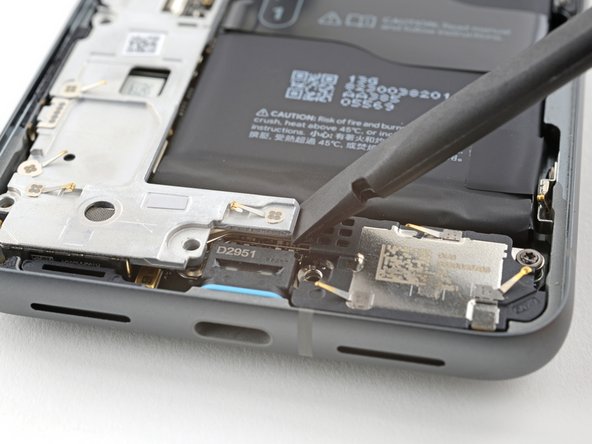
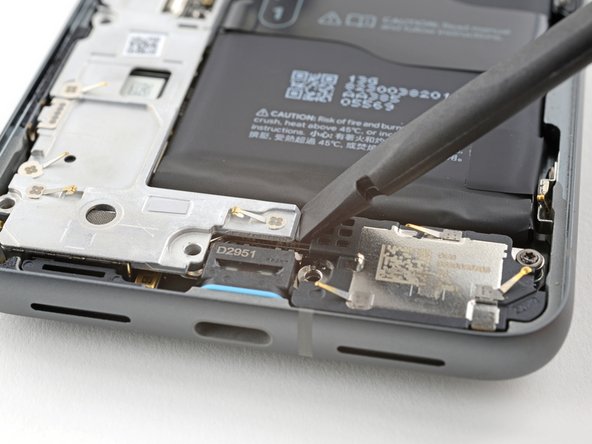
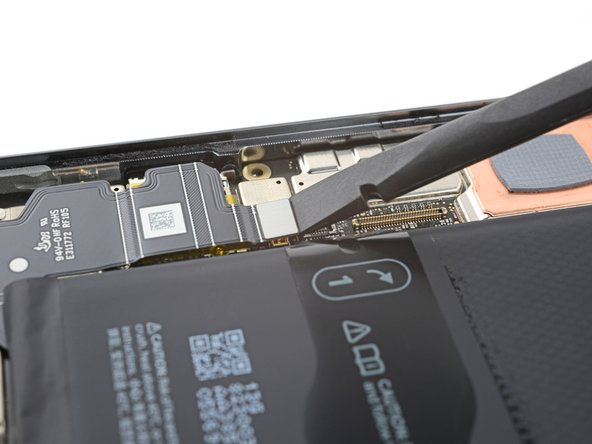
Keep your pick in the designated area—any wanderings could lead to some serious logic board injuries!
– It’s time to let your creativity shine! Disco down and disconnect that wide rear camera press connector by delicately prying up between those sassy surface-mounted components. Let’s groove to the next step!
Tools Used
Step 38

– Let’s get this party started! Grab your trusty T3 Torx screwdriver and give those two 5.1 mm-long 3IP Torx Plus screws holding down the wide rear camera a little love. Unscrew ’em, baby!
– If you need help, you can always schedule a repair
Tools Used
Step 39

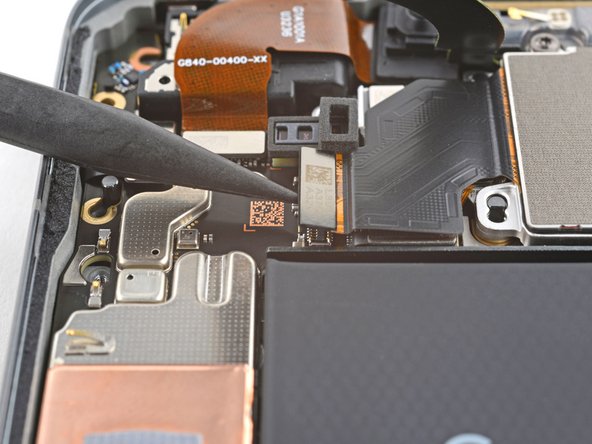
– Gently slide the spudger into one of the openings near the wide rear camera screw holes.
– Use the spudger to carefully lift the camera out of its snug little home.
– Go ahead and take the camera out!
Tools Used
Step 40


– Grab your trusty spudger and gently nudge up the ultrawide rear camera press connector from the logic board. Disconnect it like a pro!
Tools Used
Step 41


– To put everything back together, just follow these steps in reverse – easy peasy!
– Want to run a diagnostics test? Click here to get started with the built-in diagnostic tool.
– Remember to recycle your e-waste responsibly at an R2 or e-Stewards certified recycler.
– Hit a snag? Try some basic troubleshooting or reach out to our community for help.
– If you need to start over, no worries! Just cancel and begin again.
– You’ve made it to the end! If you need help or have any questions, you can always schedule a repair with Salvation Repair.
Tools Used
Success!