Google Pixel 7 Pro Screen Replacement Guide
Duration: 45 minutes
Steps: 18 Steps
This repair guide is brought to you by the awesome team at Salvation Repair. While we’re not officially backed by any big names, we’re here to help you every step of the way! Check out our repair guides for more tips.
For your safety, make sure to drain that battery below 25% before diving into the disassembly of your device. Safety first, right?
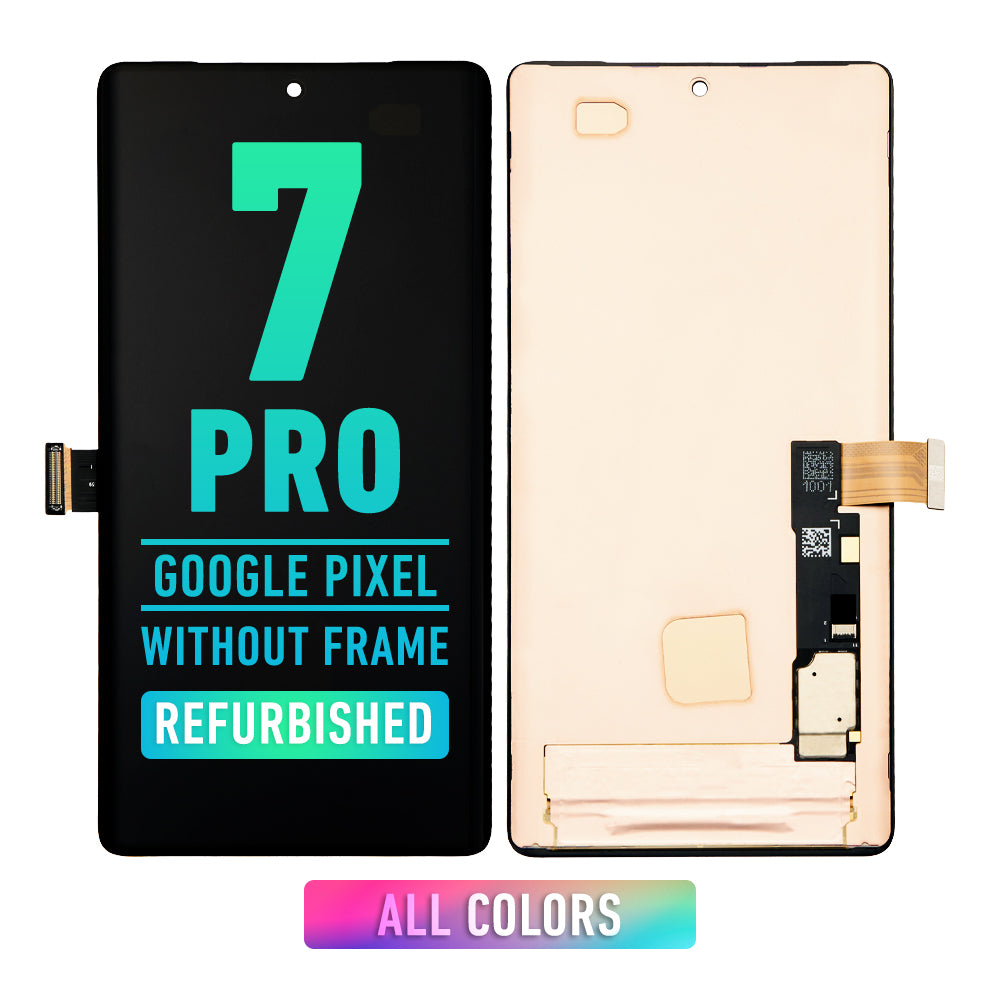
Welcome to your screen replacement adventure for the Pixel 7 Pro! Before diving in, make sure to keep things safe: drain that battery below 25% to minimize fire risks if things get a bit too intense during the repair. If your battery is looking a little puffy, be extra careful! Your shiny new screen should come with the fingerprint reader already installed, but if it doesn’t, don’t worry! Just pop your old fingerprint reader onto the new screen and recalibrate it to keep it working like a charm. A friendly reminder: the Pixel 7 Pro has class 1 lasers, so handle with care to avoid any sneaky infrared emissions. After your repair, how well you reapply the adhesive will determine if your device retains its water resistance, but keep in mind that its IP (Ingress Protection) rating will be lost. Make sure to grab some replacement adhesive to wrap up this repair. If you need help, you can always schedule a repair!
Step 1
– Completely power down your phone and disconnect any cables. Let’s get started on this journey together!
Step 2
Be careful not to insert the pick more than 3.5 mm during removal. Going too far can damage the internal components or interfere with the plastic clips, so take your time and do it just right!
– As you embark on the removal adventure, be sure to place your opening picks just right to keep that screen snug with its safety frame—no unwanted breakups here!
– Screen seam: This little gap is where the screen meets the rest of your device. It’s a no-pry zone, so steer clear!
– Bezel seam: Here’s where the plastic bezel, your screen’s trusty protector, meets the frame. It’s held tight by some plastic clips—this is your go-to spot for prying!
– Keep an eye out for those sneaky plastic clips surrounding the screen. If your opening pick feels stuck during the screen removal, it’s a sign you might have gone a bit too deep under the screen. Time to adjust!
Step 3
Get ready for some fun! The next three steps introduce you to the Anti-Clamp, a nifty little tool we created to help you open your device with ease. If you don’t have the Anti-Clamp on hand, no worries! Just skip ahead three steps for another way to tackle this.
Is your screen looking a bit worse for wear? Slap on a layer of clear packing tape to give that suction cup something to hold onto.
Want to master the Anti-Clamp like a pro? Check out this handy guide for all the deets!
If your phone’s surface feels like an ice rink and the Anti-Clamp just won’t grip, a bit of tape can work wonders to create a stickier surface.
– First, let’s get this repair started! Pull that blue handle backwards to unlock the Anti-Clamp’s arms – it’s like releasing a little robot.
– Now, slide those arms over either the left or right edge of your phone. Easy does it!
– Next, position the suction cups near the bottom edge of the phone – one on the front, and one on the back. You’re getting the hang of this!
– Finally, squeeze those cups together to apply some gentle suction. You’re making great progress! If you need help, you can always schedule a repair
Step 4
– Give that blue handle a gentle tug forward to secure those arms in place.
– Now, twist the handle a full 360 degrees or until you see those suction cups start to stretch a bit.
– Keep an eye on those suction cups to ensure they’re staying in sync. If they start to drift apart, just loosen them a tad and realign those arms like a pro.
Step 5
Take it easy and only twist a half turn at a time. Give it a minute between turns to chill out. Let the Anti-Clamp and a little patience do the heavy lifting for you.
A hair dryer or heat gun can come in handy, but be careful—too much heat might just ruin your display or internal battery. So, take it easy and keep an eye on things!
If the Anti-Clamp isn’t making enough space, don’t hesitate to warm up the area a bit more and give that handle a gentle clockwise twist for half a turn.
– Now, let’s heat up an iOpener and have a little fun threading it through the Anti-Clamp’s arms! Fold the iOpener so it’s ready to hug the bottom edge of your phone. Wait a minute for our adhesive friends to loosen their grip. You’ll know it’s working when you see a cool gap appearing. Time for an opening pick to join the fun! Don’t forget, we’ve got your back. If you need help, you can always schedule a repair!
Step 6
Feel free to use a hair dryer, heat gun, or hot plate to warm things up! Just remember to keep an eye on the temperature – you want the edge to be slightly warm, not super sizzling. You’ve got this!
Step 7
If your screen is looking like it just survived a battle, slapping on some clear packing tape might just help that suction cup stick like a charm. Don’t have packing tape? No worries! A super strong tape can step in for the suction cup too. And if you’re really in a pinch, a little superglue on the suction cup might just do the trick to keep it on that cracked screen.
Now, if your device is a bit of a vintage model, getting that heat just right could be a challenge. If things aren’t going smoothly, try giving the bottom edge a bit more warmth and give it another go.
– Now let’s get this screen party started! First, gently warm up that screen using a bit of heat to make it easier to unglue. Once it’s toasty, grab your trusty suction handle and lift that screen like you’re inviting it to dance. Finally, slide in your trusty opening pick like a secret agent to finish the job – we’re almost there!
Tools Used
Step 8
– The screen cable is hanging out a little less than halfway up the left edge of the phone. Be super careful here, you don’t want to tear the cable.
– There are lots of spring contacts around the phone’s edges. Be careful in these areas, as you don’t want to bend any of these contacts.
Step 9
– Gently glide the opening pick towards the bottom right corner of the screen to cut through that sticky adhesive layer. You’ve got this!
– Once you’ve made the cut, keep the opening pick in its place to stop that adhesive from sealing back up. You’re making great progress!
Step 10
Hey there! Just a heads up, there’s a sneaky little plastic clip hanging out in the bottom left corner that might get in the way of your opening pick. To tackle this, gently use just the tip of your opening pick (around 1 mm) to glide around it. You’ve got this!
– Slide a second opening pick into the bottom edge and gently glide it to the bottom left corner of the screen to cut through that pesky adhesive.
– Keep the opening pick in place to stop the adhesive from sticking back together.
Step 11
– Get ready to work your magic! Start by slipping a third opening pick under the bottom left corner of the screen.
– Now, gently glide that opening pick along the left edge of the screen—it’s like slicing through butter! This will help you break the adhesive and pop those plastic clips free.
– Once you’ve made some progress, leave that opening pick planted in the top left corner. This will keep the adhesive from sealing back up while you continue your repair adventure!
Step 12
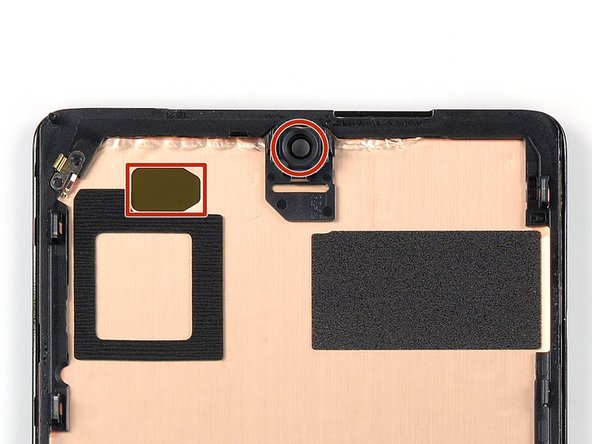
When you’re slicing near the front-facing camera, just use the tip of the opening pick (about 2.5 mm) so you keep that camera safe and sound, avoiding any smudges or damage. You’ve got this!
– Time to get this repair started! Insert a fourth opening pick at the top left corner of the screen, making sure it’s securely in place.
– Now, gently slide the opening pick along the top edge of the phone to carefully slice through the adhesive – you’re making great progress!
– Leave the opening pick in the top right corner to prevent the adhesive from resealing, and take a moment to admire your handiwork so far.
Step 13
Hold your horses! Don’t yank that display off just yet; it’s still hanging on by a flex cable.
– Pop in a fifth opening pick and glide it down the right edge of your phone to cleverly slice through that pesky adhesive and free the last of the right-side plastic clips. Smooth sailing ahead!
Step 14
Be gentle with the screen! Twisting it or pulling it too far from the frame can put a strain on the flex cable, and we definitely don’t want that. Keep it cool and steady!
Step 15
The display cable bracket is snug as a bug and might need a little elbow grease to pop it loose!
– Gently slide one arm of your trusty tweezers into the little opening at the top of the display cable bracket.
– Now, give that bracket a little nudge inward and then pry it up to set it free!
Tools Used
Step 17
– Time to get started! Use a spudger to carefully disconnect the display flex cable by gently prying the connector straight up from its socket – it’s like freeing a tiny captive!
– Now, let’s get this connector back in place. To reattach press connectors like this one, carefully line it up and press down on one side until you hear that satisfying click, then repeat on the other side. Remember, don’t press down on the middle or you might end up with bent pins and a world of trouble. If you’re not sure, take a deep breath and try again – you got this!
Tools Used
Step 18
Don’t forget to put the display cable bracket back in place – it’s a crucial step to get your device working smoothly again!
– Check out your shiny new replacement part and make sure it matches the original—don’t forget to transfer any leftover bits and peel off those pesky adhesive backings before you dive into the installation!
– Ready to put it all back together? Just retrace your steps and follow these instructions in reverse.
– Want to give your device a little health check? Run a diagnostics test with the built-in diagnostic tool, just click here.
– Got some old tech that needs a new home? Take your e-waste to an R2 or e-Stewards certified recycler.
– Things didn’t go as smoothly as you hoped? No worries! Give some basic troubleshooting a shot, or if you’re feeling stuck, you can always schedule a repair.
– If you didn’t finish this guide, that’s okay too! No pressure.
– And remember, you’re not alone in this—many have tried and succeeded!
Success!


