DIY Google Pixel 7 mmWave Antenna Replacement Guide
Duration: 45 minutes
Steps: 33 Steps
Hey there! This repair guide was created by the Salvation Repair team. We love helping people fix their stuff! If you need help, you can always schedule a repair.
Safety first! For your own good, make sure your phone’s battery is below 25% before you start taking it apart.
Hey there, repair pro! Get ready to give your Google Pixel 7 some extra love with this rad guide. ✨ We got you, but if you’re feeling dubious, don’t sweat it – just schedule a repair and let us hook it up. 😉 Harmonize the battery before you start, so you can kick it into gear without blowing a fuse. And watch those invisible lasers – or better yet, check out our pros for a smooth fix.
Step 1


– Alright, buddy, let’s get this party started! Unleash your phone from its digital leash and give it some space to breathe by fully powering it off. And don’t forget to break the connection with those trusty cables, so we can get to the root of the problem without any distractions. If you need help, you can always schedule a repair!
Step 2


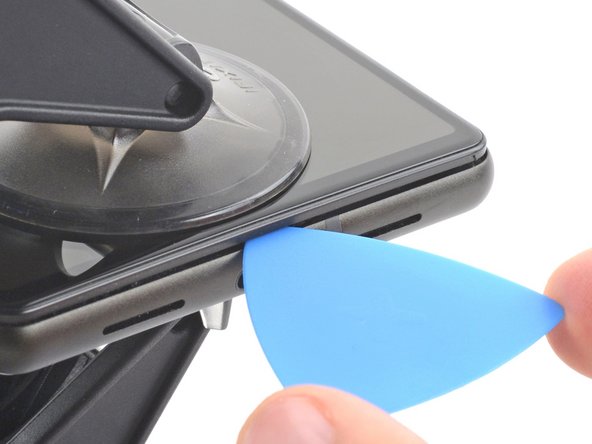
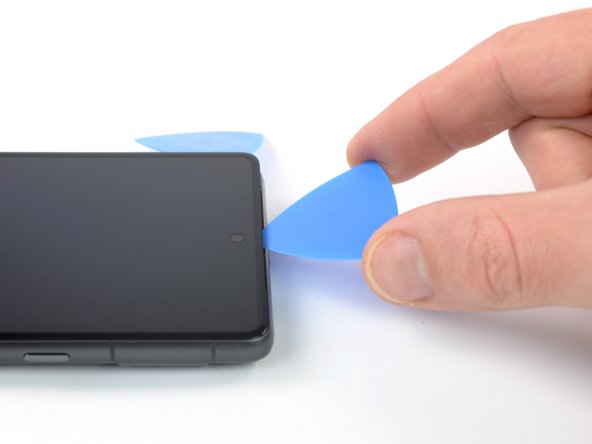
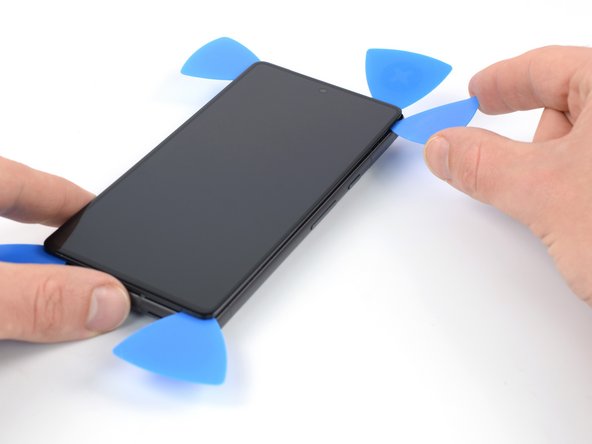
Just a friendly tip! When using the pick, go easy and only insert it about 3.5mm during the removal process. We want to avoid any accidental damage to the internal parts or those pesky little plastic clips! If you need help, you can always schedule a repair.
Alright, let’s get this party started! The screen on your Google Pixel 7 is held in place by a few plastic clips and some sticky stuff. It’s like a little hug, but a little more secure. Don’t worry, we’ll get it out, no sweat!
– As you dive into the removal process, remember to slide your opening picks under the safety frame. We want to keep that screen snug and secure, so let’s avoid any accidental separations!
– Keep an eye out for the plastic clips circling the screen. If you find your opening pick getting stuck while trying to detach the screen, it’s a sign that you’ve gone a bit too deep. No worries, just adjust your approach and you’ll be on your way!
Step 3


In the next few steps, we’ll show you how to use the Anti-Clamp, our clever little gadget that makes opening up your device a breeze. If you don’t have an Anti-Clamp, no worries! Just hop down three steps for an alternative approach.
Is your screen looking a bit jagged? Slap on some clear packing tape to give that suction cup a solid grip—it’s like a little hug for your screen!
For all the details on mastering the Anti-Clamp, make sure to check out our handy guide.
If the surface of your phone feels like ice, give it a bit of texture! Just use some tape to create a surface that the Anti-Clamp can really dig into.
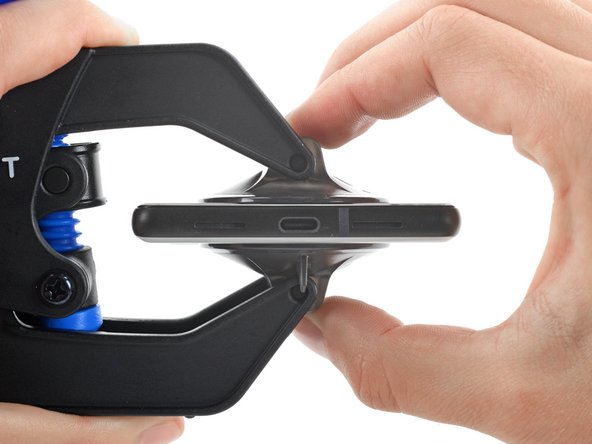
– Alright, let’s unlock those Anti-Clamp arms. Give that blue handle a nice tug backwards!
– Time to slide those arms over the left or right edge of your phone – think of it as a gentle hug!
– Now, let’s position the suction cups. Place one on the front and one on the back, near the bottom edge of your phone.
– Squeeze those cups together to get a good grip. You got this!
Step 4

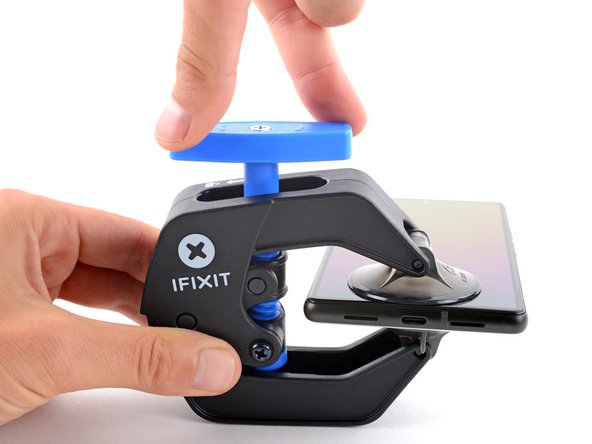

– Give that blue handle a gentle tug forward to lock those trusty arms in place.
– Rotate the handle 360 degrees in a cheerful clockwise motion or until those cups start stretching like they’re getting ready for a good workout.
– Keep an eye on those suction cups to ensure they’re in harmony. If they start to drift apart, just loosen them up a bit and guide those arms back into alignment.
Step 5

Take it easy—don’t twist more than a half turn at a time and give it a minute between each turn. Let the Anti-Clamp and your patience do the heavy lifting for you.
If you’re feeling bold, you can use a hairdryer or heat gun to loosen things up – but be careful, too much heat can make your device feel a bit hot under the collar! 😉
If your anti-clamp isn’t making enough room, give the area a little extra warmth and give that handle a half-turn clockwise. You got this! 💪
– Warm up that iOpener and slide it right into the arms of the Anti-Clamp.
– Bend the iOpener so it rests on the bottom edge of your phone.
– Hang tight for a minute to let that adhesive loosen up and create a little gap for you.
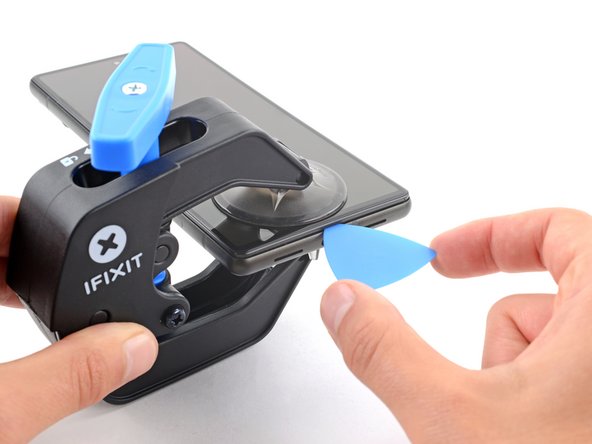
– Slide an opening pick under the screen frame once the Anti-Clamp has made a nice enough opening.
– Feel free to skip the next two steps.


Step 6

You can use a hair dryer, heat gun, or hot plate to warm things up a bit, but make sure to keep an eye on the temperature! The edge should feel just a tad too warm for comfort. Remember, we want to avoid overcooking your device!
– Time to get this repair started! Apply a heated iOpener to the screen for at least 3 minutes to loosen the adhesive underneath. If you need help, you can always schedule a repair
Step 7


Got a cracked display? No worries! Slapping on a layer of clear packing tape might just give that suction cup something to grab onto. If you’re feeling adventurous, strong tape could also do the trick instead of the suction cup. And if all else fails, a little superglue on the suction cup might just save the day!
Now, depending on how old your phone is, this might get a bit tricky. If you’re struggling, just give the bottom edge a little extra heat and give it another go!
– Alright, time to warm things up! Once the screen is toasty, grab that suction handle and stick it to the bottom edge of the screen.
– Now, with the suction handle, gently lift the screen, including its safety frame, to create a little gap between the screen and the phone’s body.
– Slide an opening pick into that gap. We’re gettin’ closer!
Tools Used

Step 8


– The screen cable is located about halfway up the left edge of your phone – be gentle here to avoid any cable damage.
– You’ll notice several spring contacts around the phone’s perimeter. Take your time and be careful not to bend these contacts. If you need help, you can always schedule a repair
Step 9


– Now it’s time to get that screen loose – gently slide the opening pick down to the bottom right corner to break the adhesive’s grip.
– Leave that pick right where it is, so the adhesive doesn’t try to reseal itself – you’re making great progress! If you need help, you can always schedule a repair
Step 10


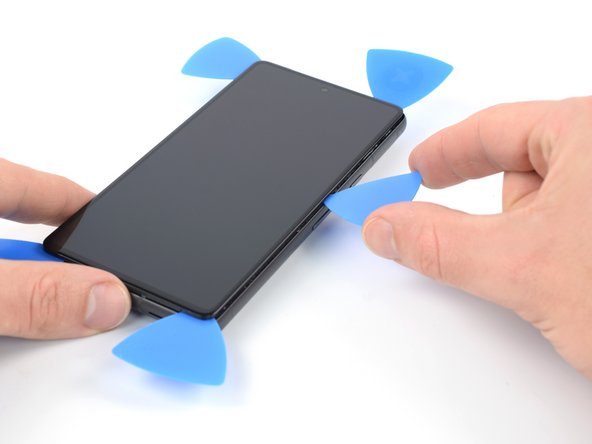
– Slide a second opening pick into the bottom edge and gently wiggle it over to the bottom left corner of the screen to cut through that pesky adhesive.
– Keep that opening pick snugly in place to make sure the adhesive doesn’t decide to play peekaboo again.
Step 11


– Let’s get this screen party started! Insert a third opening pick underneath the bottom left corner of the screen.
– Now, slide the opening pick along the left edge of the screen to slice the adhesive and release the plastic clips. Like butter, right?
– Leave the opening pick in the top left corner to prevent the adhesive from resealing. You got this!
Step 12

As you glide near the front-facing camera, just slide in the tip of the opening pick (about 2.5 mm) to keep that camera safe and sound—no smudges or damage on our watch!
If you find yourself battling a stubborn adhesive that’s acting like it’s had too much coffee, don’t worry! Just give it a little heat therapy with your iOpener or heat gun for about a minute or two. That’ll loosen it right up! If you need help, you can always schedule a repair.
– Pop a fourth opening pick into the top left corner of your screen. You’ve got this!
– Gently slide that pick along the top edge to cut through the adhesive like a pro.
– Keep the pick snug in the top right corner to stop that adhesive from sealing up again. Nice work!
Step 13

Whoa there, cowboy! Hold onto that display like it’s your lucky charm – yep, that flex cable’s still riding shotgun with the phone assembly. Keep ’em close and connected, m’kay?
– Slide a fifth opening pick along the right edge of the phone to cut through the last bits of adhesive and pop those stubborn right plastic clips loose!
Step 14


Keep your screen smooth and frame tight to keep those flex cables happy and healthy! If you need help, you can always schedule a repair.
Step 15


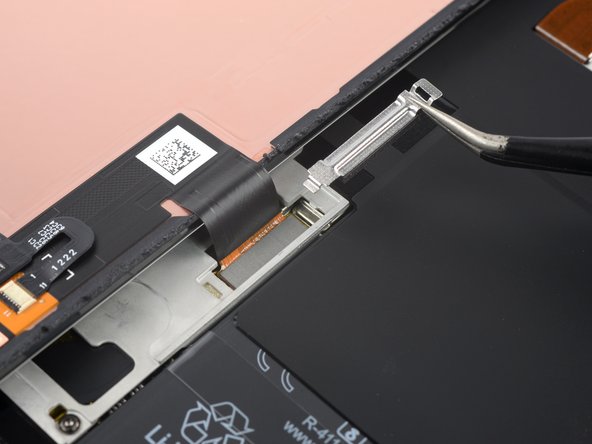
The display cable bracket is a bit of a snug fit, so don’t be shy about giving it a firm little nudge to let it go free.
– Alrighty, pals! Gears turning, mind set? Let’s go! First thing’s first, stick your hand into the squirrel’s hide – oh wait, wrong instruction. Uh, I mean, feed the tweezers-like-fingers into the little pointy hole at the top of the display cable bracket. Next, reach inside and give that bracket a gentle tickle under its chin, pushing it inwards and then scooping it up. Don’t forget to give it a high five on the way out! If you need help, you can always schedule a repair! Let’s tackle the next step together!
Tools Used


Step 17


– Time to get started! Use a spudger to carefully disconnect the display flex cable by gently prying the connector straight up from its socket – it’s like freeing a tiny captive!
– Now, let’s get this connector back in place. To reattach press connectors like this one, carefully line it up and press down on one side until you hear that satisfying click, then repeat on the other side. Remember, don’t press down on the middle or you might end up bending those pesky pins and causing some permanent damage. If you’re not feeling confident, don’t worry – you can always schedule a repair with the pros at Salvation Repair.
Tools Used

Step 18

Alright, buddy, get ready for a little screen magic! Once you’ve put everything back together and you hit that power button, your screen will go through a quick calibration thing. Just sit back, relax, and let it do its thing. Don’t go poking around on the screen during this part, or you might end up with some touchy-feely issues. 😉 If you need help with anything, you can always schedule a repair.
– Time to give that screen some space! Carefully separate it from the phone.
– Now, let’s put everything back together like a puzzle. During reassembly:
– Make sure all those screws are nice and snug, and no parts are feeling left out.
– Reconnect the screen and give your phone a test run to make sure it’s happy. Then, power it back down and finish putting it back together.
– If you need some fresh adhesive, clean the area with isopropyl alcohol (>90%) and apply some new goodness.
– Using custom-cut adhesives? We got you covered! Follow this guide.
– Using a pre-cut adhesive card? We’ve got your back! Follow this guide.
– If you need help, you can always schedule a repair


Step 20
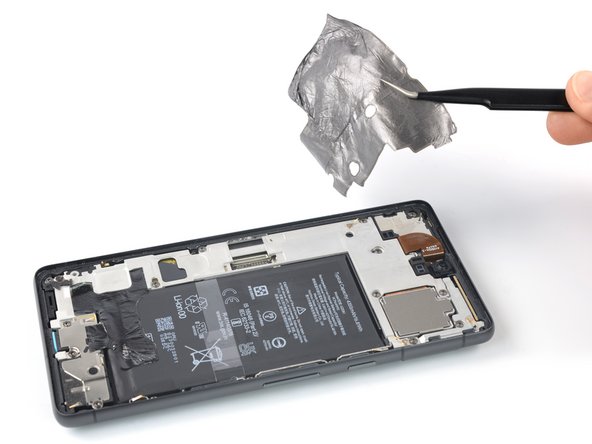

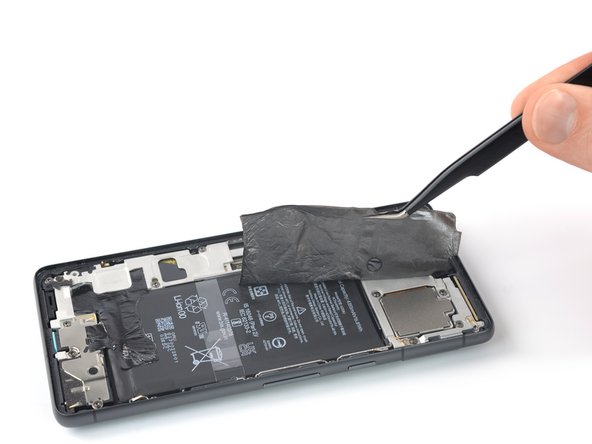
If the foil is being a bit stubborn, give it a cozy two-minute spa treatment with a heated iOpener to help it relax and release its grip.
– Time to get a little delicate! Use a trusty pair of tweezers to carefully pry the upper graphite foil off the battery and midframe. If you need help, you can always schedule a repair
Step 21


Having trouble getting that foil to budge? Try applying a heated iOpener to it for two minutes – the adhesive should loosen up nicely. If you need help, you can always schedule a repair
Step 22
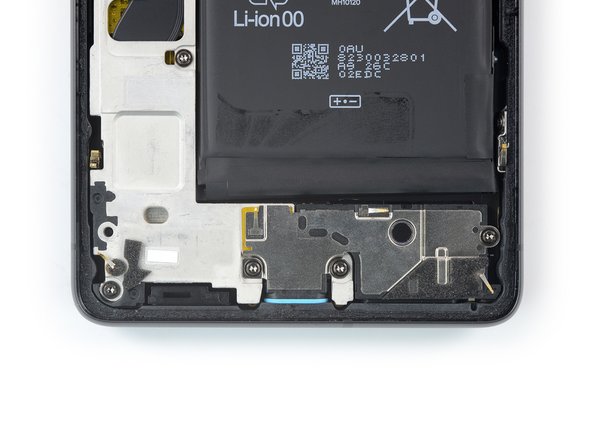

– Grab your trusty Torx T3 screwdriver and remove those three screws, each measuring 5.1 mm, that are keeping the loudspeaker in place. You’ve got this!
Step 23

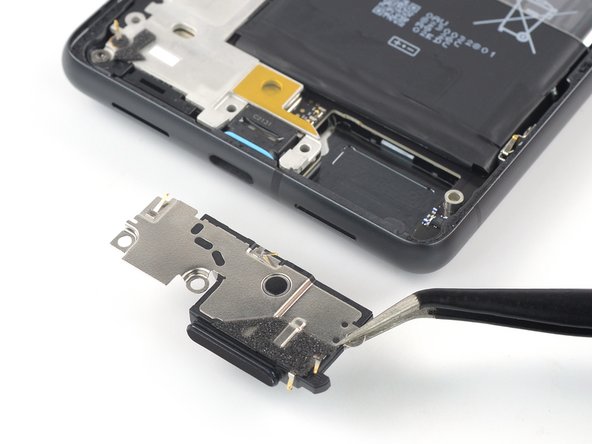
– Time to get that loudspeaker out – use a pair of tweezers to carefully lift it out of its recess, and then you can remove it. If you need help, you can always schedule a repair
Tools Used
Step 24

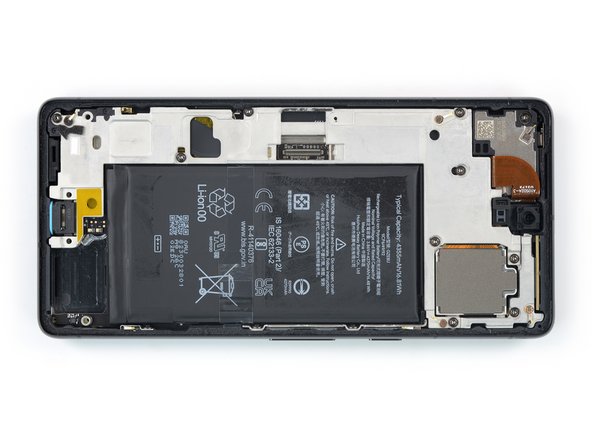
– Grab your trusty Torx T3 screwdriver and unscrew the nine 5.1 mm-long screws holding the midframe in place. If you need help, you can always schedule a repair
Step 25

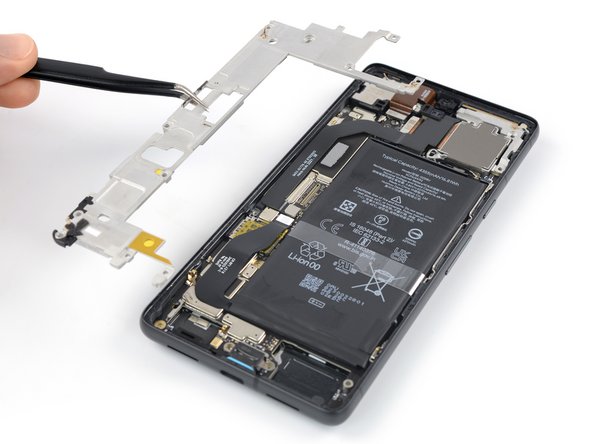

– Grab your trusty tweezers and carefully remove the midframe – you’re making great progress!
– When you’re putting everything back together, take a moment to check the thermal pad. If it’s looking a bit worse for wear, don’t worry! Just remove the old pad, give the area a good clean with some high-concentration isopropyl alcohol (we’re talking 90% or higher) and a microfiber cloth, and then apply a brand new thermal pad. If you need help, you can always schedule a repair with the experts at Salvation Repair.
Tools Used


Step 27
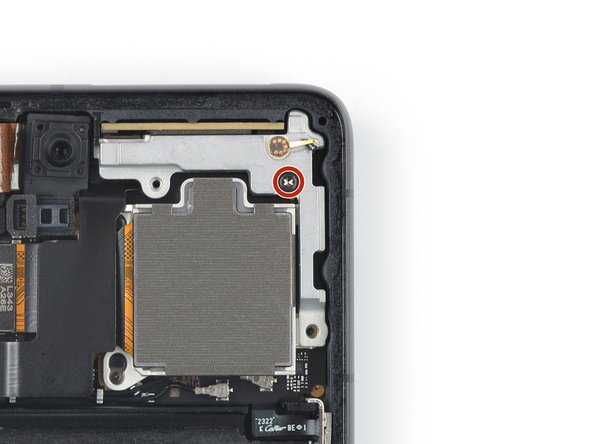

Get ready! The next six steps will guide you through the process of removing the mmWave antenna like a pro.
– Let’s get started! Use a Torx T3 screwdriver to carefully remove the 5.1 mm-long screw that’s holding the mmWave antenna bracket in place. If you need help, you can always schedule a repair

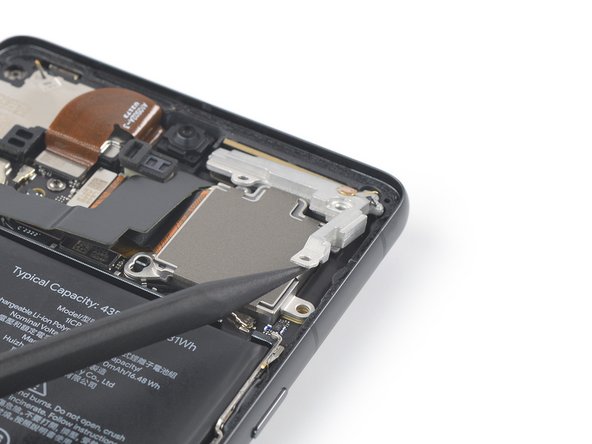

Step 30
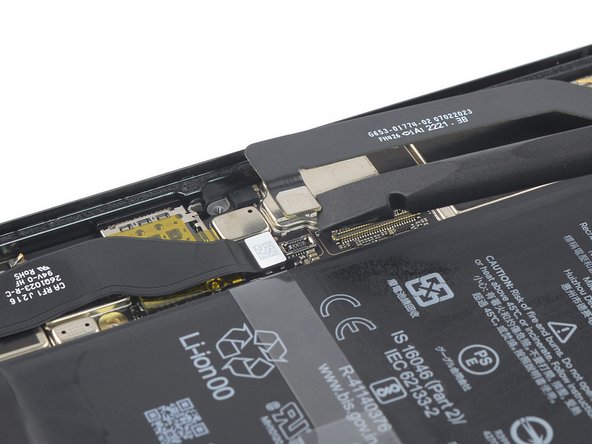

– Time to disconnect that mmWave antenna cable! Grab your trusty spudger and gently pry the connector straight up from its socket. It’s like giving it a little high five, but with a tool. 😉 If you need help, you can always schedule a repair.
Tools Used
Step 31
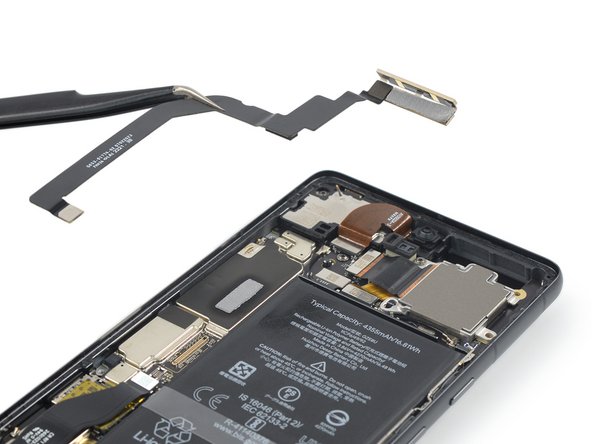

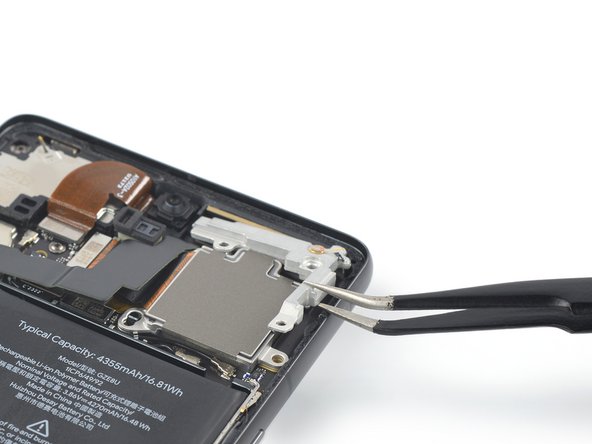
– Grab a trusty pair of tweezers and gently lift the mmWave antenna along with its cable from its little cozy spot.
– Say goodbye to the mmWave antenna assembly as you remove it.
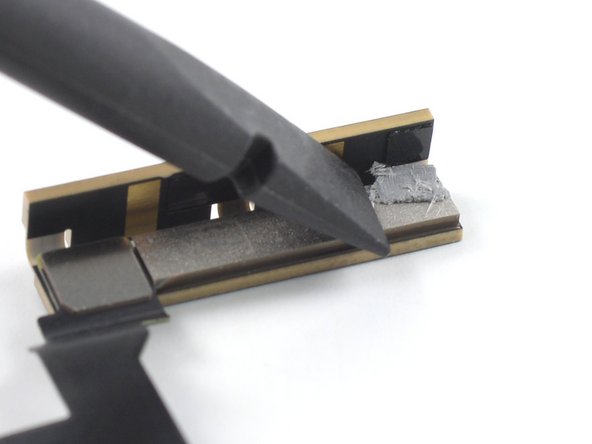
– When it’s time to put everything back together, take a moment to inspect the thermal pad. If it looks worse for wear, gently remove it and give the area a good clean with some high-concentration (over 90%) isopropyl alcohol using a microfiber or lint-free cloth. Then, pop on a shiny new thermal pad for a fresh start!
Tools Used
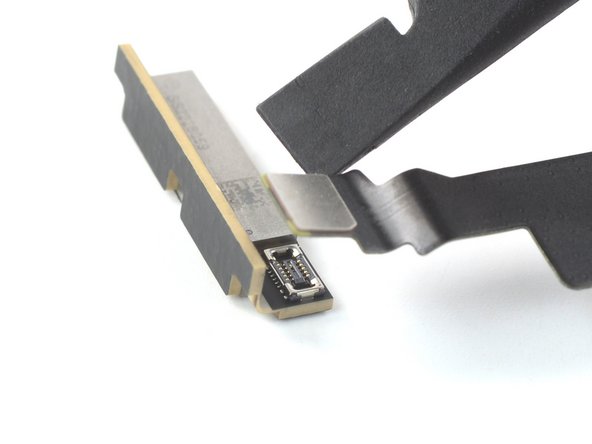

Step 33

– You should now be left with the mmWave antenna cable. Great job getting this far! If you need help, you can always schedule a repair


