DIY Google Pixel 6 Pro Rear Camera Replacement Guide
Duration: 45 minutes
Steps: 31 Steps
Hey there, this repair guide was put together by the team at Salvation Repair, but it’s not official Google stuff. Want to learn more about our guides? Check them out here.
Safety first, always! Before you start taking things apart, make sure your phone’s battery is at least 25% discharged, just to be on the safe side.
Hey there! This snazzy repair guide comes from the talented folks at Salvation Repair—not Google, so keep that in mind. Want to learn to swap out the rear camera assembly in your Google Pixel 6 Pro? You’re in the right place! Just a quick heads-up: make sure your battery is below 25% before you dive in. This way, you’ll avoid any surprise thermal fireworks if the battery gets a bit cranky during the process. If you notice any swelling, be extra cautious. And a friendly reminder: the Pixel 6 Pro has class 1 lasers hanging around. Disassembling it means you might encounter some invisible infrared laser fun—so keep your eyes open! After your repair, getting that water resistance back will depend on how well you stick everything back together. Just know that your device will lose its IP (Ingress Protection) rating. Don’t forget to grab some replacement adhesive to ensure your components are all snug and secure when you put everything back in place!
Step 1


– First things first, give your phone a little break and shut it down completely. Don’t forget to unplug any cables, just to be safe!
Step 2


Alright, let’s get this party started! The next three steps are all about the Anti-Clamp, a tool we designed to make opening your device a breeze. But if you’re not using the Anti-Clamp, just skip down three steps for an alternate method.
If your screen is cracked, cover it with a layer of clear packing tape to help the suction cup stick right on.
For complete instructions on using the Anti-Clamp, check out this guide .
If you find the phone’s surface is too slippery for the Anti-Clamp to grab onto, you can use tape to make it grippier. Easy peasy!
– Unleash the blue handle and let your Anti-Clamp’s arms roam free!
– Slide those arms to either the left or right edge of your trusty phone for a secure fit.
– Place friends, er… suction cups near the bottom edge of your squad—front and back!
– Give a gentle squeeze to lock in those mighty suction powers and let them work their magic!
Step 3


– Get started by pulling that blue handle forward – this will lock the arms in place.
– Next, turn the handle clockwise until you’ve made a full 360 degrees or until the cups start to stretch. Easy does it!
– Now, keep an eye on those suction cups and make sure they stay aligned. If they start to slip out of place, just loosen them a bit and realign the arms. You got this! If you need help, you can always schedule a repair
Step 4


Take it easy! Don’t twist more than half a turn at a time, and let the Anti-Clamp and time do their thing. You got this! 😉
If you need to use a little heat to help get the display off, go ahead and use a hairdryer or heat gun – just be careful not to get things too hot! A little heat goes a long way – you want the glue to soften, not to start sizzling.
If the tool isn’t giving you enough space, try adding a little more heat to the area. You can then rotate the handle half a turn clockwise to help get the device open.
– Get your iOpener nice and toasty and thread it through the arms of the Anti-Clamp.
– Fold the iOpener so it’s resting comfortably on the bottom edge of your phone.
– Give it a minute to let the adhesive loosen up and create a little opening.
– When the Anti-Clamp creates a gap big enough, slide an opening pick underneath the screen frame.
– You can skip the next two steps – we got you covered!


Step 5

You can also use a hairdryer, heat gun, or hot plate, but be careful not to get things too toasty. If you need help, you can always schedule a repair
Step 6


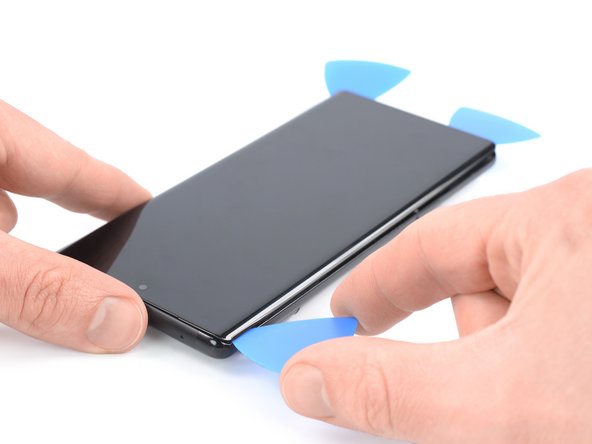
– Get that screen warm to the touch, then grab your trusty suction handle and attach it to the bottom edge – it’s go time!
– Use the suction handle to carefully lift the screen and its safety frame, creating a small gap between the screen and the phone assembly. You’re making progress!
– Now it’s time to bring in the opening pick – insert it into the gap between the screen frame and the phone assembly. Easy does it!
– Gently slide the opening pick to the bottom left corner of the screen, slicing through the adhesive as you go. You’re doing great!
– Leave the opening pick in place for now, so the adhesive doesn’t reseal and undo all your hard work. If you need help or get stuck, you can always schedule a repair with the experts at Salvation Repair.
Be careful when inserting your opening pick – make sure it’s in the right spot to avoid separating the screen from its safety frame. If you’re not sure, don’t worry, just take your time and double-check. And if you need help, you can always schedule a repair
If your screen looks like it’s been on a real wild ride and has some serious cracks, no worries! Slapping on a layer of clear packing tape might do the trick to help that suction handle stick on. If you have some tough tape lying around, that can work too instead of the suction handle. And hey, if nothing else works, you can always give the suction handle a little extra love by supergluing it to the screen. Just remember, if you need help, you can always schedule a repair.
Tools Used

Step 7


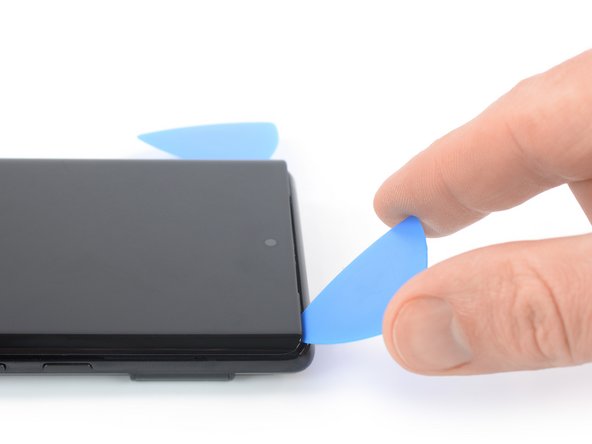
– Now it’s time to bring in some extra help – insert a second opening pick at the bottom edge of your device and gently slide it to the bottom right corner to cut through the adhesive. Don’t worry, you got this!
– Leave that opening pick right where it is, so the adhesive doesn’t try to reseal itself. You’re making great progress, and if you need any extra guidance, you can always schedule a repair
Step 8


– Let’s get this screen separated! Slide a third opening pick under the bottom left corner of the screen.
– Now, gently slide the opening pick along the left edge of the screen. We’re going to loosen that adhesive holding everything together.
– Keep that opening pick in the top left corner to stop the adhesive from getting too cozy and sticking back together. You got this!
Whoa, buddy! You might’ve gone a bit overboard with that opening pick. No sweat, though – just keep it shallow and tip it in there with élan. Go on and loosen up those display adhesives like a pro!
If you’re feeling like you could use a hand, the folks at Salvation Repair are totally here for you!
Step 9

Be careful when you’re getting close to the front-facing camera! Only use the tippy-tip of your opening pick (about 2-3mm) to avoid messing up that camera. No blurry selfies allowed! 😉
If the adhesive gets stubborn and hard to cut, don’t worry – it’s probably just cooled down. Give it a little love with your iOpener or heat gun for 1-2 minutes to warm it back up. If you need help, you can always schedule a repair
Step 10


Be careful not to completely remove the display just yet – it’s still connected to the phone’s internal assembly. If you need help, you can always schedule a repair
– Now it’s time to bring in the fifth opening pick – slide it along the right edge of your phone to carefully cut through the remaining adhesive. If you need help, you can always schedule a repair
Step 11


Be careful not to pull too hard on the display cable while you’re following these steps. You don’t want to make things more complicated, right?
– Now, picture this: you’re opening a cool, vintage book. That’s the move we’re going for. Gently fold the screen towards the left side of the phone, like you’re opening a book. Let’s get this thing open!
Step 12

While the Pixel 6 Pro is all about those fancy Torx Plus screws, don’t fret—standard Torx bits have got your back! Just remember to keep up that steady downward pressure to keep those screws from saying goodbye to their threads.
As you navigate through this repair adventure, make sure to keep an eye on each screw and return it to its cozy little home when you’re done. You’ll thank yourself later!
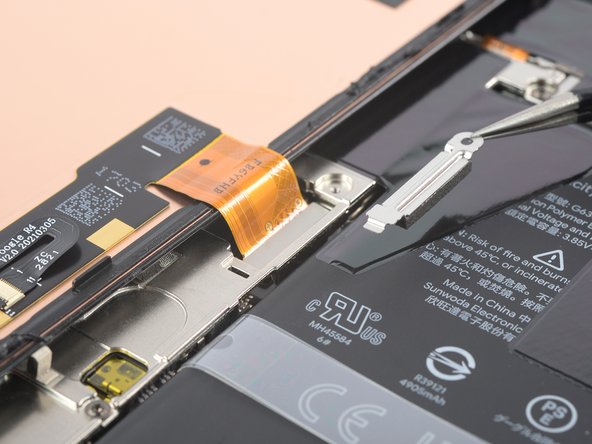
– Grab your trusty Torx T3 screwdriver and gently remove the two 2.0 mm-long 3IP Torx Plus screws that are keeping the display cable metal bracket in check. You’ve got this!
Step 13

Hang onto this component – you’ll need it again when you’re putting everything back together.
– Time to get a little handy! Use a trusty pair of tweezers to carefully remove the metal bracket that’s sitting on top of the display cable connector. If you need help, you can always schedule a repair
Tools Used

Step 14


– Grab your trusty spudger and give that display flex cable a gentle nudge upwards. Just like popping a bubble, lift the connector straight up from its socket. No need to force it, just a little encouragement. If you’re feeling a bit unsure, you can always schedule a repair.
Tools Used

Step 15

Don’t forget to pop that display cable bracket back in place!
– Hey, you’re doing great! First, let’s take that screen off. When you’re putting it back together, make sure to check the snazzy camera and sensor holes. Give your phone a quick test before sealing it up. Don’t worry if you’re using some newfangled adhesives – just follow our step-by-step guide. Once everything’s all fixed up, you might need to calibrate that fingerprint sensor. If you need help at any point, you can always schedule a repair!
Step 16

Be careful not to apply heat directly to the battery – it’s super sensitive to heat damage and could lead to a thermal event. If you need help, you can always schedule a repair
Step 17


Hey, be careful not to poke or bend that battery with your tool! It’s not a good idea to mess with a punctured or bent battery. It might leak some not-so-nice stuff or even get hot. If you need help, you can always schedule a repair.
– Let’s get this graphite film off! Gently use a pair of blunt nose tweezers or a clean fingernail to peel it back from the bottom edge of the battery and the motherboard shield.
– Go ahead and remove that graphite film – you’re doing great!
Tools Used
Step 18


To swap out your battery, simply peel off the bottom part of the graphite film – easy peasy. If you’re looking to replace your rear camera, you’ll need to remove the film completely. But if you only need to replace the earpiece speaker or front-facing camera, don’t worry about touching the film – just leave it as is. If you need help, you can always schedule a repair
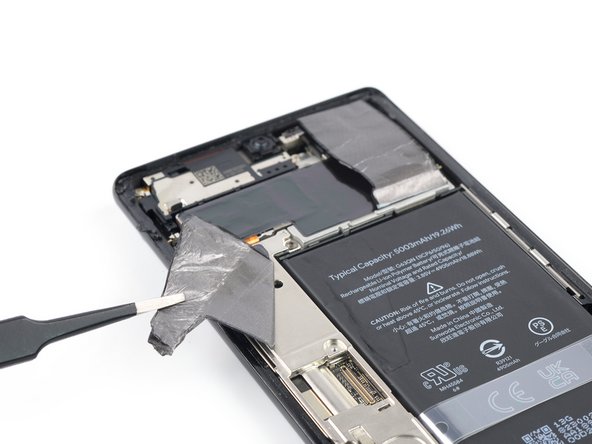
– Let’s get started! Use a pair of blunt nose tweezers or your trusty fingernail to gently pry the black graphite film off the top right corner of the battery.
– Now, fold that graphite film towards the selfie camera to get clear access to the battery. If you need help, you can always schedule a repair
Tools Used
Step 19


If the graphite film is being stubborn and won’t peel off, it might have cooled down. Give your iOpener or heat gun a whirl on the rear glass for 1-2 minutes to warm it up again.
– Grab a pair of blunt nose tweezers or your trusty clean fingernail, and gently peel back that black graphite film from the left edge of the battery and the motherboard shield. Take your time, you got this! If you need help, you can always schedule a repair.
Step 20

– Let’s get started! Use a Torx T3 screwdriver to carefully remove the two 5.1 mm-long 3IP Torx Plus screws that hold the charging port metal bracket in place. If you need help, you can always schedule a repair
Step 21


Hang onto this component, you’ll need it again when you’re putting everything back together.
– Grab your trusty tweezers and gently lift off the charging port bracket. You’ve got this!
Tools Used
Step 22

– Grab your trusty Torx T3 screwdriver and get ready! It’s time to unscrew those five 5.1 mm-long 3IP Torx Plus screws that are holding the motherboard cover in place. You’ve got this!
Step 23


– Time to get up close and personal with your device’s internals! Use a pair of tweezers or your fingers to carefully pry off the motherboard cover. Remember to take your time and be gentle, and if you need help, you can always schedule a repair
Tools Used
Step 24

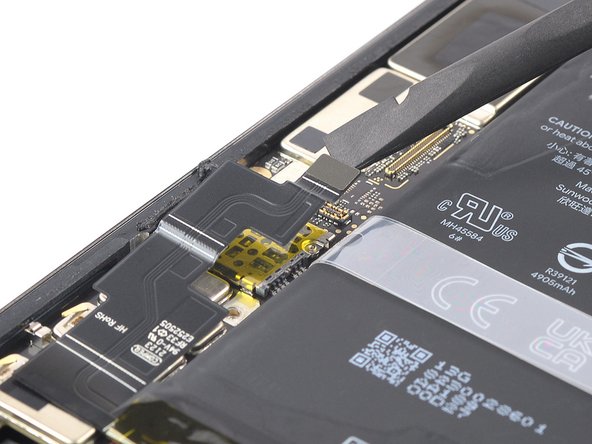
– Time to get started! Use a spudger to carefully disconnect the battery cable by gently prying the connector straight up from its socket. If you need help, you can always schedule a repair
Tools Used
Step 25

– Grab your trusty Torx T3 screwdriver and get ready to unscrew! Carefully remove the two 5.1 mm-long 3IP Torx Plus screws holding the camera connector cover in place. You’re on your way to a successful repair!
Step 26


Don’t forget to hang on to this component so you can pop it back in during reassembly!
– Time to get up close and personal with those tiny camera connectors! Use a trusty pair of tweezers to carefully remove the camera connector cover. If you need help, you can always schedule a repair
Tools Used
Step 27

– Grab your trusty Torx T3 screwdriver and gently remove the lone 3.3 mm-long 3IP Torx Plus screw holding the camera assembly in place. You’re almost there!
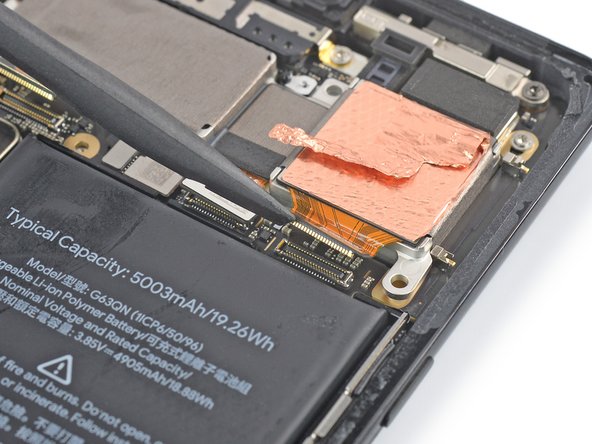
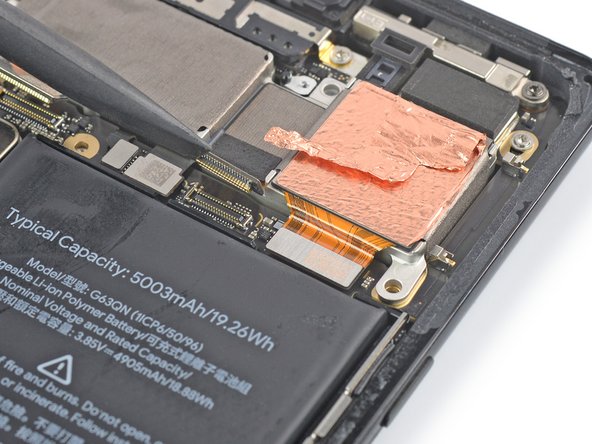
Step 28


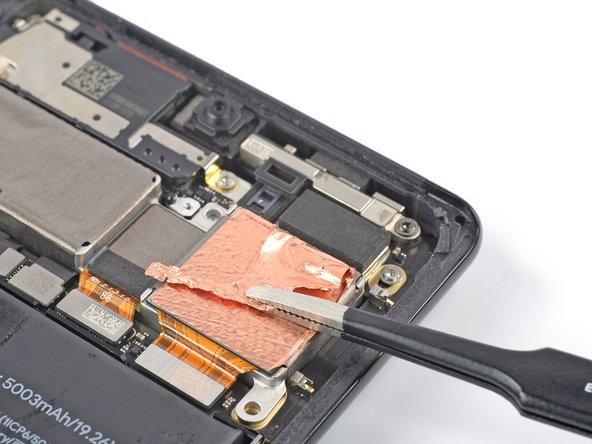
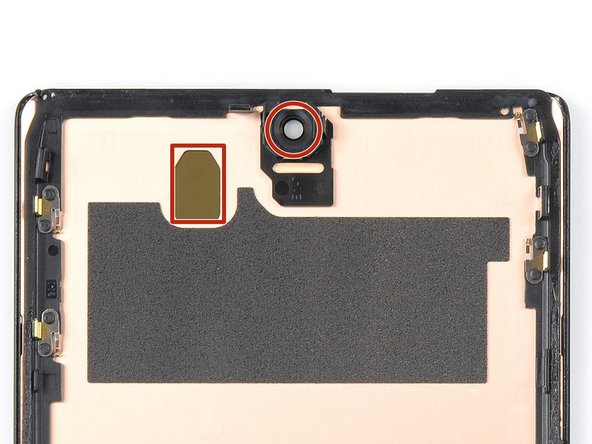
– Time to get a little delicate! Use a trusty pair of tweezers to carefully peel back the top half of the copper foil from the metal spacer, and gently fold it out of the way.
– When you’re putting everything back together, just remember to keep the copper foil from touching any components it shouldn’t – it should only be buddies with the rear camera assembly and the parts it was originally stuck to. If you need help, you can always schedule a repair
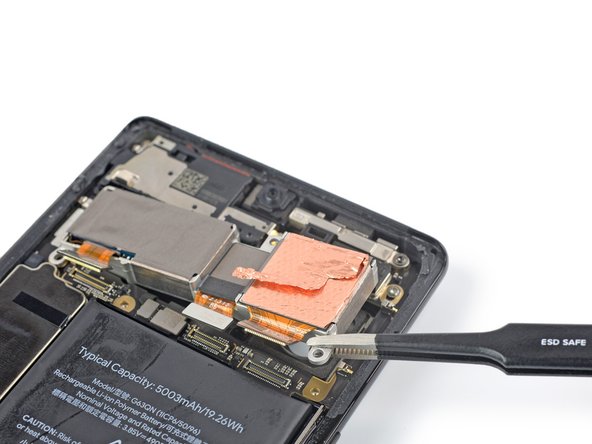
Step 29
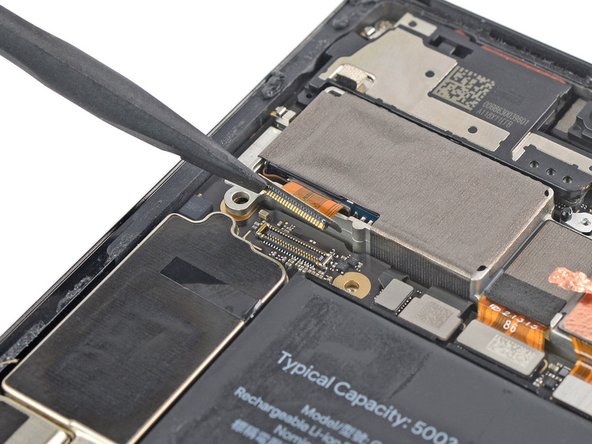

– Grab a spudger and pop the telephoto cable connector straight up from its socket. If you need help, you can always schedule a repair.
Tools Used
Step 30

– Let’s get those cameras unplugged! Use a spudger to gently pry the connectors of the wide and ultrawide cameras straight up from their sockets. You got this!
Tools Used
Step 31


– Time to get a little handy! Use a pair of tweezers or your fingers to carefully lift the camera assembly out of its recess and remove it – easy does it!
– Let’s make sure everything is in order. Compare your new replacement part to the original part and transfer any remaining components or remove adhesive backings from the new part before installing.
– A quick heads up: if your replacement camera module has a plastic spacer, be sure to remove it before you install the module. We’re getting close!
– Almost there! Before you install the camera assembly, give the lens surface a quick clean to make sure it’s smudge and dust free. If you need help, you can always schedule a repair
Tools Used