Google Pixel 6 Pro Screen Replacement Guide
Duration: 45 minutes
Steps: 15 Steps
Before you start, a heads up: this repair guide was put together by the team at Salvation Repair, and it’s not officially endorsed by Google. Want to learn more about how we create our guides? Check it out here.
Make sure to discharge your battery to below 25% before getting started – safety first!
This repair guide will help you replace a cracked or broken screen on your Google Pixel 6 Pro. No sweat! Your new screen comes with the fingerprint reader already attached, but if not, you’ll need to put the original fingerprint reader back on your new screen. If you’re replacing the reader, you’ll need to recalibrate it to keep it working. If the frame is messed up, you’ll want to replace it to make sure the new screen fits perfectly and doesn’t get squished. If your battery is looking a little puffy, take some extra care. It’s a good idea to drain the battery below 25% before you get started. That’ll help keep things safe in case something happens during the repair. Heads up: The Pixel 6 Pro has some lasers in it, so be careful when taking it apart because you might see some infrared light that you can’t see. Whether or not your phone stays waterproof after you’re done will depend on how well you reapply the adhesive, but just know that your phone will lose its IP rating. Before you start this awesome repair adventure, make sure you’ve got some replacement adhesives for both the back glass and the screen. If you need help, you can always schedule a repair.
Step 1


Before you start, make sure your battery is below 25% charged. We want to avoid any accidents, like a battery fire, so let’s play it safe. If you need help, you can always schedule a repair
– First things first, give your phone a little break! Power it down completely and disconnect any cables.
Step 2


Alright, let’s get this show on the road! The next three steps are gonna walk you through using the Anti-Clamp, a super handy tool we designed to make things easier. If you’re not using the Anti-Clamp, skip down three steps for a different way to do it.
If your screen is cracked, don’t worry, just cover it with a layer of clear packing tape to help the suction cup stick to it.
For a complete guide on how to use the Anti-Clamp, check out this guide.
If you find that the surface of your phone is a little too slippery for the Anti-Clamp, just use some tape to create a better grip.
– Give that blue handle a little tug back to free the Anti-Clamp’s arms.
– Slide those arms right over the edge of your phone, either left or right works!
– Place the suction cups close to the bottom of your phone—one on the front, one on the back, like a team!
– Now, give those cups a good squeeze to create some solid suction.
Step 3


– Give that blue handle a gentle pull forward to lock those arms in place like a pro.
– Now, twist that handle clockwise a cool 360 degrees or until you see those suction cups start to stretch; it’s all about that perfect grip!
– Keep an eye on those suction cups to ensure they’re all buddies and aligned. If they start to wander off, just loosen them a bit and nudge those arms back together.
Step 4


Take it easy and turn slowly – no more than half a turn at a time. Pause for a minute between turns and let the Anti-Clamp do its thing. If you need help, you can always schedule a repair
You can always use a hair dryer or heat gun to help loosen things up—but remember, too much heat can be a bit of a drama for your screen or battery, so be careful, okay?
If the Anti-Clamp isn’t quite doing its thing, just add a little more heat to the area and give the handle a half-turn to the right.
– Let’s get started! Heat up your iOpener and carefully thread it through the arms of the Anti-Clamp.
– Now, fold the iOpener so it’s snug against the bottom edge of your phone – this will help loosen things up.
– Be patient for just a minute – this will give the adhesive a chance to release its grip, creating an opening gap for you.
– When the Anti-Clamp creates a big enough gap, it’s time to insert an opening pick under the screen frame. You’re making progress!
– Go ahead and skip the next two steps – you’re on a roll!


Step 5

You can also use a hair dryer, heat gun, or hot plate to apply some gentle warmth! Just make sure to keep an eye on it so we don’t turn your device into a toaster.
Step 6


Alright, let’s be careful here! Make sure to insert your opening pick in the right spot to avoid separating the screen from its safety frame instead of the phone assembly. You don’t want to make things more complicated than they need to be, right? 😉 If you need help, you can always schedule a repair.
If your screen is badly cracked, don’t worry – we’ve got you covered. Try slapping a layer of clear packing tape over it to help the suction handle stick. If that doesn’t work, you can use some seriously strong tape as a substitute. And if all else fails, a tiny bit of superglue can be used to attach the suction handle to the screen. If you need help, you can always schedule a repair
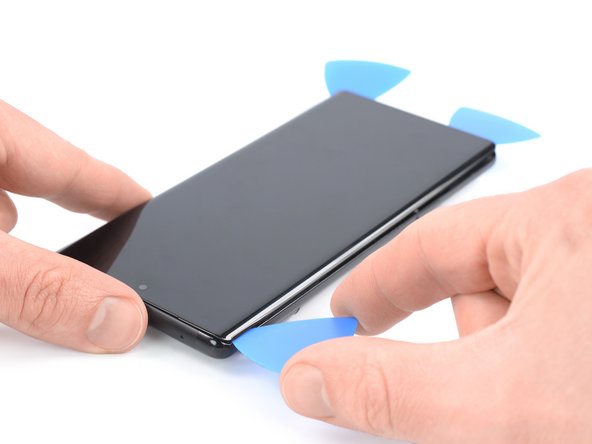
– Get ready to tackle that screen repair – once it’s warm to the touch, grab your trusty suction handle and attach it to the bottom edge of the screen.
– Now it’s time to lift the screen, safety frame and all, using that suction handle. You’re aiming for a small gap between the screen and the phone assembly, so take your time.
– Next, take an opening pick and carefully insert it into the gap you just created between the screen frame and the phone assembly. Easy does it!
– Gently slide the opening pick along the bottom of the screen, making your way to the left corner. This will help break the adhesive’s hold on the screen.
– Leave that opening pick right where it is – it’ll keep the adhesive from resealing, making the rest of the repair a whole lot easier. If you need help, you can always schedule a repair
Tools Used

Step 7


– Slide a second opening pick into the bottom edge and glide it towards the bottom right corner to break that adhesive seal like a pro.
– Keep that opening pick snugly in place to stop the adhesive from rejoining the party.
Step 8


Alright, cool cat, let’s talk about those tiny plastic pins holding your Google Pixel 6 Pro’s screen in place. They’re like little buddies, keeping everything secure. If your trusty opening pick gets stuck while you’re taking the screen off, it means you went a bit too deep. Just gently slide the tip of your pick (about 3-4 mm) under the screen’s adhesive. You’ve got this! If you need a hand, you can always schedule a repair.
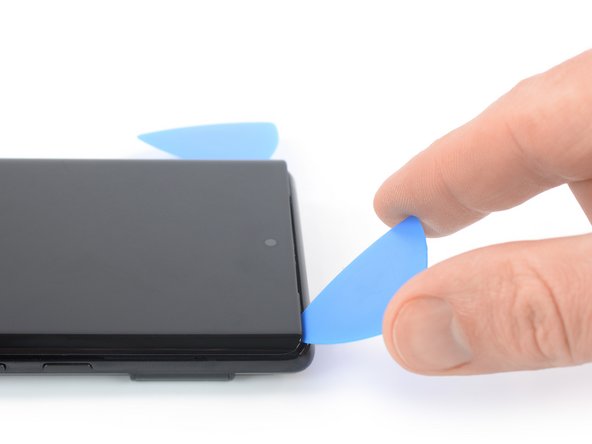
– Gently slide a third opening pick beneath that bottom left corner of your screen. You’re almost there!
– Now, take that pick and glide it along the left edge, carefully slicing through the adhesive like a pro.
– Keep that opening pick tucked in the top left corner to keep the adhesive from making any sneaky comebacks!
Step 9

When you’re working near the front-facing camera, just gently tease in the tip of that opening pick (~2-3 mm) to keep the camera safe and sound—no smudges, no scratches. You’ve got this!
– Pop a fourth opening pick at the top left corner of the screen.
– Slide that pick along the top edge of your phone to slice through the adhesive.
– Leave the pick chillin’ in the top right corner to keep the adhesive from sticking back together. If you need help, you can always schedule a repair
Step 10


– Slide a fifth opening pick along the right edge of the phone, gently cutting through the remaining adhesive. You’re doing great, keep it steady!
Step 11


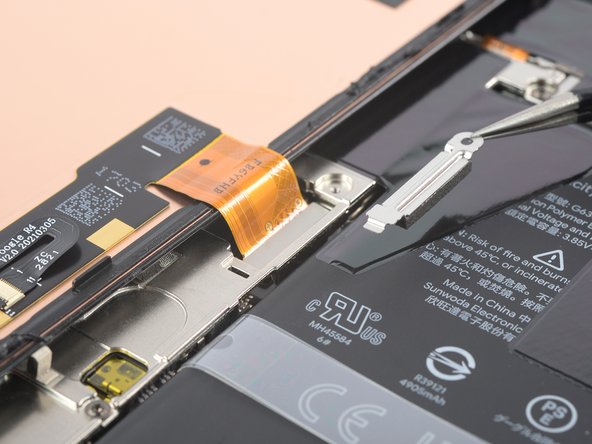
Hey, watch out for that display cable! It’s super delicate, so treat it with care during this step. If you need help, you can always schedule a repair.
– Gently fold the screen over to the left side of the phone assembly, just like you’re flipping open the front cover of a book. Easy peasy!
Step 12

Pixel 6 Pro uses Torx Plus screws, but don’t sweat it – standard Torx bits work just fine! Make sure to keep the pressure on those screws and keep ’em going straight down, or you might end up with a stripped screw situation. Yikes!
Remember to keep track of your screws as you go, just like a detective solving a case. Put ’em back where they belong, just like you found ’em! It’s all about keeping things tidy.
– Let’s get started! Use a Torx T3 screwdriver to carefully remove the 2.0 mm-long 3IP Torx Plus screw that’s holding the display cable metal bracket in place. If you need help, you can always schedule a repair


Step 14


– Grab your trusty spudger and carefully lift the display flex cable by gently prying the connector straight up from its cozy socket.
Tools Used

Step 15

Don’t forget to put the display cable bracket back in place.
– Remove the screen.
– During reassembly, you’re almost there!
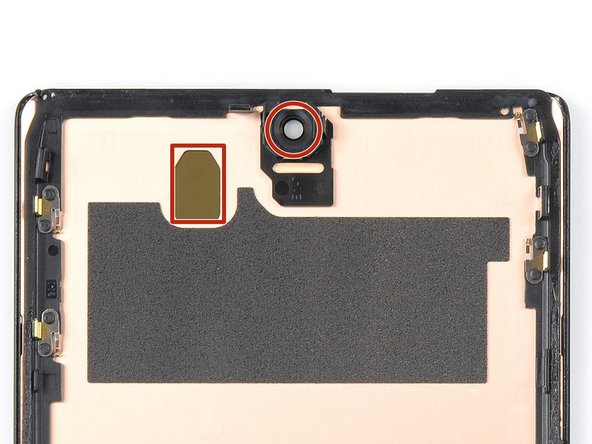
– If you swapped out the screen, check the screen’s front-facing camera hole and sensor cutout for any protective liners. You can remove these liners before you close the phone up.
– This is a great time to test your phone before you seal it up. Connect your screen temporarily, power on your phone, and make sure everything is working great. Before you continue with reassembly, power off your phone and disconnect the screen.
– Follow this guide if you’re using custom-cut adhesives for your device.
– Follow this guide in case you’re using a pre-cut adhesive card.
– If you’re installing a new screen, follow this guide to calibrate the fingerprint sensor. If you need help, you can always schedule a repair