Google Pixel 6 Loudspeaker Replacement Guide – Step-by-Step DIY
Duration: 45 minutes
Steps: 24 Steps
Welcome to Salvation Repair’s step-by-step guide! We’ve put together this handy guide to help you fix your device. Learn more about our repair process at Salvation Repair.
Before you start, make sure to discharge your battery to below 25% to ensure your safety while disassembling your phone. If you need help, you can always schedule a repair.
This handy guide comes from the talented folks at Salvation Repair and is not officially endorsed by Google. Ready to tackle the loudspeaker replacement on your Google Pixel 6? Before you dive in, make sure to discharge that battery below 25%—it’s all about keeping things safe and avoiding any thermal surprises if the battery gets a bit too cozy during repairs. If you notice a swollen battery, remember to take extra precautions! A friendly heads-up: the Pixel 6 is equipped with class 1 lasers, so disassembling it could expose you to some sneaky infrared laser fun. After the repair, ensuring water resistance is all about how well you reapply the adhesive, but just a note—your device will lose its IP (Ingress Protection) rating. Don’t forget, you’ll need some replacement adhesive to get everything back together smoothly. If you need help, you can always schedule a repair.
Step 1


Hey there! Make sure your battery gets down to less than 25% before starting this repair. A charged battery might get a little grumpy if it gets damaged. Want some help? Of course! Just schedule a repair.
– First things first, let’s give your phone a little break! Power it down completely and make sure to unplug any cables hanging out. You’re doing great!
Step 2


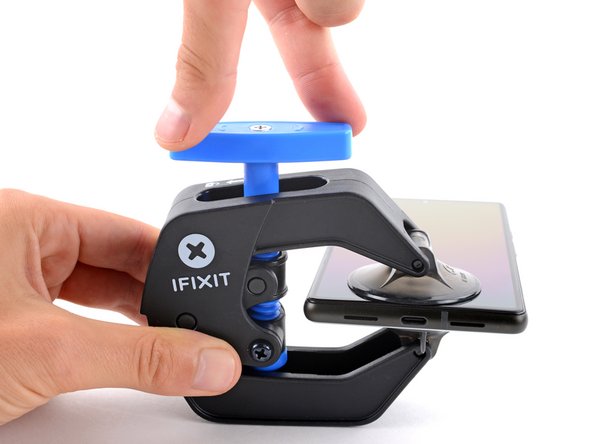
Alright, let’s get this party started! We’re going to use our Anti-Clamp tool to make opening your device a breeze. If you’re not using the Anti-Clamp, just skip ahead three steps for a different approach.
If your screen’s got a few cracks, no worries! Just cover it with some clear packing tape to help the suction cup stick. No drama.
For the full scoop on how to use the Anti-Clamp, check out this guide .
If your phone’s surface is a little too slippery for the Anti-Clamp, just add some tape to give it a little grip. You got this!
– Give that blue handle a gentle tug back to set the Anti-Clamp’s arms free.
– Slide those arms right over the edge of your phone—left or right, your choice!
– Place the suction cups at the bottom edge of your phone—one on the front and one on the back.
– Now, squeeze those cups together to create some serious suction magic!
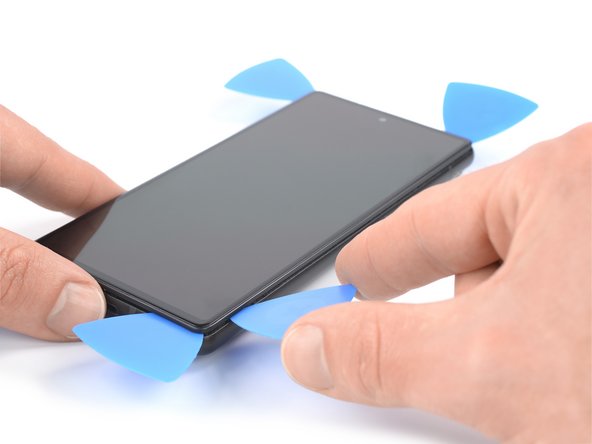
Step 3


– Grab that blue handle and pull it forward, locking those arms in place. You’re doing great!
– Now, give that handle a good spin, turning it clockwise all the way around until you see those cups start to stretch.
– Keep an eye on those suction cups to make sure they’re staying in line. If they start to slip, just loosen them up a bit and get them back in position. You got this!
Step 4


Take it easy and turn slowly – no more than half a turn at a time. Pause for a minute between turns and let the Anti-Clamp do its thing. If you need help, you can always schedule a repair
For an extra boost, try using a hair dryer or heat gun – just be careful not to overheat, as this can harm your device’s display or battery. Take your time and proceed with caution.
If the Anti-Clamp isn’t creating enough space, don’t worry! Simply apply some more heat to the area and give the handle a gentle clockwise turn – about half a turn should do the trick. If you need help, you can always schedule a repair
– Let’s get started! Heat up your iOpener and carefully thread it through the arms of the Anti-Clamp.
– Now, fold the iOpener so it’s snug against the bottom edge of your phone – this will help loosen things up.
– Be patient for just a minute – this will give the adhesive a chance to release, making it easier to create an opening gap.
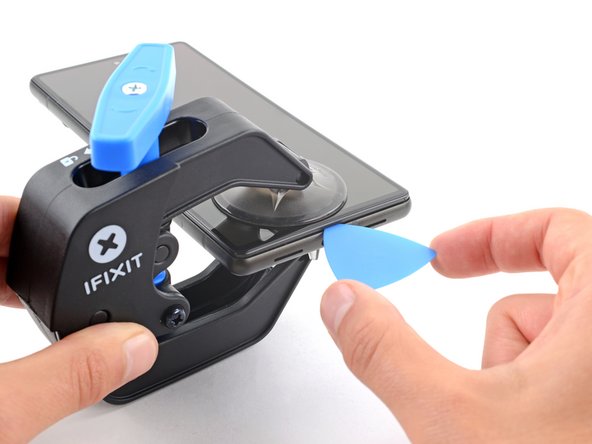
– When the Anti-Clamp creates a big enough gap, it’s time to insert an opening pick under the screen frame.
– You can skip the next two steps – you’re making great progress!


Step 5

Want to warm things up a bit? A hair dryer, heat gun, or hot plate can also be used, but be careful not to let things get too toasty. If you need help, you can always schedule a repair.
Step 6


Hey there! Double check you’re inserting that opening pick in the right spot, or you might end up with a separated screen. Not cool, so take it slow and steady if you know what I mean. You’ve got this! If you need a hand, though, you can always schedule a repair with our pro team.
If your screen is badly cracked, don’t worry – we’ve got you covered. Try slapping a layer of clear packing tape over it to help the suction handle stick. If that doesn’t work, you can use some seriously strong tape as a substitute. And if all else fails, a tiny bit of superglue can be used to attach the suction handle to the screen. If you need help, you can always schedule a repair
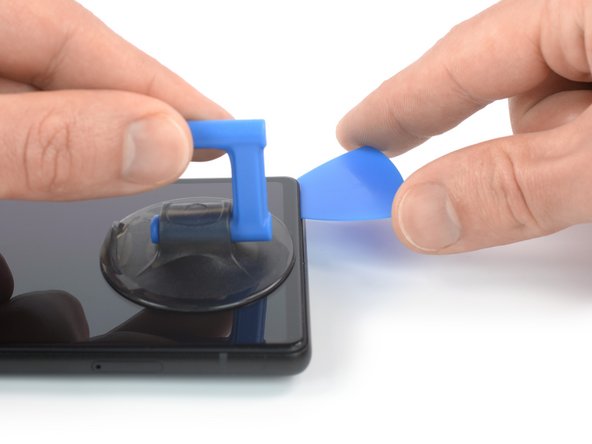
– Let’s get that screen warmed up! Once it’s toasty, stick a suction handle to the bottom of the screen.
– Time to lift! Gently lift the screen, including its frame, to create a tiny gap between the screen and the phone.
– Slide an opening pick into that gap you just made – between the screen frame and the phone.
– Now slide that pick to the bottom right corner of the screen to loosen up the adhesive.
– Keep that opening pick in place, so the adhesive doesn’t get too cozy and stick back together. You got this!
Tools Used

Step 7


– Now it’s time to bring in some extra help – insert a second opening pick at the bottom edge of your device and gently slide it to the bottom left corner to cut through the adhesive.
– Don’t remove the opening pick just yet, leave it in place to keep the adhesive from sealing back up. If you need help, you can always schedule a repair
Step 8


– Hey there, so the screen on your Google Pixel 6 isn’t just glued in, there are some little plastic clips holding it in place too. So if your tool gets stuck while you’re taking the screen off, you’ve gone too deep! Just stick the tip of the tool (like, 3-4 mm) under the screen to cut through the glue.
– Now, take another tool and put it under the bottom left corner of the screen.
– Slide the tool along the left side of the screen to keep cutting through the glue.
– Leave that tool in the top left corner to keep the glue from sticking back together. You got this!
Step 9


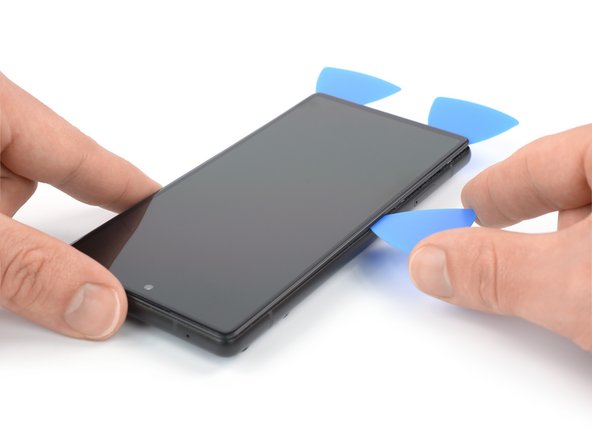
– Slide a fourth opening pick into the top left corner of the screen.
– Gently glide that opening pick along the top edge of your device to cut through the adhesive like a pro.
– Keep the pick in the top right corner to stop that adhesive from sticking again while you work your magic.
Be careful when slicing near the front facing camera – just insert the tip of the opening pick (about 2-3 mm) to avoid any damage or smudges. If you need help, you can always schedule a repair
Hey there! So the adhesive is getting tougher to slice, huh? No worries, it’s probably just gotta reheat. Whip out your trusty iOpener or heat gun and cozy up that adhesive for about a min or two. Don’t forget, if you’re struggling along the way, you can always schedule a repair with our buddies at Salvation Repair. They’re neat and tidy and everything!
Step 10

– Pop in a fifth opening pick and glide it down the right edge of the phone. This will help you slice through any remaining adhesive like a pro!


Step 12


Don’t forget to keep this little guy safe! You’ll need it to put everything back together. If you need any help, you can always schedule a repair.
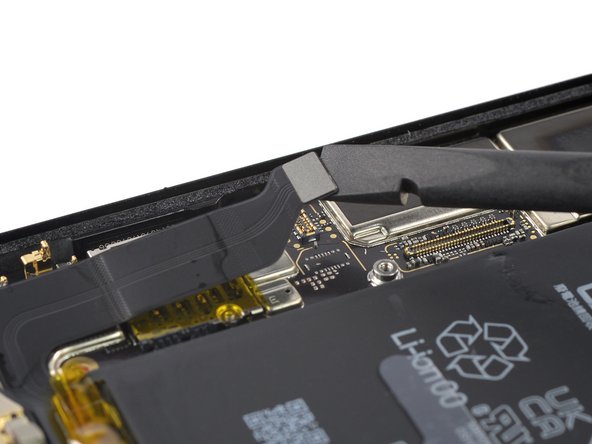
– Time to get a little handy! Use a trusty pair of tweezers to carefully pry open and remove the metal bracket that’s sitting on top of the display cable connector. If you need help, you can always schedule a repair
Tools Used

Step 13
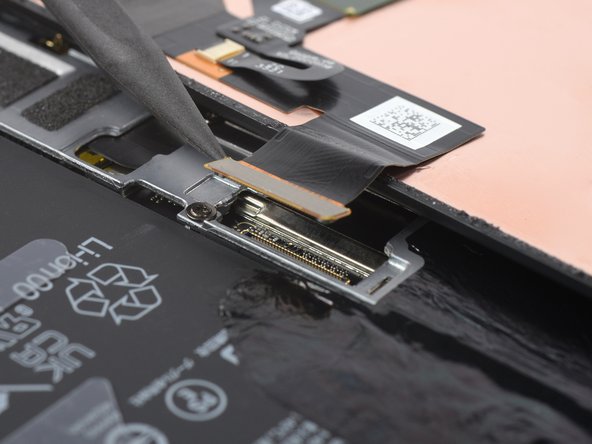

– Time to give that display flex cable a little nudge! Use a spudger to gently pry the connector straight up from its socket. It’s like giving it a high five, but in a technical way. 😉
Tools Used

Step 14

Don’t forget to pop that display cable bracket back in place!
– Here’s the lowdown on how to take your repair journey to the next level: Get those gloves off, take a deep breath, and grab your gizmo tools. First things first, free your screen from its device. Post-replace, peep through that camera hole for any lingering liners. Test before you nest; power up, check your tech, then power down and disconnect. Choose your adhesive wisely and make your device happy. Psst, if you need a little help, don’t sweat it, cos you can always schedule a repair.
Step 15

Hey there! Avoid zapping your battery with direct heat. It’s a delicate little thing and might throw a thermal tantrum.
– Grab your trusty iOpener or a heat gun and warm up that rear glass! This will help loosen the sticky adhesive lurking beneath those sleek graphite films perched on your battery. Make sure to keep that iOpener busy for at least two minutes—just enough time to brew a cup of coffee or plan your next gaming session!
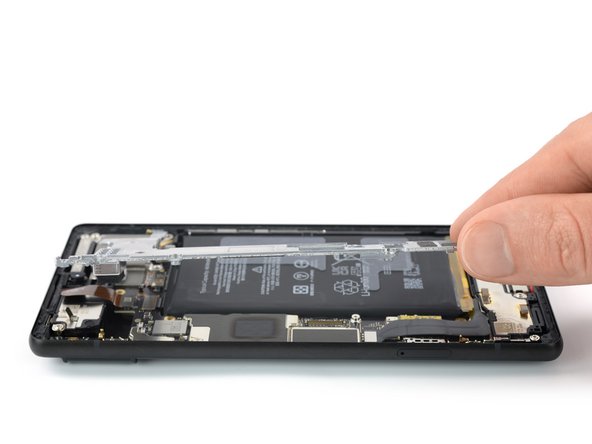
Step 16


Be careful when handling the battery – if it gets punctured or bent, it could leak chemicals or overheat. If you’re not comfortable with this step, don’t worry, you can always schedule a repair
– Grab a pair of blunt nose tweezers or your trusty clean fingernail and gently peel away that black graphite film from the top edge of the battery and the motherboard shield. You’ve got this!
– Go ahead and remove the graphite film.
Tools Used
Step 17


If the graphite film is being stubborn, don’t worry – it’s probably just cooled down. Give it a little more love with your iOpener or heat gun on the rear glass for 1-2 minutes to warm it back up. If you need help, you can always schedule a repair
Step 18


Hey there, you’re gonna need to remove the graphite film at the bottom edge of the battery only when you’re replacing the battery or the loudspeaker. It’s just a quick step to get things rolling.
Oh, and there’s a little foam piece that bridges the display and the speaker. Don’t worry, you’ll be taking that out too. Make sure to put it back in place after you install a new graphite film. It’s like a little party for the speaker, and you wouldn’t want to miss it! If you need help, you can always schedule a repair.
– Time to get up close and personal with your device’s internals. Use a pair of trusty blunt nose tweezers or a clean fingernail to gently pry the black graphite film off the bottom edge of the battery and the loudspeaker assembly.
– Next, carefully remove the graphite film – you’re making great progress! If you need help, you can always schedule a repair
Tools Used
Step 19

Hey, remember where you put all those screws? You’re gonna need them all in the same spot when you put this device back together. If you lose track of any, don’t worry – we’ve got your back! Just schedule a repair and we’ll get you sorted.
– Alright, let’s get this motherboard cover off! You’ll need your trusty Torx T3 screwdriver for this step.
– There are eight 4.8 mm-long screws holding it down. Get those babies out!
– And don’t forget that little 2.4 mm-long screw hiding in the corner.
Step 20

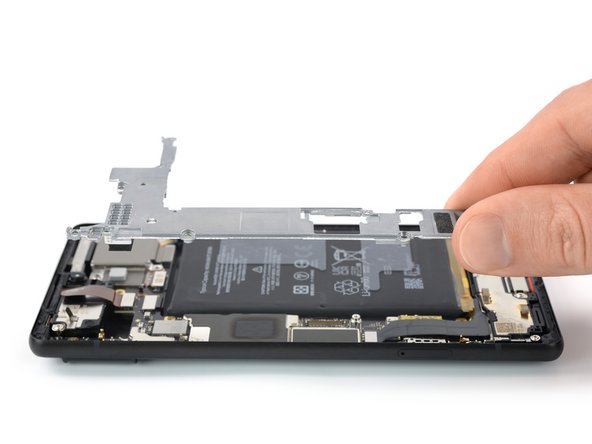
– Gently raise the motherboard cover and take it off with care.

Step 22

– Grab your trusty Torx T3 screwdriver and unscrew the five trusty 4.8 mm-long screws holding the loudspeaker in place. You’ve got this!
Step 23
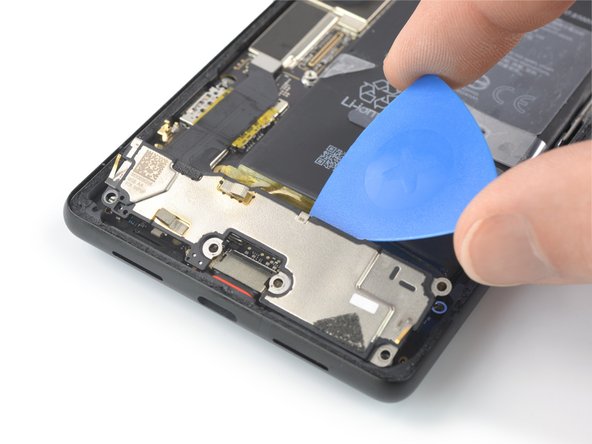

– Time to get this repair started! Insert an opening pick into the gap between the bottom edge of the battery and the loudspeaker – it’s the perfect spot to begin prying it loose.
– Now, use that trusty opening pick to gently pry up the loudspeaker by tilting it downwards. Take your time and be careful, you’re making great progress! If you need help, you can always schedule a repair
Step 24


– Grab a trusty pair of tweezers or your fingers and gently remove the loudspeaker—you’re almost there!
– Now, take a moment to compare your new replacement part with the original. Make sure to transfer any leftover bits, like those cozy foam cushions, so everything fits just right!
