DIY Guide: Replace Google Pixel 5a Headphone Jack Step-by-Step
Duration: 45 minutes
Steps: 28 Steps
This repair guide was written by the awesome folks at Salvation Repair and is not endorsed by Google.
Heads up! For your safety, let’s get that battery down to 25% or less before we get started taking things apart. You can do it!
Ready to rock your Google Pixel 5a with a fresh headphone jack? This easy-peasy guide will show you how to switch it out like a pro. We know phones are sensitive, so always make sure your battery is below 25% before taking it apart. This helps prevent any fireworks going off during the process (we’ve all been there!). If your battery looks a little puffy, take extra care. If you’re feeling overwhelmed, you can always schedule a repair. We’re here to help!
Step 1
Before you start, make sure your device is completely powered off – it’s an important safety step.
Now it’s time to carefully pry the screen up and remove it from your phone. Take a minute to read through the next few notes to ensure a smooth repair process. If you need help, you can always schedule a repair.
– Let’s take a moment to check out the two seams on the edge of your phone:
– Screen seam: This is the magical line that separates the screen from the rest of the phone. Remember, prying here is a no-go!
– Bezel seam: Here’s where the plastic bezel, which is on a mission to protect your screen, meets the frame. It’s held snugly by some plastic clips. This is your go-to spot for prying!
Step 2
Depending on how sticky your device’s adhesive is feeling, you might find yourself giving the iOpener a few rounds to really loosen things up.
You could also try using a hair dryer, heat gun, or hot plate, but just keep an eye on the heat—both the display and the internal battery can be a bit sensitive to those warm vibes.
– Time to get this repair started! Apply a heated iOpener to the right edge of the display for about a minute. This will help loosen the adhesive, making the next steps a breeze. If you need help, you can always schedule a repair
Tools Used
Step 3
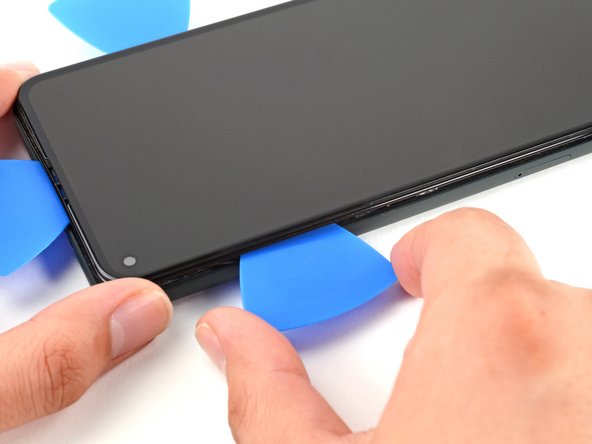
To get that screen off, just slide some opening picks between the black clips holding the bezel to the midframe. You’ve got this!
– Before you dive in, let’s scope out the best places to get started. It’s like a treasure map, but instead of buried loot, you’re digging into a device! 😄
Step 4
If your screen is badly cracked, don’t worry – we’ve got a few tricks up our sleeve. Try covering it with clear packing tape to help the suction cup stick. If that doesn’t work, super strong tape can be a great alternative. And if all else fails, a little superglue can be just what you need to get the job done. Remember, if you need help, you can always schedule a repair
– Alright, let’s get this screen off! Position a suction cup as close to the right edge of the screen as you can. You got this!
– Now, give that suction cup a good pull! You’ll want to use a steady, firm force until a tiny space appears between the bezel and the midframe. It’s like a little secret door opening up.
Step 5
Alrighty then, time to get your hands dirty! Carefully slide an opening pick along the bezel’s seam, working your way around and breaking those pesky plastic clips holding it to the midframe. Piece of cake, right? If you run into any trouble, don’t sweat it – you can always schedule a repair!
– Now it’s time to get started – insert the tip of an opening pick into the bezel seam, about 4-5 cm from the bottom of the phone. Remember to take your time and be gentle, and if you need help, you can always schedule a repair
Step 6
– Gently slide the tip of your trusty opening pick into the bezel seam, about 3-4 cm from the top of your phone. You’re on your way to a successful repair!
Step 7
If you’re having trouble with this step, don’t worry – just gently slide the pick along the top right corner of the phone until you’ve got enough space at the top to fit the opening pick. If you need help, you can always schedule a repair
– Gently slide the tip of your opening pick into the bezel seam at the top of the phone. Keep it cool and steady!
Step 8
If you’re having trouble with this step, don’t worry – just slide the pick along the bottom right corner of the phone until you’ve got enough of a gap at the bottom to fit the opening pick. If you need help, you can always schedule a repair
– Sneak the tip of an opening pick into the bezel seam at the bottom of the phone.
Step 9
– Now it’s time to get started – insert the tip of an opening pick into the bezel seam on the left side of the phone, about 2 cm from the bottom. Take your time and be gentle, you’ve got this! If you need help, you can always schedule a repair
Step 10
– Let’s get this party started! Gently slide the tip of your opening pick into the seam of the bezel, about 3-4 cm below the front-facing camera. You’re practically a pro already!
Step 11
– First, carefully release all the clips. If there’s any stubborn adhesive left, use an opening pick to gently slice through it.
– Now, open your device from the right side – think of it like opening a book. If you need help, you can always schedule a repair
Step 12
Remember where those screws came from, dude! Put ’em back where they belong. Just sayin’, it’s a good idea. 😉
– Let’s get started! Use a T3 Torx driver to carefully remove the 4.6mm-long screw that’s holding the screen connector bracket in place. If you need help, you can always schedule a repair
Step 13
– Time to get up close and personal with those tiny screen connector brackets! Use a trusty pair of tweezers to carefully remove them. If you need help, you can always schedule a repair
Tools Used
Step 14
– Grab your trusty spudger and gently pry up to disconnect that screen flex cable like a pro!
– When you’re ready to reconnect, just align those connectors like a champ! Press down on one side until you hear that satisfying click, then do the same on the other side. Remember, no pressing down in the middle! Misalignment can bend the pins, and nobody wants that kind of trouble. If you need help, you can always schedule a repair.
Tools Used
Step 15
Alright, let’s put that screen connector bracket back where it belongs. You got this!
– Let’s start by taking off that screen from your phone. Easy peasy!
– Now, when you’re putting everything back together:
– If you swapped out the screen, don’t forget to peek at the front-facing camera hole and get rid of any pesky protective liners that might be hanging around.
– Using a custom-cut adhesive? Great choice! Just follow this guide to apply that new screen adhesive like a pro.
– If you’re going with Tesa tape to secure the screen, check out this guide for the best way to do it.
– Once you power up after reassembly, your screen will go through a calibration sequence. Hands off, please! Touching the screen during this time could mess with the calibration and lead to some touchy issues.
Step 16
– Grab your trusty T3 Torx driver and get ready to tackle those screws holding the midframe snugly to the motherboard. There are six of them in total!
– Just a gentle reminder: those screws come in different lengths, so make sure to keep them organized. Trust us, your future self will thank you when it’s time to put everything back together.
– Four screws are 4.6 mm long,
– One is 4.0 mm long, and
– One little guy is 2.0 mm long.
Step 19
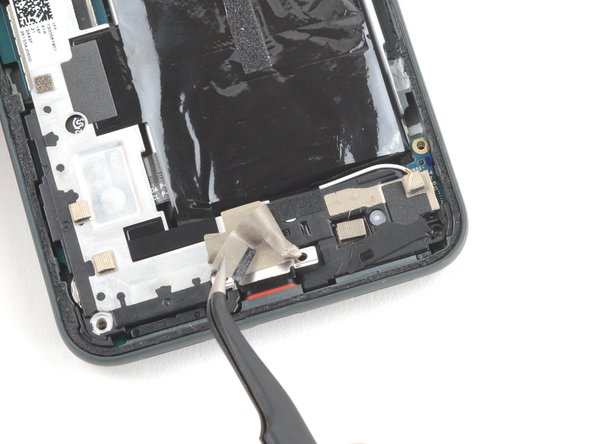
– Time to get a little handy! Use a pair of tweezers to carefully pry back the tape that’s hiding the two screws that hold the charging port bracket in place. If you need help, you can always schedule a repair
Tools Used
Step 20
– Time to get that midframe loose! Use a T3 Torx driver to remove the last four screws holding it in place to the motherboard:
– You’ll find three 4.6 mm screws
– And one 4.0 mm screw. If you need help, you can always schedule a repair
Step 21
Be super careful not to poke or bend the battery with your tool! A punctured or bent battery might leak some not-so-nice chemicals or even cause a fire. If you need help, you can always schedule a repair.
– Alright, time to get this charging port bracket off! Use your trusty spudger or tweezers to gently peel back that tape. You got this!
Step 22
Handle that graphite sheet with care—let’s not give your battery a surprise poke or a little love tap!
– Time to get up close and personal with that battery! Use a blunt pair of tweezers or your fingers to gently pry back the graphite sheet covering it. Remember to take your time and be careful. If you need help, you can always schedule a repair
Tools Used
Step 23
– Slide the tip of your trusty spudger under the top right corner of the midframe. Go on, give it a gentle nudge!
– You’ll spot a black plastic clip hanging out at the top of the midframe, holding it snugly against the frame. To set it free, use your spudger to pull the midframe down a bit and then work it up with some finesse.
Tools Used
Step 25
– Watch out for those two tiny plastic pieces that keep the midframe snugly in place. They can be a bit sneaky and easily wander off, especially when the midframe isn’t around to hold them steady.
– When you’re putting everything back together, make sure to tuck these little champs into their corners before sealing up the midframe. You’ve got this!
Step 26
– Time to disconnect the battery! Use the flat end of a spudger to carefully pry up on the battery connector – it’s like a little wake-up call for your device. If you need help, you can always schedule a repair
Tools Used
Step 27
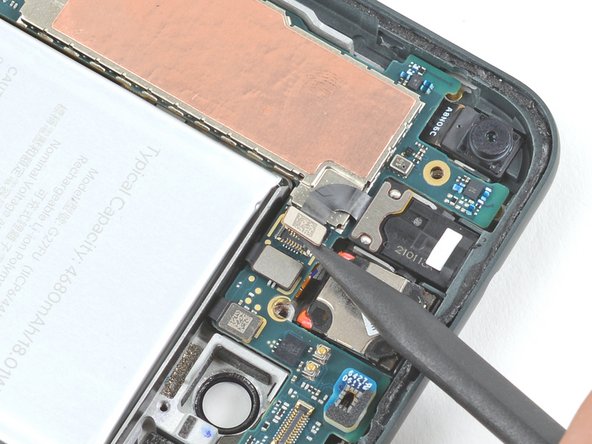
– Grab that trusty spudger and gently use its pointed end to lift up the headphone jack connector. Disconnect it like a pro!
Tools Used
Step 28
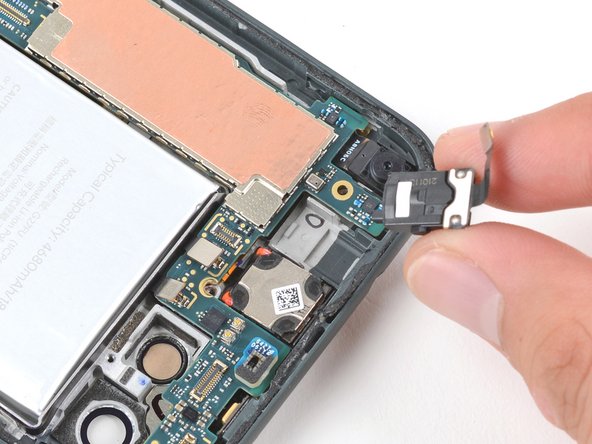
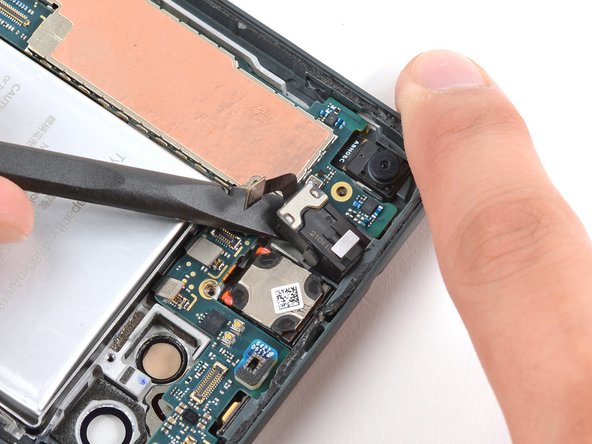
– Grab your trusty spudger and gently nudge the headphone out of its cozy little socket. It’s like giving it a friendly push to say, ‘Time to come out!’
– Now, go ahead and remove the headphone jack. You’ve got this!
Tools Used


