
Samson Meteor Teardown
Duration: 45 minutes
Steps: 4 Steps
Let’s check out the guts of the Samson Meteor Mic, all the way down to the circuit boards. Ready to see what makes this little studio workhorse tick?
Step 1
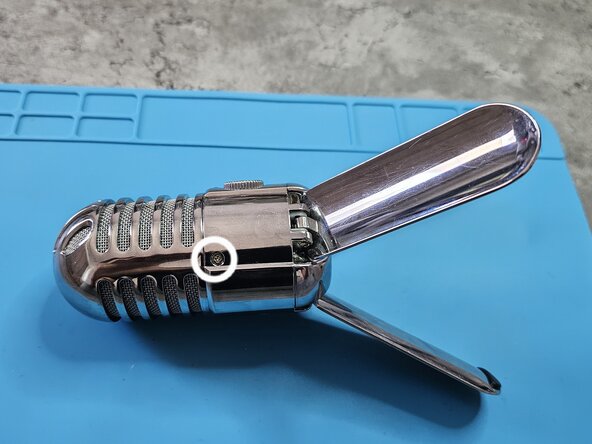

– There are two screws on the outside of the mic that we need to take out to access the internals.
– Look for the ones marked with a white circle.
– You’ll need a Phillips head screwdriver for this step.
Step 2
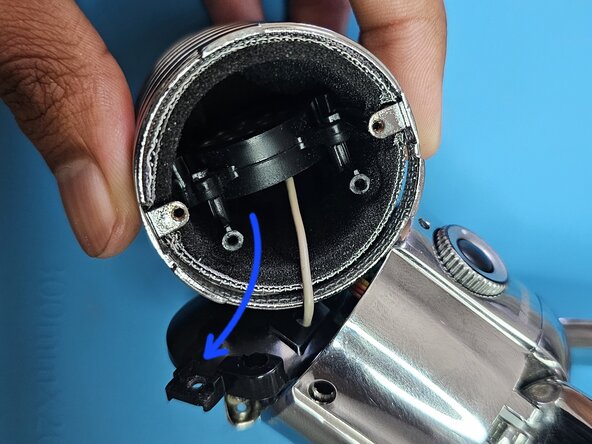

– Once you’ve taken out the screws, the capsule housing should come free. Carefully lift it away—watch out for the wires still connected from the microphone capsule and the ground wire. To separate the housing, unscrew the four screws highlighted in blue, which will let you remove the cover and then gently separate the housing from the capsule in its shock mount, as shown in image 2. Take your time and be gentle—if you need extra help, you can always schedule a repair.
Step 3

– First things first, let’s get that main PCB out of the way! To do that, we need to take off the pegs that are holding the LED indicator board in place. This will give us some room to reach the screws securing the bottom PCB. Check out image 1 for a clear view of the setup.
Step 4

– Once the screws are removed, you should be able to gently lift the main board out. And there you have it—you’re done with the teardown! Nice work.