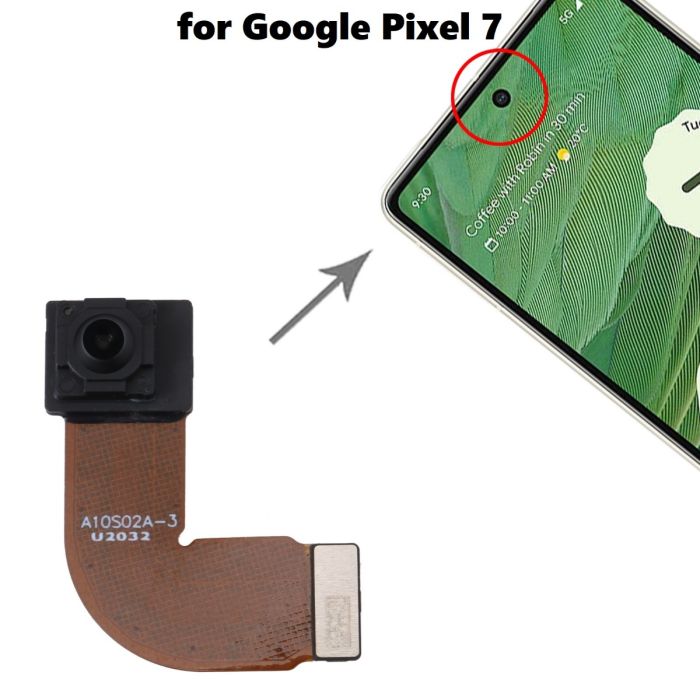
Google Pixel 5a Front-Facing Camera Replacement Guide
Duration: 45 minutes
Steps: 41 Steps
This repair guide comes straight from the talented folks at Salvation Repair, and while we think it’s pretty awesome, it hasn’t received the official thumbs-up from Google.
For your own safety, make sure to drain that battery below 25% before diving into the disassembly of your device. Safety first, right?
Yo! Ready to swap out that front-facing camera on your Google Pixel 5a? This clear and easy guide will walk you through the process step-by-step. Before you get started, make sure your battery is below 25% to keep things safe. And if that battery is lookin’ a little puffy, take extra care. If you need help, you can always schedule a repair.
Step 1
Hey there, champ! That standard SIM card tool might be a bit too chunky for this job. Don’t go forcing it in there—grab a tiny paperclip, or a tool that fits just right, like a SIM eject bit.
– Gently slide a SIM card eject tool into the tiny hole on the right side of the frame.
– Give it a firm press until you hear that satisfying pop of the SIM card tray coming out.
– Carefully take out the SIM card tray from the phone and you’re good to go!
Step 2
Alright, before we get started, make sure your device is powered down. We don’t want any surprises!
– Let’s take a moment to appreciate the two seams on the edge of your phone:
– Screen seam: This is the line that keeps your screen snug against the rest of the phone. Remember, no prying here!
– Bezel seam: Here’s where the plastic bezel, which protects your screen, meets the frame. It’s held tightly by plastic clips, and this is your go-to spot for prying.
Step 3
Hey, depending on how sticky your device is, you might have to heat it up a few times with the iOpener to loosen things up.
A hair dryer, heat gun, or even a hot plate will do the trick, but be careful not to get things too toasty. Your phone’s display and battery are a little sensitive to heat, so don’t go overboard. If you need help, you can always schedule a repair.
– Warm up your iOpener and give the right edge of the display a cozy minute of heat to loosen that adhesive up. You’ve got this!
Tools Used
Step 4
Ready to remove that screen? Insert your opening picks between those sleek black clips holding the bezel to the midframe. If you need help, you can always schedule a repair
– Scope out the best entry points before diving in.
Step 5
If your screen is badly cracked, don’t worry – we’ve got a few tricks up our sleeve. Try covering it with clear packing tape to help the suction cup stick. If that doesn’t work, super strong tape can be a great alternative. And if all else fails, a little superglue can be just what you need to get the job done. Remember, if you need help, you can always schedule a repair
– Grab a suction cup and stick it as snugly as you can near the right edge of the screen.
– Now, give that suction cup a solid pull! Keep it steady until you see a tiny gap appear between the bezel and the midframe.
Step 6
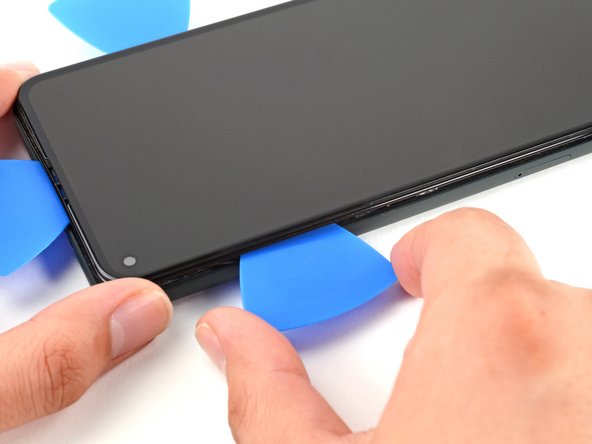
The bezel is held in place by a bunch of plastic clips that you can easily pop off. Just grab an opening pick and slide it along the seam at various points to release them. Easy peasy! If you need help, you can always schedule a repair.
– Gently slide the tip of your opening pick into the bezel seam about 4-5 cm up from the bottom of your phone. You’ve got this!
Step 7
– Gently slide the tip of your opening pick into the bezel seam, keeping it about 3-4 cm down from the top of your phone. You’re getting this party started!
Step 8
If you’re having trouble getting started, try sliding the pick along the top right corner of the phone. Keep going until you create a little gap at the top—enough for the opening pick to slip in. No worries, you got this! If you need help, you can always schedule a repair
– Alright, let’s get this party started! Slide the tip of your trusty opening pick into the seam where the bezel meets the top of your phone. It’s like a secret handshake, only cooler.
Step 9
If you’re having trouble with this step, just slide the pick along the bottom right corner of the phone until you find a gap big enough to fit the opening pick. You’ve got this!
– Gently slide the pointy end of your trusty opening pick into the groove at the bottom of your phone. You’ve got this!
Step 10
– Gently slide the tip of your trusty opening pick into the bezel seam on the left side of the phone, about 2 cm from the bottom. You’re doing great!
Step 11
– Alright, let’s get this party started! Slide the tip of your trusty opening pick into the bezel seam, about 3-4 cm below where your selfie camera hangs out. You got this!
Step 12
– First, pop off all those clips like a pro! Use an opening pick to slice through any stubborn adhesive that might be hanging around.
– Next, gently open the device from the right side, just like you’re flipping through a book. Easy peasy!
Step 13
Hey, keep track of all those screws! Make sure each one goes back where it belongs. It’s like a puzzle, but with tiny metal pieces. You got this!
– Grab your trusty T3 Torx driver and unscrew that 4.6 mm-long screw holding the screen connector bracket in place. You’ve got this!
Step 14
– Time to get a little handy! Use a pair of tweezers to carefully remove the screen connector bracket. If you need help, you can always schedule a repair
Tools Used
Step 15
– Grab your trusty spudger and gently pry up to disconnect that screen flex cable. You’ve got this!
– When it’s time to reconnect, align those connectors just right and press down on one side until you hear that satisfying click. Then, do the same on the other side. Remember, no pressure in the middle! If it’s not lined up perfectly, those pins might bend, and we definitely don’t want that. If you need help, you can always schedule a repair.
Tools Used
Step 16
Don’t forget to pop that screen connector bracket back in place. You’ve got this!
– Alright, let’s get this screen out of here! Carefully remove the screen from the phone.
– Now, when you put everything back together (reassembly, fancy word!), remember these things:
– If you’ve swapped out the screen, take a peek at the front-facing camera hole. Make sure those protective liners are gone. You don’t want them hanging around!
– If you’re using some custom-cut adhesive, check out this awesome guide to make sure you’re applying it like a pro!
– And if you’re using Tesa tape for the screen, follow this guide to get it attached just right.
– Once you’ve got everything back together and powered up, your screen will go through a quick calibration dance. Don’t touch it during this time! It’s got to get its groove back and any touching might mess things up.
Step 17
– Grab your trusty T3 Torx driver and get ready to remove six screws that hold the midframe in place – it’s time to get up close and personal with your device’s motherboard!
– Keep track of those screws, as some are longer than others, and make sure to put them back where they belong – we don’t want any mix-ups!
– Four 4.6 mm screws are waiting to be removed – let’s get them out of the way!
– One 4.0 mm screw is next on the list – carefully remove it and set it aside.
– One 2.0 mm screw is the last one to go – don’t worry, you’re doing great! If you need help, you can always schedule a repair
Step 19
– Gently guide the spudger’s pointed end to the left until that plastic cover decides to part ways with the midframe. You’re almost there!
– Now, lift that plastic cover off the midframe and give yourself a pat on the back! If you need help, you can always schedule a repair.
Tools Used
Step 20
– Let’s gently peek under that tape with a pair of tweezers. We’re looking for those two screws holding the charging port bracket in place. Don’t be shy, just give it a little lift!
Tools Used
Step 21
– Grab your trusty T3 Torx driver and let’s tackle those last four screws holding the midframe to the motherboard:
– Three screws measuring 4.6 mm
– One screw measuring 4.0 mm
Step 22
Alright, champ, let’s be careful with that tool! We don’t want to puncture or bend the battery. That could get messy and possibly dangerous. If you need help, you can always schedule a repair.
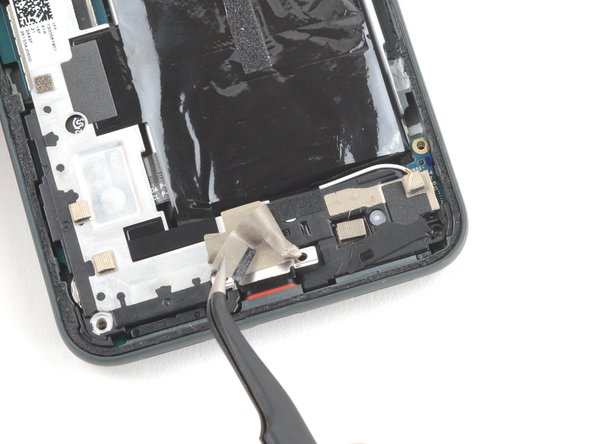
– Now, let’s get that charging port bracket unstuck from the speaker assembly. Grab your trusty spudger or a pair of tweezers and gently peel back the tape holding it in place. You’ve got this!
Step 23
Handle with care – gripping the graphite sheet can be a bit tricky, so make sure not to accidentally puncture or damage the battery. If you need help, you can always schedule a repair
– Grab your trusty tweezers (or even your fingers if you’re feeling brave!) and carefully peel back the graphite sheet protecting the battery. It’s like lifting a tiny, protective blanket.
Tools Used
Step 24
– Let’s get this party started! Slide the pointed end of your spudger under the top right corner of the midframe. You know, that part that holds everything together? It’s like the midframe’s best friend.
– Now, see that black plastic clip at the top of the midframe? That’s what keeps the midframe connected to the top of the frame. We need to break up that party. Use the spudger to pull the midframe down and then carefully pry it up. Easy peasy!
Tools Used
Step 26
– Keep an eye on those tiny plastic bits that help secure the midframe – they’re easy to misplace, so make sure to keep track of them. You’ll need them to get everything back in order when you’re reassembling your device.
– When you’re putting everything back together, don’t forget to pop these little guys back into their corners before replacing the midframe. If you need help, you can always schedule a repair
Step 30
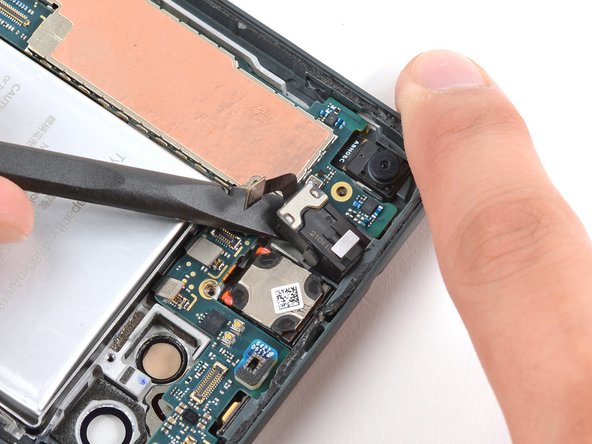
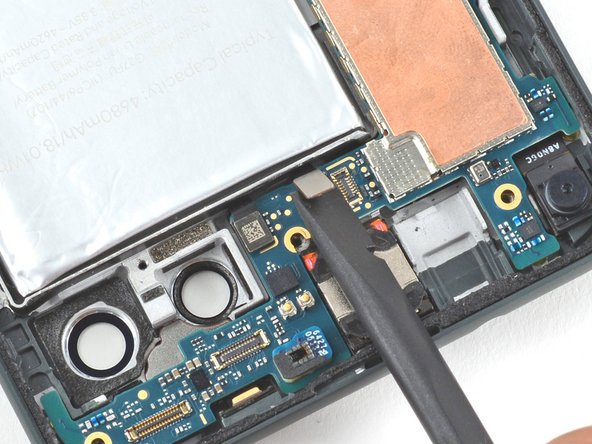
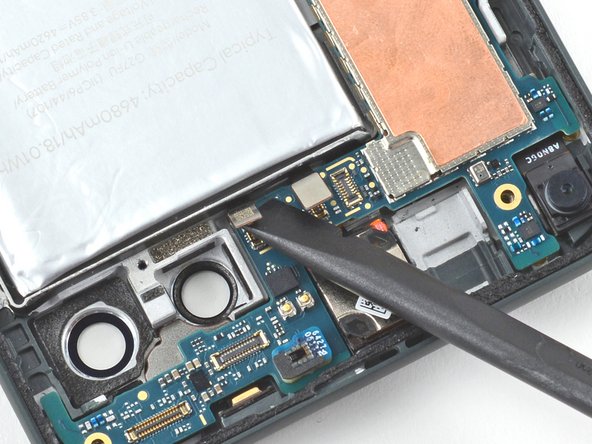
– Gently use the pointed end of a spudger to lift the headphone jack connector and disconnect it. You’ve got this!
Tools Used
Step 31
– Let’s get that headphone jack out! Use the flat end of a spudger to gently pry up on the headphone jack. You should hear a little ‘pop’ as it comes loose.
– Now that you’ve freed the headphone jack, go ahead and remove it. You’re doing great!
Tools Used
Step 32
– Grab that trusty spudger and use its flat end to gently lift the fingerprint sensor connector. Disconnecting it will be a breeze!
Tools Used
Step 34
– Alright, let’s get this motherboard out! Grab your trusty T3 Torx driver and loosen those three 2.9 mm screws holding it in place. You’ll feel a little victory with each turn. If you need help, you can always schedule a repair.
Step 35
Before you start, make sure you’ve removed the SIM card tray – it’s also what keeps the motherboard in place, so double-check that it’s out to avoid any issues. If you need help, you can always schedule a repair
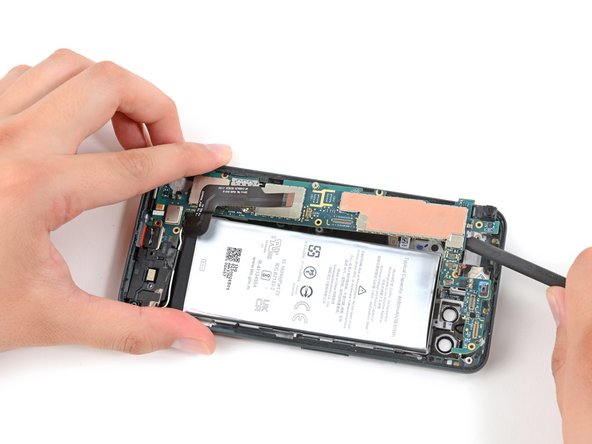
– Gently slide the flat end of your trusty spudger under the top right corner of the motherboard and give it a little lift to free it from the frame. You’ve got this!
Tools Used
Step 36
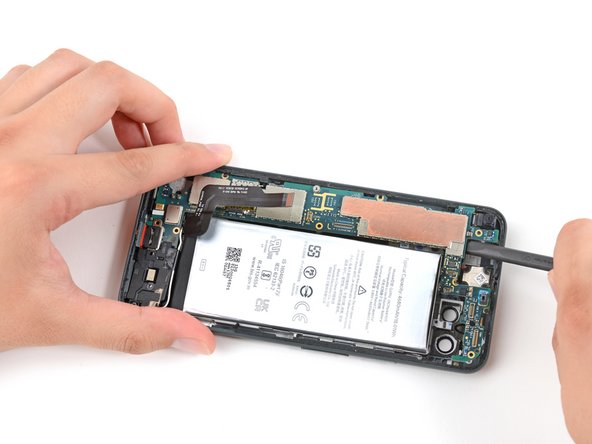
– Now it’s time to gently pry the motherboard away from the frame. Insert the flat end of a spudger under the top left corner and carefully lift it up. If you’re not feeling confident, don’t worry – you can always schedule a repair and let the pros at Salvation Repair handle it for you.
Tools Used
Step 37
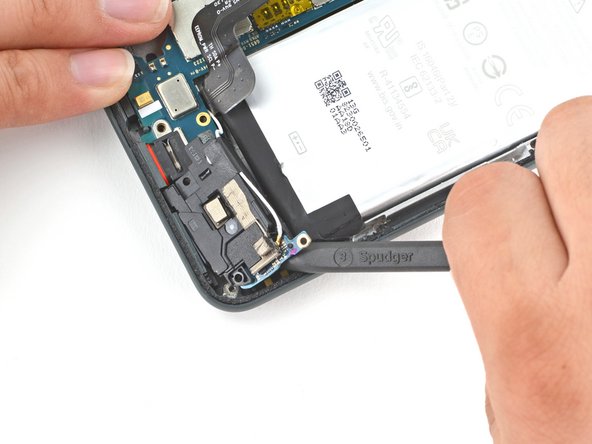
Hey, be gentle with that battery when you’re prying things apart. We don’t want any squished batteries, right?
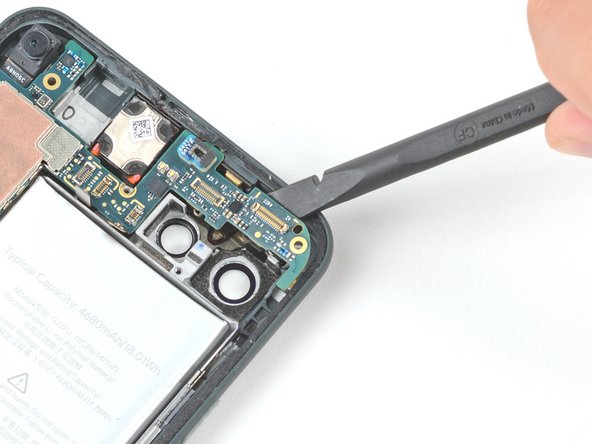
– Now it’s time to gently pry the speaker assembly loose. Insert the pointed end of a spudger under the screw slot at the top right of the speaker assembly, and carefully dislodge it from the frame. If you need help, you can always schedule a repair
Tools Used
Step 38
– Let’s get that motherboard and speaker assembly outta there! Carefully remove it, you got this!
Step 39
– Flip that motherboard over, like you’re showing it off to your friends!
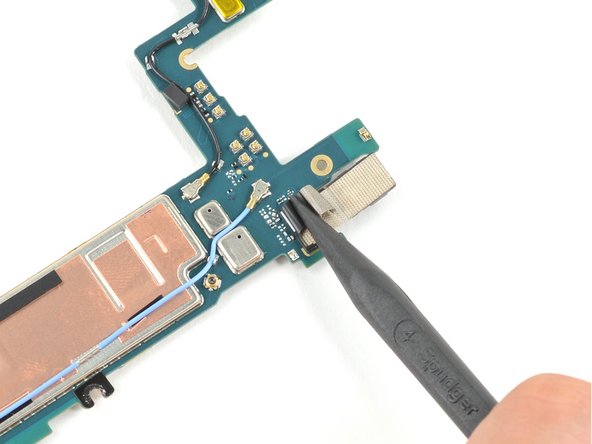
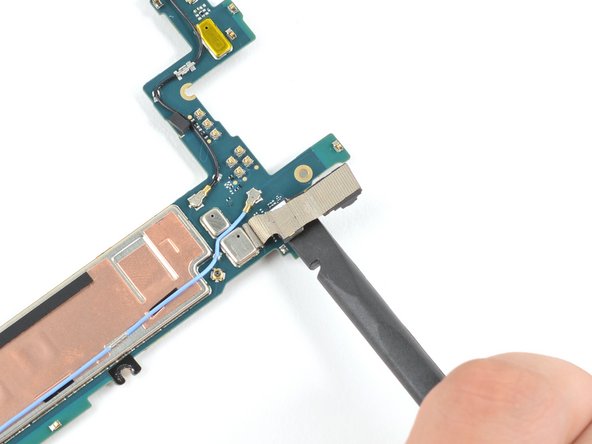
– Grab your spudger tool (the pointy end, of course) and gently peel back that tape hiding the front-facing camera connector. It’s like a little treasure hunt, but with less danger.
Tools Used
Step 41
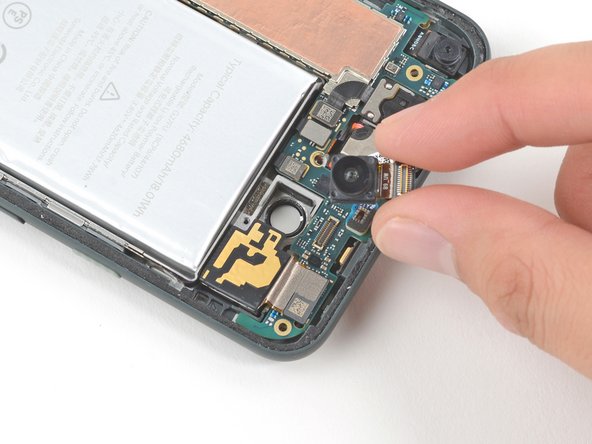
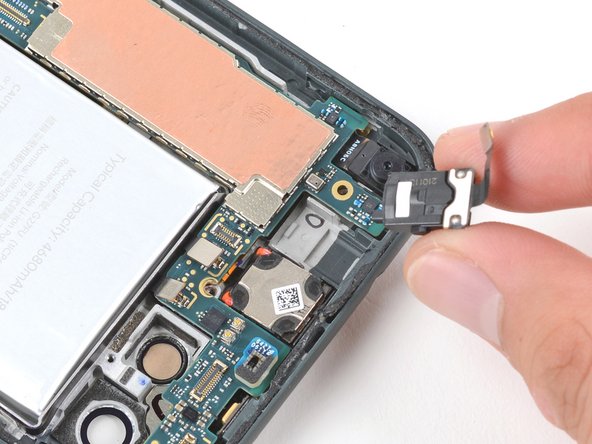
– Alright, let’s take a peek at that front-facing camera. Go ahead and gently remove it.
