Google Pixel 5 Screen Replacement: Step-by-Step Guide to Fix a Cracked or Broken Screen
Duration: 45 minutes
Steps: 15 Steps
This repair guide comes straight from the talented folks at Salvation Repair and isn’t officially backed by Google. Want to dive deeper into our repair guides? Check them out here.
Get ready to breathe new life into your Google Pixel 5 with a brand new screen. At Salvation Repair, we’ve put together this step-by-step guide to help you replace a broken or cracked screen. Unlike previous Google Pixel models, the Pixel 5’s screen is reinforced with a metal frame, and the earpiece speaker is glued onto the back side of the screen. If you need help, you can always schedule a repair. Our guide is here to walk you through the process, and with a little patience, you’ll be enjoying your like-new phone in no time.
Step 1
You can use a hair dryer, heat gun, or hot plate to help out, but remember to keep it cool! Overheating your phone can lead to some serious heat damage for the display and internal battery. So, let’s keep it chill while we work our magic! If you need help, you can always schedule a repair.
– Let’s get this repair started! Heat an iOpener and apply it to the bottom edge of the screen for about a minute to loosen things up. If you need help, you can always schedule a repair
Tools Used
Step 2
Now that you’ve got the adhesive loosening, take a moment to review these important details:
– Screen seam: This is the line that keeps your screen cozy with the rest of the phone. Remember, no prying here—let it be!
– Bezel seam: Here’s where the stylish plastic bezel meets the frame, keeping everything safe and sound. It’s held snugly by some clever plastic clips, so this is the spot to gently pry.
Step 3
In the next couple of steps, we’ll show you how to use the Anti-Clamp, a nifty little tool we created to make opening up your device a breeze. If you’re not using the Anti-Clamp, just hop down two steps for another method.
For a detailed walkthrough on using the Anti-Clamp, be sure to check out this guide.
If your device’s surface is a bit too slick for the Anti-Clamp to grip, don’t worry! You can always use some packing tape to give it a better hold.
– Let’s get this screen open! Grab the blue handle and pull it towards the hinge. You’ll hear a satisfying click, indicating that you’re ready to get started.
– Now, position the suction cups near the bottom edge of the screen. One on the front, one on the back. Think of them like little helpers getting ready to give your screen a lift.
– Press down firmly on the cups to apply suction to the area you want to open. You’re basically giving your screen a little hug. Don’t worry, it’s gentle!
Step 4
Take it easy and turn slowly – no more than half a turn at a time. Give it a minute between turns and let the Anti-Clamp do its thing. If you need help, you can always schedule a repair
Keep those suction cups snug and in line with each other! If they start to wiggle out of place, just give them a gentle loosen and guide the arms back to their happy spot.
If the Anti-Clamp isn’t quite making the gap you need, no worries! Just warm up the area a bit more and twist that handle clockwise for half a turn.
– Push that blue handle away from the hinge – it’s time to get this party started! It’s like flipping a switch to open mode.
– Now, give that handle a spin clockwise. Keep going till you see the cups starting to stretch – almost like a rubber band!
– Take a minute to let the adhesive loosen up and give you a nice opening gap. We want to make sure everything is nice and smooth for the next step.
– Okay, now’s the time to insert that opening pick under the screen and bezel. The Anti-Clamp should be creating a nice gap for you to slip it in.
– You can skip the next step – we’ve got this!
Step 5
Got a screen that’s seen better days? Don’t worry, we’ve got you covered. If your screen is badly cracked, follow this guide to tape over the cracked screen. And if all else fails, you can try supergluing the suction cup to the broken screen – just be careful not to make things worse.
Having trouble with this step? Don’t sweat it – it can be a bit tricky, especially with older devices. If you’re struggling, try applying some more heat and giving it another shot. And if you’re still having no luck, remember that you can always schedule a repair with the experts at Salvation Repair.
– Attach a suction cup to the screen, right next to the edge you’ve heated up. This will be your trusty sidekick for the next few steps.
– Now, pull up on that suction cup with some steady force – you got this! You’re creating a gap, and that’s exactly what you need.
– Time to bring in the opening pick. Slide it into the gap you just made, and you’ll be one step closer to fixing your device. If you need help, you can always schedule a repair
Step 6
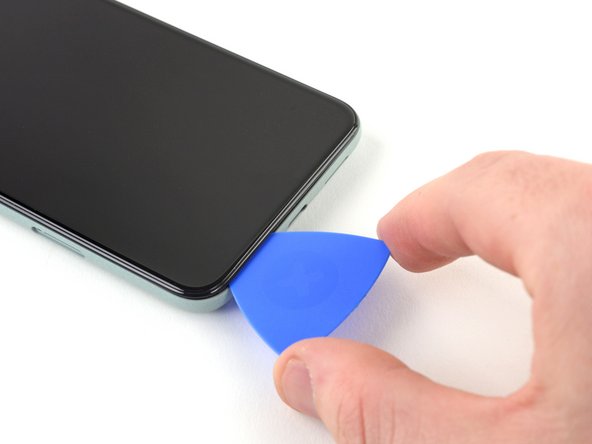
– Gently wiggle the opening pick back and forth at the bottom of the screen to break through the adhesive – it’s like cutting through sticky tape, but be careful not to push too hard.
– Leave the pick in place at the bottom right corner, so the adhesive doesn’t start to stick back together again. If you need help, you can always schedule a repair
Step 8
Whoa there, cowboy! Make sure to only stick that pick in just 1/4 inch (6 mm) – anything deeper and you might run into trouble with that sneaky flex cable hiding in the middle of the left edge. Need a hand? You can always schedule a repair!
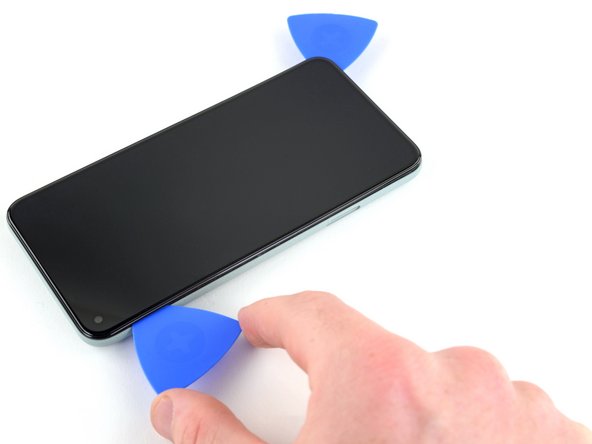
– Let’s get started by inserting another opening pick into the bottom left corner of the screen – nice and easy.
– Next, gently slide the opening pick around the left corner to loosen things up.
– Now, carefully continue to slide the pick up towards the front camera, slicing through the adhesive on the left edge of the screen as you go.
– Leave the pick in place to keep the adhesive from re-sealing – you’re making great progress! If you need help, you can always schedule a repair
Step 9
If the adhesive is putting up a fight, give it a warm hug with some heat for a minute and then try slicing again.
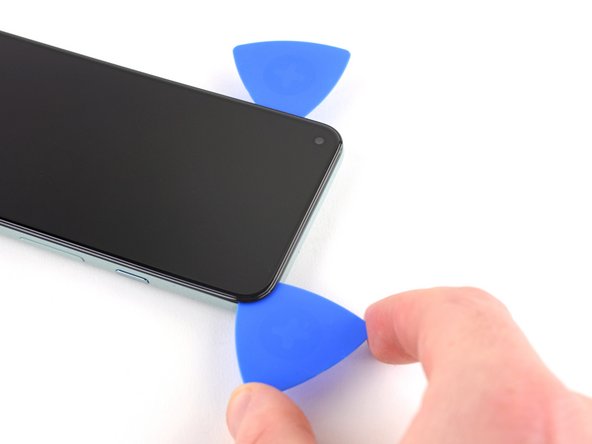
– Pop another opening pick into the top left corner of the screen like a boss!
– Gently glide the pick around the front camera and along the top edge of your phone, showing it who’s in charge.
– Slide that pick over to the top right corner and leave it there, just chillin’ while you work your magic.
Step 10
You might need to run that opening pick around the edges a few more times to make sure you’ve cut through all that sticky stuff. It’s usually thickest in the corners. If you need help, you can always schedule a repair
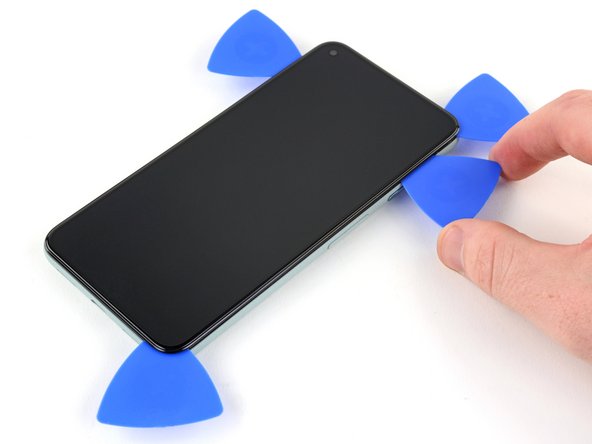
– Gently slide an opening pick into the bottom right corner of the screen.
– Carefully glide the pick up to the top right corner to cut through the last bit of adhesive.
Step 11
Hey there! Just a friendly reminder: try to keep the screen opening under 90 degrees to avoid any trouble with the screen flex cable. We want to keep everything in tip-top shape!
– Let’s get started by using the opening pick to gently pry up the left edge of the screen from the top left corner. Just lift it a few millimeters to keep those pesky clips from snapping back into place.
– Now, carefully lift the right side of the screen and swing it open like a book. You’re making great progress!
Step 12
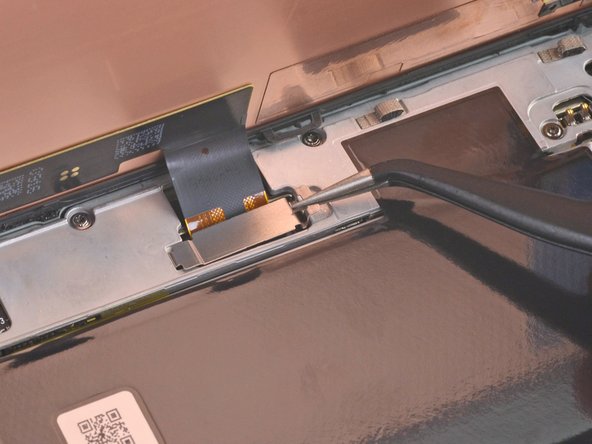
– Grab those tweezers and give a gentle grip to the screen connector cover that’s keeping the screen flex cable snug as a bug.
– Now, just push that little clip in towards the connector to release it and let the magic happen!
Tools Used
Step 13
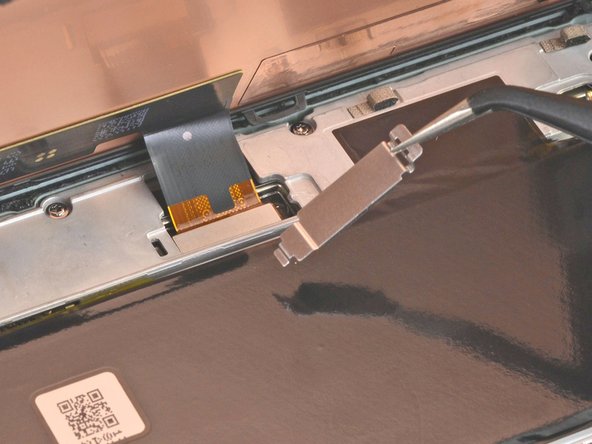
Don’t forget to keep this part handy for when it’s time to put everything back together!
– Time to say goodbye to that screen connector cover! Give it a gentle nudge and remove it like a pro.
Step 14
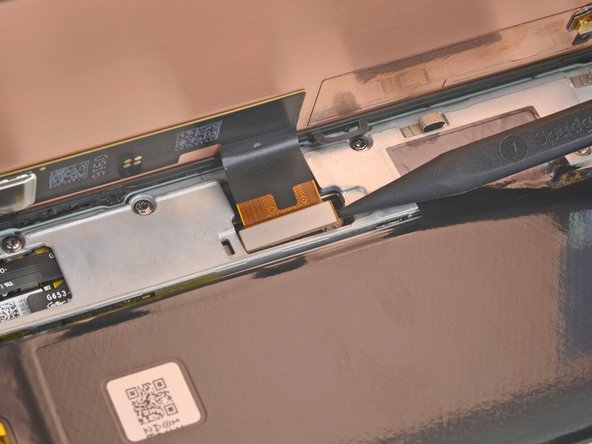
– Use your trusty spudger to carefully pry up and disconnect the screen flex cable – it’s like a little wake-up call for your device!
– To reattach those pesky press connectors, line them up just right and gently press down on one side until you hear that satisfying click. Then, repeat the process on the other side. Remember, no pressing down on the middle, or you might end up with bent pins and a world of trouble. If you need help, you can always schedule a repair
Tools Used
Step 15
When using isopropyl alcohol to tackle that pesky adhesive on your display, just be careful not to let it splash onto any other components. We wouldn’t want to weaken their adhesive bond, right? Keep it neat and tidy!
Hey there! Grab those tweezers and tackle the last bits of sticky residue on your case. You’re doing great! 🙌 If any part seems tricky, don’t sweat it – you can always schedule a repair and let our friendly pros handle it!
– First things first, gently detach that screen like it’s a mitt on a warm summer day!
– If you’re rocking a new screen, take a peek at the front-facing camera hole and peel off any pesky protective liners that might be hanging out.
– For those replacement screens held down by tape, be sure to say goodbye to that tape before you start installing! We’re going for smooth here.
– Using custom-cut adhesive? Awesome! Just follow our guide to get that new screen adhesive on right—they’ll stick around for a long time!
– Planning to use Tesa tape? Perfect! Make sure to follow our guide for a seamless reattachment experience.
– And a quick heads up: after you put everything back together and power it on, the screen will go through its cool calibration sequence. Hands off during this time, please! We don’t want any touch issues ruining the party.
Tools Used


