Google Pixel 4a 5G Screen Replacement Guide
Duration: 45 minutes
Steps: 15 Steps
Hey there! This repair guide is brought to you by the awesome folks at Salvation Repair. It’s not officially endorsed by Google, but we’re pretty sure it’s still awesome. Want to learn more about our repair guides? Click here.
Hey there, repair pals! This awesome guide from iFixit pros is totally cool, but it ain’t endorsed by Google. Check here to learn more. Ready to replace that screen on your Google Pixel 4a 5G? We’ve got ya covered! Need a little extra help? No worries, just scout this neat link: schedule a repair
Step 1


Get ready to pop that screen up and lift it off your phone. Give a quick read through these notes before you dive in.
– First, let’s get familiar with your phone’s edges. Take a look at the two seams:
– Before we dive in, make sure you know where these important areas are on your screen:
– The screen seam is where the screen meets the rest of the phone. This is where you’ll need to carefully pry.
– The frame seam is where the plastic frame meets the back cover, held together with screws. Be careful not to pry here.
– Keep an eye out for the screen flex cable – don’t insert your opening pick too deep, or you might damage it.
– Also, be mindful of the adhesive perimeter. If you pry too far without angling your pick, you risk damaging the OLED panel. If you need help, you can always schedule a repair
Step 2
If you’re feeling adventurous, you can use a hair dryer, heat gun, or hot plate to warm things up. Just be careful not to get carried away! Too much heat can be bad news for your phone’s display and battery. If you need help, you can always schedule a repair.
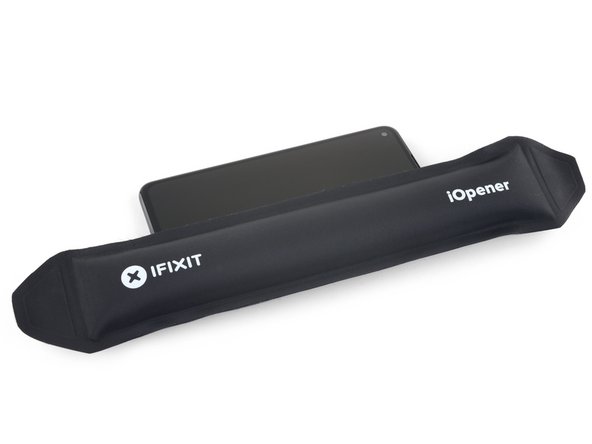
– Grab your trusty iOpener and give it a little heat on the right edge of the display for a whole minute. This will help soften that stubborn adhesive so you can get in there like a pro!
Tools Used

Step 3


If your screen is looking like a spider web, don’t fret! Slapping on a layer of clear packing tape might just do the trick to help that suction cup stick. If you’re feeling adventurous, you can also use some super strong tape instead of the suction cup. And if you’re really in a bind, a little superglue on the suction cup can help it cling to that cracked screen. Remember, if you need help, you can always schedule a repair.
– Get your suction cup close to the right edge of the screen. We’re going to get this screen off!
– Now, give that suction cup a good pull. We’re talking strong and steady, but don’t go crazy!
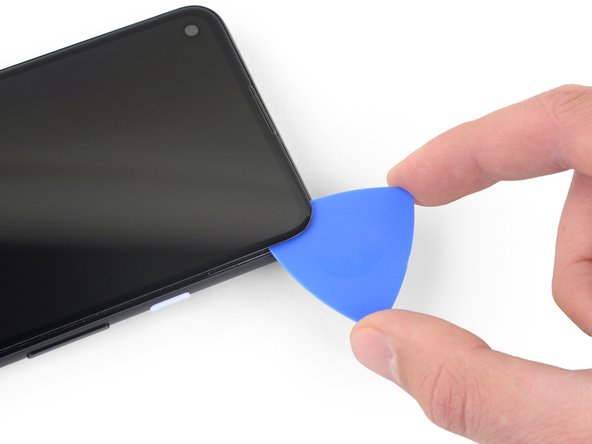
– Time to get sneaky! Slide the tip of an opening pick into that screen seam. Just a tiny bit, no more than 1 mm. We don’t want to go overboard, right?
Step 4


Whoa there, cowboy! If you feel your pick hitting a ridge, stop right there. You might be pressing against the edge of the OLED panel. Just angle the pick a bit and try again. You got this!
Here’s how to slide your pick in without putting a dent in that OLED panel. Make sure to do this before you start slicing through the adhesive.
– Get ready to unlock your device’s secrets! Insert the pick about 1 mm into the gap, then pivot it upwards to a steep angle – you’re making great progress!
– Now that you’ve got the pick at a steep angle, carefully push it into the gap about 1/4 inch (6 mm). It should slide in smoothly below the OLED panel. If you need help, you can always schedule a repair
Step 5


Hey there, don’t go crazy with the pick! Just a little nudge, about 1/4 inch (6 mm), is all you need. Go any further and you might give that screen’s flex cable a little too much love. If you need help, you can always schedule a repair.
Step 6


Hey there! Just a heads up: there’s a mesh protecting the earpiece speaker at the top edge of the screen. If you don’t have a replacement mesh handy, be super careful not to lose it or damage it during your adventure.
– Slide another opening pick into the right edge of your phone at a nice angle, right where a gap has formed to protect that precious OLED panel.
– Gently glide the pick around the top edge to sever the adhesive like a pro.
– Keep that pick in place along the top edge to make sure the adhesive doesn’t try to stick back together.
Step 7


If you’re having a tough time slicing through the screen, just warm up that tricky spot for about a minute and give it another go!
– Now it’s time to get a little more aggressive – insert another opening pick into the top edge of your phone at an angle, making sure to target a gap that’s already formed to avoid damaging that fancy OLED panel.
– Use your trusty pick to carefully slice around the top-left corner, being mindful of the camera window – we don’t want any accidents!
– Leave the pick in place along the left edge to keep the adhesive from re-sealing, and take a deep breath – you’re making great progress! If you need help, you can always schedule a repair
Step 8


Be careful now, you’re getting close to the screen flex cable and digitizer, so make sure to slice with precision! If you need help, you can always schedule a repair
If the screen is being stubborn, try warming up the tricky spot with some heat for about a minute and give it another shot. If you need help, you can always schedule a repair
– Gently glide the opening pick to slice the adhesive along the left edge of your phone. If you need a hand, you can always schedule a repair.
Step 9


Hey, just a heads up – you’re working near the screen’s flex cable and digitizer. Be careful!
If you’re having a tough time slicing through the screen, just warm up that tricky spot for about a minute and give it another go!
– Gently glide the opening pick around the bottom-left corner and across the bottom of the display to snip through the remaining adhesive.
Step 10


Hold on to your horses! We’re not taking the screen off just yet. 😉
– Time to get that screen off! Carefully cut around the phone’s edges, like you’re giving it a super cool haircut. Once that’s done, gently lift that right edge – you’re almost there!
– Now, grab your trusty opening pick and carefully snip through any lingering adhesive. Think of it like you’re giving the phone a little extra hug to say goodbye.
Step 11


Alright, let’s be super careful with that ribbon cable. We don’t want to put any extra stress on it, right?
Step 12


– Time to get up close and personal with that screen connector! Use your trusty fingernail or a pair of tweezers to gently pry off the tape covering it.
– If the tape is still in great shape, you can definitely reuse it when you’re putting everything back together. If not, don’t worry – just swap it out with some fresh Kapton tape. And if you’re feeling stuck, remember you can always schedule a repair with the pros at Salvation Repair.
Tools Used

Step 13


Be ready – that plastic cover might just take flight!
– Let’s get started by inserting the tip of a spudger into the opening of the plastic cover that’s holding the screen flex cable in place.
– Gently pry the plastic cover straight up – it should pop out of its spot with a little bit of effort.
– Now, carefully remove the plastic cover to expose the screen flex cable underneath. If you need help, you can always schedule a repair
Tools Used

Step 14


– Grab your trusty spudger and gently pry up to disconnect that screen flex cable. You’ve got this!
– Now, let’s get those connectors back together! Align them carefully, then press down on one side until you hear that satisfying click. Repeat on the other side, but remember – no pressing in the middle! If things get misaligned, those little pins might bend, and we definitely don’t want that. You’re doing great!
Tools Used
Step 15


When you boot up your device after reassembling it, the screen will run through a quick calibration process. Just let it do its thing – don’t touch the screen until it’s finished, or you might end up with some wonky touch settings. If you need help, you can always schedule a repair
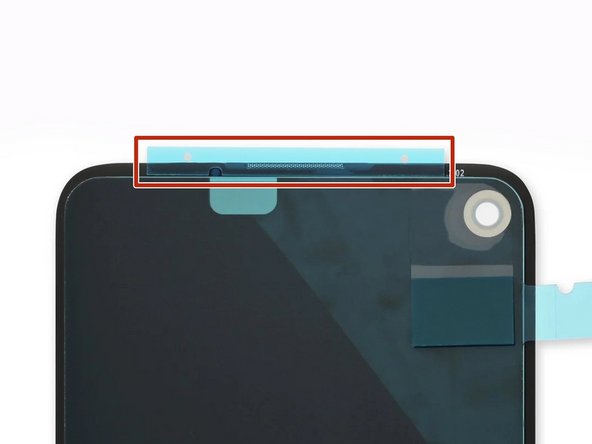
Alright, now take a peek at the third photo – it’ll show you exactly where to put those sticky strips. You’ve got this!
– Alrighty! Time to get your groove on and replace that old phone or tablet screen. First off, chuck that old screen – it’s outta here! Now, let’s get this new screen in the game. Check it out, your shiny new screen already comes with some sweet speaker mesh and top edge adhesive. Lucky you! No need to waste time applying extra stuff. Next up, if you want to make your device look factory fresh, follow this super simple guide to apply the custom-cut adhesive. If your fabulous new screen came without speaker mesh and top edge adhesive, not a problemo! Just remove the large clear liner from the adhesive and slap it onto the screen for a sleek finish. Make sure you line it up with the speaker mesh for the perfect look. And that’s it, your device is now ready to rock and roll! If you need help, you can always schedule a repair at our friendly, professional shop.