DIY Google Pixel 4a 5G Loudspeaker Replacement Guide
Duration: 45 minutes
Steps: 30 Steps
This repair guide is brought to you by the amazing team at Salvation Repair and hasn’t received the Google stamp of approval. Curious about our repair guides? Check them out here!
Heads up! The display panel on the Google Pixel 4a 5G is delicate, so handle it with care.
Hey there! This awesome repair guide comes from the talented folks at Salvation Repair, but just a heads up – it hasn’t been given the thumbs up from Google. Ready to dive in? Let’s get started on replacing the loudspeaker for your Google Pixel 4a 5G! Just a little note: the display panel on this beauty is pretty delicate, so make sure to pay extra attention to the warnings in the opening procedure if you’re planning on reusing the screen. If you need help, you can always schedule a repair.
Step 1


– Hey there! Now we’re going to show you how to take that SIM card out. First, you’ll need a little tool, like a SIM eject tool or even a paper clip! Carefully insert the tool into the SIM tray hole and gently press until it pops out. Then, you can easily remove the SIM card tray. If you need help, you can always schedule a repair with us!
Step 2


Get ready to gently pry the screen up and free it from the phone’s embrace. Make sure to check out the notes below before diving in!
– Let’s get started by checking out the two seams on the edge of your phone:
– Before diving in, take a moment to familiarize yourself with these key areas on the screen:
– Screen seam: This is the line that separates the screen from the rest of your phone. It’s the spot where you’ll want to gently pry.
– Frame seam: Here, the plastic frame meets the back cover, held tight by screws. It’s a no-pry zone, so steer clear of this seam.
– Screen flex cable: Be careful not to shove the opening pick in too deep, or you might risk damaging this delicate cable.
– Adhesive perimeter: Stick to this narrow perimeter while prying, and keep your pick angled. Going beyond could harm the OLED panel.
Step 3
You can use a hair dryer, heat gun, or hot plate to warm things up a bit, but keep an eye on it! We don’t want to turn your phone into a hot mess—the display and internal battery are both sensitive to heat.
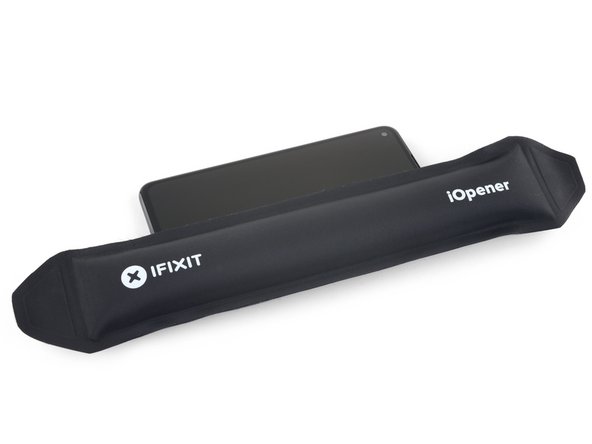
– Time to get this repair started! Apply a heated iOpener to the right edge of the display for about a minute. This will help loosen the adhesive, making the next steps a breeze. If you need help, you can always schedule a repair
Tools Used

Step 4


If your screen is looking like a spider web, don’t fret! Slapping on a layer of clear packing tape can help the suction cup stick better. If you’re feeling adventurous, you can also use some super strong tape instead of the suction cup. And if you’re really in a bind, a little superglue on the suction cup can do the trick to hold it to that cracked display. Remember, if you need help, you can always schedule a repair.
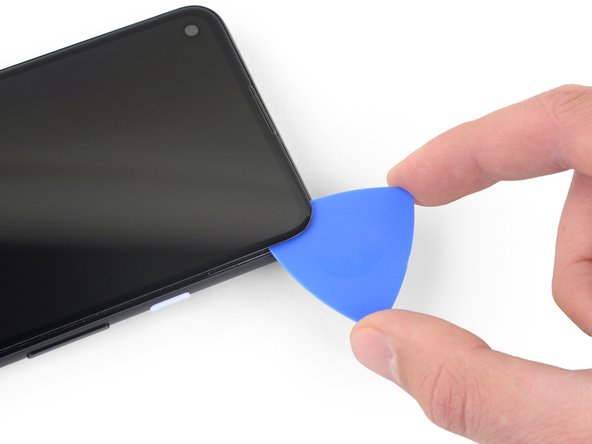
– Position a suction cup as close as you can to the right edge of the screen – this will give you the best leverage.
– Now, lift that suction cup with a firm and steady hand, you got this!
– Carefully insert the tip of an opening pick into the screen seam, about 1 mm deep. Take your time and be gentle.
Step 5


Whoa there, cowboy! If you feel the pick bumping against something, you might be touching the edge of the OLED panel. Just angle the pick a little and try again. We got this!
Here’s the scoop on how to slide your pick in without putting the OLED panel in jeopardy. Make sure to do this before you dive into slicing that adhesive.
– Slide the pick about 1 mm into the gap, then give it a little pivot upwards to a nice steep angle.
– Once you’re at that steep angle, gently push the pick into the gap for about 1/4 inch (6 mm). It should glide right under the OLED panel like it owns the place!
Step 6


Keep that pick to a maximum of 1/4 inch (6 mm)! Going deeper might just lead to some unwanted screen flex cable drama.
– Gently slide the pick along the right edge of the screen to carefully cut through the adhesive – you’re making great progress!
– Leave the pick in the bottom-right corner to keep the adhesive from re-sealing, and take a moment to double-check your work before moving on to the next step. If you need help, you can always schedule a repair
Step 7


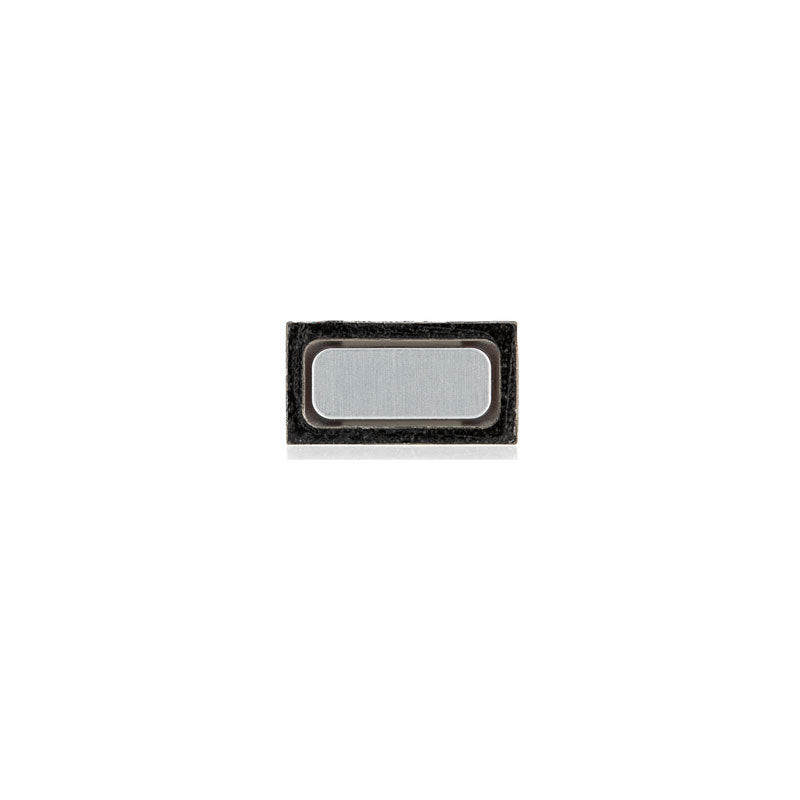
There’s a little mesh covering the earpiece speaker on the top edge of the screen. If you don’t have a replacement mesh, try not to mess it up, ok?
– Now it’s time to get a little more aggressive – insert another opening pick into the right edge of your phone at an angle, where you’ve already created some space. This will help you avoid damaging that fancy OLED panel.
– Gently slide the opening pick around the top of your phone to cut through the adhesive. Take your time, you’re doing great!
– Leave the pick in place along the top edge – this will prevent the adhesive from sneaking back in and resealing. You’re making progress, and if you need help, you can always schedule a repair
Step 8


If you’re struggling to slice through that stubborn screen, don’t fret! Just warm up the tricky spot for a minute and give it another go. You’ve got this!
– Nestle an opening pick along the top edge of your phone, at a comfy angle where a gap has made itself known—this will help keep the OLED panel safe and sound.
– Now, use that trusty pick to gently slice around the top-left corner, right where the camera window hangs out.
– Once you’ve got the pick in place, leave it snug along the left edge of your phone to keep the adhesive from giving you any trouble.
Step 9


Be careful now, you’re getting close to the screen flex cable and digitizer, so make sure to slice with precision! If you need help, you can always schedule a repair
If the screen is being stubborn, try warming up the tricky spot with some heat for about a minute and then give it another shot. If you need help, you can always schedule a repair
– Now it’s time to get that adhesive loose – gently slide the opening pick along the left edge of your phone to cut through it.
Step 10


Be careful now – you’re getting close to the screen flex cable and digitizer, so make sure to slice with precision! If you need help, you can always schedule a repair
If the screen is being stubborn, try warming up the tricky spot with some heat for about a minute and then give it another shot. If you need help, you can always schedule a repair
– Gently slide the opening pick around that bottom-left corner and across the bottom of the display to gently slice through the remaining adhesive. You’ve got this!
Step 11


Hold your horses! We’re not quite ready to remove the screen just yet. We’ll get there, I promise!
– Now that you’ve skillfully cut around the phone’s edges, gently lift the right side of the screen, opening it up like a book ready for a good read.
– Grab an opening pick and carefully slice through any stubborn leftover adhesive. You’ve got this!
Step 12


Take it easy on that ribbon cable! It’s sensitive, so give it some love and don’t apply any pressure.
– Time to get this repair started! Lift the screen from the top edge and gently swing it over the bottom edge until you can safely rest it glass-side down. If you need help, you can always schedule a repair
Step 13


– Have a blast peeling off that tape from the screen connector with your trusty nail or tweezers. If it’s still in tip-top shape, feel free to snap it back into place. But if it’s looking a bit beat up, it’s time to replace it with some fancy-schmancy Kapton tape. If you’re feeling a bit stuck, our rockstar technicians are always ready to lend a hand. Just swing by schedule a repair and let the magic happen!
Tools Used

Step 14


Watch out! That plastic cover might just jump right out at you.
– Time to get started! Insert the tip of a spudger into the opening of the plastic cover that’s holding the screen flex cable in place.
– Gently pry the plastic cover straight up – it should pop out of its spot with a little bit of effort.
– Now you can remove the plastic cover and get one step closer to fixing your device. If you need help, you can always schedule a repair
Tools Used

Step 15


– Grab your spudger (that handy little tool) and gently pry up the screen flex cable. It’s like giving it a little nudge to say ‘see ya later!’.
– Now, to reconnect that flex cable, make sure you line it up perfectly and press down on one side until you hear a satisfying click. Then, do the same on the other side. Don’t go pressing in the middle, though – you might bend those delicate pins and that’s a no-no! If you’re ever unsure, you can always schedule a repair.
Tools Used
Step 16


When your device powers up after you’ve put it back together, it’s going to run through a calibration dance for the screen. Just sit back and resist the urge to poke the screen during this time; touching it could throw off the calibration and lead to some touchy issues later on. Let’s give it a moment to shine!
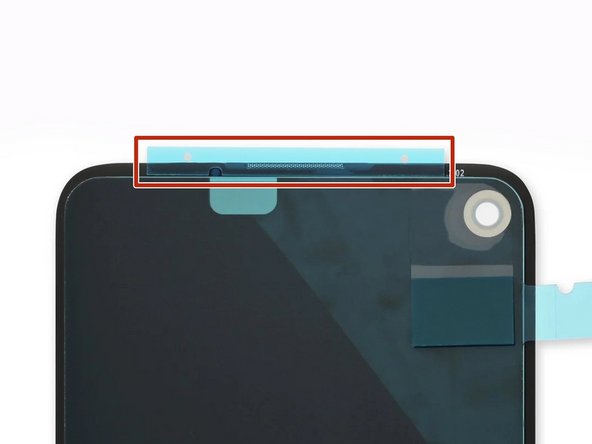
Check out the third photo for a cool way to line up your adhesives just right!
– Start by gently taking off the screen.
– Ready to put on a fresh new screen? Here’s how:
– First things first, check if your replacement screen comes with the speaker mesh and top edge adhesive already attached.
– If not, no worries! Just follow this guide to apply the custom-cut adhesive like a pro.
– If it does have them, you’re all set—no need for the top edge adhesive.
– If it doesn’t, peel off the larger clear liner from the top edge adhesive and stick it onto the screen (not the frame). Just ensure that the bigger cutout aligns perfectly with the speaker mesh.
Step 17

As you tackle this repair, remember to keep tabs on each screw and ensure it finds its way back to its original home.
– Alright, let’s get this show on the road! Grab your trusty T3 Torx screwdriver and give those nine 4.4 mm long screws holding the back cover to the midframe a good twist. They’re the ones keeping everything together, so we gotta loosen their grip! If you need help, you can always schedule a repair.
Step 18


– Start by inserting an opening pick into the seam between the midframe and the back cover, just above the SIM card slot – easy does it!
– Now, gently slide the opening pick along the right edge of your phone to release the plastic clips that hold the back cover in place. You’re making great progress! If you need help, you can always schedule a repair
Step 19


– Now it’s time to get that back cover off – keep sliding the opening pick along the top, left, and bottom edges of your phone until you’ve released all the plastic tabs holding it in place. If you need help, you can always schedule a repair
Step 20


Hold up, don’t detach that back cover just yet! It’s still connected by two little ribbon cables, remember?
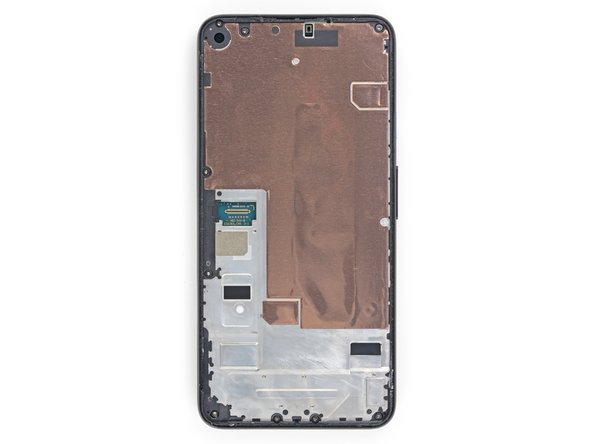
– Turn your phone over so the back cover is looking up at you.
– Gently lift the back cover into a standing position.
– Lean the back cover against something sturdy, like a cardboard box or a soda can.
Step 21


– Grab your trusty T3 Torx screwdriver and let’s get those seven screws out that are holding the motherboard bracket in place:
– Four screws that are 4.0 mm long
– Three screws that are 2.1 mm long
Tools Used


Step 23


– Gently pry the battery cable loose from the motherboard using the pointy end of your spudger. You’ve got this!
Tools Used
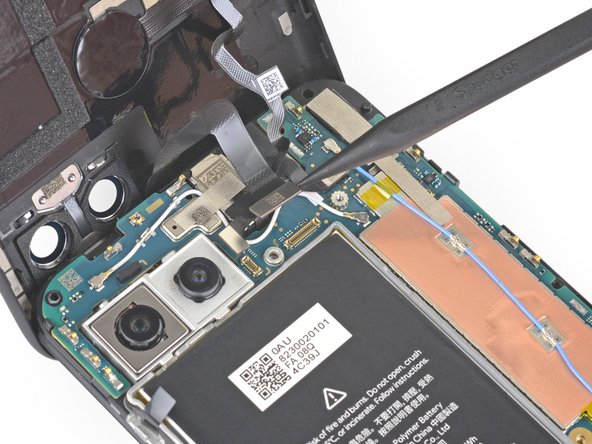
Step 24

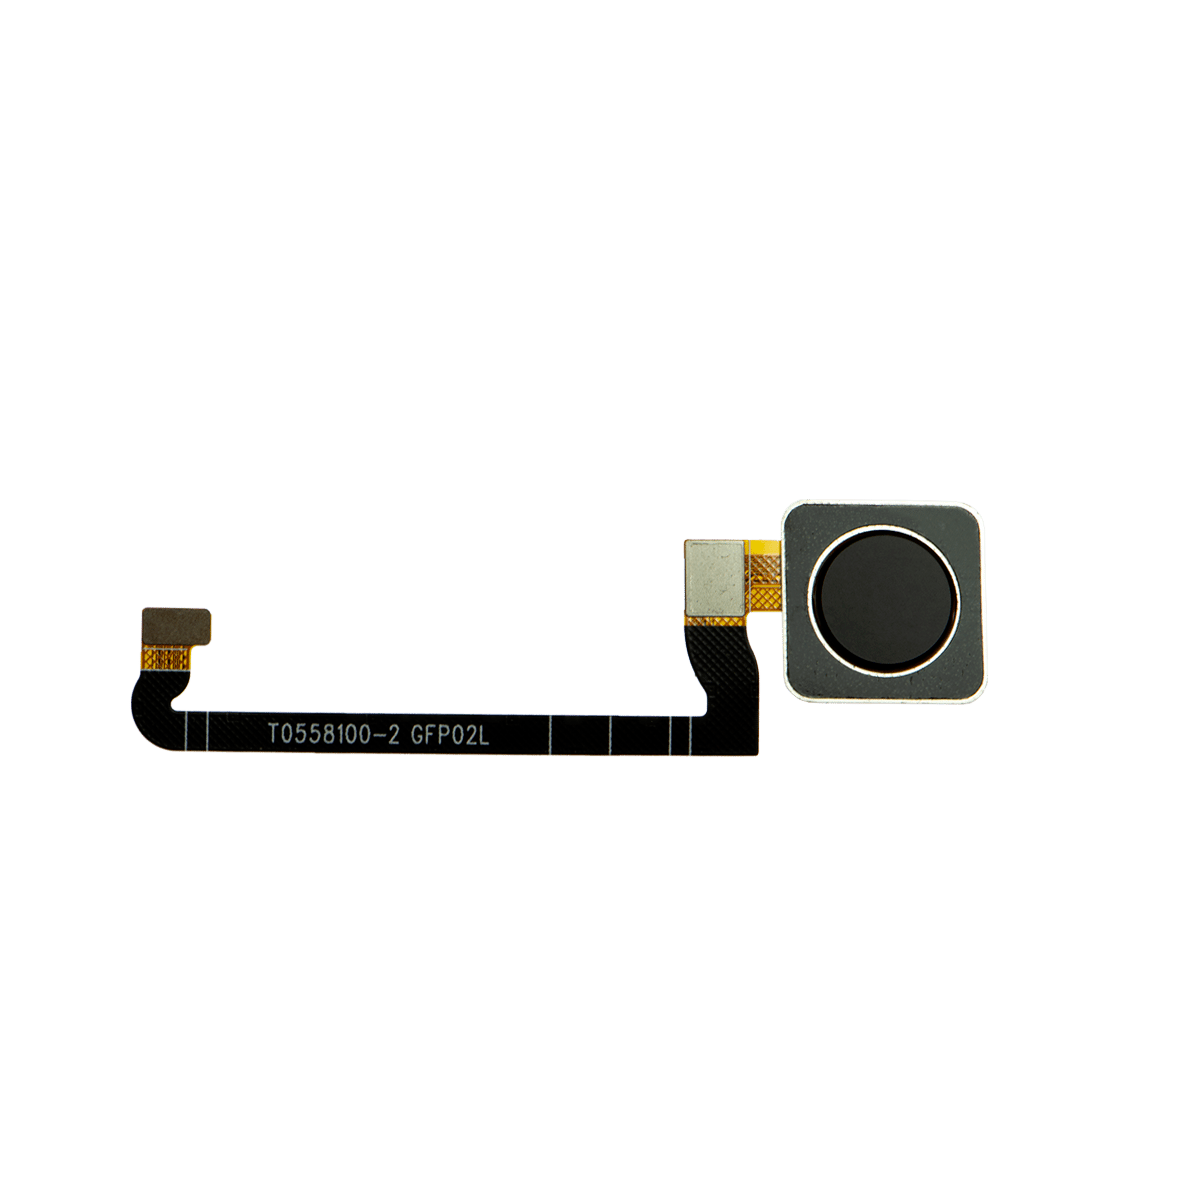
– Now, let’s take a moment to disconnect that fingerprint sensor cable. Using your spudger’s tip, carefully pry it up. You’ve got this!
Tools Used
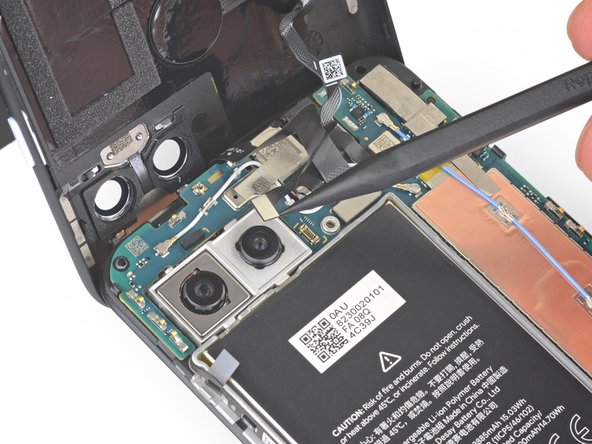
Step 25

– Now it’s time to carefully disconnect the front sensor array cable – use the tip of a spudger to gently pry it up and set it free. If you need help, you can always schedule a repair
Tools Used


Step 27

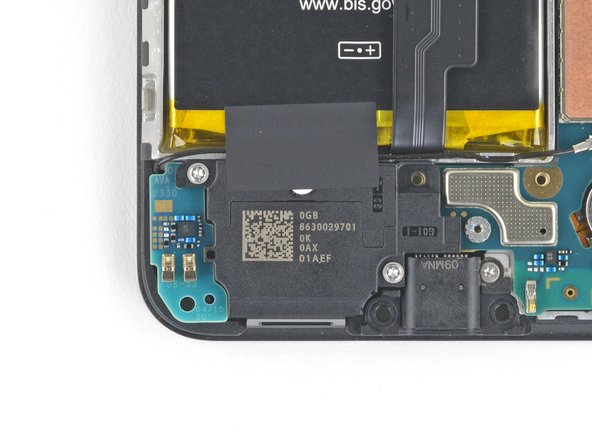
– Let’s get started! Use a T3 Torx driver to carefully remove the two 4.2mm-long screws from the loudspeaker assembly. If you need help, you can always schedule a repair
Step 28
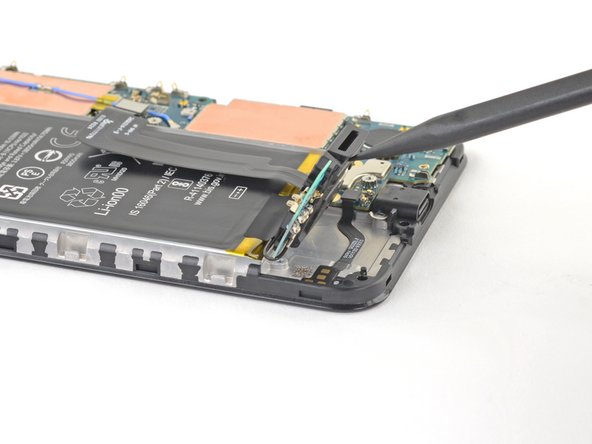
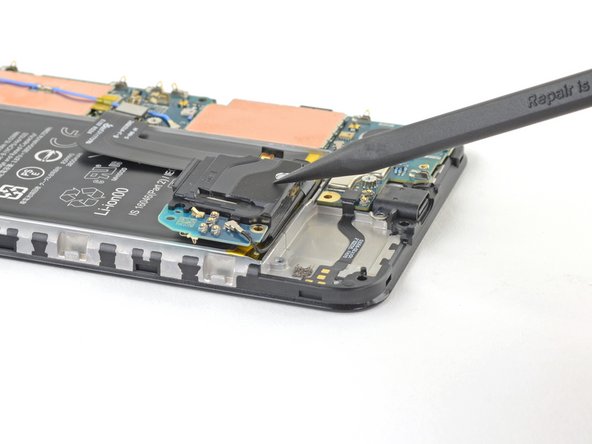

Be gentle when handling the loudspeaker – try not to puncture those delicate white membranes on either side, especially if you’re planning to reuse it. If you need help, you can always schedule a repair
– Use a spudger to gently lift the loudspeaker assembly.
– Carefully flip the loudspeaker assembly over so it rests gently on top of the battery.
Tools Used
Step 29
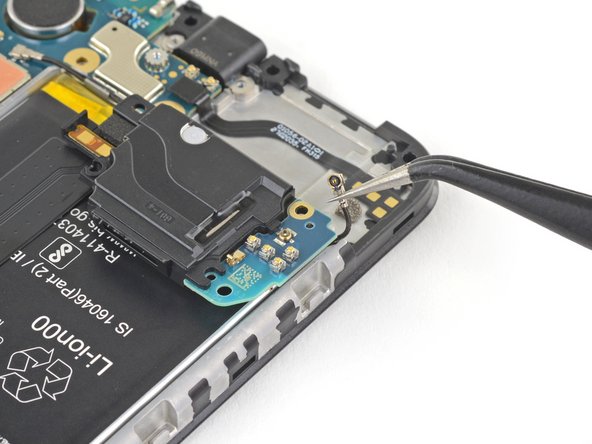

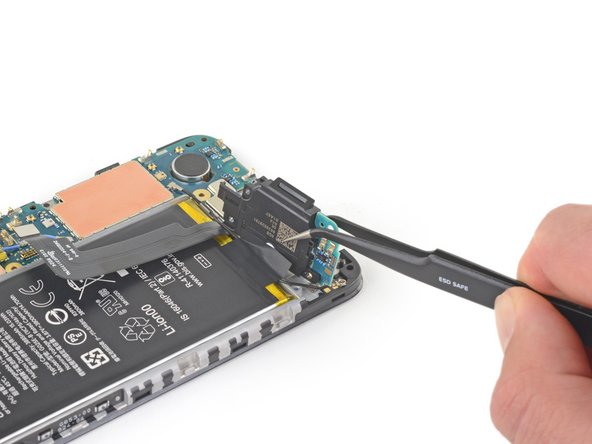
Be careful when handling the antenna cable – grip the metal connector with your tweezers, avoiding the plastic part of the cable.
– Let’s get this antenna cable disconnected! Grab your trusty tweezers and give it a gentle tug to separate it from the loudspeaker assembly. It’s like saying goodbye to an old friend (but in a good way). If you need help, you can always schedule a repair.
Tools Used
Step 30


Just a friendly reminder: be super careful not to poke those delicate white membranes next to the loudspeaker if you plan to keep it intact!
– Gently lift the loudspeaker assembly away from the tape that’s holding it down. You’ve got this!
– Now, go ahead and take out the loudspeaker assembly completely.