Replace Google Pixel 4 Camera: Step-by-Step Guide
Duration: 45 minutes
Steps: 39 Steps
This step-by-step guide was written by the awesome folks at Salvation Repair, so you can feel confident taking on this repair.
Heads up:
Hey there, tech enthusiast! This repair guide is your ticket to conquering a camera swap on your Google Pixel 4. We’ve got your back, and we’re here to make it easy. Remember, Google’s got a word of caution about the front laser assembly, so keep those safety goggles handy. You can find all the info on their website. Ready to dive in? Let’s get this done!
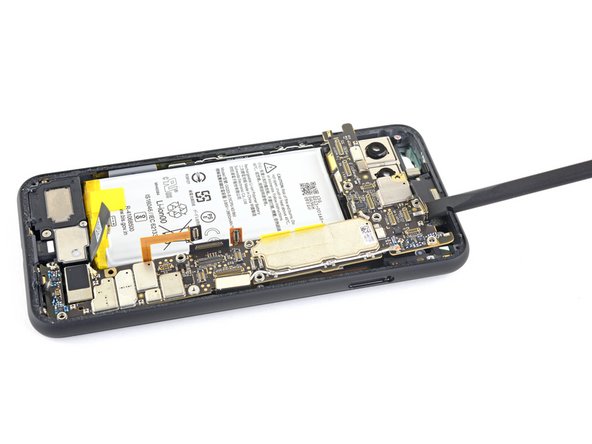
Step 1


– Grab your trusty SIM eject tool, a bit, or even a straightened paper clip, and gently slide it into the tiny hole on the left edge of your phone’s SIM card tray.
– Give it a good press to pop that tray out like a champ.
– Now, just pull out the SIM card tray, and you’re all set!
Step 2

Brrr, it’s hot in here! Be mindful though, our phones and laptops don’t like too much of that summer heat. Remember, the display and battery are very sensitive to high temperatures! If you need help, you can always schedule a repair
– Grab your trusty iOpener and give it a warm-up! Place it on the bottom edge of the back panel for about a minute to get things toasty.
Tools Used

Step 3


Hey, if your back glass is looking a little rough, try sticking a layer of clear packing tape over the cracks to help the suction cup get a grip. If that doesn’t do the trick, you can try using a super strong tape instead of the suction cup. And if all else fails, no sweat, you can always use a little superglue to secure the suction cup to the broken panel. No worries, we’ve got you covered. If you need help, you can always schedule a repair.
– Gently press a suction cup onto the warmed edge of the back panel. Make sure to press down firmly to create a solid grip, getting as close to the edge as you can for the best results.
Step 4


Hey, depending on the age of your phone, this might be a little tricky. Don’t sweat it! Just add a little more heat to the edge and give it another try. If you’re still stuck, no worries – you can always schedule a repair
– Get ready to rock this repair! Grab that suction cup and give it a good pull to create a little space between the back panel and the frame. You got this!
– Now, take your opening pick and slide it gently into that gap you just made. It’s like a little dance!
Step 5


– Let’s loosen that adhesive! Slide the opening pick along the bottom edge towards the left corner. You got this!
– Keep that pick moving! Slide it from the bottom left corner over to the bottom right corner, slicing through the adhesive. You’re doing great!
– Hold that pick right there in the bottom right corner so the adhesive doesn’t stick back together. Almost there!
Step 6

– Heat things up by applying an iOpener to the left edge of your phone for about a minute. If you need help, you can always schedule a repair
Tools Used
Step 7


– Slide a second opening pick right under the back panel, aiming straight over the charge port. You’re doing great!
– Now, smoothly glide that opening pick towards the bottom left corner of the phone. Almost there!
Step 8


Whoa, that goo is quite a character, huh? To slice through it, wiggle your tool like it’s cutting through a sticky situation. You’ve got this!
– Gently glide that opening pick around the bottom left corner and across the left side of your phone to give the adhesive a little slice.
– When you reach the top left corner, close to the camera, just pause and leave that pick in place.
Step 9

– Grab your trusty iOpener and give it a warm hug on the right edge of your phone for a whole minute. It’s like a cozy spa treatment for your device!
Tools Used
Step 10


– Now that you’ve got two opening picks in place, it’s time to bring in the third pick to help with the lower part of the righthand side.
– Gently slide the opening pick upwards towards the top of the phone, carefully cutting through the adhesive on the right side.
– When you reach the top right corner, stop and leave the pick inserted – you’re making great progress! If you need help, you can always schedule a repair.
Step 11


– Gently slide the third opening pick around the top right corner and across the top edge of the phone, cutting through the last strip of adhesive. Nice and easy—you’re almost there!
Step 12


– Alright, you’ve got the phone sliced open – awesome! Now, carefully lift the right side of the back cover like you’re opening a book. Just a little peek, we’re not tearing it all the way off just yet! It’s still hanging out with the phone, you know?
– Don’t worry, it’s all part of the plan! You’ll get to rip it off in a little bit. But for now, let’s keep things cool and collected.
Step 13


– Now it’s time to swing that back panel open – just be gentle and careful not to stress the attached ribbon cable. You’re doing great!
– Before you seal everything back up, take a minute to power on your phone and make sure all the functions are working properly. Then, completely power it down before moving forward. If you need help, you can always schedule a repair
Step 14

Hey there, repair ninja! Just a friendly reminder to keep track of all those little screws. You wouldn’t want to mix them up, right? Put ’em back where they belong, and we’ll have this thing back in tip-top shape in no time!
– First, let’s get those screws out of the way! Remove the five T3 Torx screws that are holding the battery connector shield in place:
– Four screws measuring 4.0 mm
– One screw measuring 2.1 mm
Step 15


– Time to get up close and personal with those tiny parts! Use a trusty pair of tweezers to carefully remove the battery connector shield. If you need help, you can always schedule a repair
Tools Used

Step 16


– Use the pointed end of a spudger to gently lift the battery connector straight up from the motherboard, disconnecting it without any drama.
– To reconnect, simply align the connector carefully, then press down one side until it clicks. Once that side is secured, do the same on the other side. Avoid pressing down in the middle, as that could bend the pins and cause some serious damage. If you need help, you can always schedule a repair.
Tools Used

Step 17


– Using the flat end of a spudger, gently fold the battery cable over to keep it out of the way while you work on the rest of the device. If you need help, you can always schedule a repair
Tools Used
Step 18

– Grab your trusty T3 Torx driver and carefully unscrew those two 4 mm screws holding the back panel connector cover in place. You’re doing great!

Step 20


– Time to get started! Use the pointed end of a spudger to carefully pry up and disconnect the back panel connector. If you need help, you can always schedule a repair
Tools Used

Step 22

– Let’s get started by using a T3 Torx driver to remove the four 4mm screws that hold the camera connector cover in place. If you need help, you can always schedule a repair
Step 23


– Time to get that camera cover out! Use a pair of tweezers to carefully tilt it up, then slide it out of the retaining slot on the upper right corner of the phone. If you need help, you can always schedule a repair
Tools Used
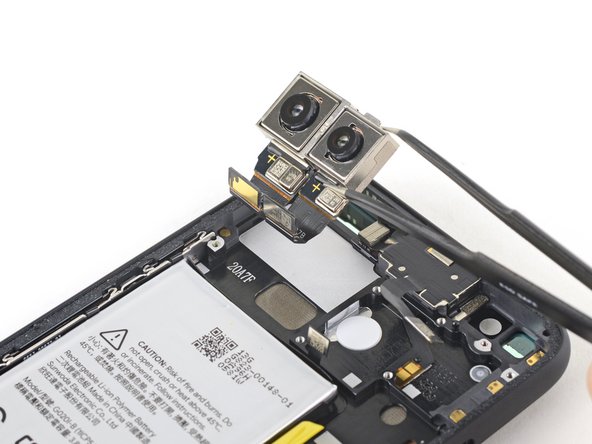
Step 24


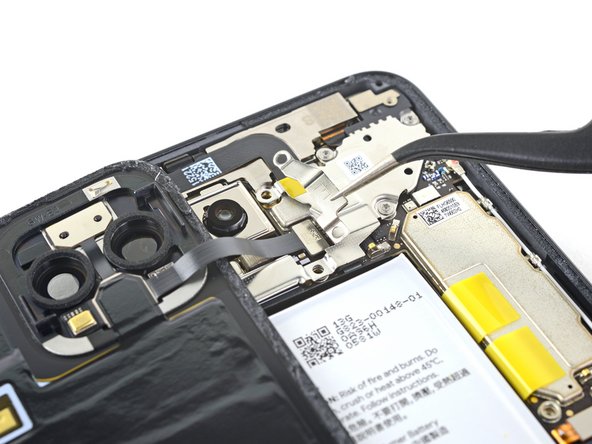
– Now, let’s gently detach those camera and sensor connectors. Use the pointed end of your spudger and carefully pry them straight up from the motherboard. It’s like giving them a little high-five!
Tools Used
Step 25


– Time to disconnect that laser module connector! Just gently unplug it and set it aside.
Step 26

– Alright, let’s get this camera out! Grab your T3 Torx screwdriver and give those two little 2.4 mm screws holding the front camera and sensor assembly in place a little twist. You got this!
Step 27


– Hey there! Alright, time to remove that pesky front camera and sensor assembly. Grab a pair of tweezers and let’s get this show on the road. Don’t worry if you’re not a pro – if you get stuck, just shoot us a message and our awesome repair experts can help you out. We’re here for you! schedule a repair
Tools Used
Step 28

– Let’s kick things off by unscrewing those two T3 Torx screws holding the vibration motor shield in place:
– One of them is a 4.2 mm screw, easy peasy!
– And the other? Just a slightly larger 4.4 mm shouldered screw. You’ve got this!

Step 30


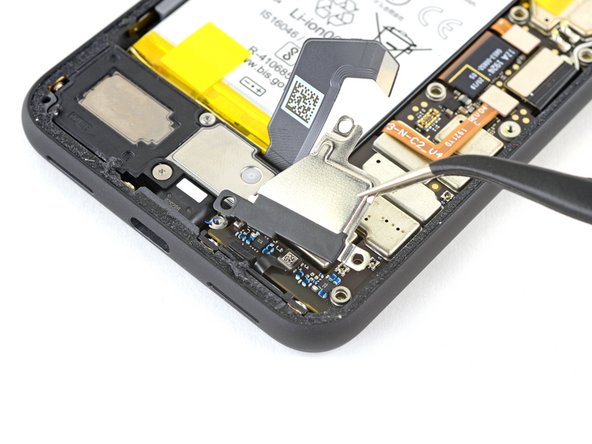
– Grab your trusty spudger and use its pointed end to gently pop off the two rear-facing camera connectors from the motherboard. You’re doing great!
Tools Used
Step 31


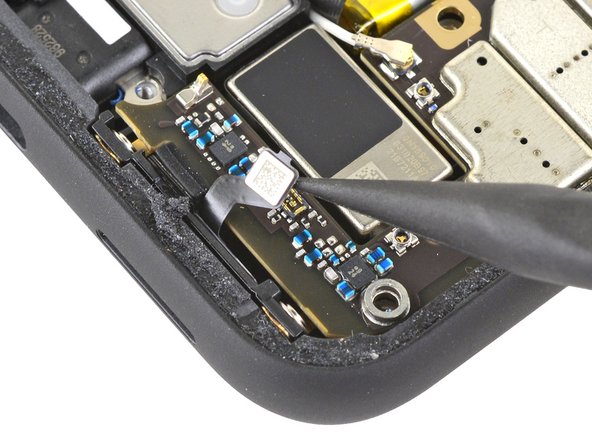
– Let’s get those connectors unplugged! First, disconnect the side buttons connector from the motherboard. Then, disconnect the earpiece speaker connector from the motherboard. You’re doing great!
– If you need help, you can always schedule a repair
Step 32


– Gently unplug the left grip sensor connector from the motherboard. You’ve got this!
– Carefully disconnect the charge port connector from the motherboard. You’re doing great!
Step 33


– Unplug that display connector from the motherboard. Nice and easy!
– Unhook the right grip sensor connector from the motherboard. You’re doing great!
Step 34


Grab a spudger and gently pry up to release the bottom antenna connector from the motherboard. You’ve got this!
– Grab your trusty tweezers and gently grasp that metal clip. With a steady hand, pull the connector straight up off the motherboard like a pro!
Step 35

– Unplug that bottom microphone connector from the motherboard like a pro! It’s time to set things free.


Step 37

– Time to get this motherboard out – use a spudger to carefully pivot the top end up and out of the phone’s frame. If you need help, you can always schedule a repair
Tools Used
Step 38


The rear-facing camera module connectors have a little dance around the motherboard, and guess what? The camera module isn’t glued down, so it might just pop out with the motherboard when you take it out. Keep an eye on it!
As you gently remove the motherboard, be aware that the tiny rubber microphone cover at the bottom might decide to take a little vacation and fall off. Make sure to catch it!
– Gently lift the motherboard out, making sure not to snag any ribbon cable connectors.
– Carefully remove the motherboard.
– When putting the motherboard back in, double check that no ribbon cable connectors are hiding underneath.
Step 39

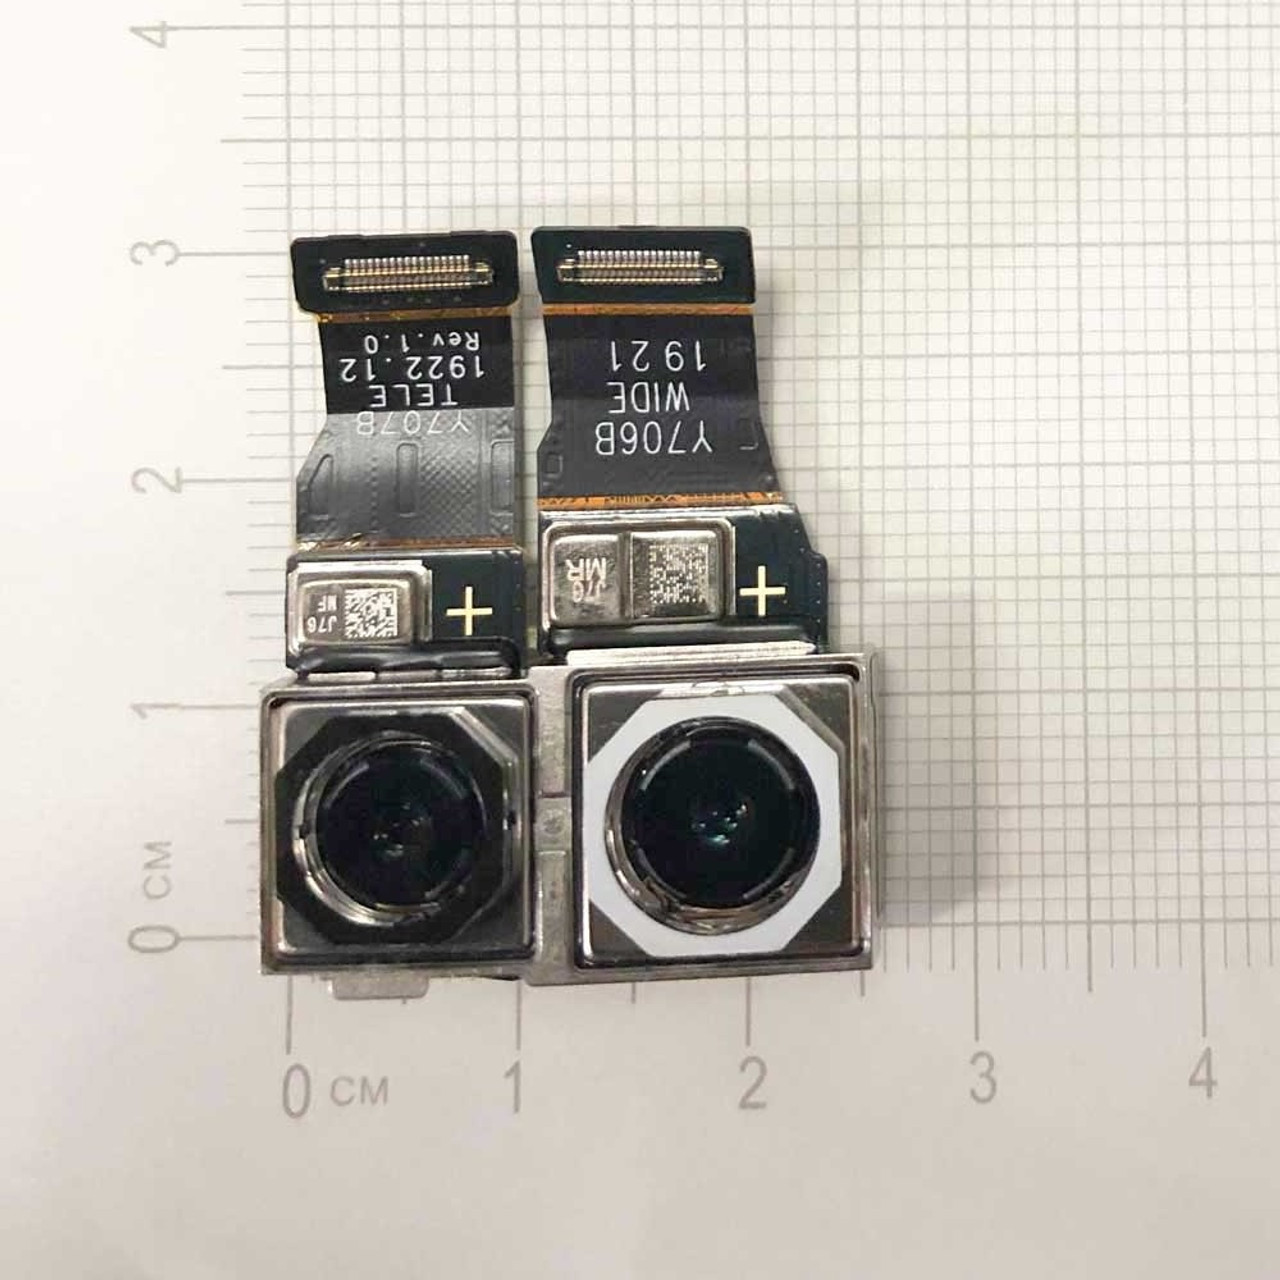
– Alrighty, let’s get our hands dirty! Time to remove that rear-facing camera module. Pop on a pair of tweezers, and gently wiggle your way to victory! Don’t forget, if you need help, you can always schedule a repair!
Tools Used