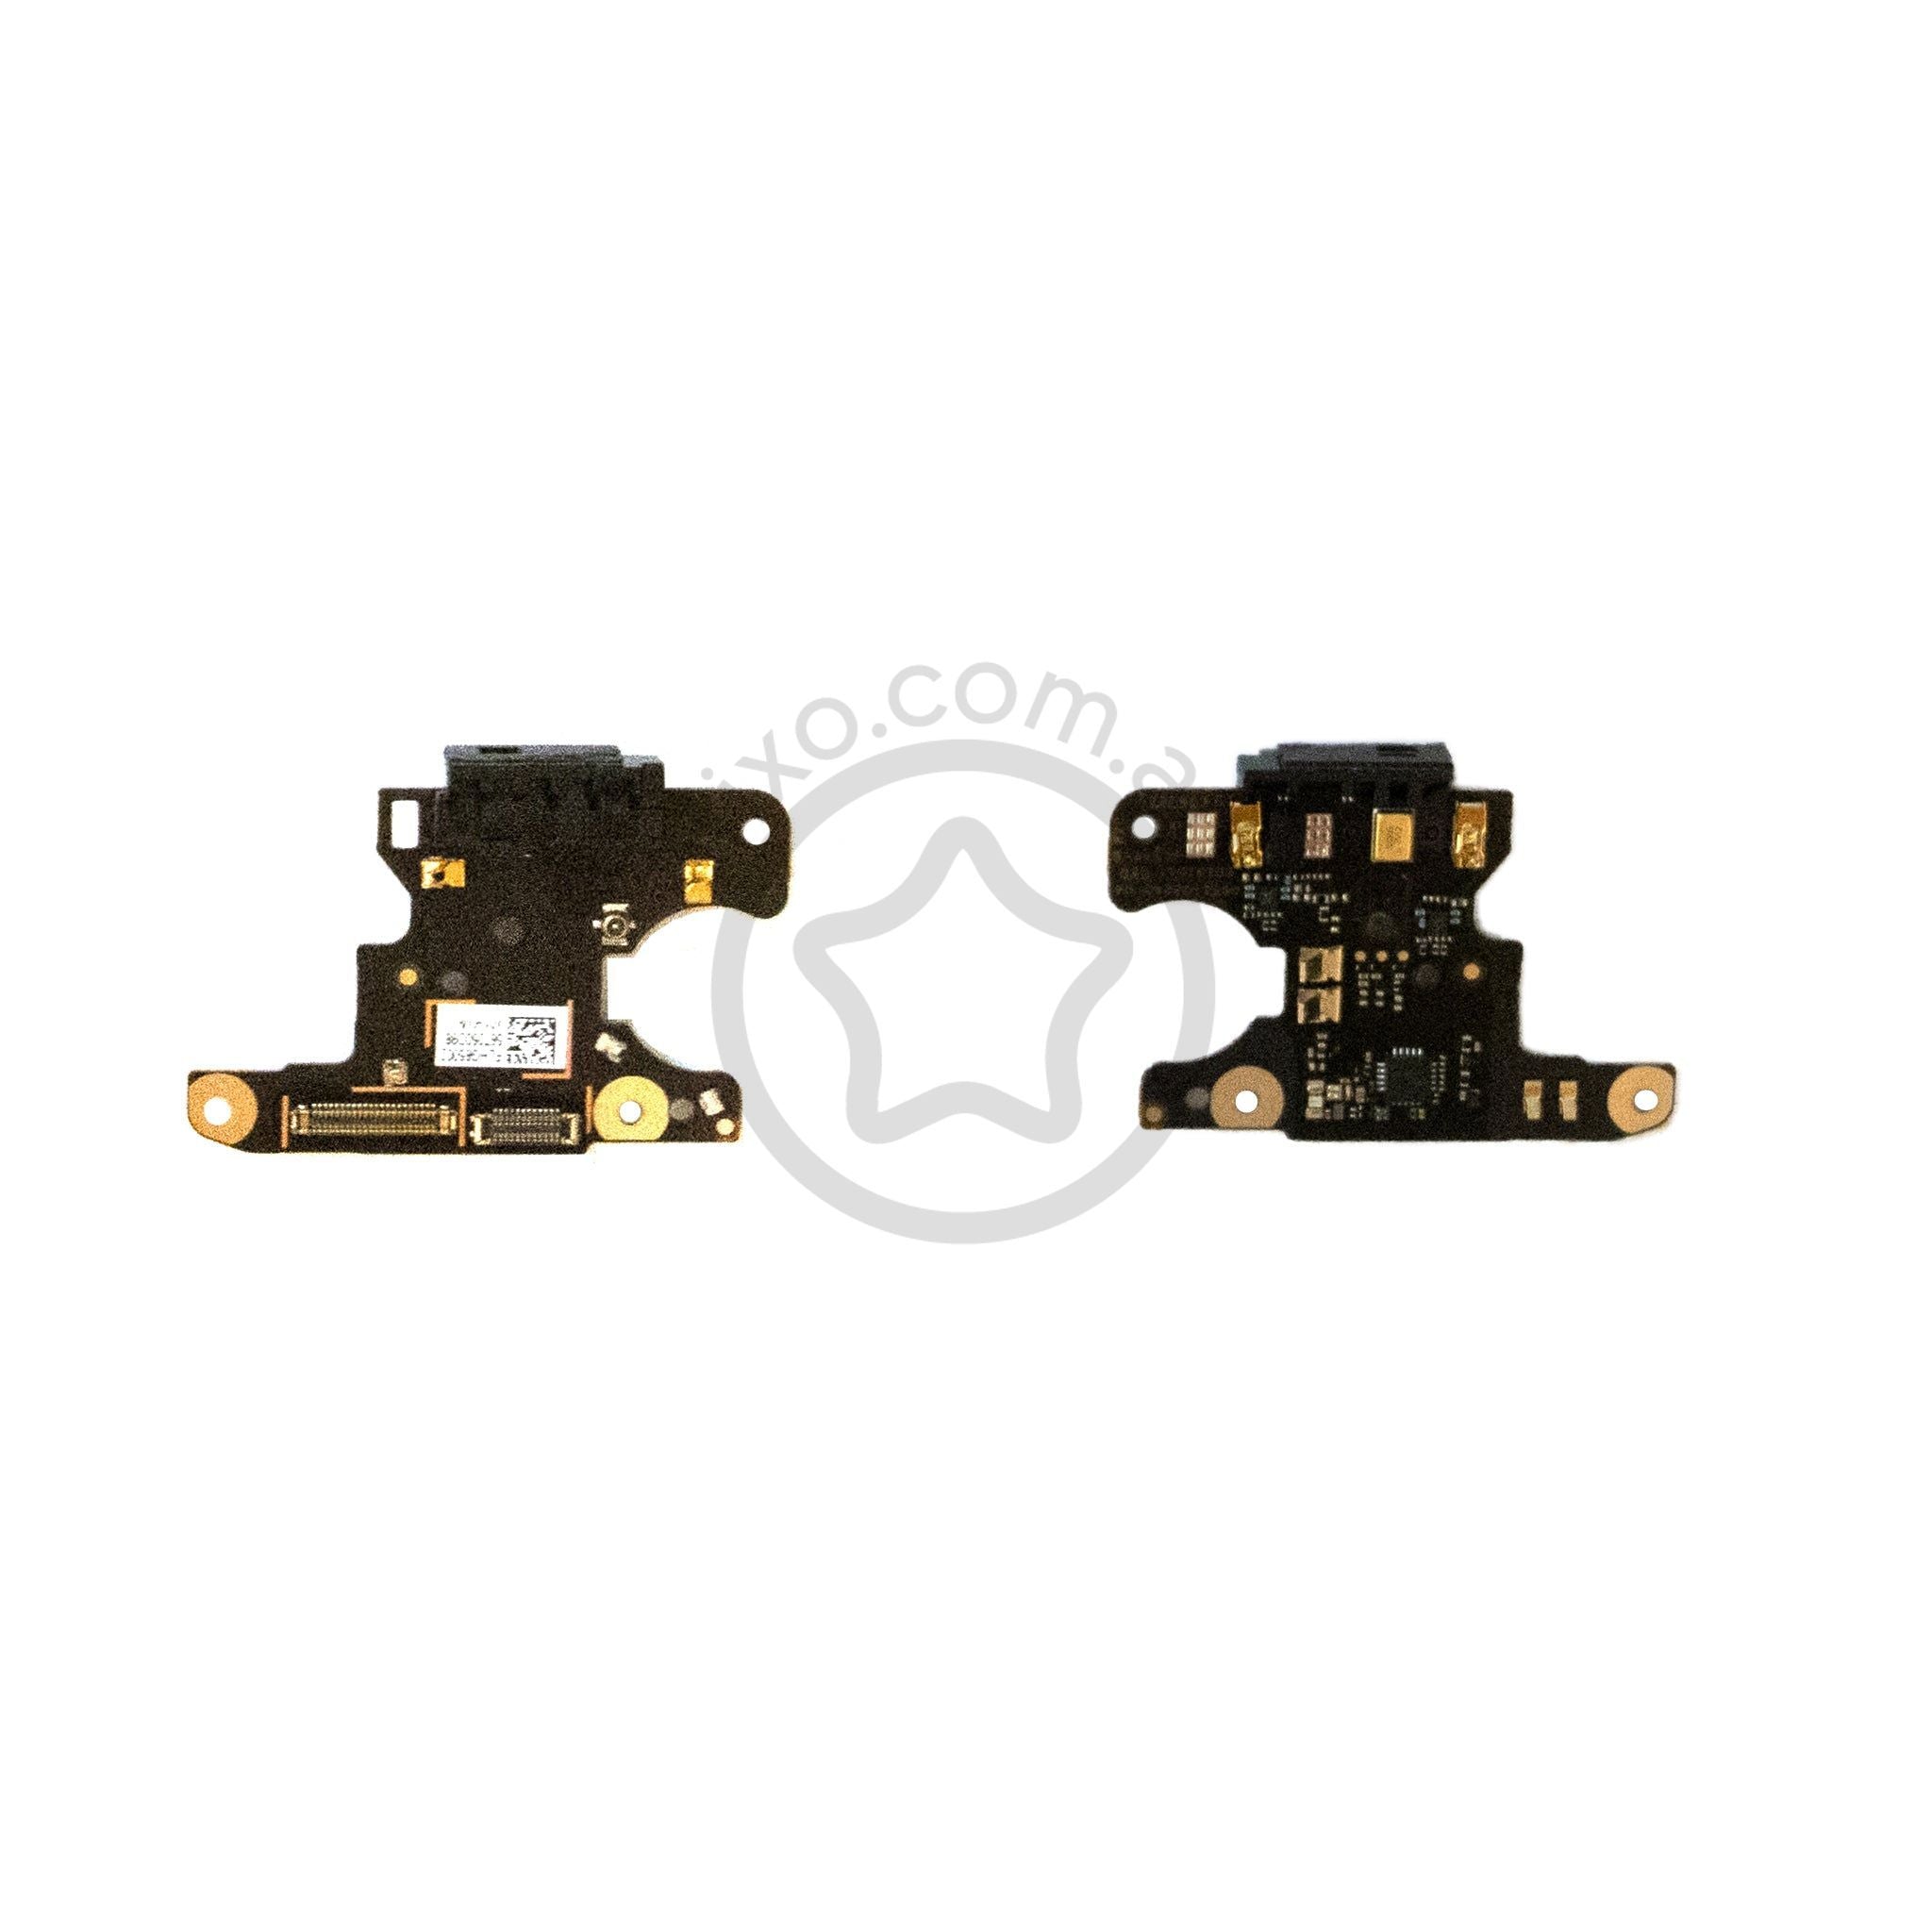
Google Pixel 3a Headphone Jack Replacement Guide
Duration: 45 minutes
Steps: 20 Steps
Welcome to Salvation Repair’s step-by-step guide. We’ve put together this easy-to-follow guide to help you repair your device. For more information about our repair guides, check out our website.
Be careful when handling the Pixel 3a’s display panel – it’s pretty fragile and can break easily. If you need help, you can always schedule a repair
The headphone jack on your Pixel 3a is a breeze to replace, thanks to its modular design. Before you start, keep in mind that the display panel is pretty fragile, so be gentle if you’re planning to reuse the screen. Our step-by-step guide will walk you through the process, and the only part that might give you a little trouble is reattaching the proximity sensor connector – but don’t worry, it just takes a bit of patience. If you need help or want some extra guidance, you can always schedule a repair with the experts at Salvation Repair. We’ve got you covered.
Step 1


– Let’s take a moment to spotlight the two seams on your phone:
– Before you dive in with your prying tool, keep an eye on these key areas of the screen:
– Screen seam: This is the line that distinguishes the screen from the rest of your phone. That’s your go-to spot for prying!
– Frame seam: Here’s where the plastic frame meets the back cover, securely held by screws. Give this seam a wide berth!
– Screen flex cable: Stay within the advised limits when prying; going too deep could put this cable at risk.
– Adhesive perimeter: If you pry beyond the slim perimeter without angling your pick, you might unintentionally damage your display panel.
Step 2

– Grab that iOpener and give it a little heat! Stick it on the right edge of the display for about a minute. You’ve got this!
Tools Used

Step 3


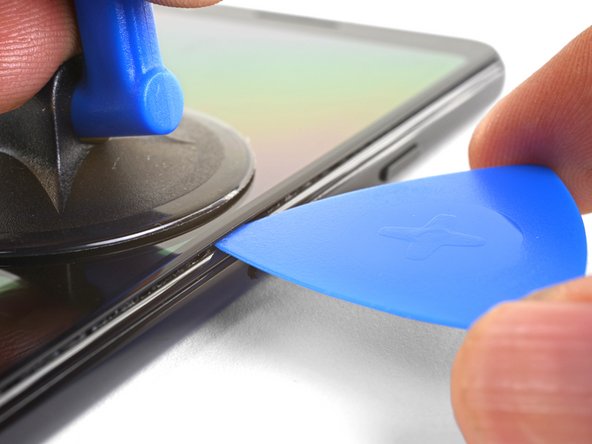
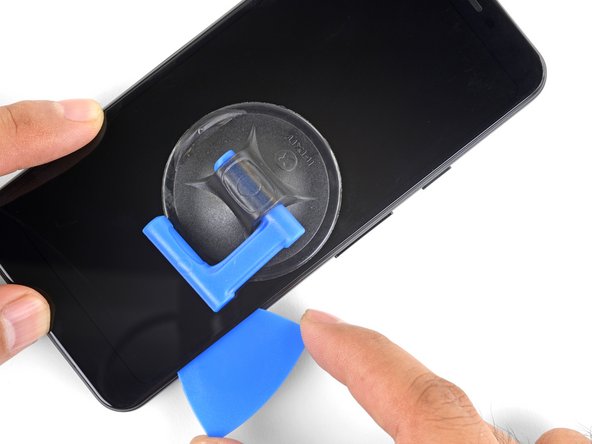
– Alright, let’s get this screen popping! Place a suction cup near the right edge of the screen.
– Now, give that suction cup a good pull with strong, steady force. You got this!
– Time to slide that pick into the gap, but just a tiny bit – think 1 mm or less. We don’t want to go overboard, right?
Step 4

If you feel the pick hitting a ridge, stop! You might be pressing against the edge of the OLED panel. Just angle the pick a bit and try again. No worries, we’ve all been there.
Now it’s time to carefully insert the pick without damaging that fancy OLED panel. Make sure to do this step before slicing either of the phone’s long edges. If you need help, you can always schedule a repair
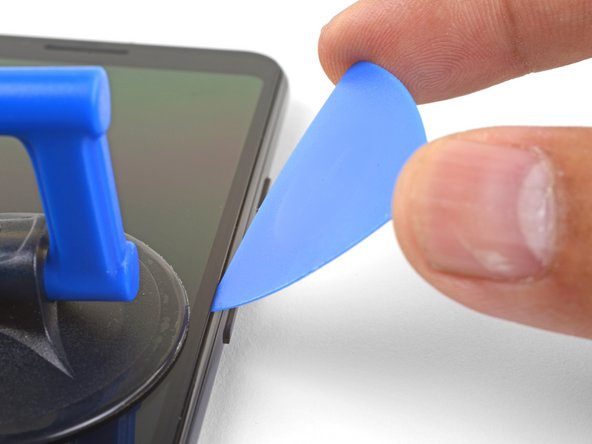
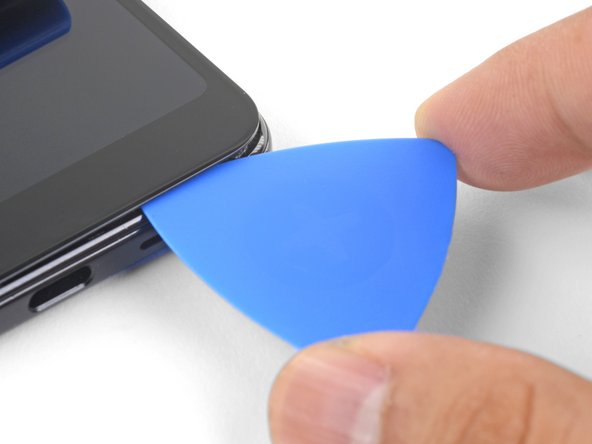
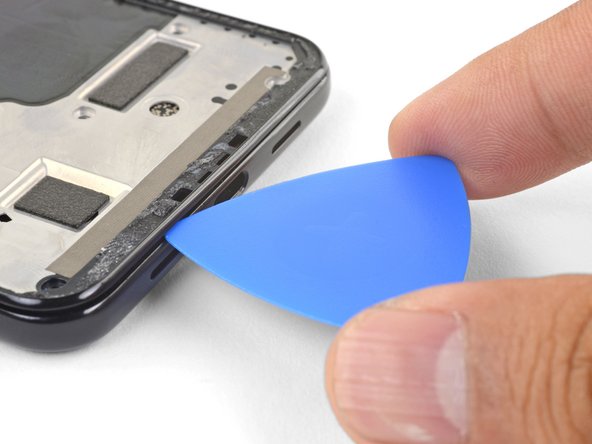
– Slide the pick into the gap, just 1 mm in, and give it a little pivot upwards at a sharp angle. You’ve got this!
– Now, with that angle set, gently nudge the pick deeper into the gap about 1/4″ (6 mm). It should fit snugly below the OLED panel!
Step 5


Be careful not to insert the pick more than 1/4″ (6 mm) into your device, as this could potentially damage the screen’s flex cable. If you’re unsure, don’t hesitate to schedule a repair and let the pros at Salvation Repair handle it for you.
Step 6

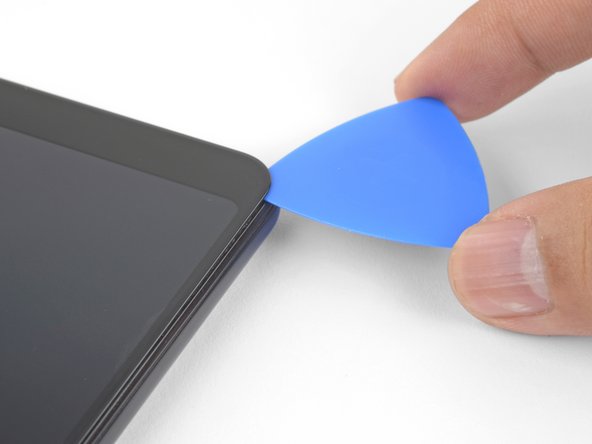
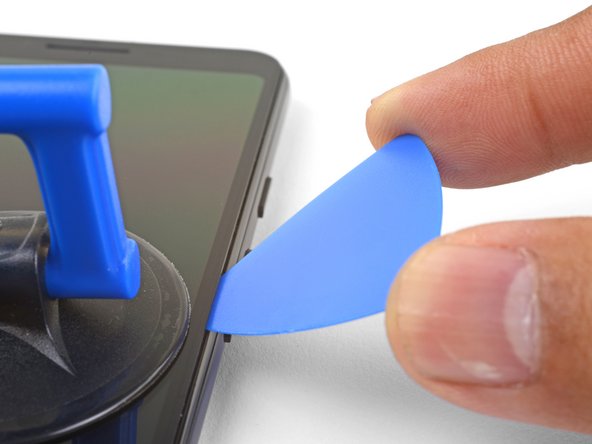
Carefully slice around the bottom edge of your phone, but don’t insert the pick more than 1/4″ (6 mm) – we don’t want any accidents!
Having trouble slicing through a corner? Try applying a heated iOpener to the area for about a minute and then give it another shot. If you need help, you can always schedule a repair
– Gently glide the pick around the bottom right corner to cut through that sticky adhesive like a pro.
– Keep on slicing along the bottom edge of the phone and around the left corner. You’re doing great!
Tools Used
Step 7


– Gently glide your pick along the left edge of the phone, ensuring you angle it just right beneath the OLED panel. Slide it in no more than 1/4″ (6 mm) for a smooth entry.
– To get that perfect angle under the OLED panel, insert the tip of the pick no more than 1 mm in, tilt it upwards, and then gradually push it in another 1/4″. You’ve got this!
Step 8


– Carefully slice along the top edge, making sure to keep the pick inserted no more than 5/16″ (8 mm) to avoid any damage. If you need help, you can always schedule a repair
Step 9


Be careful not to remove the screen just yet – it’s still connected to the phone by a flex cable located near the left edge. If you need help, you can always schedule a repair
– Now that you’ve cut through all the edges, it’s time to carefully pry open the right edge of the screen – you’re making great progress!
– Use an opening pick to gently cut through any remaining adhesive, and you’ll be one step closer to a fully repaired device. If you need help, you can always schedule a repair
Step 10


– Now that you’ve cut all the adhesives, it’s time to flip the screen glass over and place it on top of the phone, making sure the screen flex cable is loosely arched. If you need help, you can always schedule a repair
Step 11

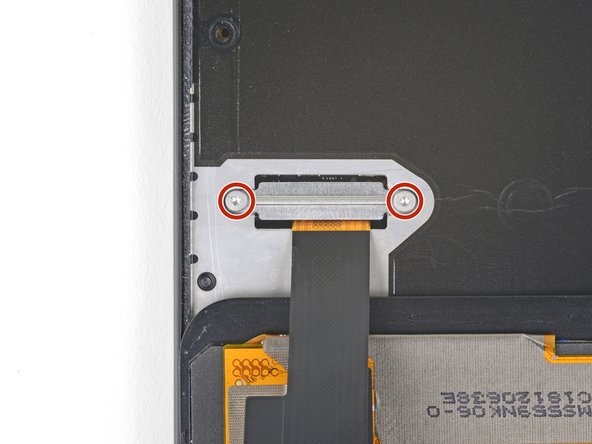

– Time to ditch that pesky black tape! Carefully peel it back from the screen connector bracket. It’s like removing a band-aid, but way cooler.
– Now, let’s loosen those screws! Unscrew the two 4.4 mm long T3 screws holding down the screen connector bracket. Think of it as giving the bracket a little freedom.
– Alright, the bracket’s ready to go! Remove the screen connector bracket. It’s like taking off a party hat.
– If that old tape is still rockin’, feel free to reuse it when you put everything back together. If not, grab a piece of electrical tape and give it a new life! And remember, if you need help, you can always schedule a repair.
Step 12


When you disconnect those little connectors, be extra gentle so you don’t accidentally knock off any of the itty-bitty parts hanging out around the socket. If you need help, you can always schedule a repair.
– Grab your trusty spudger and gently pry up to disconnect the screen flex cable. Easy peasy!
– Now, let’s get those connectors back in place! Align them carefully and press down on one side until you hear that satisfying click. Then, do the same for the other side. Just a heads-up: steer clear of pressing down in the middle! If things get misaligned, those pins can bend and nobody wants that. If you need help, you can always schedule a repair.
Tools Used

Step 13


– First things first, let’s get that screen off! Give it a gentle nudge and remove it.
– Now, take a moment to check out your shiny new replacement screen. Compare it to the original like a true detective! You might need to move over some extra bits (like the speaker mesh) to the new part, so keep an eye out.
– Ready to put the screen back on? Here’s how:
– Once you’ve reassembled everything, your screen will do a little calibration dance during boot-up. It’s super important to let it groove without your fingers getting in the way—otherwise, it might end up with some touchy issues.
– Using custom-cut adhesives? Great choice! Make sure to follow this guide for a smooth application.
– If you’re going the double-sided tape route, like Tesa tape, we’ve got you covered—just follow this guide.
Step 14

– Let’s get started by removing the fourteen T3 screws that hold the plastic midframe in place – don’t worry, we’ll guide you through it!
– As you work through this repair, be sure to keep track of each screw so you can put it back exactly where it came from – it’s like solving a puzzle!
– You’ll find twelve 4.3 mm silver T3 screws and two 4.3 mm black T3 screws – easy peasy!
– If you need help along the way, you can always schedule a repair with the experts at Salvation Repair
Step 15


The midframe is still snugly secured by those trusty plastic clips.
– Start by inserting an opening pick into the frame seam at the bottom of your phone – that’s the gap between the plastic midframe and the back cover. Get ready to set that midframe free!
– Now, gently slide the pick along the seam to release the clips holding the plastic midframe in place. You’re making great progress! If you need help, you can always schedule a repair
Step 16


– Gently glide that opening pick along the left and right edges of your phone to pop those midframe clips loose. You’re doing great!
– Now, lift the bottom edge of the plastic midframe up, but hold your horses! Don’t take it off just yet. It’s still connected to the phone by the delicate proximity sensor cable at the top.
– To get that plastic midframe back in action, simply align it with the back cover, and give the perimeter of the phone a little squeeze with your fingers. You’ll hear those clips snap back into place, and voila!
Step 17


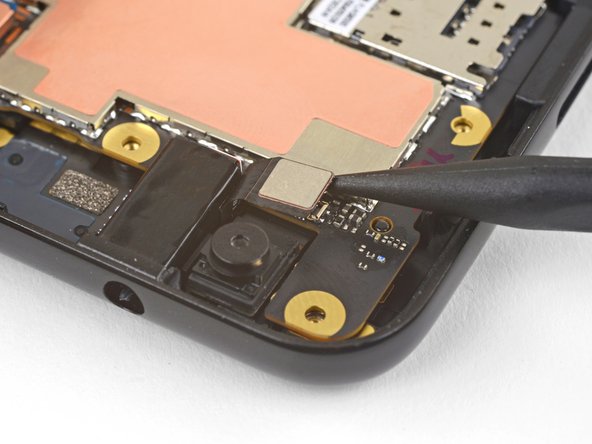
It’s possible that your proximity sensor connector got disconnected when you removed the midframe. No worries, it’s an easy fix! If you need help, you can always schedule a repair
– Grab your trusty spudger and gently nudge the proximity sensor connector away from the motherboard—it’s like giving it a little high-five!
– Next up, let’s get that plastic midframe off. Just slide it out and give it some space!
Tools Used
Step 18


Another option is to detach the proximity sensor from the midframe and reconnect it to the motherboard first – a simple step to get you closer to a fully functional device. If you need help, you can always schedule a repair
– Let’s get that proximity sensor reconnected during re-assembly, shall we? Start by aligning the top edge of the plastic midframe with your phone.
– Grab your trusty spudger and gently nudge the proximity sensor connector into the motherboard socket. A little patience goes a long way here!
– Once the connector is in place, feel free to use your finger to give it a gentle press to ensure it’s snug.
– Now, let’s carefully pry the proximity sensor out of its cozy spot on the midframe. It’s just lightly stuck, so it should come out without too much fuss.
– Remove the sensor from the midframe and attach its connector to the motherboard socket. You’re doing great!
– Thread that sensor cable through the midframe and reposition the sensor back into its recess. A little press with your finger will help it stick back on.
– And there you have it! If you need help, you can always schedule a repair.
Tools Used
Step 19


– Grab your trusty spudger and gently pry up to disconnect the battery connector from its cozy spot on the motherboard. You’ve got this!
– Give that battery flex cable a little bend to keep it from accidentally making friends with the socket again. Safety first!
Tools Used
Step 20


– Time to get started! Use your trusty spudger to carefully pry up and disconnect the headphone jack’s connector from its motherboard socket. Take your time and be gentle.
– Now, go ahead and remove the headphone jack. If you need help or get stuck, don’t worry – you can always schedule a repair
Tools Used