Google Pixel 2 Fingerprint Sensor Replacement Guide – DIY Tutorial
Duration: 45 minutes
Steps: 29 Steps
Hey there! This repair guide was put together by a member of the iFixit crew. Salvation Repair loves helping people fix things, so you can always schedule a repair if you need help. Let’s get this thing fixed!
Hey there, techie! This guide’s got your back as you swap out the fingerprint sensor on your Google Pixel 2. We’re not affiliated with Google, but we’re here to make your repair a smooth ride! If you need a helping hand, you can always schedule a repair. Let’s get this thing fixed!
Step 1


The suction cup might struggle to stick well on the curved parts of the glass.
– If you’ve got a cracked display, let’s keep things safe. Tape that glass to prevent any more shattering and protect your precious fingers. It’ll also give us a nice smooth surface for our trusty suction cup.
– Now, grab that suction cup and stick it as close to the volume button edge of your phone as you can, just avoid the curved edge. You’ve got this!
Step 2


Watch out! This display panel is super delicate. If you’re planning to reuse it, be gentle and slide your tool in just enough to break the adhesive. Going too far can harm the OLED panel underneath the glass.
Don’t push the pick deeper than 1.5 mm, or you might damage the OLED panel.
This step takes a bit of muscle and patience. Don’t worry, you got this! If you’re struggling, gently rock the suction cup and screen to loosen the adhesive, or give it a little warmth with an iOpener, heat gun, or hair dryer. If you need help, you can always schedule a repair.
– Now, get ready to give that suction cup a good pull! Use firm, steady pressure and slip that opening pick right in between the front panel and the back case. You got this!
Tools Used

Step 3


Heads up! We’re about to get a little hands-on here, so let’s be extra careful.
If you’re using an opening tool, keep it at or under 1.5mm on the sides and 9mm on the top and bottom. If you go deeper, you might end up with a cracked display – and no one wants that! If you need help, you can always schedule a repair
– Be careful not to insert the pick more than 9 mm into the bottom edge of the phone – if it hits the folded part of the OLED panel, you might end up with a damaged display. Let’s keep that screen safe!
– When making cuts in the upper left corner, keep them super shallow. Prying too deeply can put the front-facing camera at risk of damage. Take your time and you’ll be golden! If you need help, you can always schedule a repair
Step 4


Those side bezels are super thin, just 1.5 mm! Be careful not to bend them while you’re working. If you need help, you can always schedule a repair.
When working through these steps, use the flat edge of the opening pick to pry here, rather than the corner. This technique helps you avoid inserting the pick too far, making the process smoother. If you need help, you can always schedule a repair
– Let’s get this display popping! Slide that opening pick along the right side of your phone to gently loosen the adhesive holding the screen in place.
Step 5


There’s a mesh covering the earpiece speaker on the top edge of the screen. If you don’t have a replacement mesh, be careful not to damage or lose this component. If you need help, you can always schedule a repair.
– Now, let’s slide that opening pick around the upper-right corner and along the top edge of the phone. It’s like giving your phone a little high-five, but with a tool!
Step 6


– Glide that pick smoothly around the upper-left corner and down the left edge of the phone.
Step 7


Hey there, just a friendly reminder to keep that opening pick under 9 mm—let’s not give the OLED panel any reason to feel sad!
– Gently work the pick around the bottom-left corner and along the bottom of the phone, keeping it at a slight angle to protect those sensitive OLED corners. If you need help, you can always schedule a repair
Step 8


Hold your horses! Don’t go fully separating that display just yet; there’s a delicate ribbon cable still linking it to the phone’s motherboard.
Step 9


– Gently lay the display on top of the rear case just like in the picture, making sure to avoid any creases or tears in that fancy display ribbon cable.
– Now, let’s remove those two 4.0 mm T5 Torx screws holding the display cable bracket in place.
– Remember, treat those screws like your best friends – keep them organized and make sure they go back exactly where they came from. Don’t worry, if you get stuck, you can always schedule a repair with us!
Step 10

– Time to get that display cable bracket outta there! Let’s get this done!
Step 11


Hey, be careful around the motherboard! Those parts near the socket are pretty delicate. Don’t poke at them with your spudger. Just be gentle with everything, and you’ll be fine. If you need help, you can always schedule a repair.
– Use the pointy end of your spudger tool to gently lift the display cable connector out of its socket on the motherboard. You got this!
– To reconnect this kind of connector, line it up carefully and press down on one side until you hear a satisfying click. Then, do the same on the other side. Don’t press down on the middle, you might bend the pins. That wouldn’t be good!
– If any part of your screen isn’t working after you’re done, make sure this connector is seated properly. Give it a good push to make sure it’s all the way in, and check for any dust bunnies or other debris in the socket.
– As you put everything back together, pause here and replace the adhesive around the edges of the display. You’re almost there!
Tools Used

Step 12

– Let’s warm up that proximity sensor! Apply a heated iOpener to the top edge of the midframe for two minutes to loosen up the adhesive.
Tools Used
Step 13


– Gently sneak the spudger under the proximity sensor cable, starting from the edge that’s closest to the front-facing camera. It’s like giving it a spa day—just a little lift!
– Carefully raise the edge of the sensor cable until it stands tall and proud, perpendicular to the midframe. You’re doing great!
Tools Used
Step 14

– Gently peel back the little piece of tape covering the screw below the earpiece speaker. Do the same for any other screws covered by tape.
– Remove these screws that are holding the midframe in place:
– Keep track of every screw you remove, and make sure to put each one back exactly where it came from.
– Eleven 3.7 mm Phillips screws
– One 4 mm T5 Torx screw
Step 15


– Time to get started. Insert an opening tool into the notch in the midframe, located near the hold button – it’s the perfect spot to begin.
– Gently pry the midframe up to create a gap between it and the phone case. Don’t worry about removing it completely just yet, we’re making progress. If you need help, you can always schedule a repair
Step 16


– Start by gently lifting the midframe up from the bottom edge. You’ve got this!
– Once the midframe tilts to about a 45° angle with the rest of the phone, pull it straight up and away like it’s your new favorite dance move.
– As you lift the midframe, be sure to guide the proximity sensor through the little slot in the midframe with care. It’s like a smooth escape route!


Step 19

– To loosen the battery’s grip, fill a plastic dropper or syringe with some high-concentration isopropyl alcohol and add a few drops under each corner of the battery. Let it sit for about a minute to help weaken the adhesive.
– If that doesn’t work, try using a heated iOpener on the back of the phone, right over the battery, for at least two minutes. If needed, reheat and reapply until the adhesive is nice and weak. And remember, if you need help, you can always schedule a repair
Tools Used
Step 20


Be super careful not to squish the battery while you’re at it! Those soft-shell lithium-ion batteries can be a bit moody—they might leak some nasty stuff, catch fire, or even pop like a popcorn kernel if mishandled. So, channel your inner gentle giant and avoid using too much force or poking at the battery with metal tools.
– Let’s get this battery out! First, gently move the charging assembly cable out of the way. Then, slip an opening pick along the bottom edge of the battery – think of it like a little dance.
– Now, apply some steady pressure and slowly lift the battery up. You’ve got this!
– If you’re having a little trouble, add a bit more alcohol under the battery and try again. That should loosen things up.
– Remember to pry from the center of the battery – those ribbon cables on either side are delicate. We don’t want to hurt them! If you need help, you can always schedule a repair.
Step 21


Heads up! Once you’ve taken out the battery, it’s time to give it a well-deserved rest. Don’t try to put it back in – it’s time to swap it for a fresh one! You know, like trading in those old jeans for a new pair. 😉 We’re all about safety here, so let’s keep things running smoothly. If you need any help, you can always schedule a repair.
– First, take out the battery – it’s time to give your device a new power source.
– Now it’s time to install a new battery: let’s get started.
– Use a spudger to gently scrape away any leftover adhesive from your phone, and then clean the area with some isopropyl alcohol and a lint-free cloth. This will help your new battery stick nicely.
– To secure your new battery, use some pre-cut adhesive or double-sided adhesive tape. Apply the adhesive to the phone, not directly to the battery, and make sure it doesn’t touch any of the cables underneath. This is the important part – you want to position it just right.
– Finally, press the battery firmly into place for 20-30 seconds. If you need help or feel unsure, you can always schedule a repair with Salvation Repair.
Tools Used
Step 22


– Now, let’s get that charging assembly connector unplugged! Grab your trusty spudger and gently use the flat end to disconnect it from the motherboard. You got this!
Tools Used
Step 23


– Grab a paperclip or your trusty SIM eject tool and gently insert it into the tiny hole on the left side of your phone. Give it a little push, and watch as the SIM card tray pops out like magic!
– Now, go ahead and remove that SIM card tray with ease.
Step 24

– Let’s get started by removing the two 2.5 mm PH00 screws – easy does it! If you need help, you can always schedule a repair
Step 25


– Alright, let’s disconnect those two connectors at the bottom of the motherboard. Just gently pull them apart – no need to be rough! If you’re feeling a little unsure, you can always schedule a repair.
Step 26


– Time to give that motherboard a little nudge! Carefully pry it up using a plastic opening tool.
– Now, gently remove the motherboard. You’re doing great!
Step 27


You’ve successfully detached the motherboard from the phone – nice work!
– Give the motherboard a spin and flip it over.
– Unplug that fingerprint sensor cable like a pro.
Step 28

– Alright, flip your device over so the screen is getting a nice view of the ground!
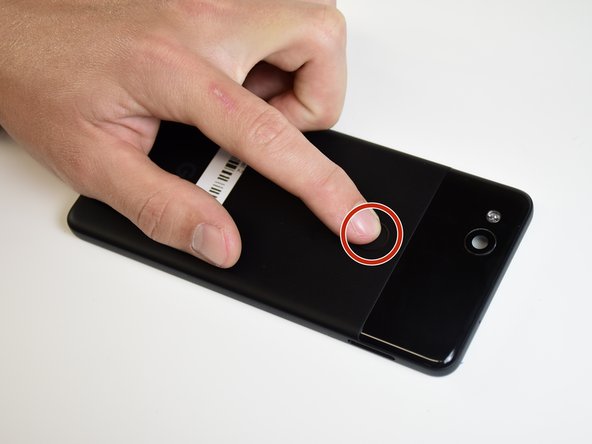
– Now, give that fingerprint sensor a gentle nudge towards the inside of the phone with your hand.
Step 29


– Let’s flip the device over, display side facing up. We’re almost there!
– Time to give that fingerprint sensor a little farewell hug.
