Samsung Galaxy Rush Front Camera Replacement: DIY Guide
Duration: 45 minutes
Steps: 12 Steps
Ready to give your front camera a fresh start? This guide will walk you through the process of swapping it out. It’s a little like giving your phone a mini-facelift! If you get stuck along the way, you can always schedule a repair.
Step 1


– Take a gander at the back of your phone and gently use your finger to pop off that back cover. You’ve got this!


Step 3

– Alright, grab that trusty Phillips-head screwdriver and give those six screws holding the back panel in place a little nudge. Let’s get this party started!
Step 4

– Let’s get started by using a pry tool to carefully remove the back panel from the rest of the phone. To make things easier, try prying from the edge closest to the screen. If you need help, you can always schedule a repair
Step 5

– Time to get up close and personal with those connectors – use your trusty tweezers to gently lift them off the motherboard.
– Take a look at the upper left, you’ll find a connector waiting to be freed.
– The second connector is hanging out near the top of the phone, just above the camera. It’s pretty easy to remove, so take a deep breath and gently pry it off. If you need help, you can always schedule a repair
Step 6

– Grab your tweezers and carefully peel off those two bright orange adhesive ribbons.
– Don’t worry, they’re stuck to the motherboard, so just be gentle.
– You’ll find them chilling on the side of the phone.
Step 7

– Alright, let’s get this party started! Grab your trusty Philips-head screwdriver and give that single screw on the bottom of the phone a little twist. You’ll find it hanging out to the right of the charging port.
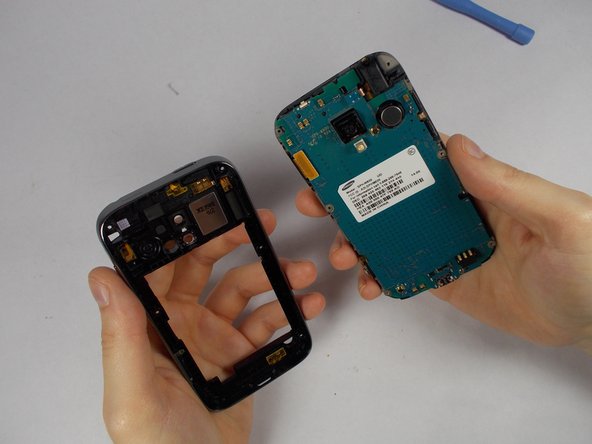
Step 8

– Now, with a little gentle persuasion, lift that motherboard right up, separating it from the screen. You’re doing great!
Step 9

– Keep the motherboard turned so the circuits are facing away from you.
– Gently pop off the two black tabs at the top of the motherboard.
Step 10

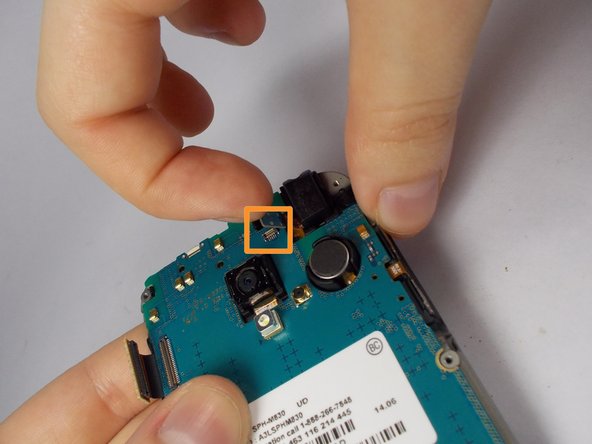
– Now it’s time to flip that motherboard over, so the circuits are facing you. This will give you a better look at what you’re working with.
Step 11

– Time to get started – gently lift and carefully remove the connecting tab
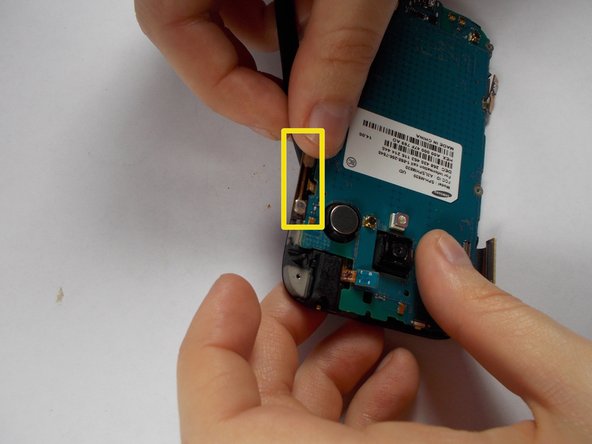
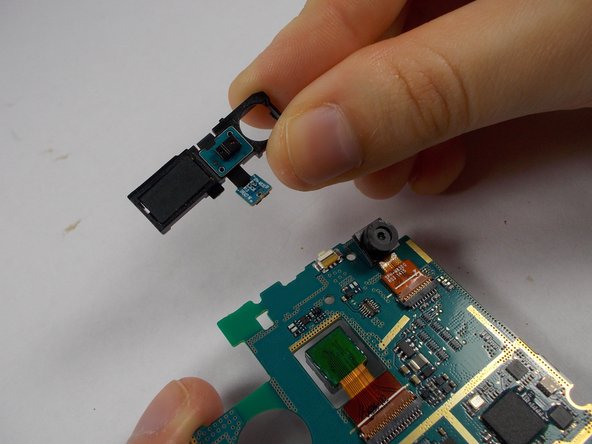
Step 12


– Carefully grasp the front camera with two fingers and give it a gentle upward tug. A little wiggle can work wonders!

