How to Replace Samsung Galaxy Prime Rear Camera (Step-by-Step Guide)
Duration: 45 minutes
Steps: 9 Steps
Step 1

– Start by inserting an opening tool or your trusty fingernail into the tab on the power button side of the phone – it’s time to get this repair started!
– Gently lift on the tab to pry the back cover off the phone, working your way around the edges.
– Keep prying around the edges of the phone until the entire back cover is removed – you’re making great progress! If you need help, you can always schedule a repair

Step 3


– Slide out the SD card and Sim card from just above the battery bay.
– Use an opening tool to lift up the plastic plate covering the LCD ribbon cable and remove it.
Step 4

Keep those screws safe and sound on a magnetic mat or in a cozy spot. You wouldn’t want them to wander off on their own adventure!
– Grab your trusty PH000 Phillips screwdriver and start unscrewing those nine screws on the back. You’ve got this!


Step 6


No need to get your motherboard all worked up! You don’t have to remove it for this step.
– Let’s disconnect that speaker cable! Use a plastic spudger to gently detach it from the speaker unit.
– Now, it’s time to say goodbye to the speaker! Lift it up from the top, and it should pop right off the phone.
Tools Used

Step 7

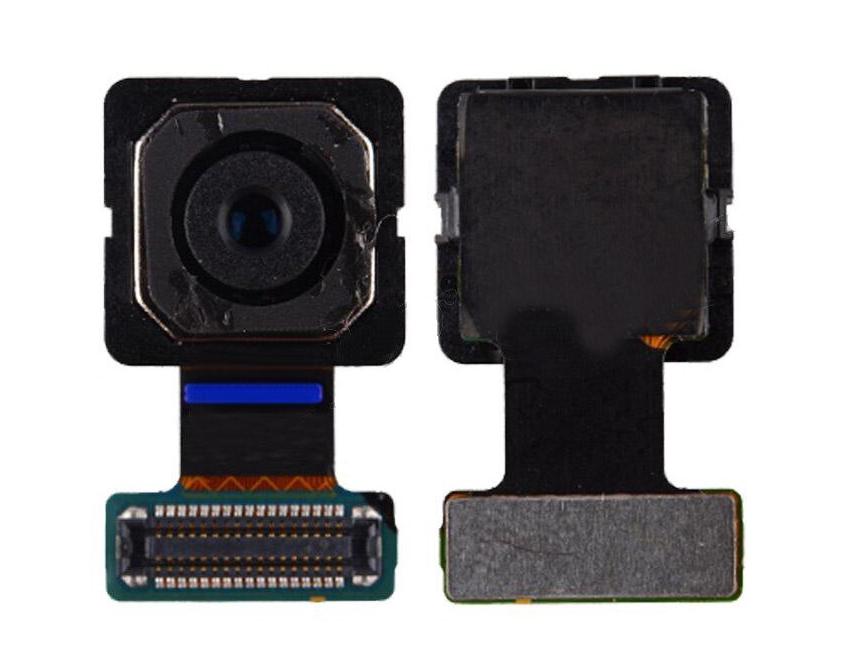
– Time to get started – use a plastic spudger to carefully disconnect the ribbon cable from the motherboard. You’re making great progress!
– Now that the cable is out of the way, the camera should be free to remove. Keep going, you’re doing fantastic! If you need help, you can always schedule a repair
Tools Used
Step 8


– Grab a trusty plastic spudger and gently wiggle it to unplug the LCD ribbon cable and front-facing sensor. You’re doing great!
Tools Used
Step 9

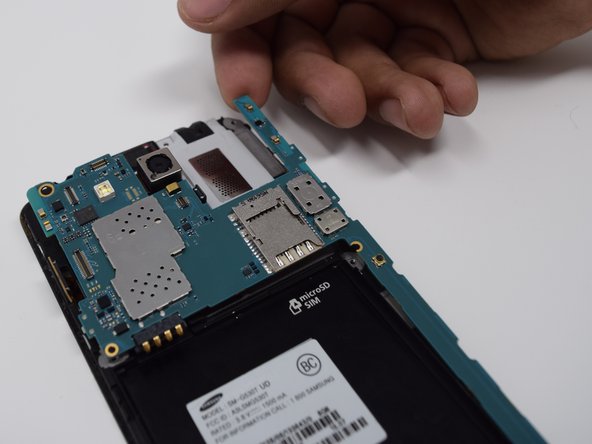
– Alright, let’s get that motherboard out! It should be free to come out now.
– Gently lift each edge of the motherboard and wiggle it free.
– Flip that motherboard over, and use a plastic spudger to carefully disconnect the rear-facing camera ribbon connector. You don’t want to bend that connector, so be super gentle.
– If you need help with any of these steps, you can always schedule a repair.
Tools Used