Samsung Galaxy Tab S2 9.7 AT&T Battery Replacement
Duration: 45 minutes
Steps: 11 Steps
A dead battery is like the ultimate tablet buzzkill—it just won’t work! Before you swap out that old battery, make sure your device is powered off and unplugged. Safety first, always!
Step 1


Keep the heat gun moving—don’t hang out in one spot for more than two seconds, or you might end up melting the plastic around the screen.
No heat gun? No problem. An iOpener or even a hair dryer does the trick too. If you want some tips on using an iOpener, check out the guide.
– Use the heat gun to gently warm around the edges of the tablet, helping to soften the adhesive glue. Keep the heat moving to avoid overheating. If you need help, you can always schedule a repair.


Step 2


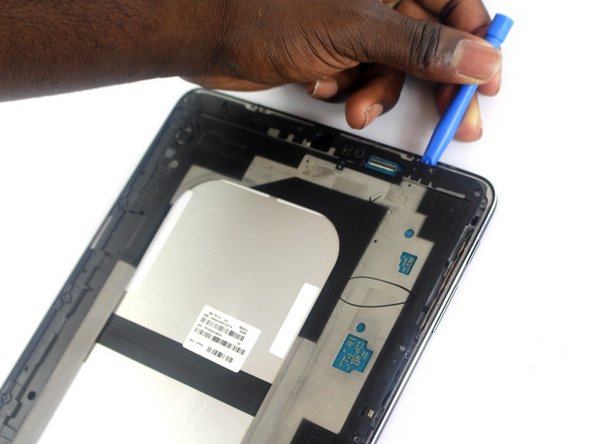
– Start by applying the suction cup to one of the corners, either top or bottom right – your choice!
– While the suction’s doing its thing, gently work the plastic opening tool around the edges of the screen to loosen it up and pop it free. Nice and easy!
Step 3

Careful when opening up the tablet—gently do it and avoid yanking on the orange ribbon cable, or you might end up with a tangled mess or a broken connection. Take your time, and if you need a hand, you can always schedule a repair.
– After detaching the screen, gently open the tablet like you’re flipping through a book. Keep it steady and friendly, and if you need help, you can always schedule a repair.
Step 4

– Grab your precision tweezers and peel away the shiny silver tape that’s keeping the orange ribbon cable in place between these two parts.
Step 5

– Grab your precision tweezers and gently pop the tiny press-fit connector off the tablet’s body. Easy does it!
Step 6


Pop those screws onto a magnetic mat or into a container—no one likes crawling on the floor hunting for missing hardware.
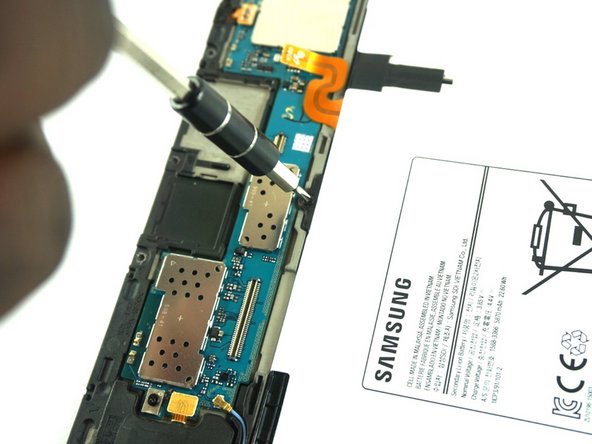
– Grab your Phillips #000 screwdriver and loosen all seventeen 2.74 mm screws circling the edges—easy peasy!
– Then, find the two black 2.74 mm screws right in the middle of the tablet and give them a gentle turn with the Phillips #000 screwdriver. You’re doing great!
Tools Used

Step 7


– Gently work the plastic opening tool around the edges of the tablet to carefully lift and detach the motherboard from the device. Take your time and keep it steady—patience is key! If you need some extra help, you can always schedule a repair.
Step 8


– Grab your trusty plastic opening tool and pop off the lower press-fit connector of the black ribbon cable at the bottom left of the battery.
– Still using the plastic opening tool, unclip the connector on the left side of the black ribbon cable.
– Gently lift the black ribbon cable up and out—easy does it, you’re all set!
Step 9

– Grab the plastic opening tool and gently pry up the orange ribbon cable that links the battery to the motherboard. If you need help, you can always schedule a repair.
Step 10

– Grab your Phillips #000 screwdriver and unscrew the four 2.74mm black screws around the edge of the battery. If you need help, you can always schedule a repair.
Tools Used

Step 11

– Now that the battery is free from the motherboard, it’s time to give it a gentle lift. Carefully raise the battery to detach it from the motherboard and set it aside. If you need help, you can always schedule a repair.