
Samsung Galaxy Nexus Back Camera Lens Replacement Guide
Duration: 45 minutes
Steps: 13 Steps
Is your phone’s camera taking pics that are less than stellar? No worries! This easy-peasy guide will help you replace your Galaxy Nexus’s back camera lens, and you’ll be snapping amazing shots in no time! If you need a hand, you can always schedule a repair.
Step 1

– Pop the back off the phone to access the battery. Grab those plastic opening tools (or just use your fingernail) and slide it into the notch.
Step 2


– Let’s get started by removing the back cover of your phone. To do this, use a prying tool or your fingernail to gently pry the cover away from the phone while it’s still in the divot. If you need help, you can always schedule a repair
Step 3


– Time to get that battery out – simply insert your finger into the divot and gently pull it towards you to remove it. Easy peasy!
– Now it’s time to put a new battery in – just pop it into place and you’re one step closer to getting your device up and running again. If you need help, you can always schedule a repair
Step 4


– Unscrew those 4.4 mm screws with a PH # 000 screwdriver, just like shown in the picture. You got this!
Step 5


Carefully remove the screen from the outer shell, taking extra caution to avoid damaging the control board or the screen itself. If you’re not feeling confident, don’t worry – you can always schedule a repair
– Now that the screws are out, flip your phone over so it’s right side up – you’re making great progress!
– Next, carefully insert your plastic opening tool between the screen and the outer case. Gently work it around the phone, making sure it stays in place between the screen and the shell. If you need help, you can always schedule a repair
Step 6


– Let’s get started by removing the 4.4mm screw with a PH #000 marked screwdriver. If you need help, you can always schedule a repair
Step 7


– Time to get funky with that flathead screwdriver! Gently lift up the blue connector—it’s like giving it a little high five.
Step 8


– Gently pry the bottom module back with your finger or a trusty prying tool. If you need help, you can always schedule a repair
Step 9


Whoa, buddy! Looks like there’s some sticky friends holding down those phone parts. Gotta break ’em free so we can go on an awesome adventure together!
– Let’s get that battery out! Use your trusty tweezers or a flathead screwdriver to gently remove the internal battery. If you’re not comfortable with this step, you can always schedule a repair.
Tools Used

Step 10


– Alright, let’s give those display and USB connectors a little TLC. Using your trusty tweezers, gently peel the display connector strip off the main circuit board. Then, do the same thing with the USB connector strip. Easy peasy, right?
Tools Used


Step 12


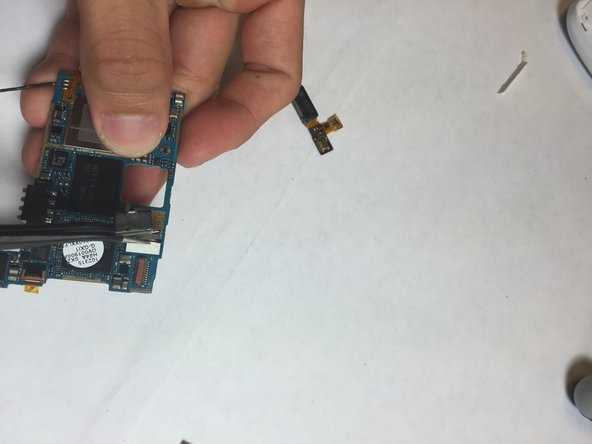
Hey, just a heads-up! Your model might have some ribbon cable connectors hanging out under the board. Be super careful when you lift it up so you don’t yank them out of their sockets. No worries, it’s all good if you need a helping hand, you can always schedule a repair.
– With a steady hand, use those trusty tweezers to gently lift the top circuit board off. You’ve got this!
Tools Used
Step 13

– Grab those tweezers and carefully lift the back camera lens from the circuit board. If you need help, you can always schedule a repair.
Tools Used

