iPod Classic Teardown
Duration: 45 minutes
Steps: 10 Steps
We cracked open this iPod on September 7, 2007, and we’re here to walk you through the process, step by step.
Step 1

– Apple drops two new iPods at once, and we’re diving into both—double the teardown fun, all in a day’s work.
– We call this moment, ‘stepping up to the plate.’
Step 2

– In the box:
– A handy manual for your new, bigger iPod.
– A USB to iPod cable for smooth syncing.
– Some headphones to enjoy your tunes.
– A dock insert to fit the different thicknesses between the 80 GB and 160 GB models.
– Your sleek, silver iPod Classic, ready to go.
Step 3

– Check out the 80 GB Classic and the 30 GB Video side-by-side. They’re both the same size, but the Classic keeps it slimmer while packing in more storage.
– The Classic’s front sports anodized aluminum with a slight bevel, giving it a sleeker feel compared to the Video’s flat plastic top.
Step 4

– All looks familiar in here, right?
– Now, for those of you keeping track, you might’ve noticed we took our sweet time getting here. Why’s that, you ask? Well, just like the faceplate, the Classic swapped out its old plastic tabs for sturdier metal ones. These new tabs grip way better, making the case a bit trickier to open. But no worries, you’ve got this!
Step 5

– The Nano’s battery pretty much owns the space, but in the Classic, it’s the hard drive that’s the real boss.
Step 6

– The Classic hard drive comes with an 80 GB capacity, which isn’t groundbreaking for an iPod. But here’s the twist: while the Video’s 80 GB drive is 8 mm thick, the Classic’s is a slimmer 5 mm. Thanks, Toshiba!
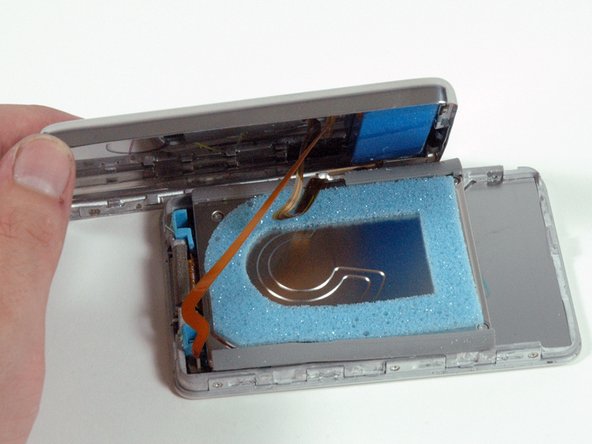
Step 7

– We found a new metal plate backing the display, which was a bit of a surprise. Looks like it might be there to give the display some extra support, making it less likely to crack. Pretty neat, right?
Step 8

– Here’s the full lineup of parts you’ll be working with. Heads up:
– The battery matches the one from the 30 GB Video.
– The logic board is now held in place with two screws—no more zero-screw setup like the Video.
– The display is noticeably slimmer than the Video’s, coming in at about 70% of the thickness.
Step 9

– Check out the top side of the logic board—here’s where all the action happens!
Step 10

– Here’s a cleaner view of the bottom side of the logic board. Keep in mind, handling delicate components with care is key—think of it as giving your device a gentle hug. If you get stuck or need a pro touch, you can always schedule a repair to get expert assistance. Proceed carefully and enjoy the process!