DIY Guide: Replace Samsung Galaxy Alpha Motherboard Tutorial
Duration: 45 minutes
Steps: 8 Steps
Get ready to breathe new life into your Samsung Galaxy Alpha by replacing the motherboard. If your phone won’t turn on or is running super slow, this repair can be a total game-changer. Just remember to handle the screen and back cover with care – they can be a bit delicate. By following these easy steps, you’ll be able to fix your phone without breaking the bank. And if you need a little extra help, you can always schedule a repair with Salvation Repair.
Step 1


– Flip your phone over and check out the back. Spot the slot on the side? If you’re looking at the phone upright from the back, it should be to the left of the camera, just waiting for your attention.
– Grab an iFixit opening pick or even just your trusty fingers to slide into that gap. Gently pry it apart to create some space between the back panel and the phone’s body. If you don’t have a tool handy, no worries—your hands can do the job too!
Step 2

Make sure your phone is off before diving in. Safety first, folks!
– Find the little slot hanging out near the bottom of the battery compartment.
– Grab your trusty iFixit opening pick or just use your hand, and gently nudge the battery up and out like you’re giving it a little lift-off!
Step 3


– Grab your trusty Phillips #00 screwdriver and carefully take out the twelve 3.0 mm screws that are holding the back case snugly against the main phone body. Set those little guys aside and we’ll be one step closer to your repair mission!
Tools Used

Step 4


– Flip the phone so the screen is facing upward. You’re about to give this phone a makeover!
– Now, use the flat blade end of the halberd spudger to gently create some space between the front screen and the phone’s body. We’re just giving them a little breathing room.
– Go ahead and lift the screen up and outward to remove it. You’re doing great! If you need help, you can always schedule a repair.
Tools Used


Step 5


– Alright, flip that phone over so the back is facing up, like it’s ready for a selfie!
– Next, grab that halberd spudger and slide its hook into the little gaps on the side of the battery housing. Give it a gentle pry upwards until you see that lovely separation between the back case and the main phone body.
– Now, use your fingers or a trusty prying tool to fully separate and remove the back case. You’ve got this!
Tools Used
Step 6


– Grab your trusty Phillips #00 screwdriver and carefully unscrew those three 3.0 mm screws that keep the motherboard snug in the main phone body. Once you’ve got them out, set them aside in a safe spot—your future self will thank you!
Tools Used
Step 7


– As you tackle those screws from the last step, keep an eye out for those sneaky pin connector tabs that might have decided to take a little vacation. Grab your trusty spudger and gently lift them up, making sure they’re not still clinging to the main phone body.
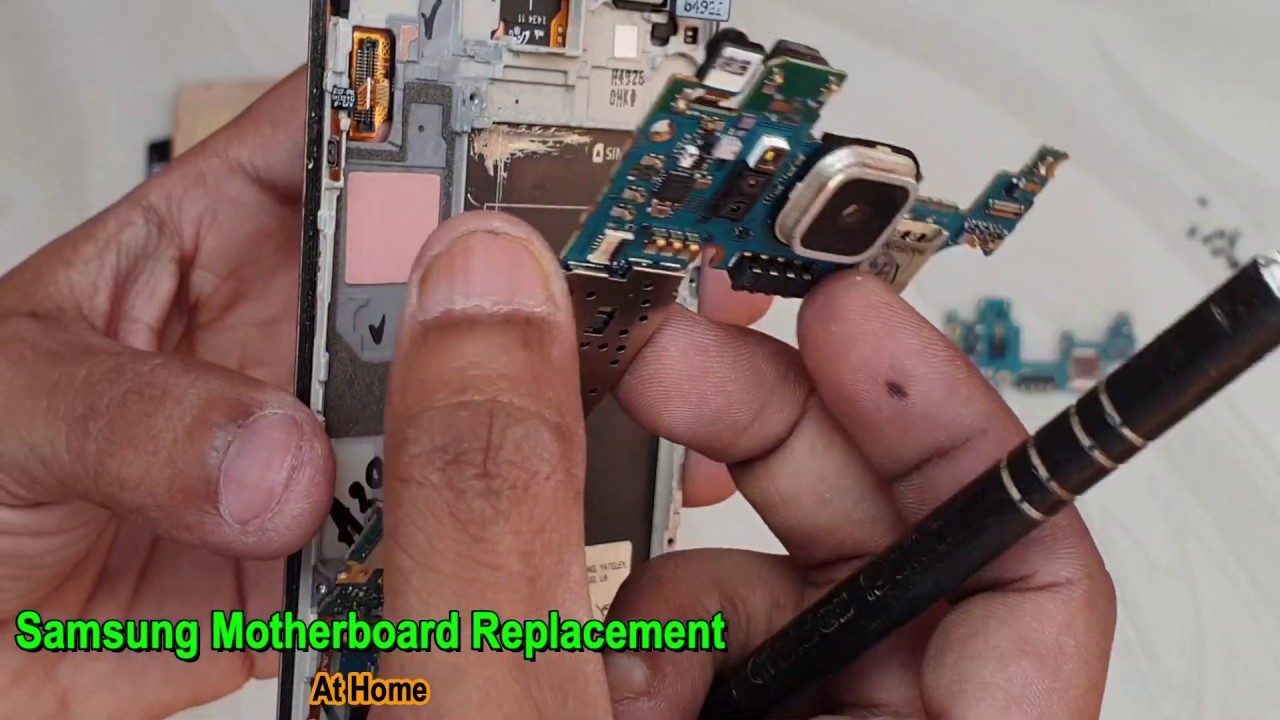
– Now, with your spudger in hand, it’s time to carefully lift the motherboard off the back of the phone case. You’ve got this!
Tools Used
Step 8


– With a gentle touch, use your hands or a trusty spudger to carefully lift and free the motherboard from its cozy spot.
Tools Used