
Replace Galaxy Note8 Display: Step-by-Step DIY Guide
Duration: 45 minutes
Steps: 19 Steps
Hey there, techie! Before you start tearing your phone apart, make sure that battery is chilled out – below 25% charged. You know, just in case things get a little spicy. A punctured battery can be a bit of a fire hazard, but it’s way less likely if it’s nice and relaxed. No need to worry though, if you need a hand, you can always schedule a repair.
Note
damage the waterproof sealing
function normally
loose its water-protection
If the frame is damaged or bent
Ready to tackle that cracked display on your Samsung Galaxy Note8? Awesome! Before you dive in, make sure to drain that battery below 25%. Why? Well, we want to keep things safe—nobody wants a battery fire or explosion on their hands! Just a heads-up: this guide is all about swapping out the display while keeping the original frame, logic board, and battery intact. If you happen to have a replacement screen that comes with a shiny new frame (also known as a chassis), you’ll be in for a different adventure—think transplanting your phone’s insides and installing a brand new battery! So double-check you’ve got the right part before you get started. You’ll need to pop off the rear glass cover, and don’t forget to grab some replacement adhesive to stick that back cover back on. If your new display doesn’t come with adhesive, tape will do the trick for securing it. Keep in mind, opening up your Galaxy Note8 will mess with its waterproof seals. Your phone will still function like a champ, but it’ll lose that water resistance. If the frame has seen better days or is bent, consider swapping it out too; a wonky frame can lead to a wonky screen experience. And remember, separating the display from the frame typically means the old display is a goner, so only follow this guide if you’re set on replacing it! If you need help, you can always schedule a repair.
Step 1

– First things first, turn off your phone. You know, just to be safe.
– Grab your iOpener and get ready to warm up the adhesive on the back of your Note8. It’s like a mini spa treatment for your phone!
– Now, apply the warm iOpener to the side of the Note8 with the power button. It’s time to loosen things up!
Tools Used

Step 2


Be gentle when using the opening pick – don’t push too hard, or you might damage the back cover. Instead, use the suction handle to pull and the pick to carefully cut through the adhesive. If you need help, you can always schedule a repair
Since the back cover is a bit curved at the edges, you’ll want to slide the opening pick in from underneath at a slight angle.
If it’s getting harder to move the pick, just warm up your iOpener again and lay it on the back cover for a moment – you’ll be a pro in no time! If you need help, you can always schedule a repair
– Let’s get this party started! Grab your suction handle and give that back cover a little lift. Now, slip your opening pick into the gap you just created. You’re on a roll!
– Start in the middle of the side and carefully slice through that adhesive while holding onto the back cover with your trusty suction handle. We’re making progress!
– Slide that pick towards the bottom corner and park it there to keep that adhesive from sticking back down. Nice work!
– Now, grab another pick and move it to the top corner. You’re practically a pro at this point! If you need help, you can always schedule a repair.
Tools Used

Step 3


– Grab another opening pick and gently slide it around the corner and along the top edge.
– If things are feeling a bit stubborn, give it a little warmth with an iOpener.
– Keep that pick in the top right corner to stop the adhesive from sealing up again.
Tools Used
Step 4


– Time to get this party started! Rotate your device and slide your opening pick along the bottom to separate the adhesive. Keep it cool and steady, we’re in this together.
– Now, leave that opening pick chillin’ at the bottom right corner to make sure the adhesive doesn’t get sneaky and seal itself back up. You got this!
Step 5


No need to force it! If the back cover is stubborn, use the iOpener again to loosen up that glue. We don’t want any bends happening, now do we?
– Once you’ve carefully separated the adhesive on all three sides, you can gently lift the back cover. It’s like a little dance, just be smooth about it!
– Keep an eye on the fingerprint sensor connector as you flip the cover open. You might need to give it a little break – we’ll show you how in the next step.
Tools Used
Step 6

Hey, you know what? That connector might have already popped off when you flipped the back cover open. No worries, happens sometimes! We’ll get it sorted.
– Grab those tweezers and gently pop off the fingerprint sensor.
Tools Used

Step 7

– Take off the back cover – it’s time to get started on your repair journey.
– Now, let’s get your phone ready for reassembly. Remove any leftover adhesive and give the glued areas a good clean with isopropyl alcohol and a lint-free cloth. If you need help, you can always schedule a repair
Step 8

– Time to get down to business! Grab your trusty Phillips #00 screwdriver and unscrew the ten screws like a pro.
Step 9


– Time to get this repair started. Use an opening pick at the top edge to carefully pry between the NFC antenna and charging coil assembly and the case – it’s like a little puzzle.
– Gently lever the top of the assembly out of the case. If you need help, you can always schedule a repair
Step 10

– Now it’s time to carefully lift out the entire charging coil and NFC antenna assembly – take your time and you’ve got this! If you need help, you can always schedule a repair


Step 12

– Let’s get started by removing the six Phillips #00 screws from the loudspeaker assembly located at the bottom of your phone. Take your time and make sure to keep those screws organized – you’ll need them later! If you need help, you can always schedule a repair
Step 13
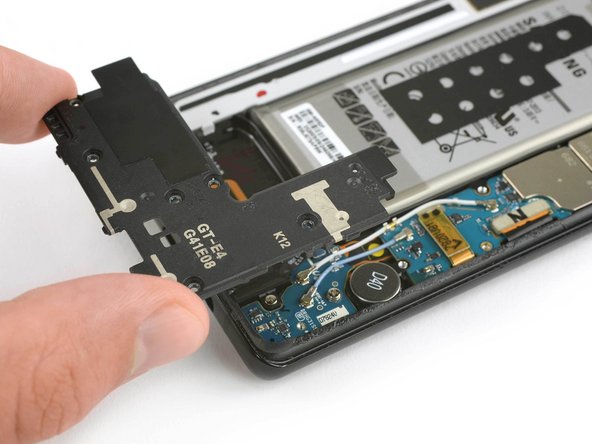

You’re going to be prying above the mainboard and the antenna cable. Take it slow and steady to keep those nearby components safe and sound.
– Grab your trusty spudger and gently use the flat end to lift up that loudspeaker assembly. It’s easier than pulling a rabbit out of a hat!
– Once you’ve got it pried up, just remove the loudspeaker assembly with grace. You got this!
Tools Used


Step 15

Don’t forget to rock those safety glasses! They’ll keep your peepers safe from any sneaky shards that might pop out during your repair adventure.
Hey, if your screen is cracked, protect yourself and keep those shards from flying around by taping over it.
You might need to warm things up a bit with the iOpener. Make sure you follow the iOpener instructions to avoid any accidental meltdowns. If you need help, you can always schedule a repair.
– Grab an iOpener and give that display a warm hug for at least two minutes to help loosen up the adhesive lurking beneath.
– Cover the Note8’s display with overlapping strips of clear packing tape until everything is snug and secure.
– This clever wrap will keep any glass shards in check and add some solid support while you’re gently prying and lifting the display.
Tools Used
Step 16


Hey there! The screen’s flex cable lives right below the midpoint on the side of the power button. Keep an eye out for it when you’re working with your tools, so you don’t accidentally nick it. If you need help, you can always schedule a repair.
Thanks to that lovely curved glass, remember to give a little nudge upwards instead of trying to fit it in parallel like a puzzle piece. You’ve got this!
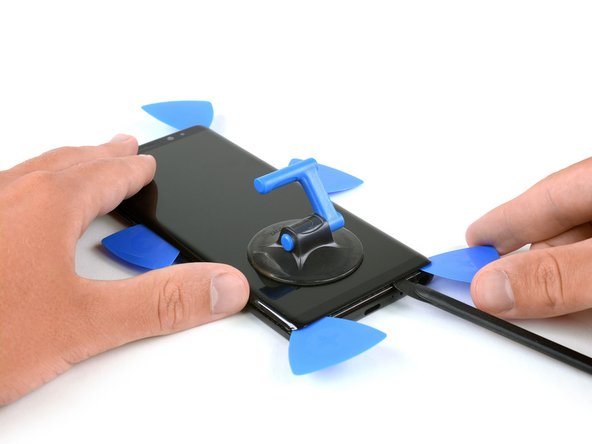
– Time to get this screen warm! Heat it up until it’s nice and toasty, then stick a suction cup to the bottom edge of the phone.
– Uh oh! Cracked screen? No problem! If the suction cup won’t stick, try lifting it with some strong tape or even superglue the suction cup in place and let it dry. We’ve got this!
– Now, grab that trusty halberd spudger or opening pick and slide it under the display assembly.
– Slide that tool along the bottom edge of the phone like you’re a pro, cutting through the adhesive. Leave an opening pick at the corner to stop the adhesive from sticking back together.
– Keep sliding that tool along the side of the phone and pop in another opening pick. You’re almost there!
Tools Used
Step 17

Be careful when prying near the top edge – you’re getting close to the front-facing sensors and earpiece speaker, so take your time to avoid any damage. If you need help, you can always schedule a repair
Take your time and work carefully so the tool stays in the seam. If the cutting gets tough, don’t worry – just reheat and reapply the iOpener. And remember, if you need help, you can always schedule a repair
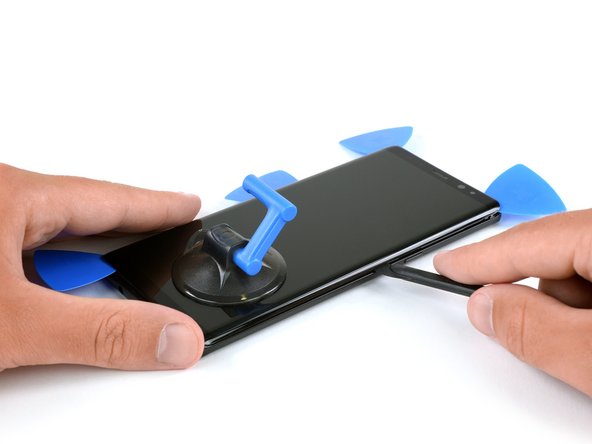
– Gently slide that halberd spudger or opening pick into the upper corner of your phone to slice through the adhesive. Pop in an opening pick to keep the adhesive from re-sticking to the display. You’re doing great!
– Now, let’s keep the momentum going! Repeat the heating and cutting dance for the other sides of the phone. Make sure to tuck an opening pick into every corner and along both sides of the Note8. You’ve got this!
Step 18

Whoa, those midframe openings can be a real handful! Don’t worry, you’ve got this. Just take it slow and steady, and you’ll have those cables out in no time. Need a hand? You can always schedule a repair!
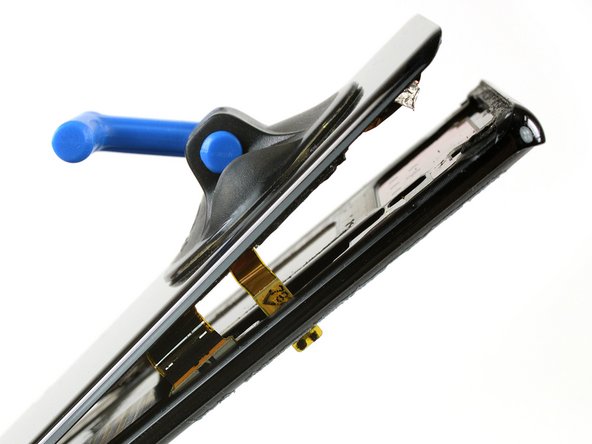
– After you’ve carefully sliced through the adhesive on all edges of your phone, grab that handy little suction cup and gently lift it upward. You’ve got this!
Step 19

– Say goodbye to any leftover adhesive on your phone! Grab some isopropyl alcohol (90+%) and a lint-free cloth to give those glued areas a nice, clean touch-up. You’ve got this!

