Samsung Galaxy Note 5 Rear Glass Replacement Guide: Step-by-Step DIY
Duration: 45 minutes
Steps: 11 Steps
Ready to give your Samsung Galaxy Note5’s back cover a makeover? Let’s get this glass back cover off! Just follow along with this easy guide, and you’ll be on your way to a fresh new look in no time. And hey, if you’re feeling a little lost, remember you can always schedule a repair. We’re here to help!
Step 1
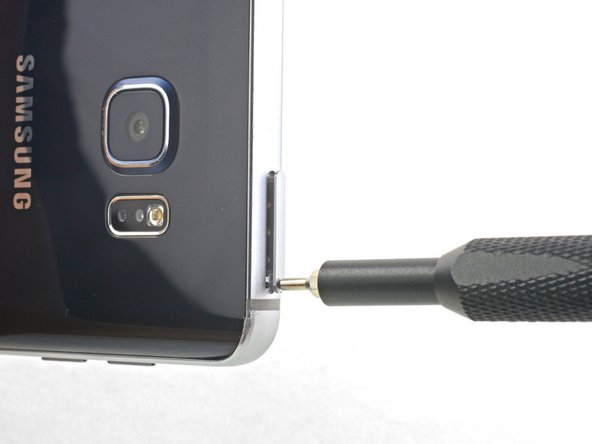


– Time to get started. Insert a SIM eject tool, a SIM eject bit, or even a straightened paperclip into the small hole in the SIM card tray at the top of your phone – it’s easier than it sounds.
– Give it a gentle press to eject the tray. Don’t worry if it takes a bit of force, that’s totally normal.
– Now, carefully remove the SIM card tray. You’re making great progress so far. If you need help, you can always schedule a repair
Step 2


– Ready to unleash that S-Pen? Give the S-Pen button a little nudge with your fingernail, and watch it pop out! Go ahead, grab that S-Pen and get ready to unleash your creativity.
– If you’re having any trouble, you can always schedule a repair.
Step 3

You can use a hair dryer, heat gun, or hot plate, but keep an eye on the heat—overheating can be a real party crasher for your phone’s OLED display and internal battery. Play it cool and keep everything safe!
If the glass back is cracked, don’t fret! Just carefully tape over the entire surface with packing tape.
You may need to reheat and reapply the iOpener a few times to get the phone nice and warm. Follow the iOpener instructions to avoid overheating. If you need help, you can always schedule a repair
– Warm up your iOpener and gently place it on the bottom of your phone for roughly two minutes. Let’s get that adhesive all toasty and ready for action!
Tools Used

Step 4


Hey, that rear glass is pretty delicate, so be careful not to use too much force or metal tools. Take it easy, and if you’re ever feeling unsure, you can always schedule a repair.
If your phone’s back cover is cracked, don’t worry – the suction cup might not stick, but you’ve got options. Try using some strong tape to lift it, or apply a bit of superglue to the suction cup and let it cure before you proceed. If you need help, you can always schedule a repair
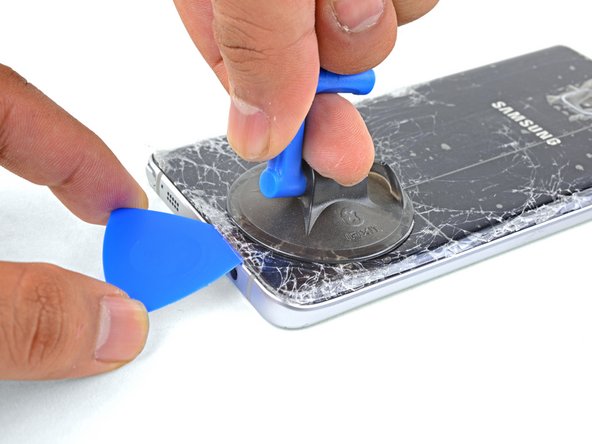
– First, attach a suction cup to the bottom edge of your phone – get it as close as you can for the best grip.
– Now, gently lift the suction cup and carefully slide an opening pick under the rear glass to get started on opening up your device. If you need help, you can always schedule a repair
Step 5

– Alright, now that your pick is in place, let’s give that edge another quick blast of heat with your iOpener for a minute. You’ve got this!
Tools Used
Step 6


Take it easy and keep that tip snug in the seam. If it’s getting stuck, give it another warm-up with the iOpener and reapply. If you need help, you can always schedule a repair.
– Gently slide the pick along the bottom edge of your phone like a pro!
– Keep that pick in place to stop the adhesive from getting clingy again, and grab a second pick as you move on to the next step.
Tools Used
Step 7


Heads up! Those corners are super delicate because of the curve. Go slow, and if you need to, warm it up again with the iOpener. You got this!
– Now, let’s get that pick in there and carefully slice around that corner. It’s like a little dance, right? Just be gentle and you’ll be fine. If you need help, you can always schedule a repair
Tools Used
Step 8

– Alright, before you get too scissor-happy, grab that handy-dandy iOpener and give the long edge a nice warm hug.
Tools Used
Step 9


– Now, let’s keep the momentum going! Just like before, heat and carefully cut around the last three sides of your phone.
– And hey, to keep things tidy, stick an opening pick in each edge as you tackle the next one. This will help prevent that pesky adhesive from sealing back up!
Step 10


– Let’s get those edges freed up! Use your trusty opening pick to carefully cut through any remaining adhesive holding the glass in place.
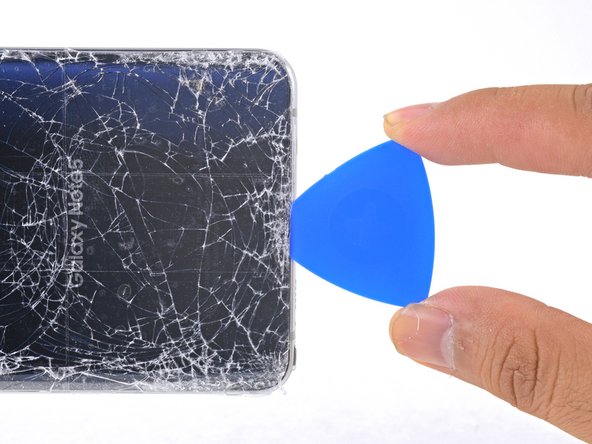
– Now, gently lift that glass right off. You got this!
Step 11

Feel free to pop the back cover on without new adhesive, just clear out any chunky bits that could mess up the fit. After it’s on, give it some heat and press down to make sure it sticks. It won’t be waterproof, but the adhesive is plenty strong.
The replacement adhesive is designed to fit the back cover exactly. If you can’t get that, a high-bond double-sided tape like Tesa 61395 works too. Just remember, this might leave some gaps that could let in liquids.
– Let’s get that back cover back in action! First up, grab some tweezers and gently remove any leftover adhesive from both the back cover and the phone’s chassis.
– Next, it’s time to clean those adhesion areas! Use some high concentration isopropyl alcohol (90% or more) along with a lint-free cloth. Just swipe in one direction – no back and forth – to prep that surface for the new adhesive.
– Before you dive into applying new adhesive and sealing everything up, make sure to power on your phone and give your repair a quick test. You want to ensure everything is working like a charm!
– Once you’ve got the rear cover installed, apply some strong, steady pressure to your phone for a few minutes. A stack of heavy books can do the trick – this helps the adhesive bond like a pro!