Samsung Galaxy Note 5 Display Replacement Guide: DIY Repair Tutorial
Duration: 45 minutes
Steps: 18 Steps
Oops! Did you crack the screen on your sleek Galaxy Note 5? Don’t stress, we’ve got your back! This guide will walk you through the steps to swap out that cracked or broken display on your Samsung Galaxy Note 5. You’ll be melting the adhesive that keeps the back glass snug, then gently separating the middle housing before tackling the display removal. Just a heads-up: the display removal usually means the old one won’t make it, so make sure you’re ready to replace it with a fresh new screen. If you need help, you can always schedule a repair.
Step 1

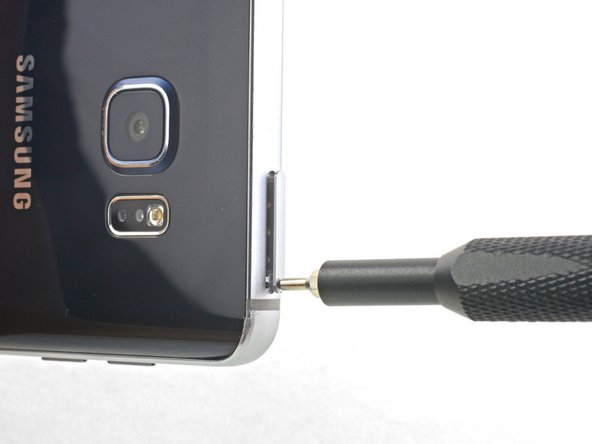
– Time to get that SIM card out! Grab your SIM Ejector Tool and slide it into the tiny hole on the top edge of your device. You’ll find it on the left side.
– Press down gently on the tool, and watch the SIM Card Tray pop out, ready to be replaced. It’s like magic!
Step 2

– Slide out the SIM Card Tray from its cozy little home.
Step 3

– Now it’s time to get this repair started – heat up the back of your device with a heat gun for about two minutes. If you need help, you can always schedule a repair
Tools Used

Step 4

Pop the suction cup on the flat part of the glass. Trust me, it’s the sweet spot!
– When your device is warm to the touch, it’s time to get started – place a suction cup near the bottom of the back of your device.
– Now, gently pull upwards on the suction cup to carefully separate the rear glass from the phone’s body.
– As you’re pulling upwards, slide a pick under the rear glass to help with the separation. If you need help, you can always schedule a repair
Step 5

– Now, slide the pick along the bottom edge of the device, keeping it under the rear glass. This will help us loosen that sticky adhesive holding the glass in place. Easy peasy!
Step 6

– Now it’s time to repeat the heating and cutting process for the remaining three sides of your phone – you’ve got this!
– As you move on to the next side, leave a pick in place to keep the adhesive from resealing, making your job a whole lot easier. If you need help, you can always schedule a repair
Step 7

– Now that you’ve cut through all the adhesive, it’s time to carefully pry up the rear glass and set it free. If you need help, you can always schedule a repair
Step 8

– Let’s start by giving that S-Pen a little vacation! Gently pull it out from the bottom of your device.
Step 9

– Let’s get started by removing 20 tiny 5mm screws using a trusty Phillips #1 Screwdriver. If you need help, you can always schedule a repair
Tools Used

Step 10


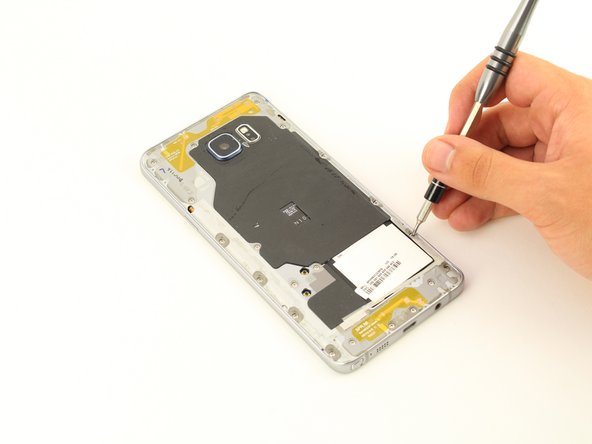
– Grab the back of your device and give that white square a good press. That’ll pop the middle housing right off. Easy peasy!
Step 11

– Gently loosen those two signal cable connectors and give your device a little breathing room!
Step 12
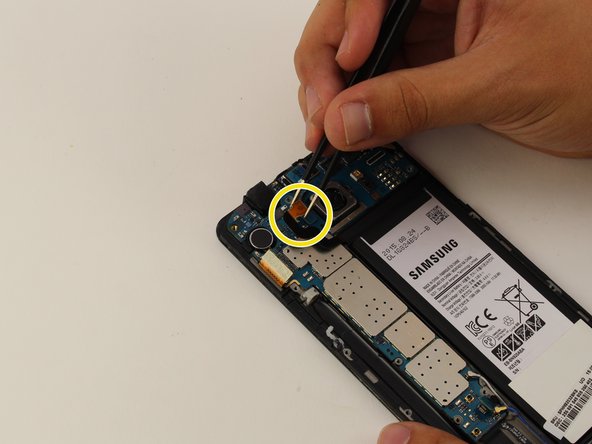


– Gently lift the exposed tab with your tweezers to disconnect those flexes like a pro.
– Time to say goodbye to the battery flex – disconnect it with care!
– Next up, let’s disconnect that earpiece flex – you’re doing great!
– And lastly, give that battery flex one more gentle disconnect. Almost there!
Tools Used

Step 13

– Time to say goodbye to the teal navigation button flex! Just gently remove it and keep moving forward.
Step 14
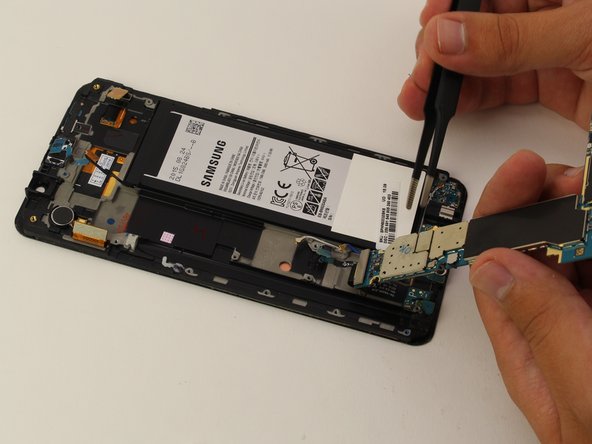
Before you embark on your motherboard removal journey, make sure to disconnect all those sneaky flexes! If the motherboard is being a bit stubborn, don’t hesitate to pull off any attached flexes.
– Now, gently lift the motherboard from the top end. Let’s get this party started!
Step 15

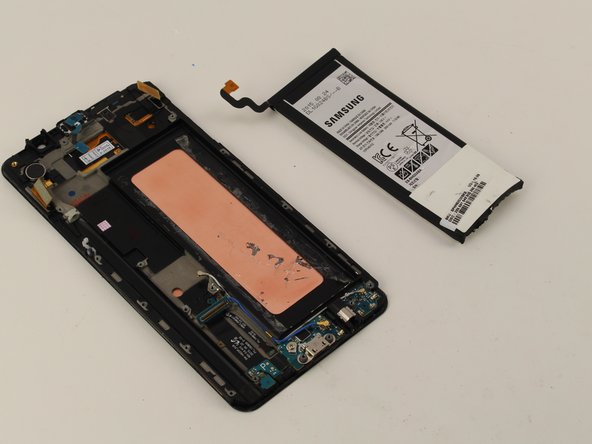
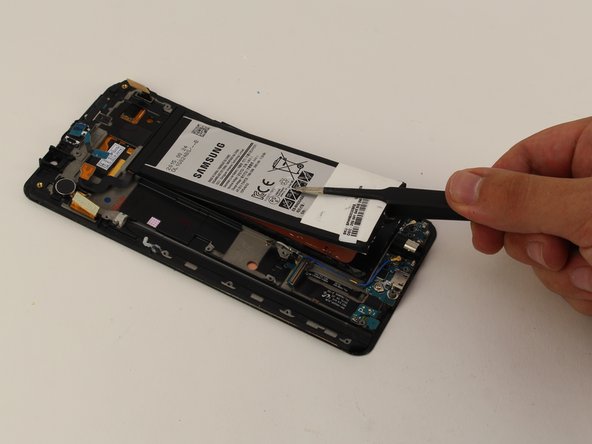
Watch out for that battery! Puncturing it could lead to some serious issues. Let’s keep everything intact and happy!
– Now that the motherboard is out of the way, gently use your trusty tweezers to lift the battery off, starting from the bottom. Take it slow and steady— you’ve got this!
Tools Used

Step 17

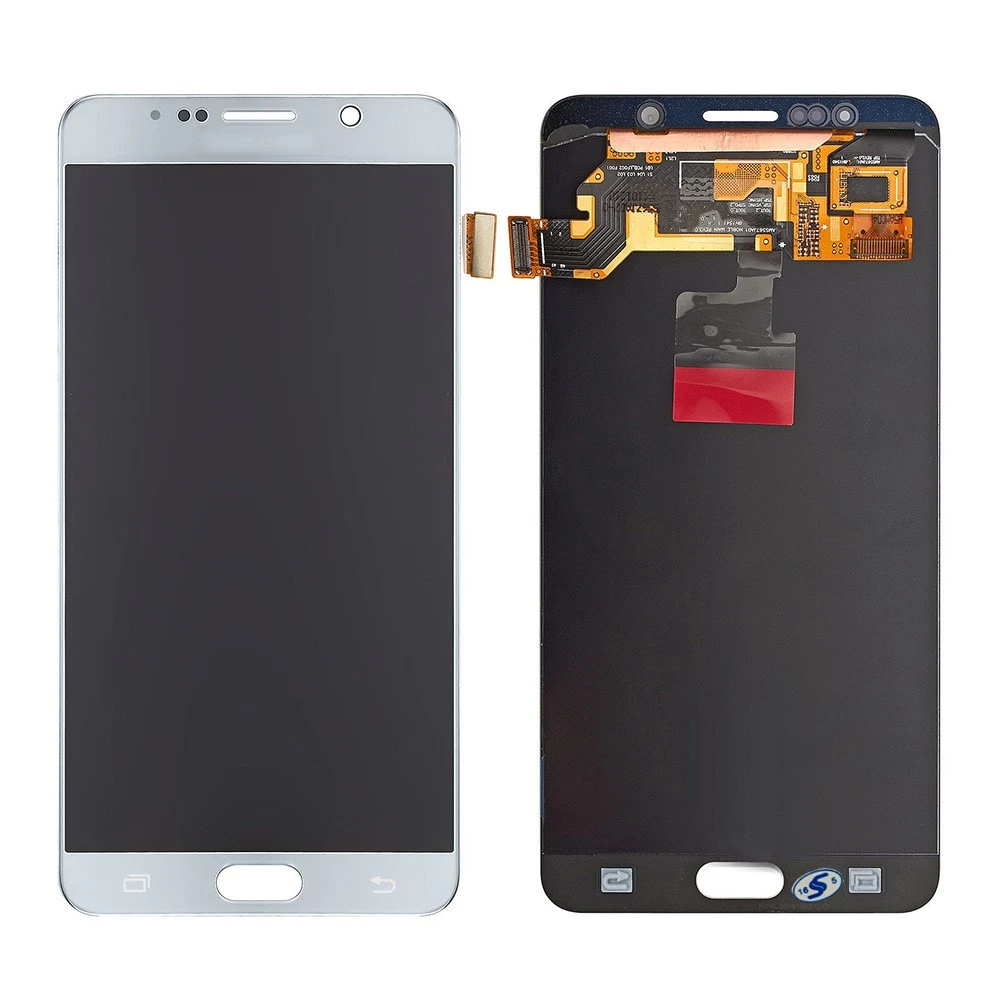
– Once the display is toasty warm, gently slide a pick between the LCD and the LCD shield on the bottom edge of the device. No need to be a hero, just a little nudge to get things moving.
– Slide the pick across the bottom to carefully cut through the adhesive. You got this! Just remember to be gentle and you’ll be golden.
Step 18

– You’ve successfully removed the display. Now you’re one step closer to getting your device up and running again. If you need help, you can always schedule a repair