Samsung Galaxy S23+ Earpiece Speaker Replacement Guide
Duration: 45 minutes
Steps: 24 Steps
Ready to swap out the earpiece speaker on your Samsung Galaxy S23+? Let’s get it done! Just a heads up: keeping your phone’s water resistance intact after the repair depends on how well you reseal the back cover. Your device will lose its IP rating, though, so no swimming with it right after. If you need help, you can always schedule a repair.
Step 1


Let’s get that battery power low! Go ahead and drain it down below 25%. A charged battery can be a little feisty, so it’s safer this way. And hey, if your battery is looking a little puffy, take it easy and schedule a repair.
– First, let’s get started by unplugging any cables from your phone – we want to make sure it’s safe to work on.
– Now, press and hold the side key and the volume down button, then select ‘Power off’ to shut down your phone. If you need help, you can always schedule a repair
Step 2

If you’re feeling brave, you can try using a hairdryer, heat gun, or hot plate to warm things up. Just be super careful not to cook the phone – the display and battery don’t like getting too toasty. If you’re not sure what you’re doing, you can always schedule a repair.
– Alright, let’s warm up that back cover! Grab your iOpener and give it a good heat for a couple minutes. Then, apply the warm iOpener to the right edge of the back cover. This will help loosen the adhesive and make it easier to get started. If you need help, you can always schedule a repair.
Tools Used


Step 3


Having a hard time getting that gap started? No worries! Just add a bit more heat to loosen up that stubborn adhesive. Remember to follow the iOpener instructions closely so you don’t accidentally overdo it.
– Alright, let’s get this party started! First, find a cozy spot for our trusty suction handle right in the middle of that delectable right edge. Give it a good tug with some serious smarts to create a little hungry gap between our pals, the cover and the frame. Now’s your chance to slide in that incredible opening pick and let the fun begin!
Tools Used


Step 5

– Let’s get this repair started. Apply some heat to the bottom edge of the back cover using a heated iOpener for about two minutes. If you need help, you can always schedule a repair
Tools Used
Step 6
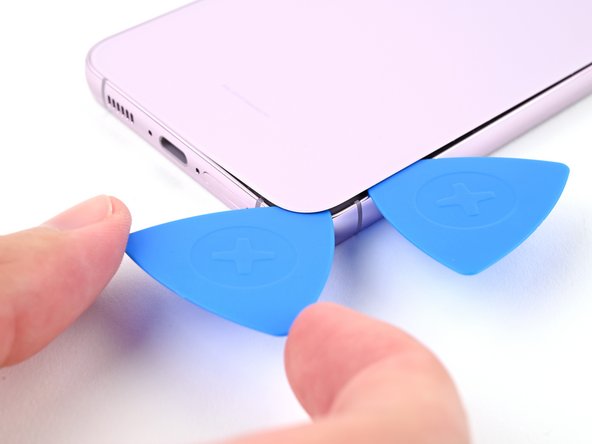

– Let’s slide a second pick into the bottom right corner, like you’re giving that corner a little nudge.
– Now, give that pick a spin around the bottom right corner, separating the adhesive like you’re opening a treasure chest.
Step 7


– Glide the opening pick to the bottom left corner to loosen that sticky adhesive.
– Keep the pick in the bottom left corner to stop the adhesive from sticking back together.
Step 8

– Time to get this repair started. Apply a heated iOpener to the left edge of the back cover for about two minutes. If you need help, you can always schedule a repair
Tools Used
Step 9


– Now, let’s get that bottom left corner separated! Gently wiggle the opening pick around that corner to loosen up the adhesive. Don’t worry, we’ll be careful. If you need help, you can always schedule a repair
Step 10


– Now it’s time to add a third opening pick – slide it into the bottom left corner and get ready to make some progress.
– Gently push your pick upwards toward the top left corner. This will help loosen the adhesive and get you closer to fixing your device.
– Leave that pick right where it is, in the top left corner, to keep the adhesive from sticking back together. You’re doing great, and if you need help, you can always schedule a repair
Step 11

– Get your iOpener nice and toasty. Hold it against the top edge of the back cover for a couple of minutes. Let’s get this party started!
Tools Used
Step 12


– Slide in a fourth opening pick at the top left corner. You’ve got this!
– Twist it around that corner to break free the adhesive. Go for it!


Step 14


Hey there, champ! Let’s keep those cameras happy. Don’t go poking around with your tool near the lenses. We don’t want to turn your device into a blurry mess. If you need help, you can always schedule a repair.
There’s a little patch of adhesive hanging out right under the flash, just waiting for your attention.
You should spot the opening pick peeking through the flash cutout like it’s ready for its big moment!
– Let’s get started by lining up the tip of an opening pick with the flash cutout – it’s the perfect spot to begin.
– Now, gently slide the opening pick under the top of the back cover until you feel it catch on the adhesive. Don’t worry, it’s supposed to do that!
– Keep sliding the pick toward the bottom of the phone, and you’ll know you’re doing it right when the adhesive starts to release from the back cover. You’re making great progress! If you need help, you can always schedule a repair
Step 15


If your cover is still stuck to the frame, don’t worry – just grab an opening pick and gently slide it around the edges until the cover comes off completely. If you need help, you can always schedule a repair
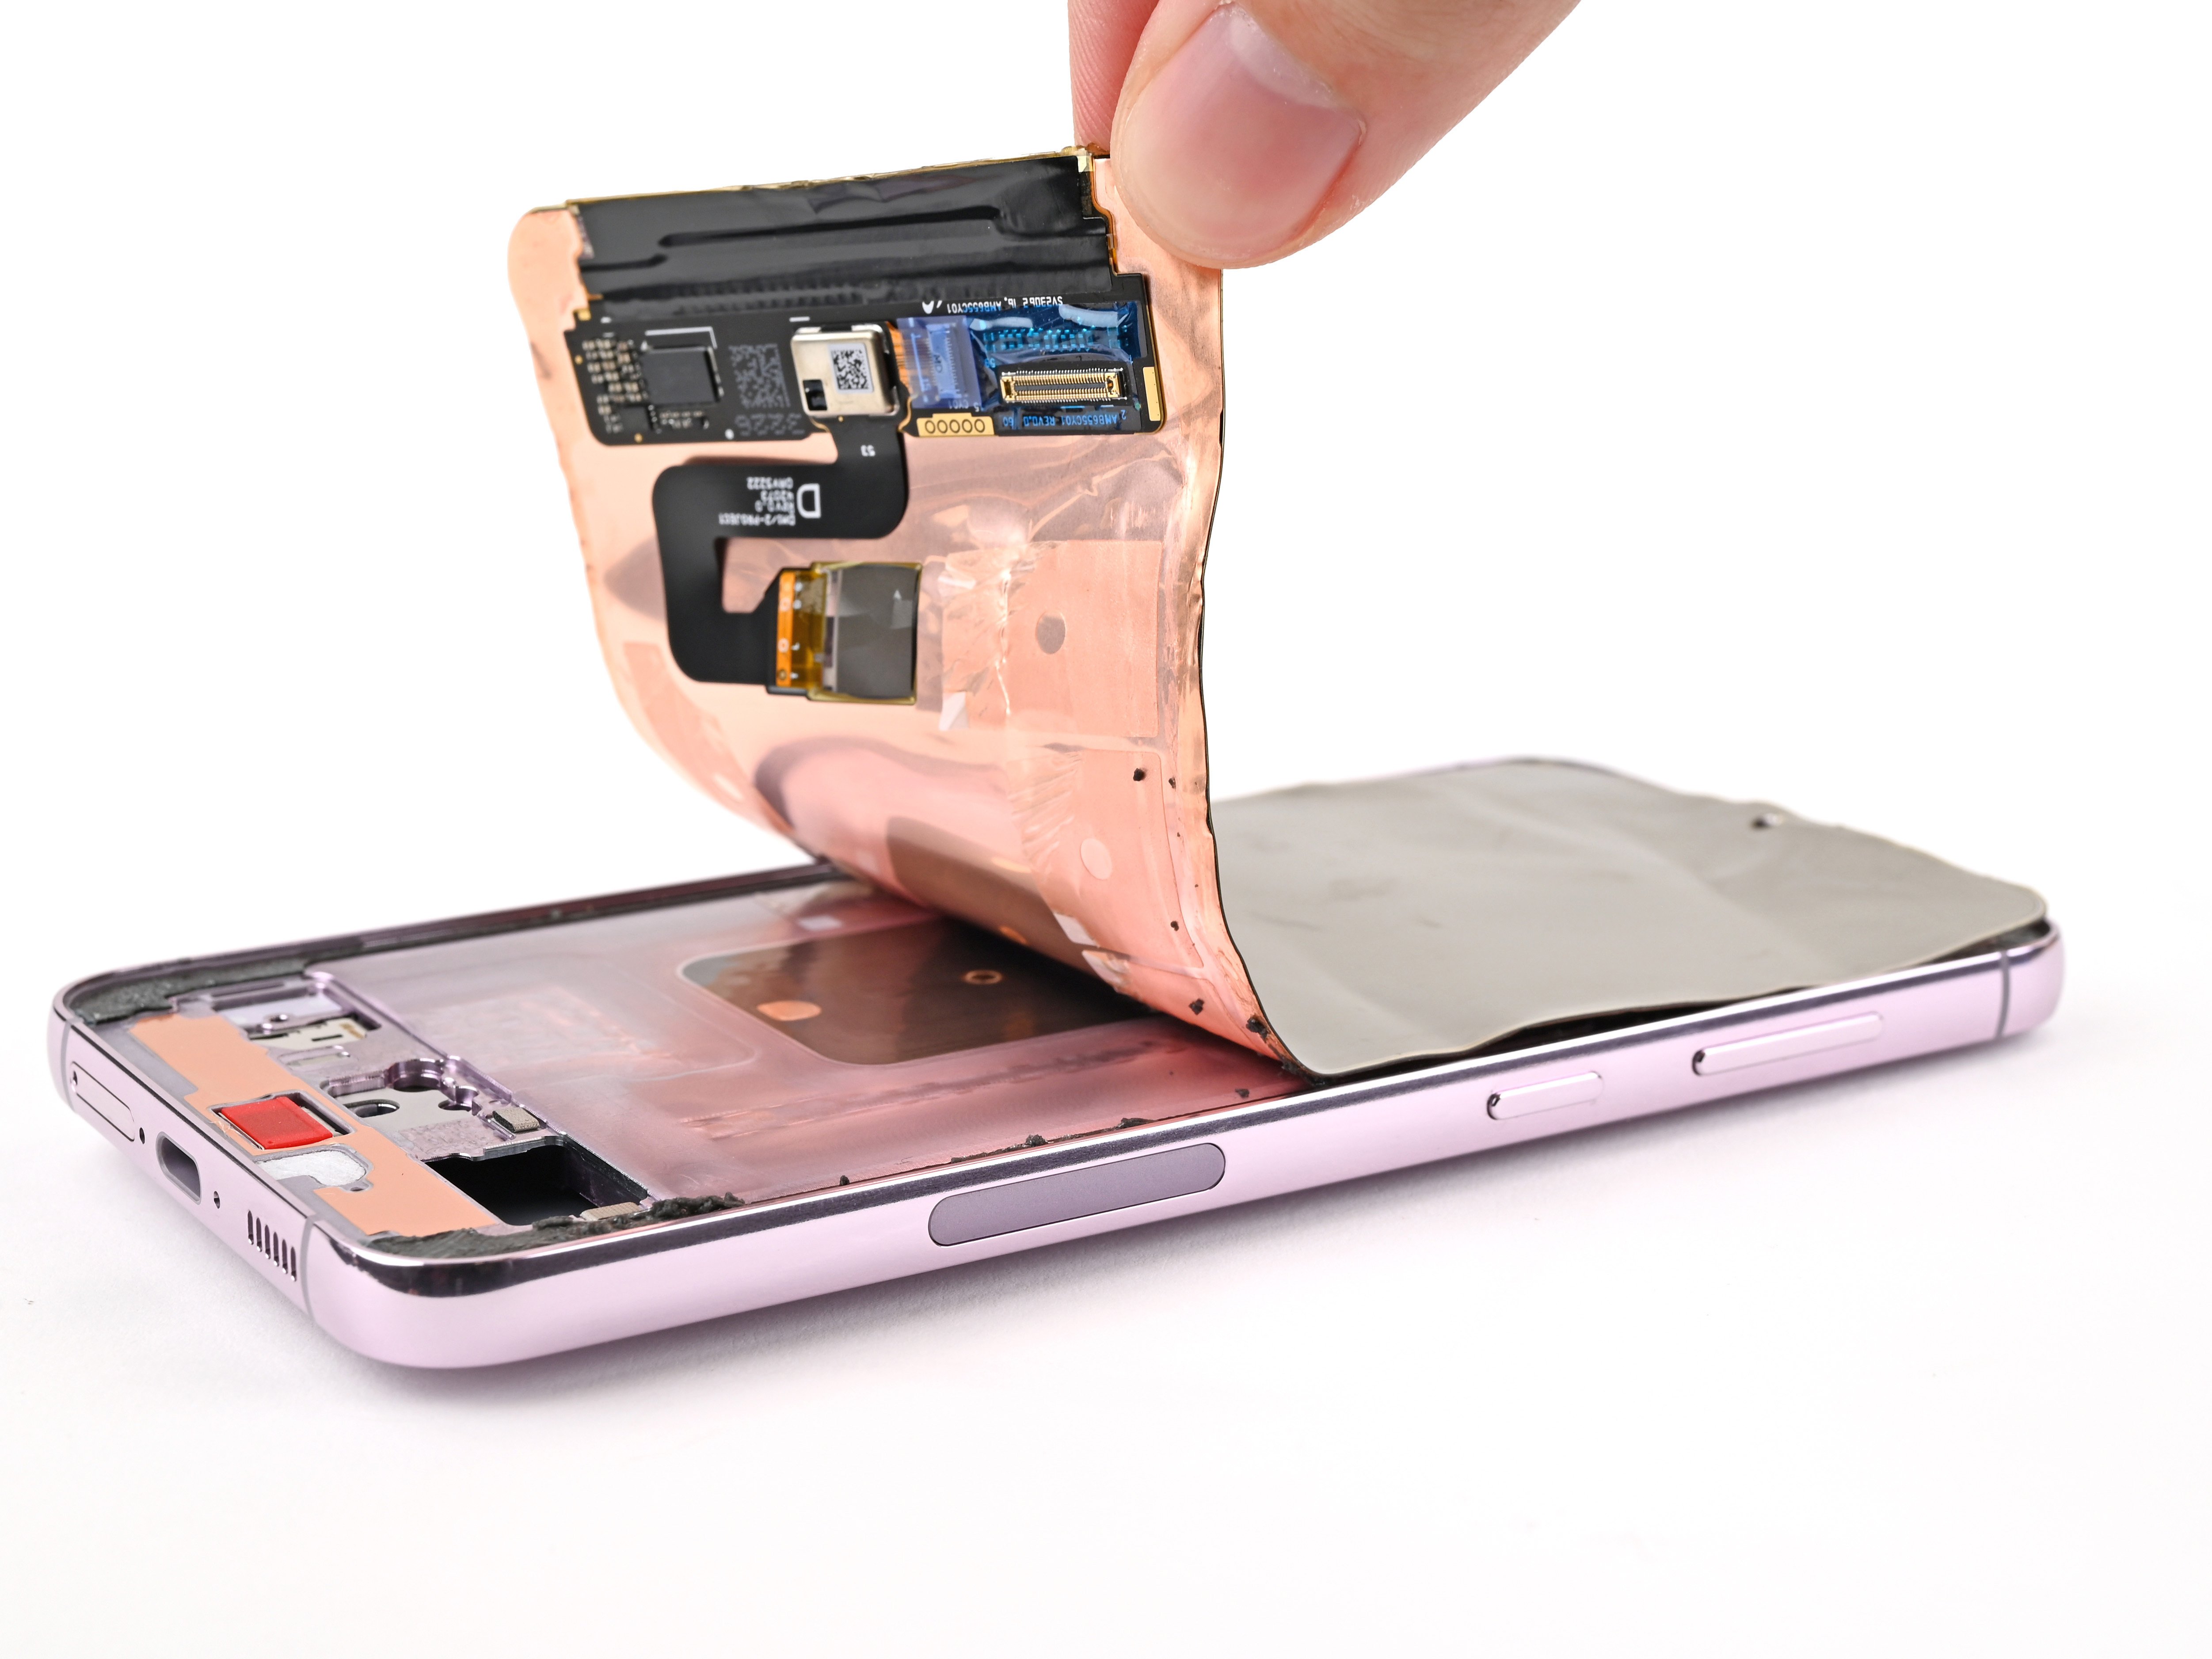
– Kick off by taking off the back cover. You’ve got this!
– When you’re putting everything back together:
– This is the perfect moment to fire up your phone and check that everything’s working like a charm before you seal it up. Just remember to power it down completely before diving back into the repairs.
– If you’re dealing with any stubborn adhesive bits, grab some tweezers or use your fingers to gently pull them away. A little heat and some 90% or stronger isopropyl alcohol can work wonders if things get tricky.
– Using custom-cut adhesives? Just follow the guide provided.
– Got double-sided tape in hand? No worries, just check out the guide for that too.
Tools Used


Step 16


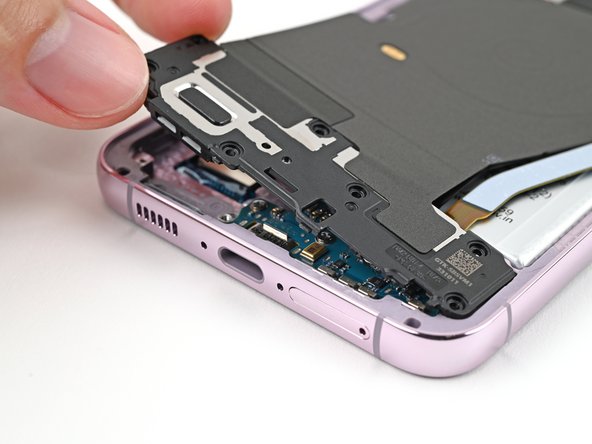
– Grab your trusty spudger and gently pry up that wireless charging coil connector from the motherboard. It’s like giving it a little lift-off!
– When you’re ready to get those press connectors back in action, just align them carefully and give one side a gentle press until you hear that satisfying click. Then, do the same on the other side—easy peasy! Remember, avoid pressing down on the middle to keep those pins safe and sound. If things seem a bit off, don’t worry; just straighten it out to prevent any bending that could cause trouble down the line.
Tools Used


Step 18


– Grab your trusty Phillips screwdriver and get ready to remove thirteen 3.5mm-long screws. These little guys are holding down the wireless charging coil and the loudspeaker. Six screws are holding the charging coil in place, and the other seven are keeping the loudspeaker happy.


Step 20

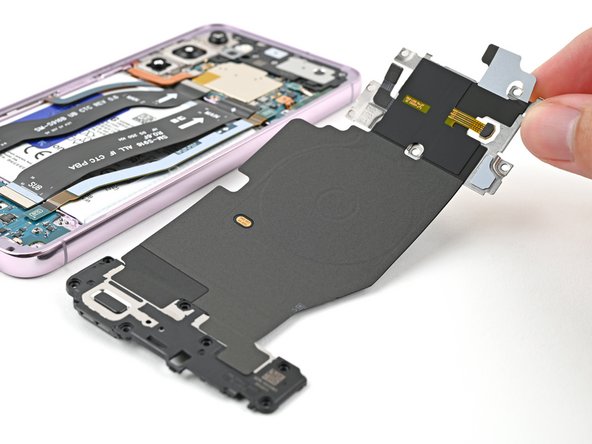
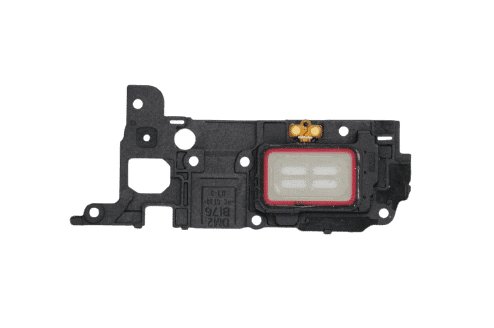
– Gently pry the loudspeaker away from the frame with your fingers to completely detach it.
– Next, remove the wireless charging coil and loudspeaker from the frame – it’s an easy step.
– When putting everything back together, press around the loudspeaker’s edges to securely clip it to the frame. If you need help, you can always schedule a repair


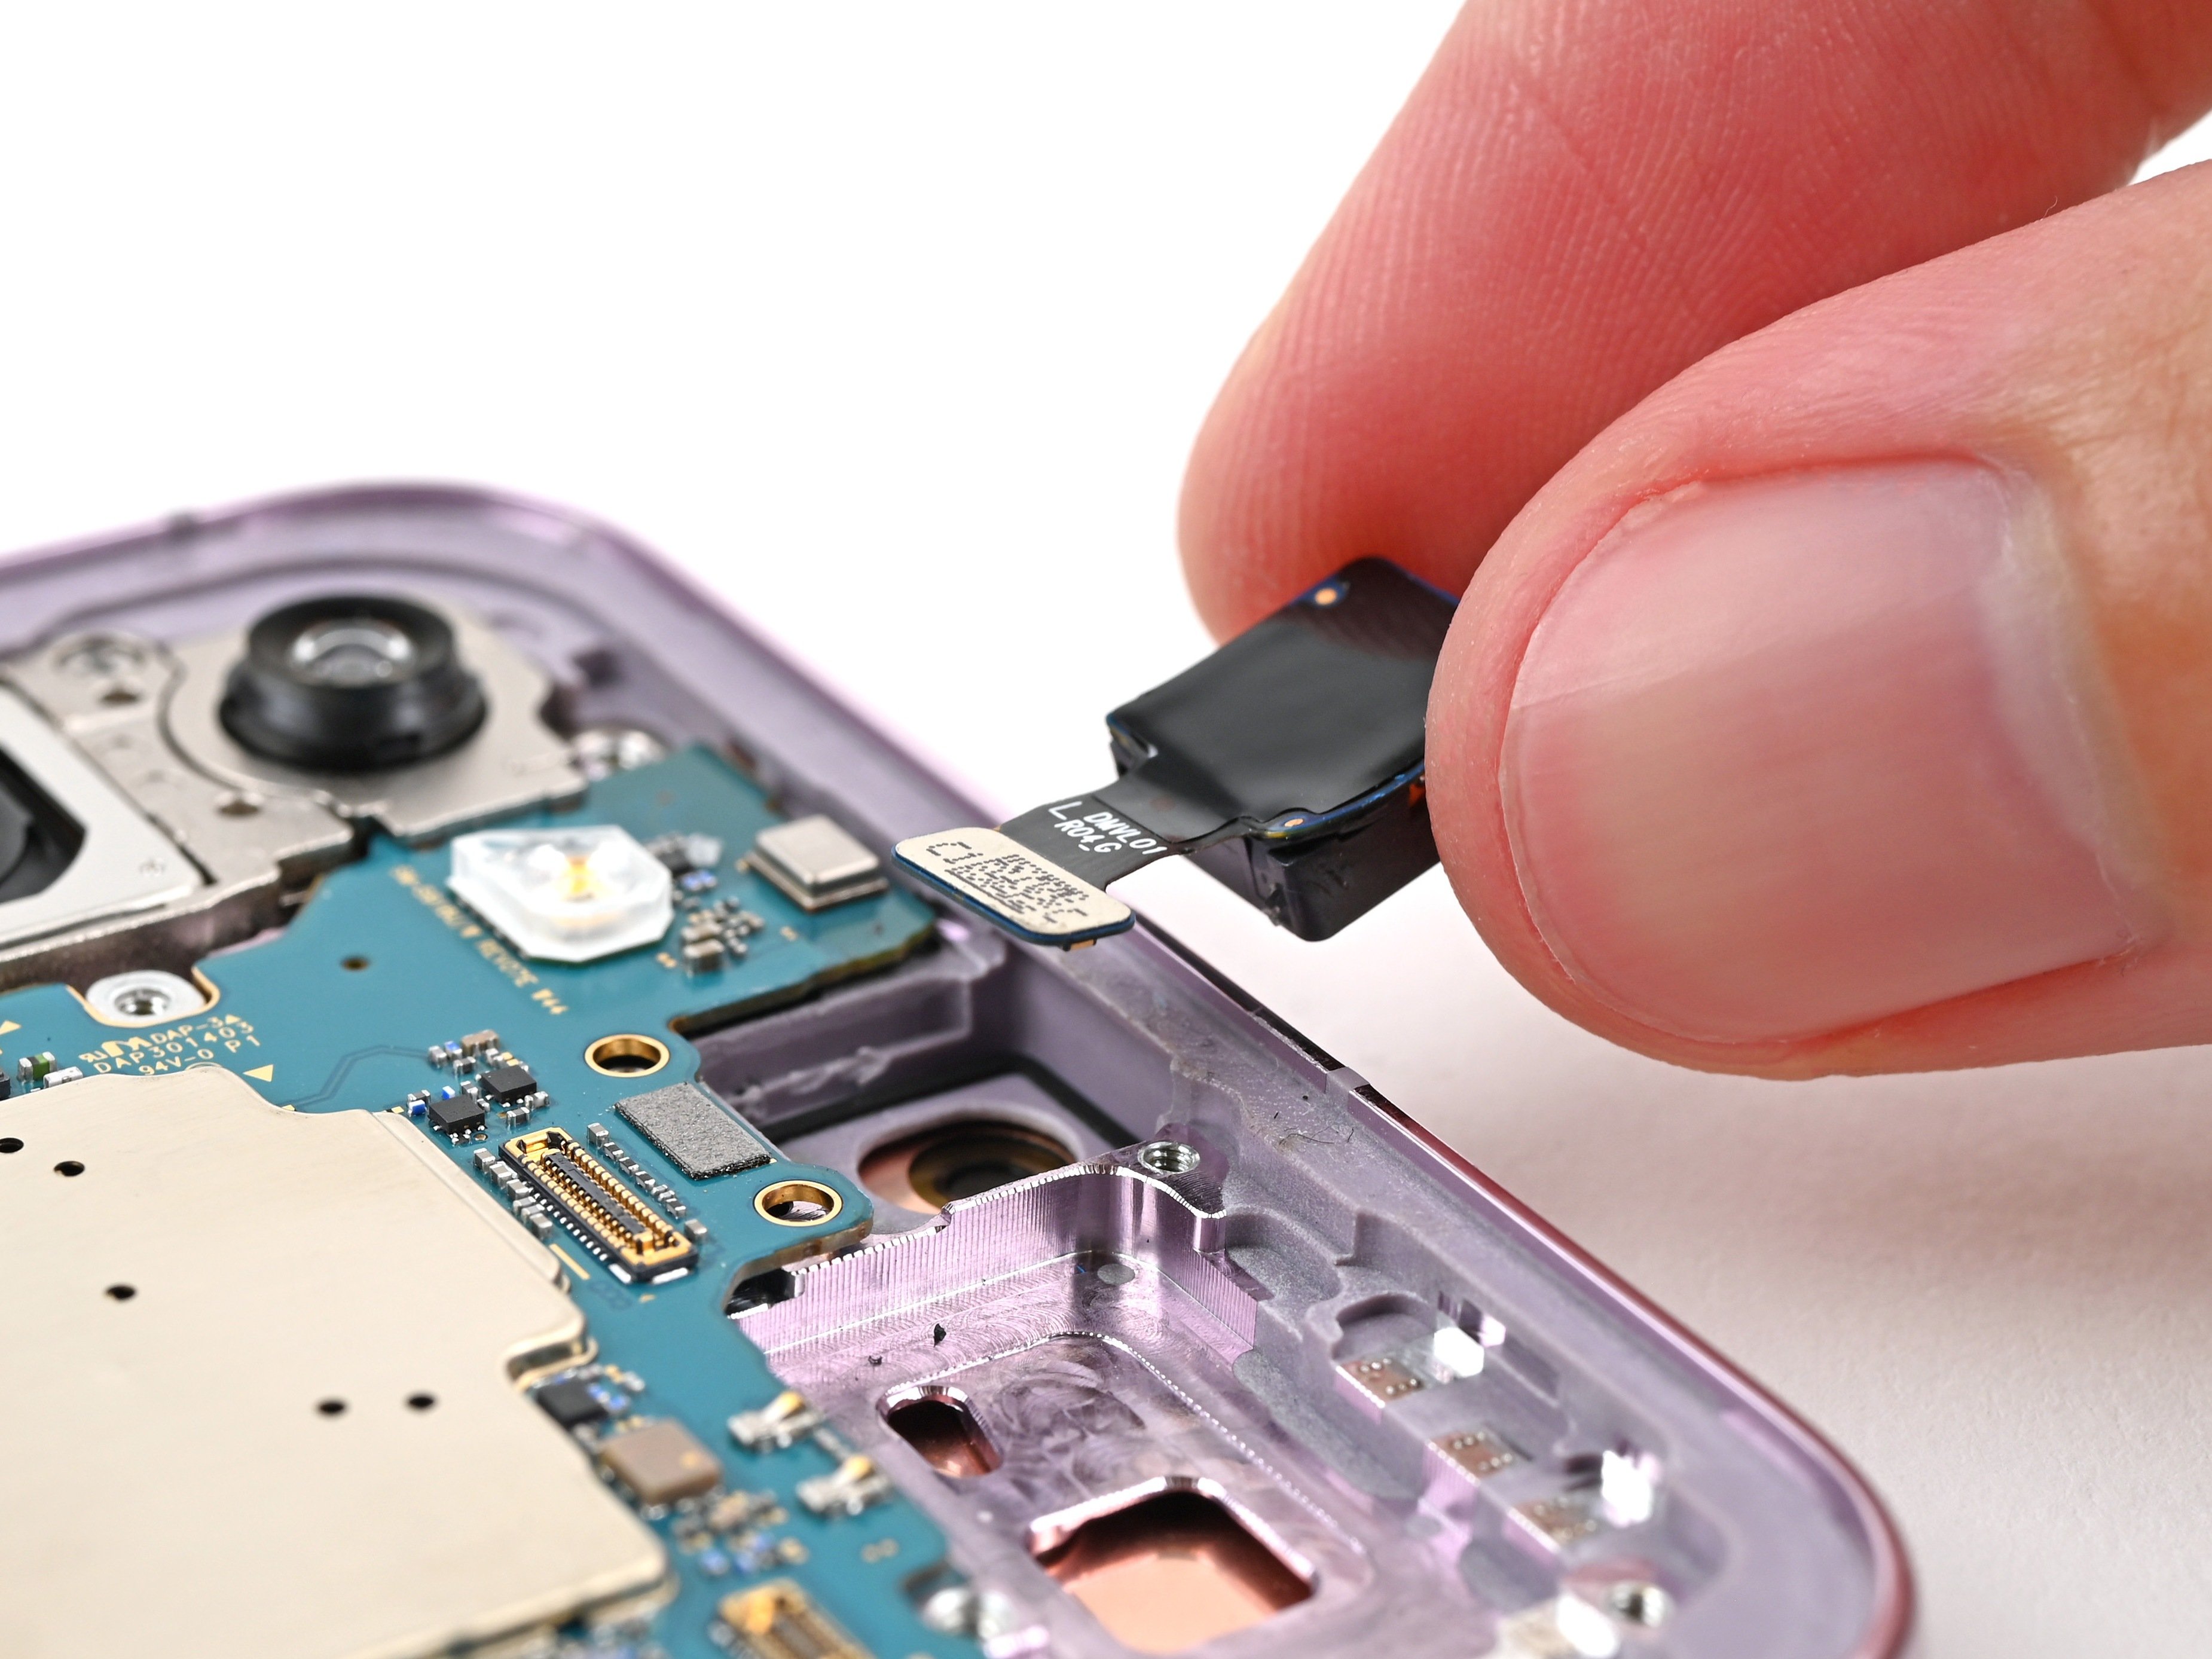
Step 22


– Time to get this earpiece speaker talking again! Gently pry up the connector using the tip of your spudger. Disconnect it – you’re almost there!
Tools Used
Step 23


– Grab your trusty Phillips screwdriver and give those five 3.5 mm screws holding down the earpiece speaker a little love. Unscrew ’em and set them aside for later!
Step 24


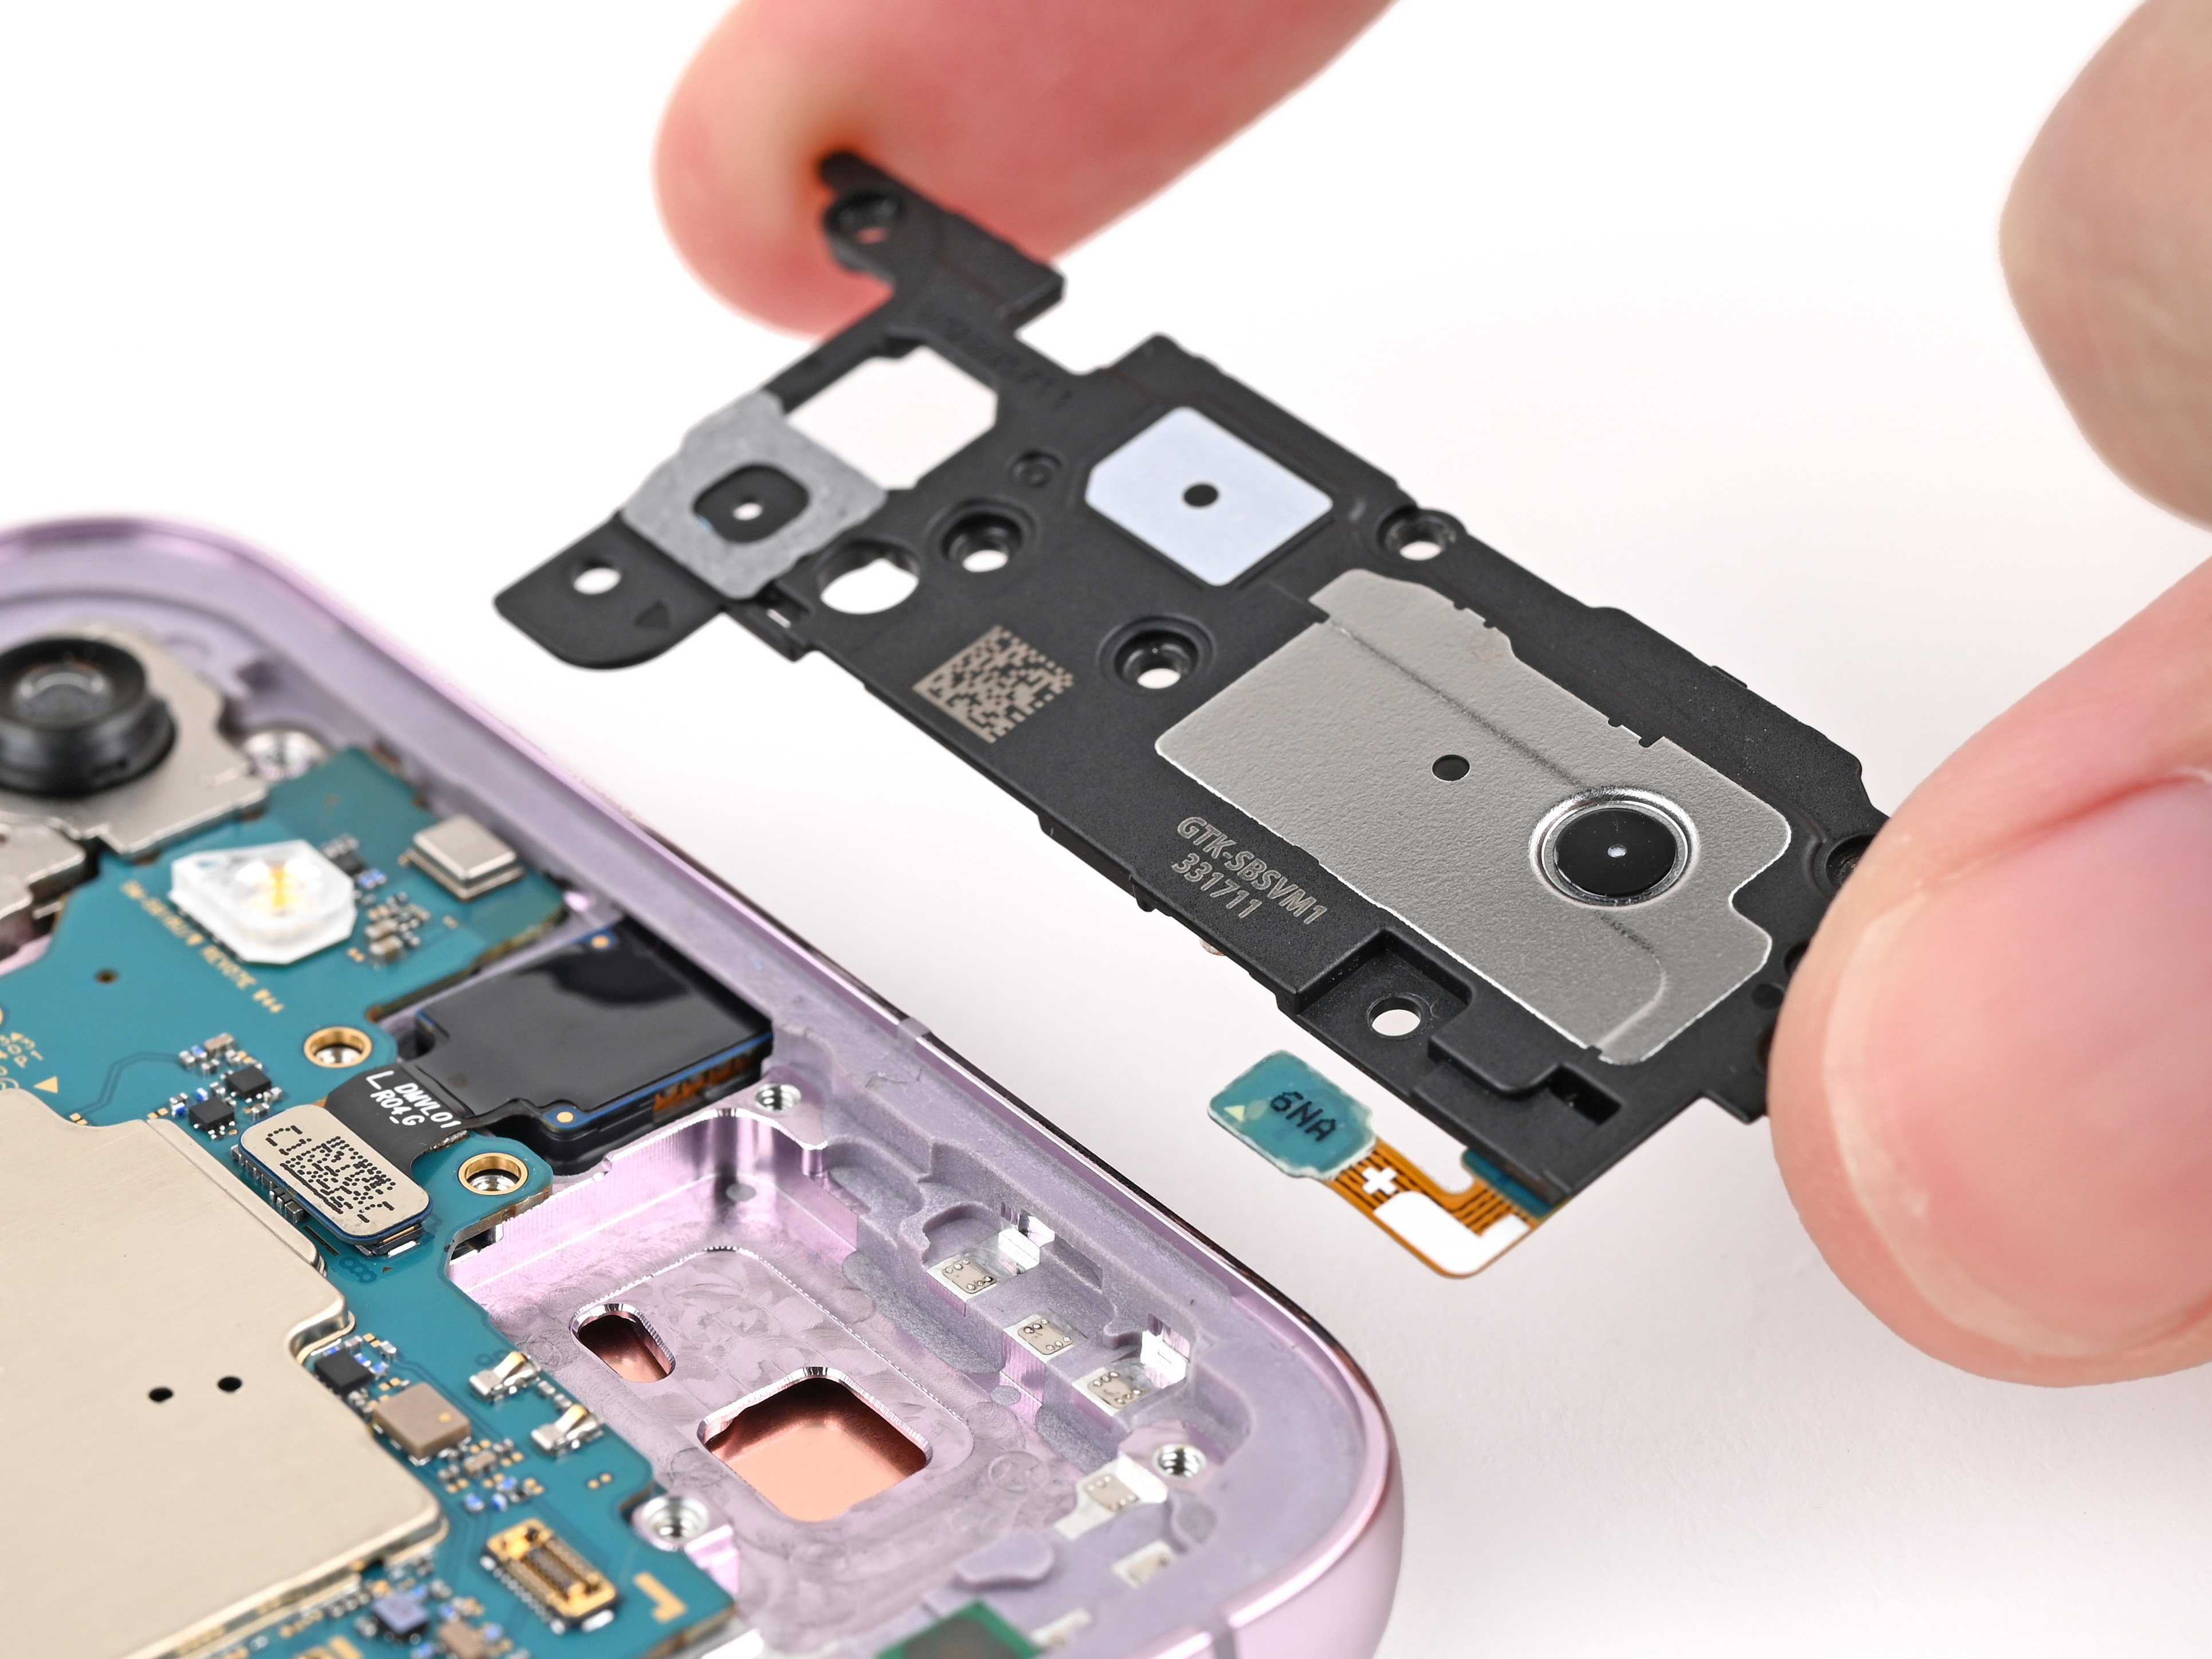
Keep your spudger in the designated spots to avoid sending those delicate surface-mounted components on an unexpected adventure.
– Gently slide the flat end of your spudger between the bottom edge of the earpiece speaker and the shiny shield on the motherboard.
– Give that spudger a little twist to pop the earpiece speaker free from the frame and take it out.
– When it’s time to put everything back together, remember to insert the top end of the earpiece speaker into the frame first, then press down and snap it back into place.
Tools Used