How to Remove SIM from Samsung Galaxy S7: Step-by-Step Guide
Duration: 45 minutes
Steps: 5 Steps
Hey there! We’re here to help you get that SIM card out with ease. This is the way we do it at Salvation Repair, and it’s the best way to keep your device safe and sound. We’re all about keeping your phone, tablet, or laptop in tip-top shape, so don’t worry if this seems a little long – it’s all about doing it right! And if you need any extra help, you can always schedule a repair.
Step 1


– Crank up your hot air gun to the magic number for melting adhesive—around 250 degrees should do the trick!
– Give some love to the four edges of the back glass, warming them up nicely.
– Grab a suction cup and gently pull upwards. This will help the glass start to lift as it warms up.
– Dab a bit of Ethyl Alcohol (99%) along the seam to help loosen that stubborn adhesive.
Step 2


– Once you’ve popped off that back glass, it’s time to tackle those screws on the three housing panels. Let’s get to it!
– After you’ve unscrewed everything, those panels are just hanging on by a thread. A gentle nudge with a spudger or pick will have them off in no time!
– Now, go ahead and remove those three panels to unlock full access to the motherboard. You’re doing great!
Tools Used

Step 3
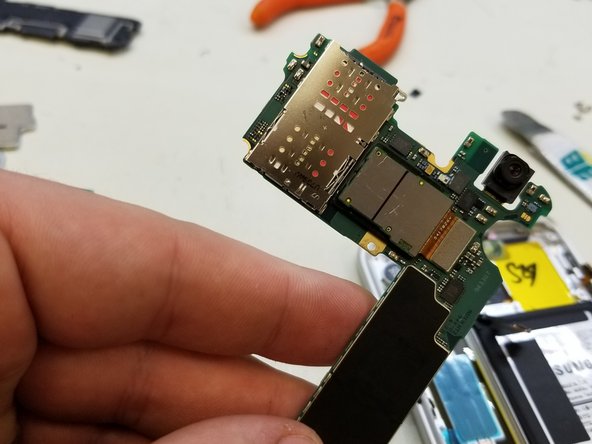
– The SIM tray is hanging out on the other side of the motherboard, waiting for you to check it out!
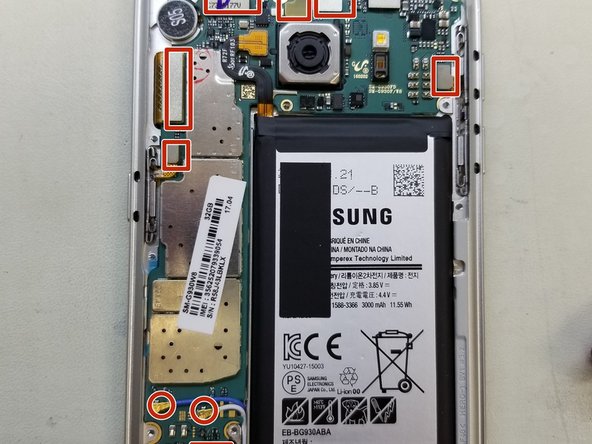
– To get to that sneaky spot, gently lift all the connectors attached to the board, including the Camera, Screen, Power button, Network Coaxials, Fingerprint Sensor, Earspeaker, Prox/Light Sensors, and Volume Buttons.
– When you’re lifting the board, remember to start at the top—after all, the Charge port is hanging out at the bottom. As you carefully lift the board out, make sure to disconnect the Charge flex. You’ve got this!
Step 4
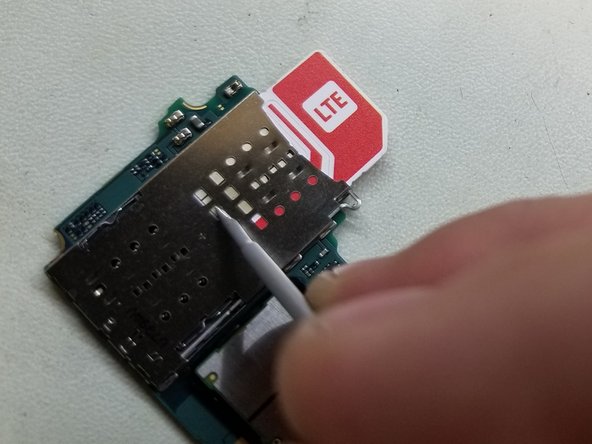

– Grab a small slot screwdriver and gently slide it into the openings of the reader. Take your time and coax that SIM card out like you’re giving it a little nudge!
– Once you’ve got the SIM card out a bit, give it a comfy grip and pull it out of the device with ease. You’ve got this!
– Before diving in with any metal tools on the board, make sure there’s no power running through it. Give each tool a quick de-static treatment and remember to be gentle. We’re all friends here!
Step 5
– Take a step back and retrace your steps to put the device back together. It’s like a fun puzzle!
– Keep an eye out for moments when you might need some fresh adhesive to stick that back housing on nice and snug.


