Samsung Galaxy M51 Back Cover Replacement Guide: Step-by-Step DIY Tutorial
Duration: 45 minutes
Steps: 7 Steps
Ready to give your Galaxy M51 a makeover? Let’s swap out that back cover! You’ll need some fresh adhesive to stick everything back together when you’re done. If you need help, you can always schedule a repair.
Step 1

Before you get started, make sure your phone is completely off – no power whatsoever!
– Get your iOpener ready and give that back cover a nice warm hug for at least two minutes. It’ll make things a little easier for us later.
If you need help, you can always schedule a repair
Tools Used

Step 2


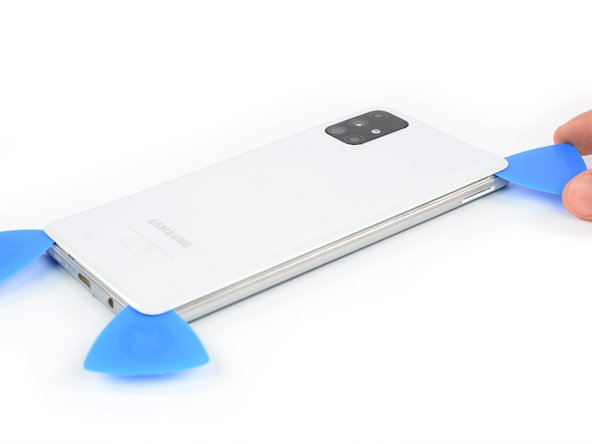
– Get a grip on that back cover by attaching a suction handle as close to the USB-C port as you can – it’s go time.
– Lift the bottom edge of the back cover with your trusty suction handle and create a small gap between the cover and the frame. You’re making progress!
– Now it’s time to bring in the opening pick – insert the tip into the gap you just created and get ready to move on to the next step.
– Slide that opening pick all the way to the bottom left corner and leave it there for now. If you need help, you can always schedule a repair with the pros at Salvation Repair.
Tools Used

Step 3


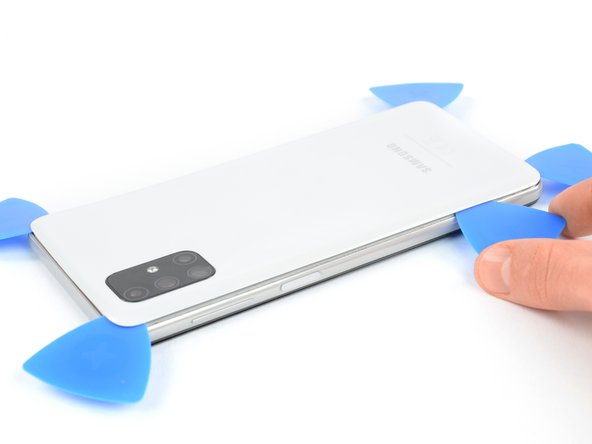
– Now, let’s slip in a second opening pick, like a cool secret agent, and slide it from the bottom left corner all the way to the bottom right. This is going to cut that adhesive right up!
– Leave those opening picks in place, holding the adhesive captive. We don’t want it sneakily re-sealing itself, do we?
Step 4

If you’re having some trouble, don’t worry – just apply a bit more heat to loosen up that adhesive. Be sure to follow the iOpener instructions so you don’t overdo it. And if you need help, you can always schedule a repair
– Slide a third opening pick under the bottom right corner of the back cover like a pro.
– Gently glide it along the right edge of the phone all the way to the top right corner to slice through that adhesive.
– Keep the opening pick in the top right corner to stop the adhesive from sealing back up. You’re doing great!
Tools Used
Step 5


– Now it’s time to add a fourth opening pick – slide it under the top right corner to get started.
– Gently slide the pick along the top edge towards the left corner. This will help cut through the adhesive, making the repair process smoother.
– Leave that pick right where it is – this will prevent the adhesive from resealing, making your job easier. If you need help, you can always schedule a repair
Step 6

– Now it’s time to bring in the fifth opening pick – slide it into the top left corner and gently work it along the edge to cut through the remaining adhesive. If you need help, you can always schedule a repair
Step 7

– Let’s get started by removing the back cover. This is the first step in giving your device a brand new lease on life. If you need help, you can always schedule a repair