Samsung Galaxy J3 Luna Pro Headphone Jack Replacement Guide
Duration: 45 minutes
Steps: 6 Steps
Having trouble getting your earphones or headphones to connect to your phone? It’s possible that the headphone jack is the culprit. Luckily, replacing it is a breeze. Our step-by-step guide will walk you through the process of swapping out the headphone jack on your Samsung Galaxy J3 Luna Pro. If you need help, you can always schedule a repair.
Step 1

– First, power down your phone to avoid any accidental turns-ons.
– Next, carefully remove the back cover and take out the battery to get started on your repair journey. If you need help, you can always schedule a repair
Step 2


Be careful not to detach the screen completely—there are still some sneaky cables hanging on between the two parts!
– Grab your trusty suction cup and gently pull up on the screen like you’re unveiling a surprise. You’ve got this!
– Now, take your plastic opening tool and slide it into the little gap beneath the screen. Just work your way around the edges like you’re tracing a treasure map. Easy peasy!
Step 3

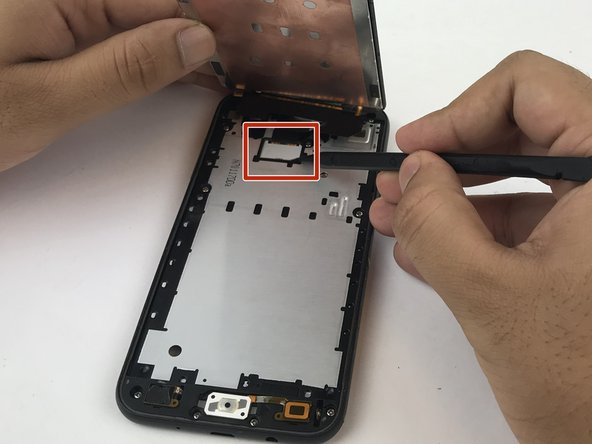

– Use the pointy end of a spudger to gently lift off the white plastic cover from the display cover. Think of it like taking off a hat!
– Now, use the spudger to carefully pry up the display cable from the motherboard. It’s just like unplugging a cord!
– Time to remove the screen. You’re doing great! If you need help, you can always schedule a repair
Tools Used

Step 4


– Alright, let’s get those screws out! Remove the eleven JIS 00 screws that hold the mid-frame in place.
– Now, grab your trusty spudger (it’s like a little plastic friend) and gently pry the mid-frame away from the screen. Take your time and be careful, you don’t want to scratch anything. If you need help, you can always schedule a repair.
Tools Used
Step 5


– Alright, time to get that motherboard out of the mid-frame. It’s like a little dance, just take it slow and steady!
Step 6


– Gently slide the flat end of a spudger under the headphone jack cable connector and pop it out from its cozy home on the motherboard. You’ve got this!
Tools Used
