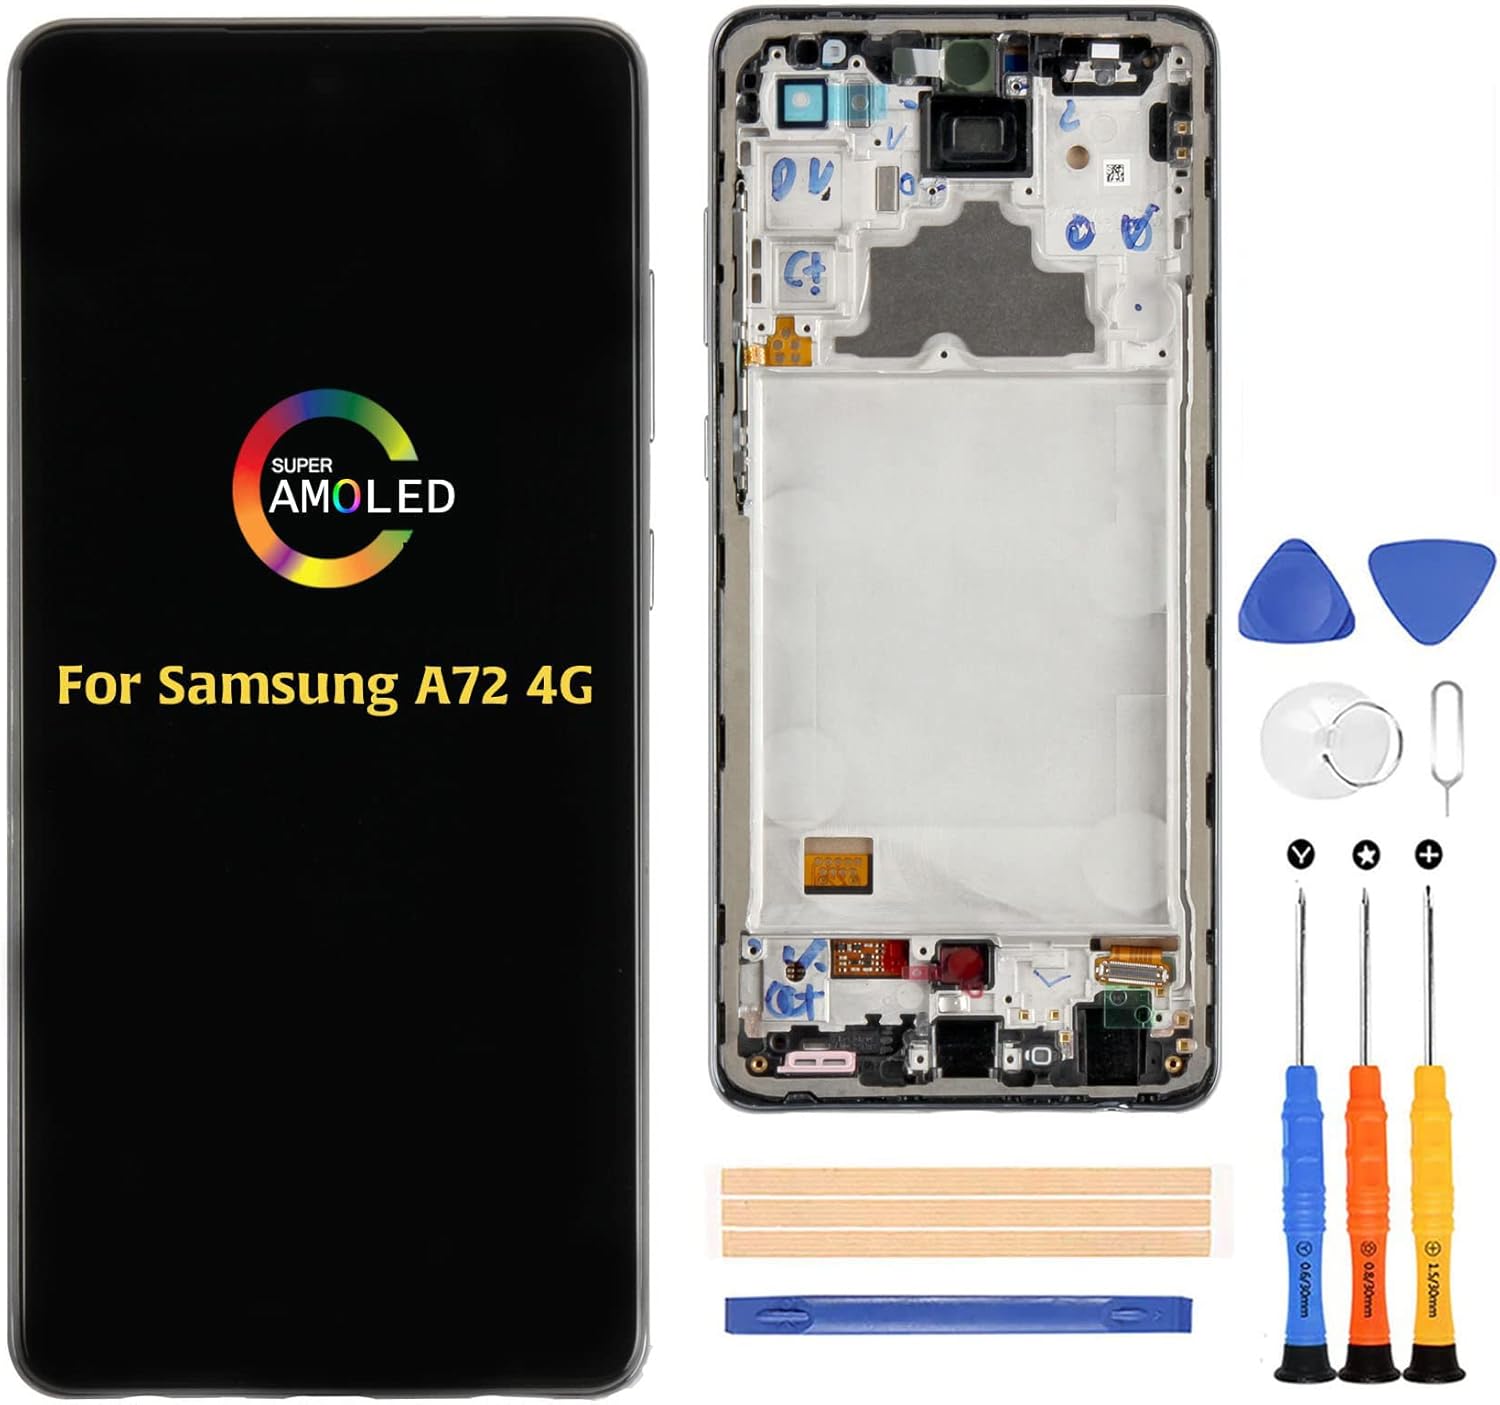
DIY Samsung Galaxy A72 Battery Replacement Guide
Duration: 45 minutes
Steps: 20 Steps
To keep things safe and sound, make sure to drain your battery below 25% before diving into your phone’s guts.
Get ready to breathe new life into your Samsung Galaxy A72 by replacing that worn-out or dead battery. Before you start, make sure to discharge the battery to below 25% to minimize the risk of fire if it’s accidentally damaged during the repair. If your battery is swollen, take the necessary precautions to avoid any accidents. The good news is that you can remove the battery without taking out the loudspeaker assembly and interconnect cable, but be careful not to damage the cable – it’s a bit of a tight squeeze. Removing the cable will make the process way easier, though. Also, keep in mind that if you don’t replace the adhesive seals when you’re putting everything back together, your device will still work just fine, but it might lose its water protection. Don’t worry if you’re not feeling confident – if you need help, you can always schedule a repair. Just remember to pick up some replacement adhesive to reattach components when you’re reassembling your device.
Step 1

Feel free to use a hair dryer, heat gun, or hot plate to gently warm things up, but keep an eye on the temperature! Overheating can be a real bummer for your phone’s display and internal battery, so let’s avoid that heat damage. Remember, if you need help, you can always schedule a repair.
– Grab your trusty iOpener and pop it on the back cover for a solid two minutes. This will help loosen up that stubborn adhesive waiting beneath. You got this!


Step 2


Don’t worry if your back cover is cracked – it happens! The suction handle might not stick as well, but don’t give up! Try lifting it with some strong tape, or get crafty and superglue the handle in place. Let it dry for a bit and you’re good to go.
If you’re having trouble creating a gap, a little extra heat can help loosen up that sticky adhesive. Just be careful not to overheat things – check out our iOpener instructions to keep things safe and sound.
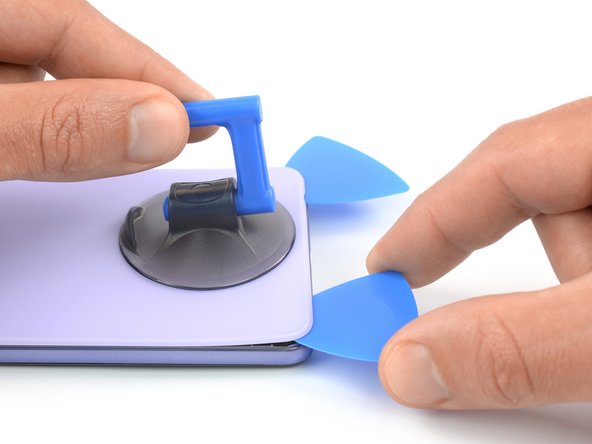
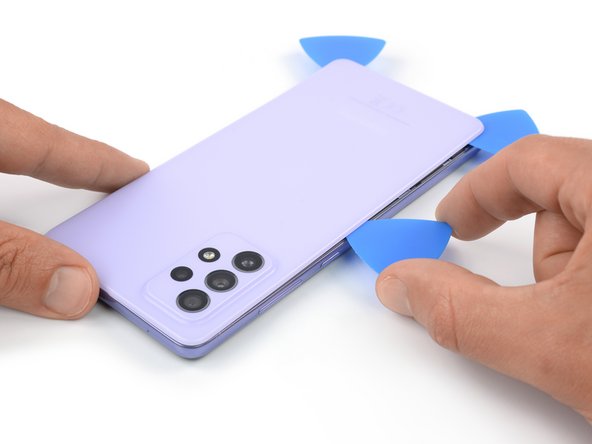
– Grab a suction handle and securely attach it to the bottom edge of the back cover, getting as close to the edge as you can. You’ve got this!
– Gently lift the back cover using the suction handle to create a little opening between the back cover and the frame.
– Slide an opening pick into that gap you just opened up. It’s like giving your device a little tickle!
– Carefully glide the opening pick over to the bottom right corner to slice through that stubborn adhesive.
– Keep the opening pick in there to stop the adhesive from trying to reseal itself. You’ve got the upper hand now!
Tools Used

Step 3

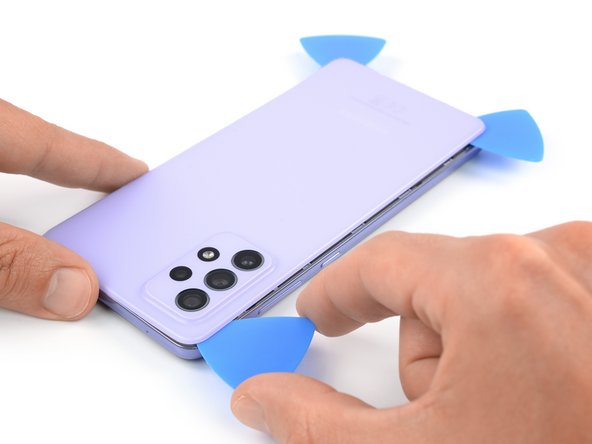
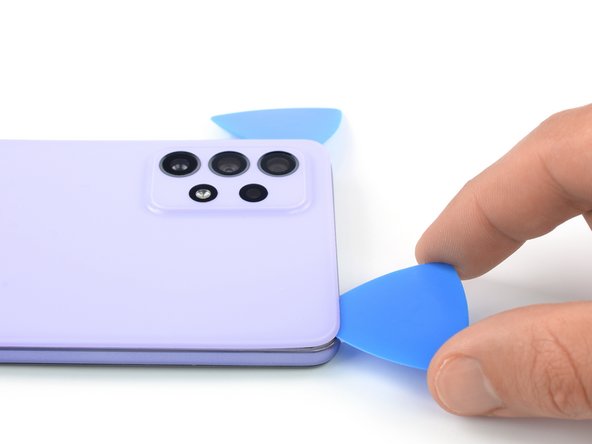
– Pop in a second opening pick at the bottom edge of your phone.
– Gently slide that opening pick over to the bottom left corner to cut through the adhesive like a pro.
– Keep those opening picks right where they are to keep the adhesive from getting cozy again.
Step 4

If the adhesive is putting up a tough fight and feels like it’s turning into a rock, it’s probably just cooled down. Grab your iOpener and give it a warm-up for one to two minutes to get it back in the game.
– Time to get this repair started – insert a third opening pick at the bottom left corner of your phone, it’s going to help you get inside.
– Now, gently slide the opening pick along the left edge of your phone to carefully slice through the adhesive, you’re making great progress.
– Leave the opening pick in the top left corner, this will prevent the adhesive from resealing and make the rest of the process smoother. If you need help, you can always schedule a repair
Tools Used
Step 5

– Grab a fourth opening pick and slide it under the top left corner of your phone like you’re sneaking a snack.
– Now, give that opening pick a gentle slide along the top edge to cut through the adhesive like a hot knife through butter.
– To keep that adhesive from playing tricks on you, leave the opening pick in the top right corner as a little reminder.
Step 6
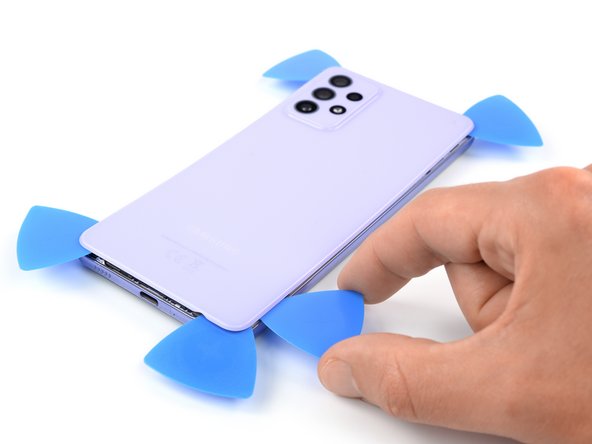

– Now, let’s get that back cover loose! Carefully slip your opening pick under the top right corner.
– Slide the opening pick along the right edge of the back cover. It’s like giving it a little massage, but with a tool. This’ll cut through any remaining adhesive holding it in place.
Step 7
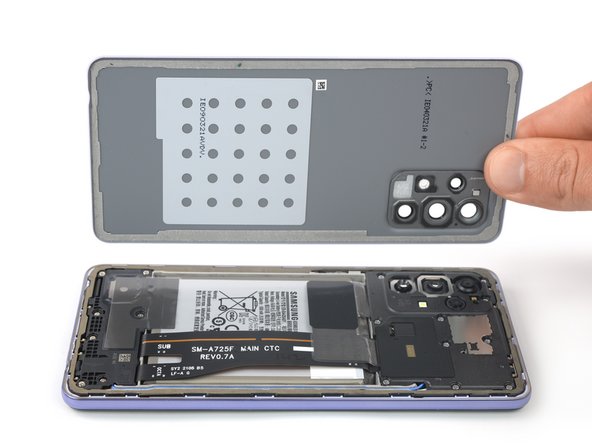

– Let’s start by taking off the back cover—just a little wiggle and it should come right off!
– Next up, grab some isopropyl alcohol (>90%) and give those sticky areas a good clean. Once that’s done, apply fresh adhesive where it’s needed.
– Now, it’s time to secure that new back cover! Use some pre-cut adhesive or double-sided tape to keep it snug. After you’ve got it in place, press down firmly for a few minutes. A stack of heavy books can help make sure everything sticks just right!
Step 8

– Let’s get started by removing the ten 4.5 mm-long screws that hold the motherboard cover in place – just grab your trusty Phillips screwdriver and you’re all set. If you need help, you can always schedule a repair
Step 9


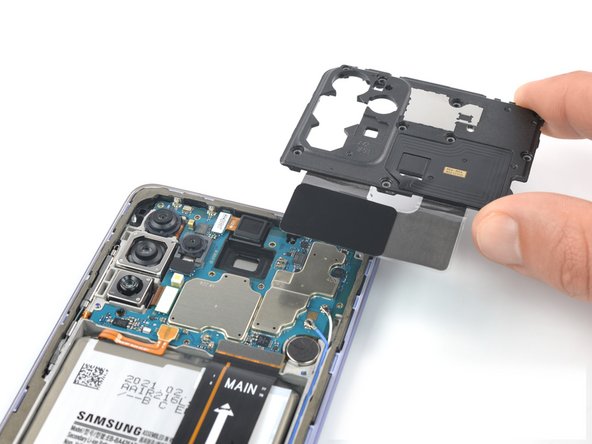
– Gently slide the pointed end of your trusty spudger under the right edge of the motherboard cover. You’ve got this!
– With a little finesse, use your spudger to lift the motherboard cover by tilting it downwards. It’s all about that smooth motion!
Tools Used


Step 12

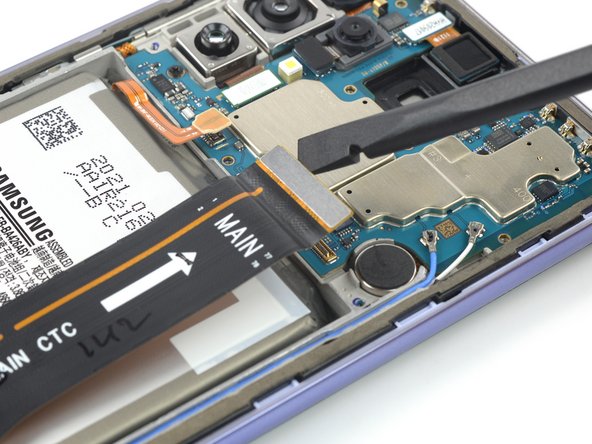
– Time to get disconnected – use a spudger to carefully pry the interconnect cable’s connector straight up from its socket. If you need help, you can always schedule a repair
Tools Used
Step 13

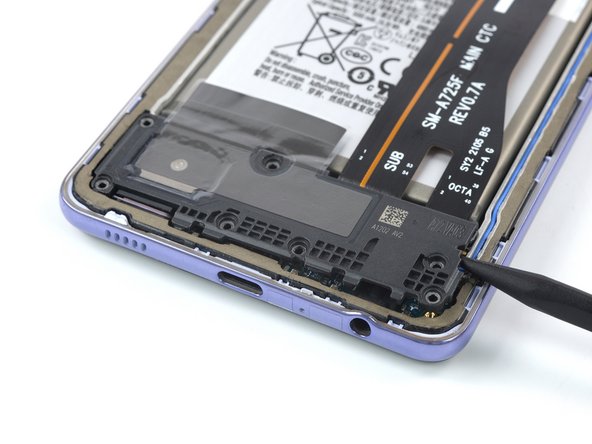
– Let’s get started by removing the seven 4.5mm-long screws that hold the loudspeaker assembly in place – just grab your trusty Phillips screwdriver and you’re all set. If you need help, you can always schedule a repair

Step 15
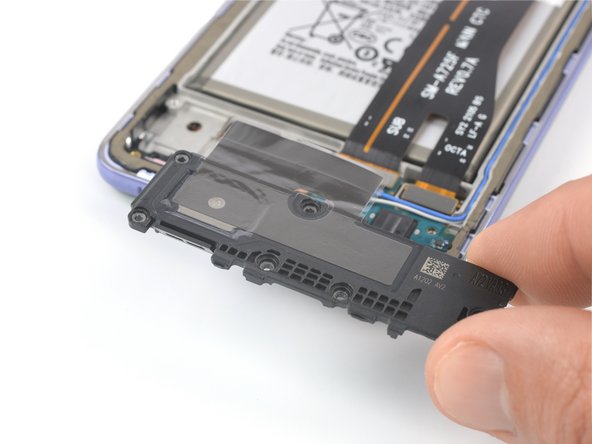

– Take out the loudspeaker assembly – it’s time to say goodbye to that old part.
– When you’re putting everything back together, don’t forget to add some fresh adhesive where it’s needed, and give the relevant areas a good clean with isopropyl alcohol (>90%). If you need help, you can always schedule a repair
Step 16
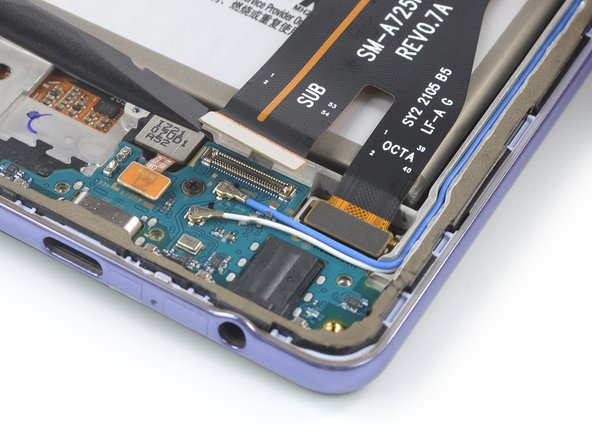


– Now, take that spudger and give those interconnect cable connectors a gentle nudge upwards. We’re talking a friendly pry, not a full-on wrestling match. Just lift them straight up out of their sockets. You got this!
Tools Used
Step 17
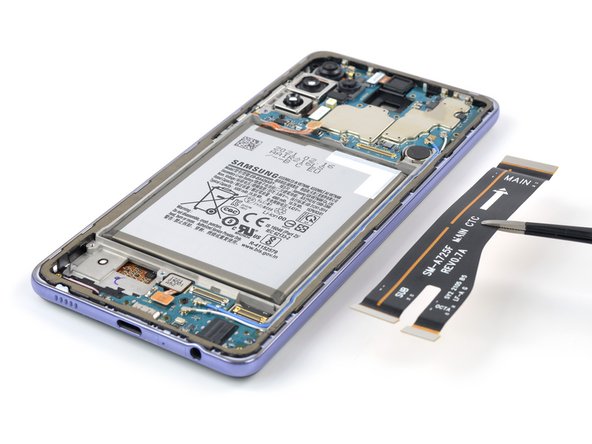

– Grab a trusty pair of tweezers or just your fingers, and gently lift out that interconnect cable. You’ve got this!
Step 18

Keep the heat away from the battery! Applying heat directly can lead to some serious safety concerns, and we definitely want to avoid that. Let’s keep it safe and sound!
Feel free to whip out a hair dryer, heat gun, or hot plate—just remember to keep the heat in check so we don’t fry your device!
Step 19


Handle the battery with care—no poking or bending allowed! A battery that’s been punctured or twisted might spill some hazardous stuff or even start a thermal party. If you’re having a hard time getting the battery out, don’t hesitate to add a little more isopropyl alcohol and give it another go.
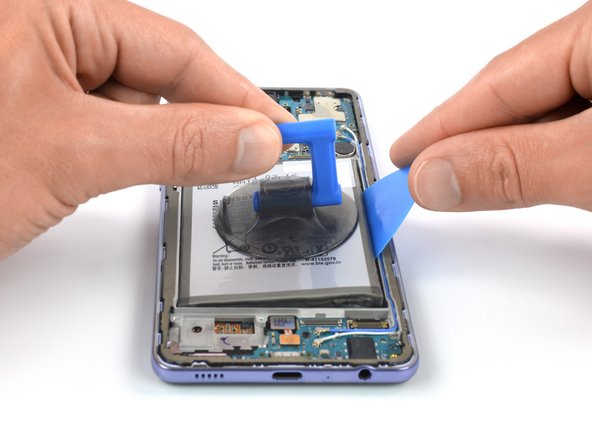
Alright, let’s get that opening pick in there! Slide it into the edge where there’s a bigger gap between the midframe and the battery. This will give you more room to maneuver and a nifty little boost in leverage.
Having a tough time lifting the battery with your suction handle? No worries! Grab a heavy-duty suction cup and give it another go!
– Stick that suction handle right next to the edge of the battery.
– Slip the long edge of an opening pick into the tiny gap between the battery edge and the frame.
– Pull up on the suction handle while tilting the pick downward to pop the battery out.
Tools Used
Step 20


Avoid reinstalling a battery that looks a bit worse for wear. It’s not just a bad call, it could become a safety issue!
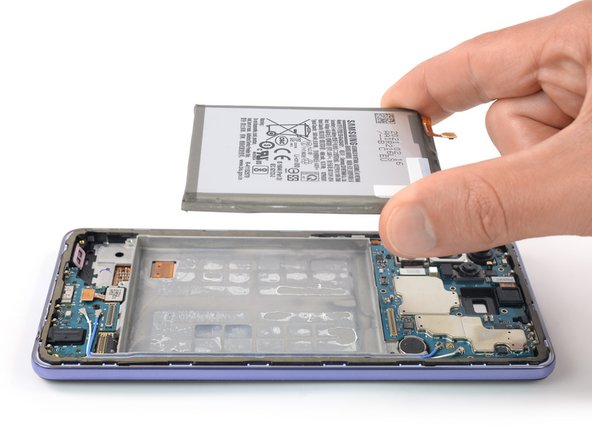
– Gently peel the battery away from the sticky stuff holding it on.
– Say goodbye to the old battery and remove it from the device.
– Time to bring in the new battery! Secure it using some pre-cut adhesive or double-sided tape. Just a friendly tip: stick the new adhesive where the old stuff used to be, not directly on the battery. Then, give that new battery a solid press to make sure it’s snug as a bug!
– As you put everything back together, give the battery a little reconnect to the motherboard for some alignment magic. Once it’s all lined up, feel free to disconnect the battery again after it seats nicely.