
Samsung Galaxy Z Flip Repair: Step-by-Step Guide to Replace Top Glass
Duration: 45 minutes
Steps: 7 Steps
Get ready to bring your Samsung Galaxy Z Flip back to life by fixing that cracked or damaged top glass! Follow this guide and you’ll be on your way to a revitalized device in no time. If you need help, you can always schedule a repair.
Step 2

Watch out while using a heat gun or hairdryer, as you may accidentally harm your device’s battery or screen. If you need help, you can always schedule a repair.
– Grab your trusty iOpener and give it a warm hug on the left edge of the phone for a solid minute. You’re doing great!
Tools Used

Step 3


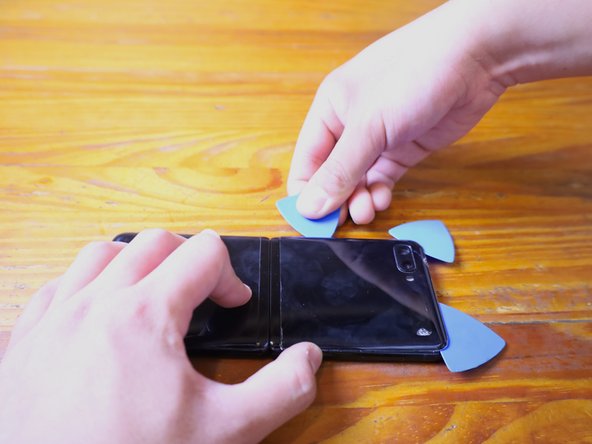
If your glass is looking like a spider web, grab some clear packaging tape to cover those cracks. This little trick will help the suction cup stick like a champ!
– Grab your suction cup and stick it to the glass. It’s like giving the glass a friendly hug!
– Now, gently press down on the metal hinge part. You’re just coaxing the glass apart from the frame – think of it as a dance! Pull up on the glass as you press down, and you’ll start to see a gap appear.
– With a bit of a gap, you can slide in your opening pick. It’s like a tiny door opener for your device. Be gentle, we don’t want to scratch anything! If you need help, you can always schedule a repair
Step 4

Be careful not to insert your pick too far, about a quarter of the way through is the max – you don’t want to risk damaging those internal components. If you need help, you can always schedule a repair
– Now, let’s loosen things up a bit. Slide that pick down towards the corner of your phone and gently slice through that adhesive.
Step 5


– Give each side of the phone some love with those heating instructions again!
– Keep an opening pick in each corner while you gently slice through the adhesive around the phone.
Step 6

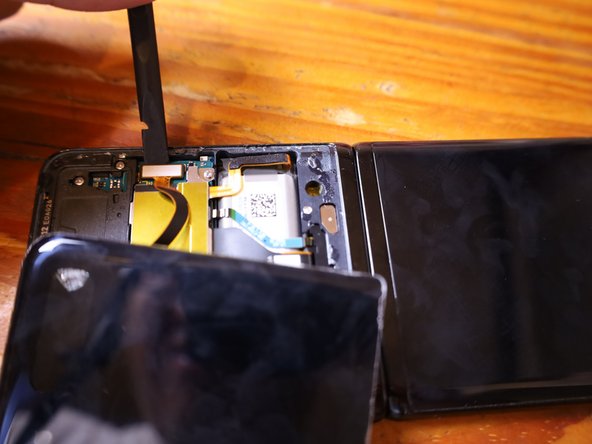
– Alright, let’s get this party started! Carefully lift the rear glass of the phone, starting from the far left side. Be gentle, you don’t want to mess with the ribbon cable, it’s like the phone’s little nervous system! If you need a hand, you can always schedule a repair
Step 7

Don’t forget to power up your device and give your repair a test run before applying that fresh adhesive and sealing everything back up. You’re almost there!
– Let’s get started by using a Uspudger to carefully remove the plastic bracket that’s covering the connector. Take your time and be gentle!
– Next, use a spudger to disconnect the ribbon cable from the board. It’s easier than you think, and you’re doing great!
– Almost done! Now, follow our guide to reinstall the rear cover and replace the adhesive. If you need help, you can always schedule a repair
Tools Used
