DIY Guide: How to Replace Samsung Galaxy Note20 Ultra Daughterboard
Duration: 45 minutes
Steps: 20 Steps
Hey there, safety first! Let’s chill out and get that battery down to 25% before we get started. We’re going to be messing around inside, so we wanna be extra careful. If you need help, you can always schedule a repair.
Ready to tackle the challenge of swapping out the daughterboard on your Samsung Galaxy Note20 Ultra? Awesome! Just a quick note for your safety: make sure the battery is below 25% before getting into the nitty-gritty of disassembling your phone. This little step helps keep everything safe and sound, lowering the odds of any thermal surprises if you happen to accidentally nick the battery during your repair adventure. And hey, if your battery is bloated, be extra careful and take the right steps!
Step 1

Turn off your phone completely before you start taking it apart. You don’t want any surprises, right?
– Warm up your iOpener and press it against the left side of the rear cover for a cozy minute.
Tools Used

Step 2


Hey, just a heads-up! Don’t get too excited and go all out on the opening pick. Keep it chill, and gently slide it in no more than 5 mm. You don’t wanna cause any trouble for those delicate components inside, right? If you’re feeling a little unsure, you can always schedule a repair.
Hey, if that back glass is looking a bit rough, don’t fret! Give it a little TLC with some clear packing tape – that should make things stickier for the suction cup. If that doesn’t do the trick, strong tape can also be your new best friend. And hey, if you’re really struggling, a little superglue on the suction cup to the broken panel can be a life-saver!
Sometimes those older phones can be a bit stubborn. No worries, just crank up the heat a bit more and give it another try. You got this!
– Get your suction cup ready and stick it on that heated edge of the rear cover, nice and close to the edge.
– Now, give that suction cup a good pull, nice and strong, to create a little gap between the rear cover and the frame.
– Time to slide in that opening pick into that gap you made, and you’re almost there!
Step 3


– Gently slide the opening pick down the left edge, heading toward the bottom left corner, to neatly slice through that pesky adhesive.
– Keep that pick snugly in the bottom left corner to stop the adhesive from sticking back together. You’re doing great!
Step 4


As you slice through the adhesive, remember to keep that opening pick no deeper than 5 mm into the phone, or you might accidentally poke something important inside!
Slide each new opening pick into the spaces made by the picks you’ve already placed in the corners. Keep it smooth and steady!
– Heat things up and gently slice away the adhesive on the other three sides of the back cover. You’re almost there!
– While you’re at it, pop an opening pick in each corner to keep that pesky adhesive from sticking back together.
– Wiggle an opening pick around the entire edge of the phone to chase off any leftover adhesive. If some of it is being stubborn, don’t hesitate to give it another round of heat.
Step 5


– Gently pry the rear cover straight up – it’s time to set it free. Lift it off and get ready for the next step.
Step 6


Just a heads-up: When prying, make sure you’re only lifting under the edge of the connector. This will keep you from messing up the socket or any nearby parts. You got this!
– Alright, let’s get this wireless charging coil disconnected! Use the pointed end of a spudger to gently pry it up. No need to get rough, just a little nudge will do the trick.
– Now, to re-attach that connector, we need to be careful! Line up the connector, and gently press down on one side until you hear a click. Then, repeat on the other side. Don’t press down on the middle, we don’t want to bend those delicate pins. If you need help, you can always schedule a repair.
Tools Used

Step 7


– Grab your trusty spudger and gently use its pointed end to lift and disconnect the white press connector nestled in the bottom right corner of the motherboard shield. You’ve got this!
Tools Used
Step 8

Heads up! If you haven’t taken these screws out before, they might be a little stubborn because they’ve got some threadlocker on them. No sweat, though, we’ve got your back.
Hey, while you’re at it, make sure you keep track of all those screws and put them back where they came from. We don’t want any mix-ups, right?
– Grab your trusty Phillips screwdriver and tackle those six 4.0 mm screws holding the motherboard shield in place. You’ve got this!
Step 9


Heads up! The motherboard shield has some pretty thin and sharp edges, so be careful when handling it.
– Time to get a little handy – use a pair of tweezers to carefully lift up the motherboard shield.
– Now, use your fingers to get a good grip on the motherboard shield. If you need help, you can always schedule a repair
Tools Used

Step 10


The wireless charging coil is held in place with a bit of light adhesive magic.
– Gently lift the wireless charging coil away from the device to free it up.
Step 11


– Before you go any further, let’s give that battery a little break! Use the pointed end of a spudger to gently pry up the battery connector. This will safely disconnect the battery and let you keep on fixing without any unexpected zaps. If you need help, you can always schedule a repair.
Tools Used
Step 12

– Grab your trusty Phillips screwdriver and get ready to tackle those five 4.0 mm screws holding the loudspeaker snugly to the frame. You’ve got this!
Step 13


– Time to get started. Insert the pointed end of a spudger into the hole marked by a triangle on the left side of the loudspeaker – it’s a great first step in getting your device back up and running.
– Now, use that trusty spudger to pry up and loosen the left side of the loudspeaker. Remember, if you need help, you can always schedule a repair with the experts at Salvation Repair.
Tools Used
Step 14


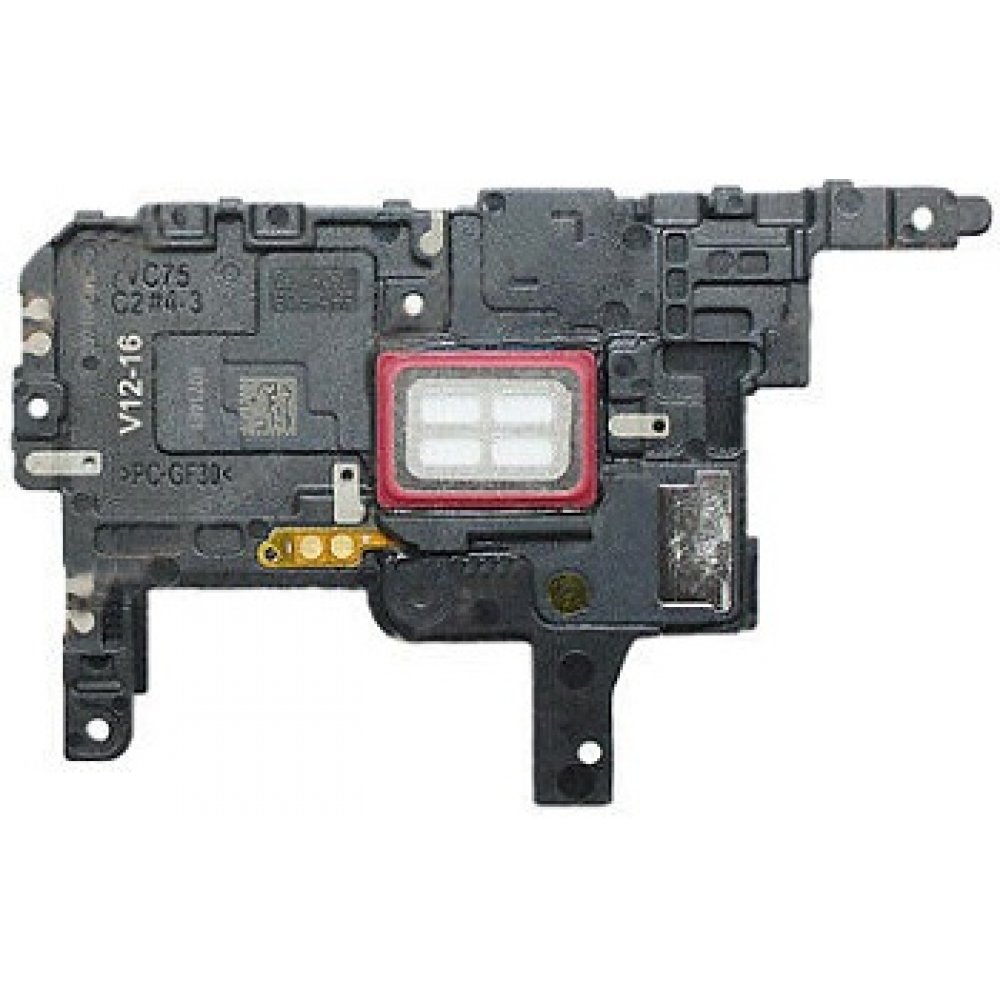
The loudspeaker is hanging out with the frame, held in place by some little clips along its bottom edge. Let’s get it out!
– Let’s get that speaker out! Find the tiny triangle on the right side of the loudspeaker. Slip the pointed end of your trusty spudger into that hole.
– Now, gently use the spudger to pry up the loudspeaker from the frame. You’re almost there!
Tools Used
Step 15

– Time to get a little handy – use a pair of tweezers to carefully lift and remove the loudspeaker. If you need help, you can always schedule a repair
Tools Used


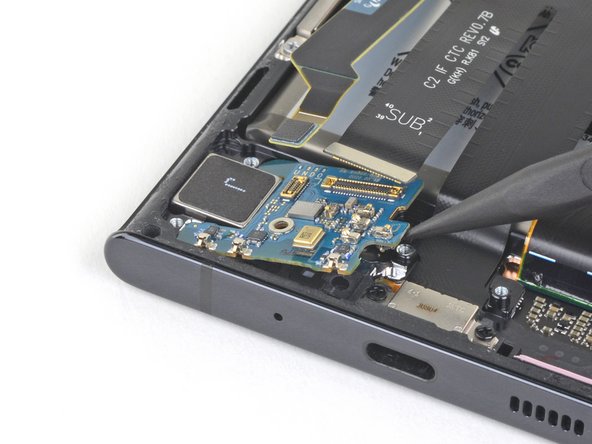
Step 18

– Grab your trusty Phillips screwdriver and deftly unscrew the 3.0 mm screw that’s holding the daughterboard snugly in place against the frame. You’re almost there!
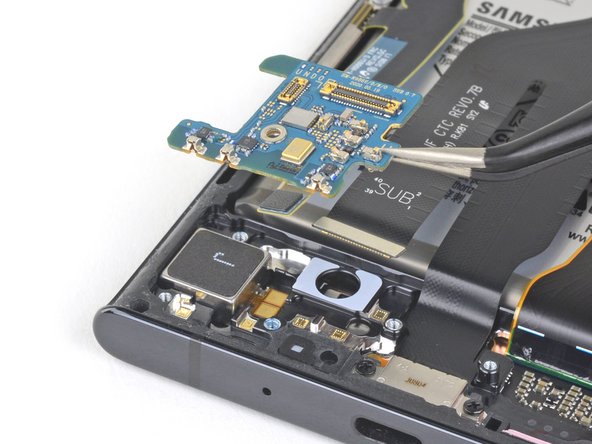
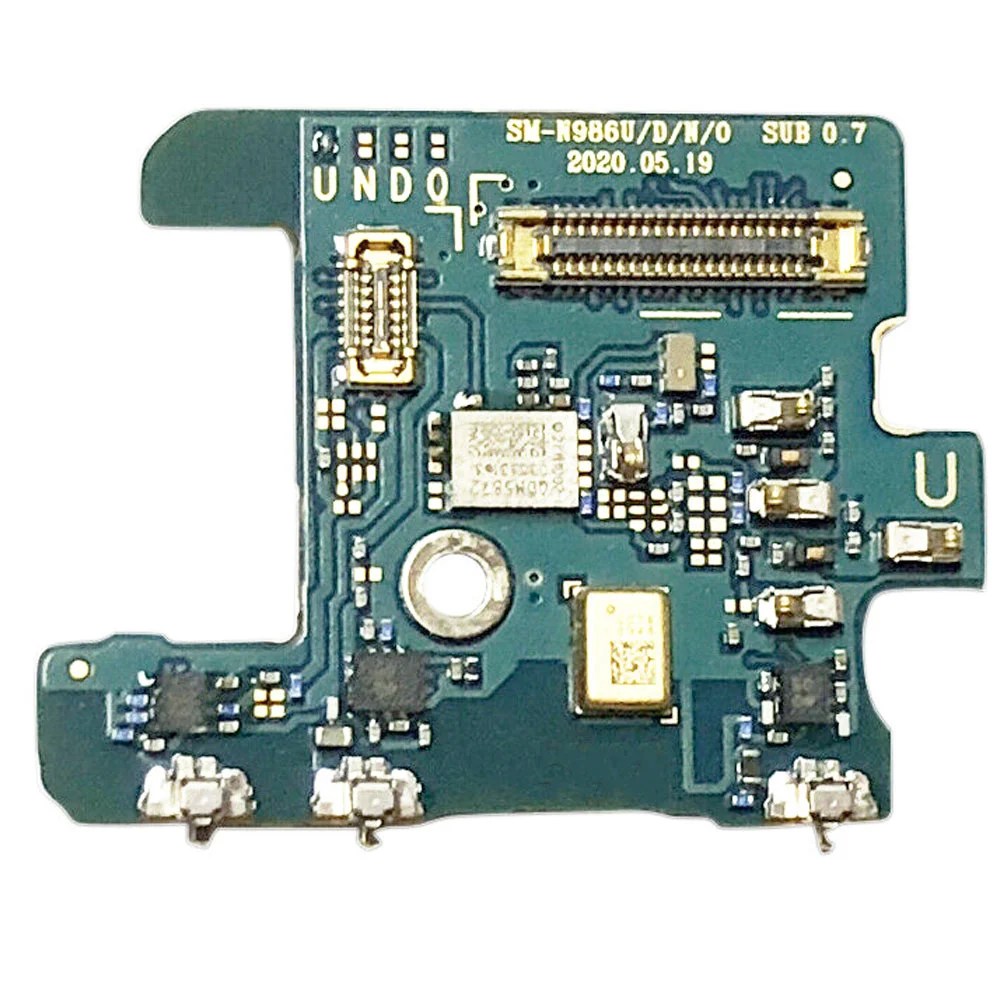
Step 19

Be careful! There are tiny components hiding under the daughterboard. Just slide the spudger in gently—only as far as you need to—so you don’t accidentally bump into those little guys.
The daughterboard is secured to the frame with three spring connectors along its bottom edge. If you need help, you can always schedule a repair.
– Slide the sharp end of your trusty spudger under the right side of the daughterboard, right by that little screw boss. You’ve got this!
– Now, gently use the spudger to lift and free the daughterboard from the frame. It’s like giving it a little nudge to say, ‘Time to move on!’
Tools Used