Samsung Galaxy Note20 Screen Replacement Guide: DIY Repair Tutorial
Duration: 45 minutes
Steps: 28 Steps
Hey, you don’t need to mess with the speakers for this repair, it’s a breeze!
Heads up! This step is a little tricky. The display panel is delicate, so be careful not to crack it.
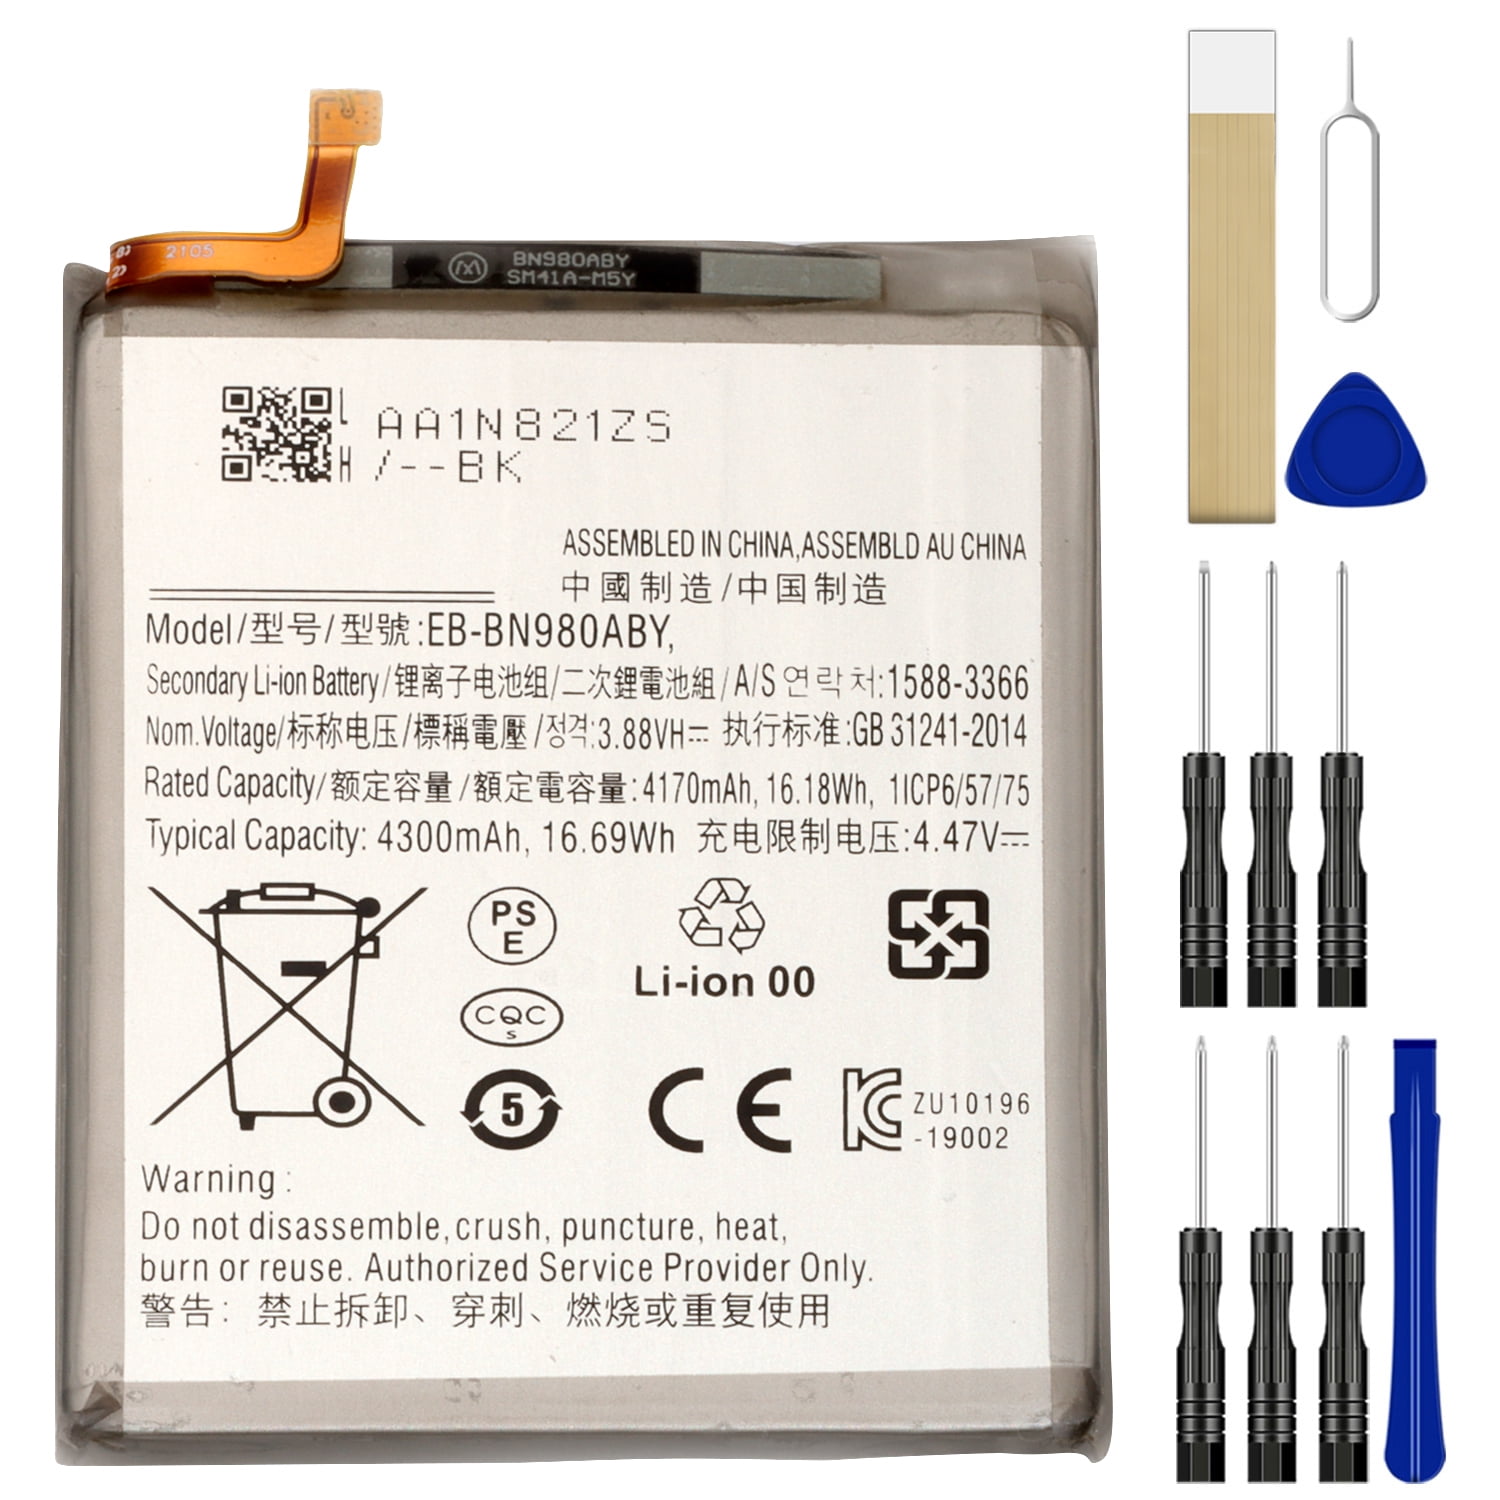
Safety first! It’s always a good idea to discharge the battery below 25% before starting to take your phone apart. Just a little extra precaution, you know?
Get ready to breathe new life into your Samsung Galaxy Note20 by replacing the screen. Keep in mind that the fingerprint sensor is embedded in the screen, so if it’s not working, you’ll probably need to replace the whole thing. Don’t worry if some pics show the loudspeaker and earpiece speaker missing – you don’t need to remove them for this job. Be careful, though, as the display panel can be super fragile and might break easily. If you’re hoping to reuse the screen, make sure to apply plenty of heat and handle it with care during the prying stage. For your safety, discharge the battery to below 25% before you start taking things apart. This will help prevent any nasty thermal events if the battery gets damaged. And if your battery is swollen, take the right precautions. If you need help, you can always schedule a repair.
Step 1

Before you dive into the disassembly adventure, make sure your phone is completely powered off—safety first, right?
Feeling a bit chilly? A hair dryer, heat gun, or hot plate can warm things up a bit, but keep a close eye on the temperature! The screen, battery, and plastic back of your phone can be real heat-sensitive, so let’s avoid any heat mishaps.
– Time to warm things up! Grab your trusty iOpener and give the left side of the rear cover a nice, warm hug for one minute. It’ll make things a little easier for us.
Tools Used

Step 2


Keep that opening pick to a maximum of 5 mm into the phone, or you might accidentally poke something you shouldn’t!
Depending on the age of your phone, this might be a bit tricky. Don’t worry, we’ve got your back! If you’re having trouble, just give the edge a little more heat and try again. If you need help, you can always schedule a repair.
– First, attach a suction cup to the heated edge of the rear cover – get it as close to the edge as you can.
– Now, pull up on the suction cup with some strong, steady force. You’re aiming to create a gap between the rear cover and the frame, so don’t be shy!
– Next, take an opening pick and carefully insert it into the gap you just created. If you need help, you can always schedule a repair
Step 3


While you’re carefully slicing through the sticky stuff around the edge of your phone, keep that pick under 5 mm deep to steer clear of any internal boo-boos.
– Now it’s time to get that pick sliding – gently work it along the left edge towards the bottom left corner to cut through the adhesive. You’re making great progress!
– Leave that pick right where it is, stuck in the bottom left corner, to keep the adhesive from re-sealing. You’re doing a great job so far! If you need help, you can always schedule a repair
Step 4


If the rear cover is still hanging on after you’ve sliced through all four sides, give that adhesive another go with your trusty opening pick.
Feel free to slide in each new opening pick into the little gaps made by the picks you already placed in the corners.
– Let’s keep going! Repeat the heat and cut routine along the other three sides of the back cover.
– As you cut, stick a handy-dandy opening pick in each corner to keep that adhesive from getting too cozy and re-sealing. We don’t want that! 😉
Step 5


– Time to get started – carefully lift the rear cover straight up to remove it. If you need help, you can always schedule a repair
Step 6

If these screws are playing hard to get, don’t worry! They might just be a bit stubborn from the threadlocker. Take your time and they’ll come off!
As you tackle this repair, keep an eye on each screw and remember where it belongs. It’s like a little treasure hunt, and you’ll want to make sure each piece finds its way back home!
– Grab your trusty Phillips screwdriver and get ready to tackle those six 4.0 mm screws holding down the motherboard shield. Let’s make this magic happen!
Step 7


Handle the motherboard shield with care—its edges are as sharp as your wit!
– Grab your trusty tweezers and give that motherboard shield a little lift. Flip it back, and you’re ready for the next step!
Tools Used

Step 8


Be sure to gently pry just under the edge of the connector to keep the socket and nearby components safe and sound!
– Grab your trusty tweezers and gently hold the motherboard shield out of the way. Now, take the pointed end of a spudger and carefully pry up the battery press connector. You’ve got this!
– To re-attach those press connectors, just align one side perfectly and give it a gentle press until you hear that satisfying click. Then, do the same on the other side. Remember, no pressing down in the middle! If things get misaligned, those little pins can bend, and we definitely don’t want to cause any permanent damage.

Step 9


– While you’ve got your trusty tweezers holding the motherboard shield out of the way, use the pointed end of a spudger to carefully pry up the wireless charging coil press connector. If you need help, you can always schedule a repair
Step 10


The wireless charging coil is stuck to the device with a bit of adhesive, but don’t worry, it’s easy to remove. If you need help, you can always schedule a repair
– Get a good grip on that motherboard shield with your fingers.
– Gently peel back the wireless charging coil, lifting it away from the device.
– Now, go ahead and remove the wireless charging coil completely.
Step 11
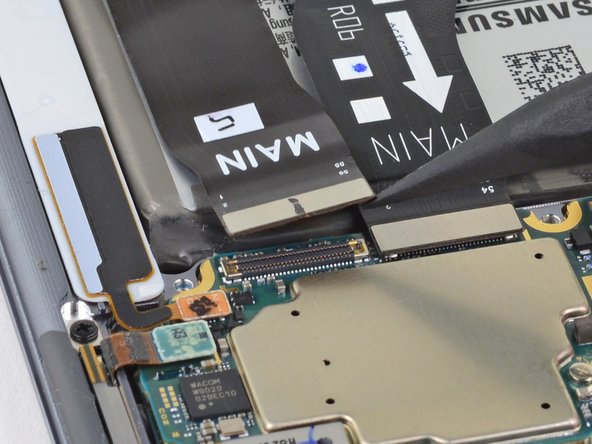

– Alright, time to disconnect that display cable. Grab your spudger (the pointy end, of course) and give that cable a gentle nudge away from the motherboard. You got this!
Tools Used
Step 12


– Alright, let’s disconnect that touch layer cable connector from the motherboard. Grab your trusty spudger (that handy little tool with the pointed end) and gently pry that connector loose. You got this!
Tools Used
Step 13

Hey, be careful! Pushing those opening picks too hard might hurt the innards of your device. If you’re not sure about anything, you can always schedule a repair.
Alright, so you’re looking at the phone with the screen off. Pretty cool, huh?
Now, to get this screen off, we’re going to need to weaken and cut through the glue holding the screen to the frame.
Heads up, there’s a little extra glue around the selfie camera and fingerprint sensor, just a heads up. You got this!
Step 14

Your trusty iOpener should keep its cozy warmth for up to 10 minutes. Remember, no need for endless reheating – just the right amount will do!
You can use a hair dryer, heat gun, or hot plate to help out, but watch out for overheating your phone! Both the screen and the internal battery can be a bit sensitive to heat, so keep it cool and steady.
– Warm up your trusty iOpener and give the top of your screen a nice, cozy two-minute hug.
Tools Used
Step 15


Be careful when using the opening pick – make sure it slides smoothly over the front-facing camera without putting any pressure on it. If you need help, you can always schedule a repair
Hey, that cracked screen is a tough one! If it’s pretty bad, try covering it with some clear packing tape. This might help the suction cup stick better. You can also use super strong tape instead of the suction cup if you’re feeling crafty. And if all else fails, well, you can always superglue the suction cup to the screen. Just kidding! (But really, if you’re having trouble, you can always schedule a repair.)
Depending on how old your phone is, this might be a bit tricky. If you’re having trouble creating a gap for the opening pick, just keep applying heat to the edge and try again. You might need to do this a couple of times, but we believe in you!
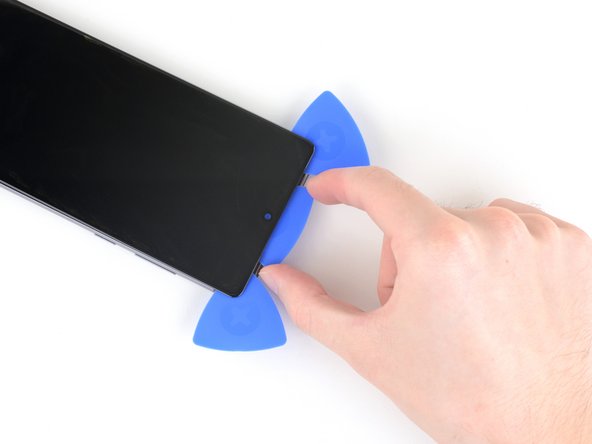
– Start by sticking a suction cup to the warm top edge of the screen, getting as close to the edge as you can without crossing it.
– Gently pull up on that suction cup like you’re lifting a tiny, delicate treasure to create a little gap between the screen and the frame.
– Now, take the tip of your trusty opening pick and slide it into that gap at a nice steep angle. Press down so it aligns with the screen.
– Keep that opening pick in place to stop the adhesive from getting all clingy again.
Step 16


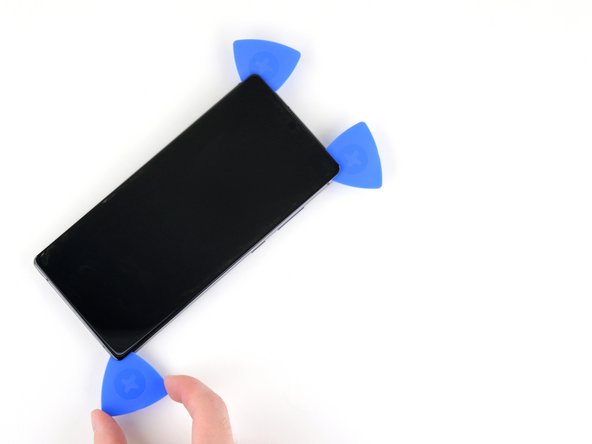
– Pop a second opening pick into that little gap you’ve got going on.
– Gently slide it up to the top left corner of the screen to slice through that adhesive like a pro.
– Keep that opening pick planted in the top left corner to stop the adhesive from getting all clingy again.
Step 17


– Pop a third opening pick into that first little gap you’ve made.
– Gently slide it up to the top right corner to slice through the adhesive.
– Keep that opening pick in the top right corner to stop the adhesive from sticking back together.
Step 18

Be careful not to slide the opening pick too far under the screen – you want to make sure you can easily grab it when you need to. If you need help, you can always schedule a repair
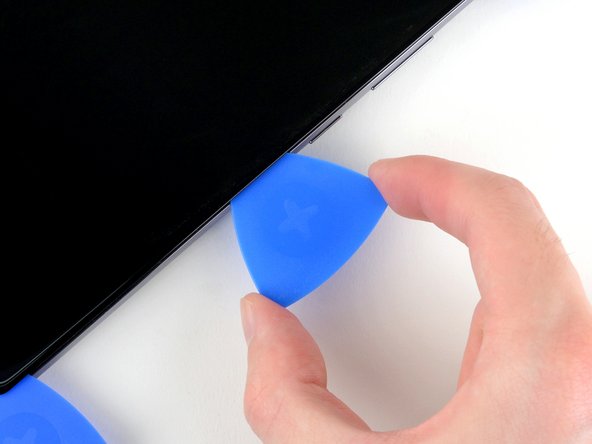
– Alright, let’s get this earpiece speaker and front-facing camera out! Carefully push that opening pick deeper into the phone to cut through the sticky stuff holding it in place.
– Now, carefully remove that pick. You’re doing great!
Step 19

– Give that screen a little love! Heat up the right edge with a heated iOpener for two minutes. If you need help, you can always schedule a repair
Tools Used
Step 20

– Slide an opening pick into the little space at the top right corner of your screen.
– Gently slide that pick all the way down to the bottom right corner to loosen up the sticky stuff.
– Leave the pick in there at the bottom right to keep that adhesive from making a comeback.
Step 21

– Slide the tip of your handy opening pick under the middle of the right edge of the screen at a nice sharp angle.
– Gently press down on the opening pick until it’s nice and flat with the screen.
– Keep that opening pick in place at the center of the right edge to stop the adhesive from getting all clingy again.
Step 22

– Let’s warm up that screen! Apply a heated iOpener to the left edge for a couple of minutes. You’ll be surprised how much easier this makes things. If you need help, you can always schedule a repair
Tools Used
Step 23


– Alright, let’s get this party started! Insert another opening pick into the gap in the top left corner of the screen.
– Now, slide that opening pick down to the bottom left corner to cut through the adhesive. You got this!
– Leave that opening pick in the bottom left corner to keep the adhesive from sealing itself back up. We’re almost there!
Step 24


Alright, let’s get that screen separated from the frame! If you’re still feeling a little resistance around the edges, grab your trusty opening pick and give that adhesive another little trim. You’ve got this!
– Let’s get started by carefully inserting the tip of an opening pick under the center of the left edge of the screen at a pretty steep angle – you got this!
– Now, gently push down the opening pick until it’s level with the screen, making sure not to apply too much pressure.
– Great job so far! Leave the opening pick in the center of the left edge of the screen to prevent the adhesive from re-sealing, and take a moment to review your progress – if you need help, you can always schedule a repair
Step 25


Gently slide the isopropyl alcohol applicator into the upper part of the inner adhesive area, keeping it clear of the fingerprint sensor to ensure it stays safe and sound.
Feel free to apply the isopropyl alcohol without having to dip the applicator into the phone if that’s what you prefer.
– Start by applying a couple of drops of high-concentration (90% or higher) isopropyl alcohol right under the edge of the screen. This will help loosen up that pesky adhesive near the fingerprint sensor.
– Now, give your phone a little tilt so the isopropyl alcohol can work its magic and flow toward the inner adhesive.
– Take a breather and wait for about two minutes while the alcohol does its job of weakening the adhesive.
Step 26

Be careful not to completely remove the screen just yet, there are still a couple of cables that need to be dealt with first.
When lifting the screen, keep it at a gentle 15-degree angle to avoid causing any damage to your device. If you need help, you can always schedule a repair
If the screen is being stubborn and won’t easily lift off the frame, don’t worry – you’ve got options. Try cutting through a bit more of the perimeter adhesive or apply some extra isopropyl alcohol to the inner adhesive to help loosen things up. And remember, if you need help, you can always schedule a repair
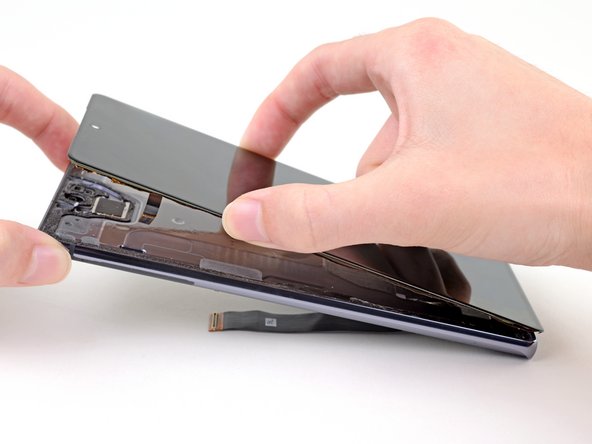
– Now it’s time to get the top half of the frame in place, making sure the touch layer cable can pass through its designated cutout – easy does it!
– Gently lift the screen from the top half of the frame, carefully threading the touch layer cable through its cutout. If you need help, you can always schedule a repair
Step 27

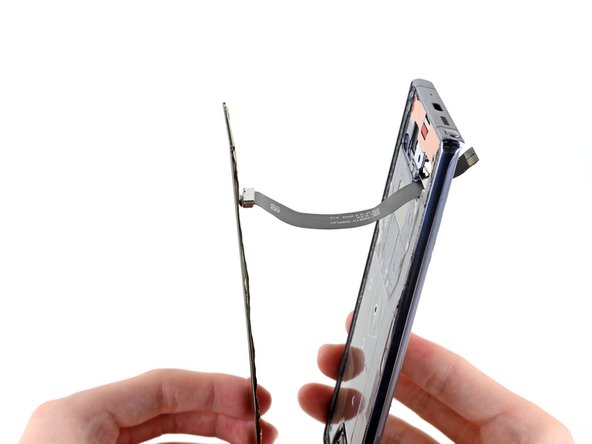
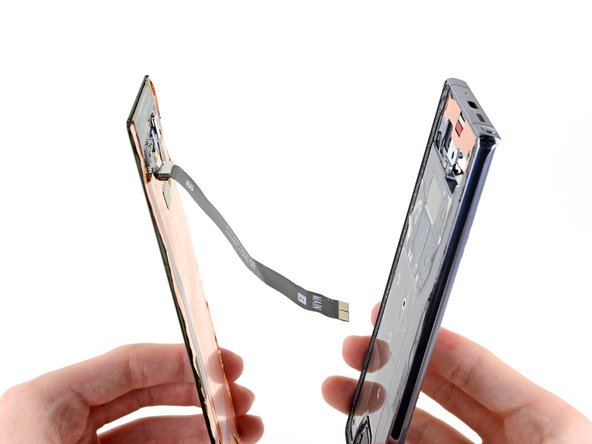
– Alright, cool cats, let’s get those cables snaking through their little holes! The display cable and touch layer cable need to wiggle their way through the cutouts in the frame as you take the screen off.
– Remember, when you put it all back together, you gotta make sure those cables are back where they belong, threadin’ back through the frame’s cutouts. It’s like a cable dance party!
– The display cable has some little clips near the screen that hold it onto the metal bracket on the frame. As you thread the cable through, make sure to line up those clips so they hang over the edge of the bracket, just like a cool, stylish accessory.
Step 28

Alright, let’s get those sticky bits out of the way! Before you put on that shiny new screen, make sure all the old adhesive is gone.
If you’ve got some alcohol hanging around, give it a quick wipe or let it dry out. We don’t want any surprise moisture messing up your fresh screen!
– First things first, let’s get that screen off! Time to say goodbye to the old one.
– Before you go all in with those new adhesives, take a moment to test your awesome repairs. Trust us, it’s worth it!
– Using a custom-cut adhesive? No worries! Check out our guide for the best ways to apply that sticky goodness to your new screen.
– Got a pre-cut adhesive card? Awesome! Just follow our guide and you’ll be on your way to a smooth installation.