Samsung Galaxy Note10+ 5G Loudspeaker Replacement Guide: DIY Repair Tutorial
Duration: 45 minutes
Steps: 12 Steps
Ready to give your Samsung Galaxy Note10+ 5G loudspeaker some love? This guide will walk you through the process of removing or replacing it. While the steps are tailored for the non-5G Note10+, don’t worry, you’ll be a pro in no time. You might see some minor differences in the pictures, but trust us, they won’t throw you off. If you need any help along the way, you can always schedule a repair with our team. Let’s get this done!
Step 1

Alright, superstar! Let’s make sure your phone is completely powered off before we start tinkering. We wouldn’t want any unexpected surprises, would we? If you need help, you can always schedule a repair
You can also give your device some warmth with a hair dryer, heat gun, or hot plate, but be sure to keep an eye on things! Too much heat can be a real party crasher for your phone’s display and internal battery, so let’s keep it cool while we work our magic! If you need help, you can always schedule a repair.
– Grab your trusty iOpener and place it on the left edge of the rear cover for a cozy minute.
Tools Used

Step 2


Hey, sometimes that rear cover is a little grumpy and doesn’t want to cooperate. If it’s super cracked, try giving it a little hug with some clear packing tape. That might help the suction cup get a grip. You can also try using some really strong tape instead of the suction cup. If you’re still having trouble, don’t worry, just remember that you can always schedule a repair with us. We’re always here to help!
Time can really take its toll on our devices. If you’re having trouble with the heat, just apply a little more and try again. Remember, we’re rooting for you!
– Grab a suction cup and stick it to the warm edge of the rear cover, getting as close to the edge as you can.
– Give it a firm and steady pull to create a little gap between the rear cover and the frame—you’re doing great!
– Now, take the tip of an opening pick and gently slide it into that gap you just made.
Step 3


Be careful not to insert the opening pick too far into the phone – about halfway is the sweet spot. Going further could put those internal components at risk, and we want to keep them safe and sound. If you need help, you can always schedule a repair
– Now it’s time to get that pick sliding – gently work it along the left edge towards the bottom left corner to break through the adhesive. You’re making great progress!
– Leave that pick right where it is, stuck in the bottom left corner, so the adhesive doesn’t start to seal itself back up. If you need help, you can always schedule a repair
Step 4


You’ll see the rear cover start to loosen up as you work your way around the phone. Keep going, you’re almost there!
– Now it’s time to repeat the heating and cutting process for the remaining three sides of your phone – just like you did before, but on the other sides. Keep it up, you’re doing great!
– As you move on to the next side, make sure to leave an opening pick in place to prevent the adhesive from sneaking back in. You’re making progress, and that’s something to be proud of! If you need help, you can always schedule a repair
Step 5


Don’t forget to power up your device and give your repair a test run before slapping on that new adhesive and sealing everything up. You’ve got this!
– Time to give that rear cover a lift! Pop it straight up and watch it come right off.
– Now, let’s put everything back together just like it was before. Follow these steps to put the rear cover back in place and replace the adhesive. Don’t forget to give those screws a good tighten!
– Using Tesa tape to reattach parts? No problem! We’ve got you covered. Follow this guide to make sure everything is securely in place. If you need help, you can always schedule a repair.
Step 6

– Let’s get started by removing the five 4mm screws that hold the wireless charging coil in place – just grab your trusty Phillips screwdriver and you’re all set. If you need help, you can always schedule a repair
Step 7


– Get ready to be a tech hero! Use a pair of handy-dandy tweezers to gently pop up that metal shield and give it a little flip – voila! You’re one step closer to fixing your device. Need a hand? You can always schedule a repair!
Tools Used

Step 8


– Alrighty then, now you get to play superhero and disconnect the battery connector! Hold up that metal shield like a trophy, and use that spudger like a magic wand. The pointed end will help you pry it up – voilà! Connection officially disconnected. Need help? You can always schedule a repair.
Tools Used

Step 9


– Now it’s time to carefully disconnect the wireless charging coil connector from the motherboard – simply use the pointed end of a spudger to gently pry it loose. If you need help, you can always schedule a repair
Tools Used
Step 10


The wireless charging coil is stuck to the phone with a bit of adhesive, but don’t worry, it’s easy to remove. If you need help, you can always schedule a repair
– Give that metal shielding a little lift, like you’re giving it a high five! Now you can grab hold of it with your fingers.
– Time to peel back the wireless charging coil. Gently lift it away from the device – think of it like giving it a little hug goodbye.
– Now you can remove the wireless charging coil. You’re doing great, keep going!
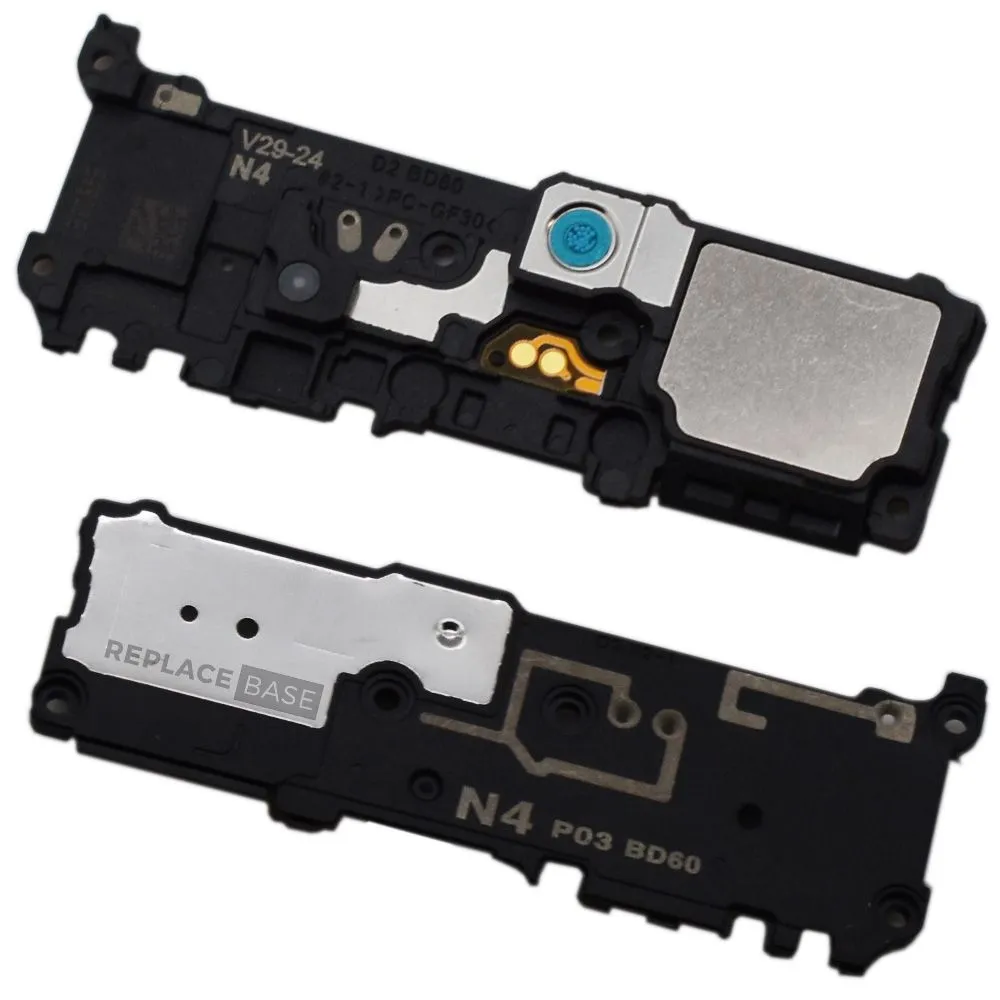
Step 11

– Let’s get started by removing the five 4mm screws that hold the loudspeaker in place – just grab your trusty Phillips screwdriver and you’re all set. If you need help, you can always schedule a repair