Samsung Galaxy Note10+ 5G Battery Replacement Guide – DIY Tutorial
Duration: 45 minutes
Steps: 19 Steps
Hey there! Just a friendly reminder: make sure to drain that battery to below 25% before diving into the disassembly of your phone. Safety first, friends!
This guide will walk you through replacing the battery on your Samsung Galaxy Note10+ 5G. It’s a breeze! If your battery is swollen, be careful! Always discharge your battery to below 25% before taking things apart. This helps keep things safe and reduces the risk of a little boom if anything goes wrong during the repair. The steps are written for the non-5G Note10+, but it’s all the same. Some of the images might look a little funky, but it’s all good – they won’t confuse you. If you need help, you can always schedule a repair.
Step 1

Make sure to power down your phone completely before diving into the disassembly adventure!
If you’re feeling brave, you can use a hairdryer, heat gun, or even a hot plate to help loosen things up. But remember, these tools are like spicy salsa – a little goes a long way! Overheating your phone can be a real bummer, since it can hurt the display or the battery. If you need help, you can always schedule a repair.
– Get your trusty iOpener ready and place it on the left edge of the rear cover. Give it a minute to work its magic!
Tools Used

Step 2


Hey there, techie! If your rear cover is lookin’ a bit rough, try covering the cracks with some clear packing tape. This’ll help that suction cup stick like glue. Or, you can try some super strong tape instead. If all else fails, you can stick that suction cup right to the cover with some superglue.
Alright, now, depending on how old your phone is, getting that cover off might be a bit of a challenge. No worries! Just apply some heat to the edge, and give it another go. You got this!
– Grab your trusty suction cup and stick it on the heated edge of the rear cover. Get it as close to the edge as you can, like a little suction cup hug!
– Now for the fun part! Pull up on that suction cup with some good, strong, steady force. We’re creating a little gap between the rear cover and the frame. Think of it like a tiny escape route for your phone’s secrets!
– Slide that opening pick into the gap. It’s like giving your phone a little peek-a-boo, just a tiny glimpse of what’s going on inside.
Step 3


Keep that opening pick to just half the way in—your phone’s delicate insides will thank you for it!
– Let’s loosen things up! Slide the opening pick along the left edge towards the bottom left corner, carefully slicing through that adhesive.
– Keep the pick in place in the bottom left corner, like a little guardian angel, so the adhesive doesn’t get cozy again.
Step 4


As you go around the edges of the phone, the back cover will start to pop off. You’re doing great! If you need help, you can always schedule a repair.
– Alright, champ! Let’s repeat the heating and cutting process for the remaining three sides of the phone. It’s like a dance, but with a heat gun and a cutting tool.
– Keep a handy opening pick on each side as you move to the next. We don’t want that sticky adhesive sealing itself up again. Don’t worry, it’s all part of the fun!
Step 5


Alright, superstar! Go ahead and power up your device and make sure everything’s working like a charm before you seal it up tight. You’re almost done! If you need a hand with anything, you can always schedule a repair.
– Time to get lifting! Carefully lift the rear cover straight up and give it a little wiggle to pop it right off.
– Don’t worry about putting everything back together just yet. We’ve got a whole guide on reinstalling the rear cover and replacing that sweet adhesive.
– If you’re using Tesa tape to reattach things, we’ve got a super helpful guide for that too. Just remember, if you need help, you can always schedule a repair.
Step 6

– Grab your trusty Phillips screwdriver and get ready to tackle those five 4 mm screws holding the wireless charging coil in place. You’ve got this!


Step 9


– Grab your trusty spudger and gently use the pointed end to unplug the wireless charging coil connector from the motherboard. You’re doing great!
Tools Used
Step 10


Alright, the wireless charging coil’s holding on tight with some light adhesive. Just a little bit of persuasion, and you’ll be able to gently pry it loose.
– Time to get a grip on that metal shielding – gently tilt it up so you can get a good hold of it with your fingers.
– Now, carefully peel the wireless charging coil away from the device – it’s time to set it free.
– The final step: remove the wireless charging coil and you’re one step closer to getting your device back in action. If you need help, you can always schedule a repair
Step 11

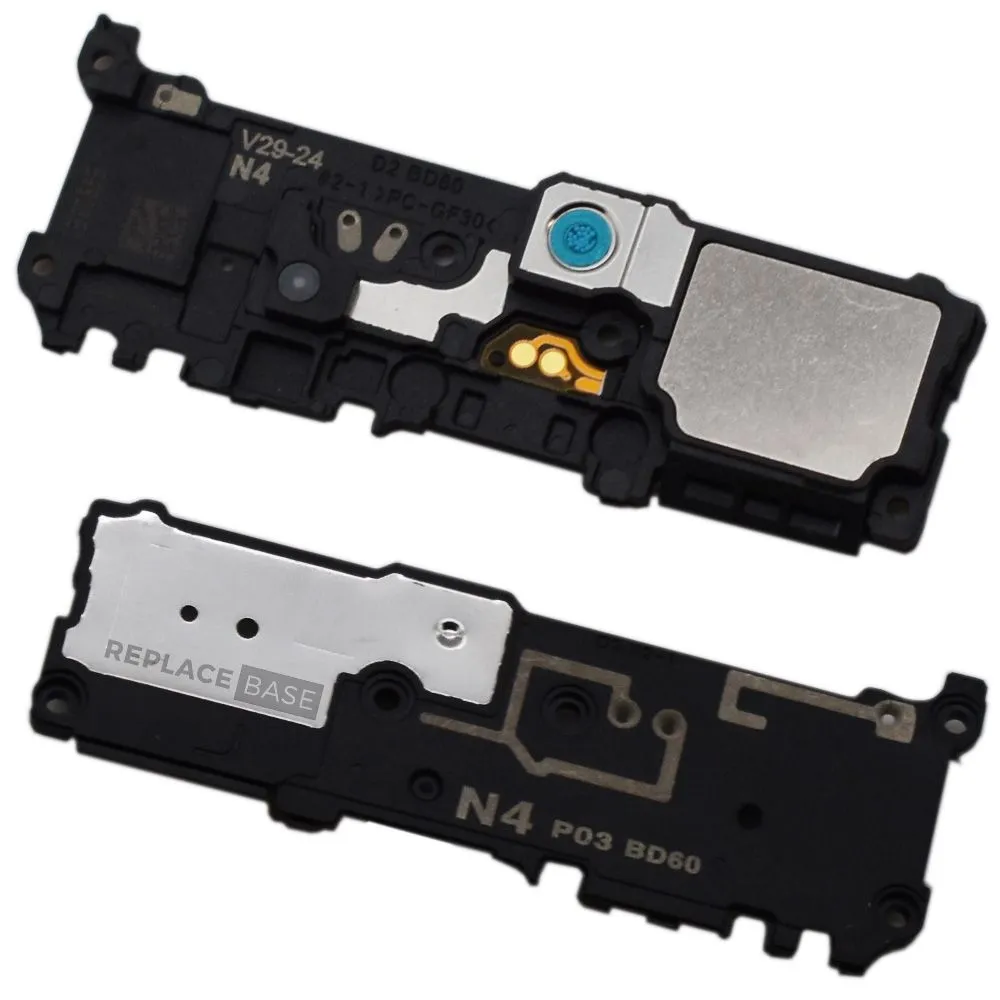
– Grab your trusty Phillips screwdriver and give those five 4mm screws holding the loudspeaker in place a gentle nudge. Time to set that speaker free!
Step 12


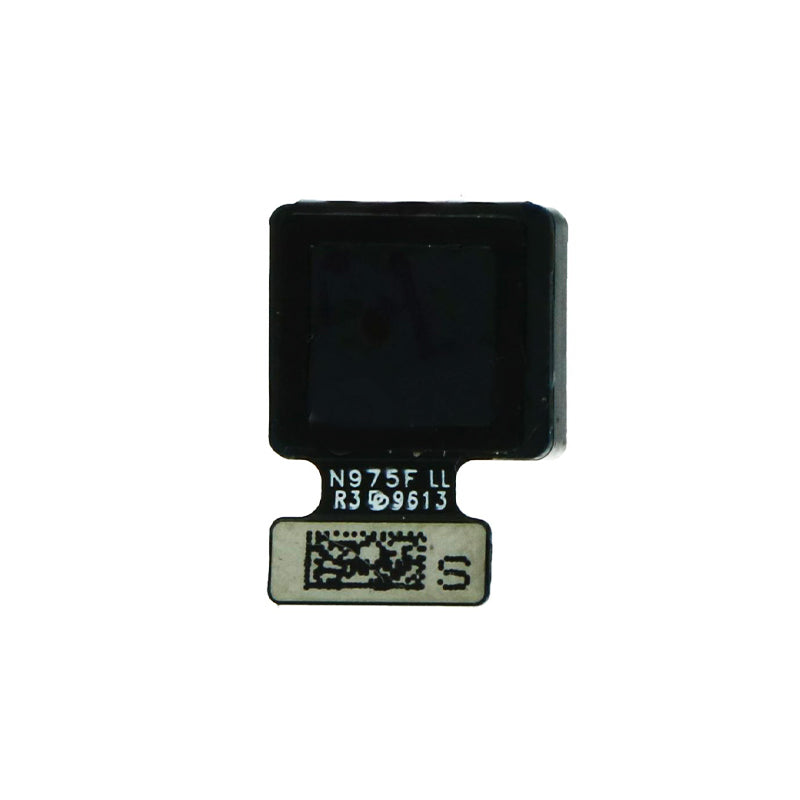
– Time to get up close and personal with those tiny components – use a trusty pair of tweezers to carefully remove the loudspeaker. If you need help, you can always schedule a repair
Tools Used
Step 13


– Time to get started! Use the pointed end of a spudger to carefully disconnect the main interconnect cable from the motherboard.
– Next, gently disconnect the secondary interconnect cable from the motherboard. If you need help, you can always schedule a repair
Tools Used
Step 14


– Alright, now let’s gently disconnect that main interconnect cable from the daughterboard using the pointed end of your spudger. It’s like giving the cable a little high-five!
– And while we’re at it, let’s disconnect that secondary interconnect cable from the daughterboard. Just a quick release and we’re good to go!
Tools Used
Step 15

– Alright, let’s disconnect that main interconnect cable. It’s like giving your device a little break from all the hard work it does.
Step 16


Hold up, buddy! Let’s not mess with that secondary interconnect cable. It’s all connected to the side 5G mmWave antenna, and we wouldn’t want to disconnect anything essential. If you need any expert guidance or tools, we’ve got your back. Just schedule a repair and let the pros handle it with care!
Tools Used
Step 17


– Now, grab that spudger tool and use the pointy end to carefully disconnect the display cable connector from the motherboard. It’s like giving the cable a gentle nudge to say “see ya later!”
Tools Used
Step 18

Be careful not to overdo it with the alcohol, or you might end up damaging that beautiful display. If you need help, you can always schedule a repair
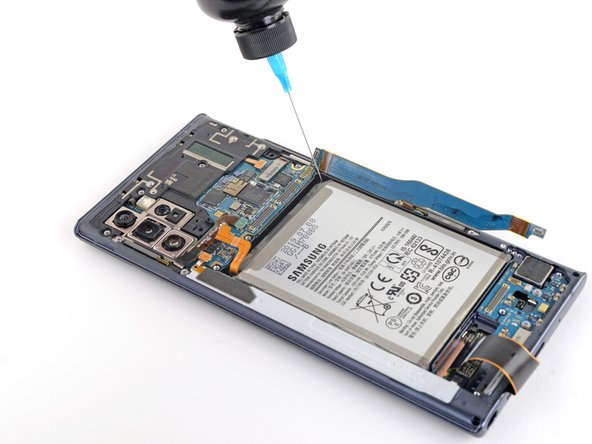
– First, let’s loosen things up – apply 1-2 drops of high concentration (90% or greater) isopropyl alcohol to the tear-shaped indents near the corners of the battery well, right underneath the battery. This will help break down the adhesive.
– Now, take a minute to let the isopropyl alcohol do its magic and weaken the battery adhesive. If you need help, you can always schedule a repair
Step 19


Be cautious not to push the opening pick in too far—going over halfway might put your fingerprint sensor at risk!
If you’re having trouble, don’t worry – just add a few more drops of isopropyl alcohol under the battery, wait two minutes, and give it another shot. If you need help, you can always schedule a repair
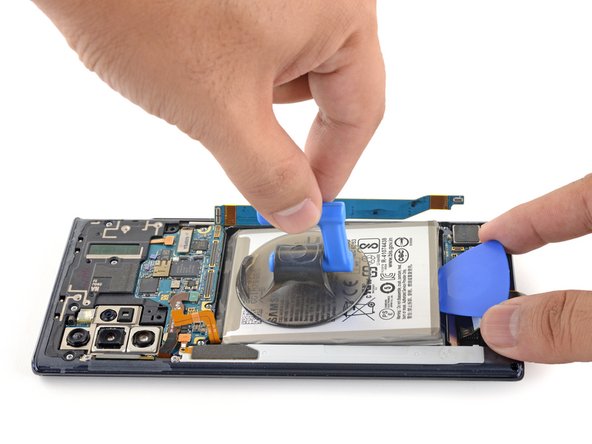
– Let’s get started by applying a suction cup to the back of the battery – this will help you get a good grip on it.
– Now, pull up on the suction cup with some steady force to start separating the battery from the frame. You got this!
– Next, take an opening pick and insert the point into the gap you just created between the battery and frame. Easy does it!
– Keep pulling up on the suction cup to completely remove the battery. You’re making great progress!
– If you used isopropyl alcohol, take a 10-minute break to let it fully evaporate before installing the new battery. Safety first!
– When you’re putting everything back together, be sure to remove the old adhesive and apply some new stretch release