Samsung Galaxy Note10 Earpiece Speaker Replacement Guide
Duration: 45 minutes
Steps: 25 Steps
Alright, let’s get this earpiece speaker swap done! This guide will help you remove or replace the earpiece speaker on your Samsung Galaxy Note10. No sweat, you’ve got this! If you need help, you can always schedule a repair.
Step 1

Alright, let’s get started! First things first, make sure your phone is completely powered off before you start taking things apart. You wouldn’t want to get a little shock, would you? 😉
You can use a hair dryer, heat gun, or hot plate to provide some warmth, but keep an eye on the heat—your phone’s display and internal battery don’t take kindly to being too toasty!
– Grab your trusty iOpener and give the left edge of the back panel a nice, warm hug for about a minute.
Tools Used

Step 2


If your back glass is looking a little rough, try covering it with a layer of clear packing tape – it might just give that suction cup the grip it needs! If that doesn’t work, try some super strong tape instead. And if all else fails, you can always superglue the suction cup to the broken panel. No sweat, right?
Depending on the age of your phone, this might be a little tricky. If you’re having a tough time, just apply more heat to the edge and try again. Don’t worry, we’ve got your back – or your phone’s back, really! If you need help, you can always schedule a repair.
– Grab a suction cup and place it right on that warm edge of the back panel, getting as close to the edge as you can.
– Give that suction cup a solid, steady pull to pop open a little gap between the back panel and the frame.
– Slide the tip of your opening pick into that newly created gap.
Step 3


Keep that opening pick on a short leash! Don’t push it in more than halfway, or you might accidentally poke something you shouldn’t.
– Gently slide the opening pick along the left edge, working your way towards the bottom left corner. This will help you carefully slice through the adhesive.
– Leave the pick in place at the bottom left corner – this will prevent the adhesive from re-sealing, making the rest of your repair a whole lot easier. If you need help, you can always schedule a repair
Step 4


– Alrighty, pals! Let’s keep that opening pick busy and slide it all the way across the left side, up to the top left corner. Think of it like carving a sweet, sweet slice of adhesive. And don’t worry, we’ll leave our trusty pick hanging out in that top left corner, just in case our slippery pal, the adhesive, tries to sneak back in. If you need a little extra help, our fearless repair squad is standing by. You can always schedule a repair! Peace out and power through!
Step 5

– Get ready to unlock your phone’s full potential – start by heating up an iOpener and applying it to the top edge of your phone for about a minute. If you need help, you can always schedule a repair
Tools Used
Step 6


– Pop in a third opening pick into the little gap at the top edge of your phone.
– Gently slide that pick over to the top right corner, cutting through the adhesive like a champ.
– Keep the pick in that top right corner to stop the adhesive from getting all clingy again.
Step 7

– Grab an iOpener and stick it on the right edge of your phone for a solid minute. You’re doing great!
Tools Used
Step 8


Keep going! You’ll see the back panel start to loosen up as you get closer to the bottom. It’s almost like the phone is saying ‘Hey, I’m ready for a makeover!’
– Slide in that fourth and final opening pick into the gap on the right side of your phone. Give it a little shimmy down towards the bottom right corner to cut through that sticky adhesive like a pro.
– Now, take an opening pick and gently glide it back and forth around the entire perimeter of your phone. This will help release any stubborn adhesive that might have been missed. If you encounter any particularly clingy spots, don’t hesitate to give it a little heat to loosen things up.
Step 9


– Gently pop off the back panel like it’s a lid on a jar of pickles and set it aside.
Step 10

– Grab your trusty Phillips screwdriver and carefully take out those five 4 mm screws that are keeping the wireless charging coil in its cozy spot.


Step 12


– Now, keep that metal shield held up and out of the way, like a superhero ready for action! Grab your trusty spudger and gently pry up the battery connector. We’re disconnecting it, so we can get this show on the road! If you need help, you can always schedule a repair.
Tools Used

Step 13


– Let’s get that wireless charging coil unplugged! Use the pointy end of your trusty spudger to gently disconnect the connector from the motherboard. You’ve got this!
Tools Used
Step 14


The wireless charging coil is held snugly in place with a touch of adhesive magic.
– Time to get a little hands-on! Give that metal shielding a gentle tilt so you can get a good grip.
– Now, it’s time to peel back that wireless charging coil. Just gently lift it up and away from the device.
– You’re almost there! Carefully remove the wireless charging coil. You’re doing great!
Step 15

– Grab your trusty Phillips screwdriver and tackle those five 4 mm screws that are keeping the loudspeaker in place. You’ve got this!
Step 16


– Time to get a little handy – use a pair of tweezers to carefully remove the loudspeaker. If you need help, you can always schedule a repair
Tools Used
Step 17
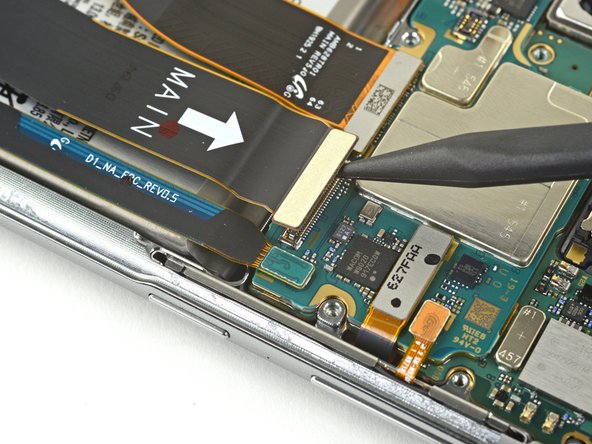


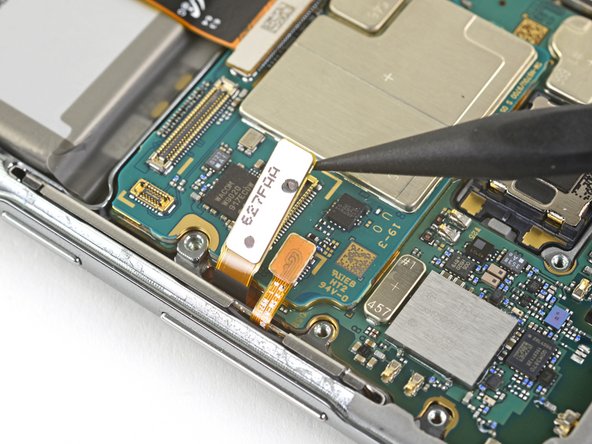
– Alrighty, let’s unplug that main interconnect cable from the motherboard’s party with the pointy end of a spudger. Now, let’s break up with the secondary interconnect cable, too! You’re doing great, friend! If you need help, you can always schedule a repair.
Tools Used


Step 19


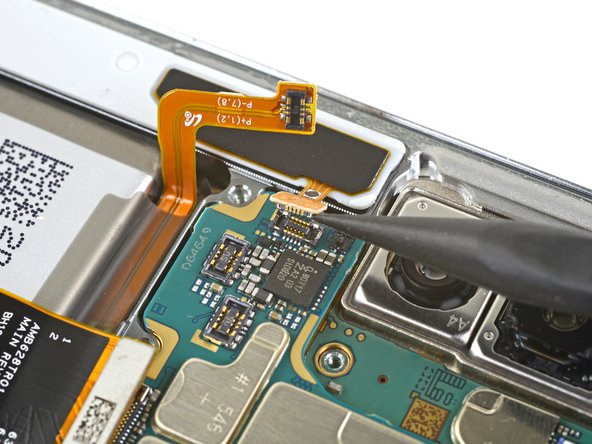
– Take a moment to unplug both interconnect cables. You’ve got this!
Step 20
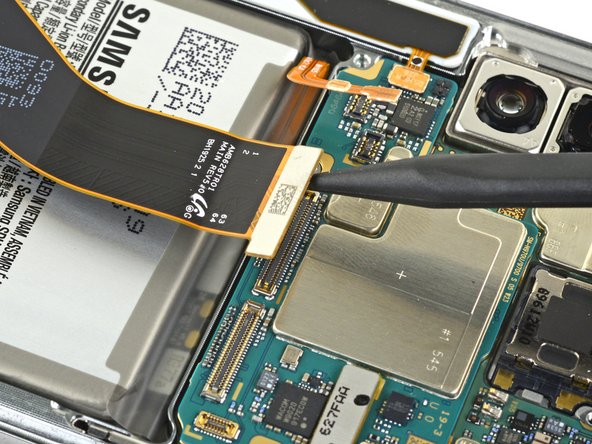

– Now, let’s give that display cable a little break! Grab your spudger (that handy tool with the pointed end) and gently disconnect the display cable from the motherboard.
Tools Used
Step 21

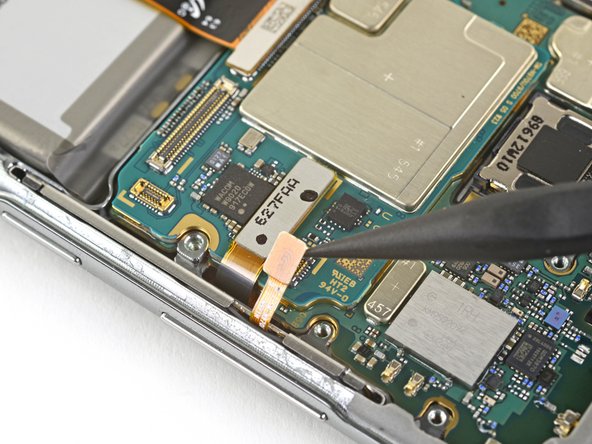
– Time to get started – use the pointed end of a spudger to carefully disconnect the side button connector from the motherboard. Take your time, you got this!
– Next up, let’s disconnect the touch layer connector from the motherboard. If you need help, you can always schedule a repair
Tools Used
Step 22

– Now it’s time to carefully disconnect the S-Pen charging coil connector from the motherboard. Use the pointed end of a spudger to gently pry it loose. If you need help, you can always schedule a repair
Tools Used
Step 23
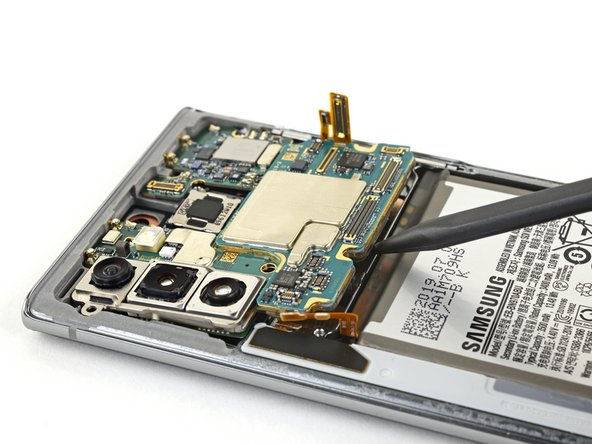

– Alright, time to give that motherboard some air! Use the pointed end of a spudger to gently lift up the motherboard. You got this!
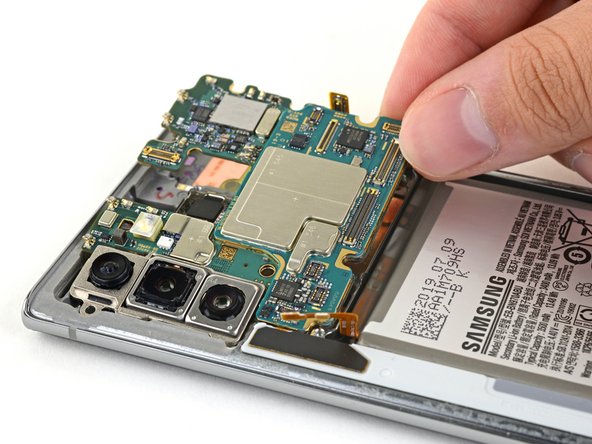
– Now, grab that motherboard with your fingers and carefully remove it. You’re almost there!
Tools Used
Step 24


– Let’s give that earpiece speaker a little nudge! Insert the pointed end of a spudger into the gap between the speaker and the phone’s frame, near the top right of the speaker.
– Now, gently pry up to loosen the earpiece speaker from its cozy little recess. If you’re feeling stuck, remember you can always schedule a repair with us!
Tools Used
Step 25
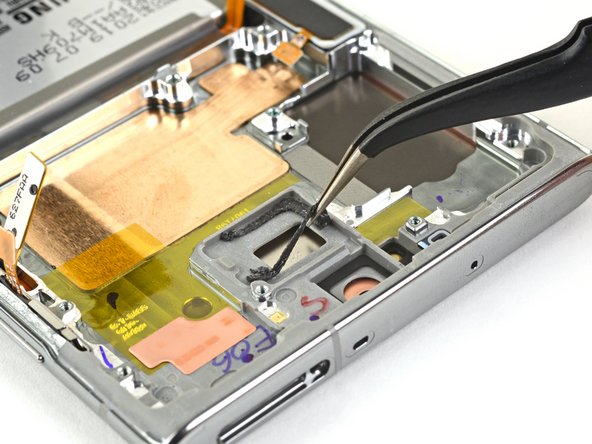

Hold on to your hats! This earpiece speaker is holding on tight with some light adhesive. Don’t worry, with a little patience and care, you’ll have it free in no time. If you need help, you can always schedule a repair.
– Grab your trusty tweezers and gently pull that earpiece speaker right out of its little home.
– Before you pop in your new earpiece speaker, make sure to give that old adhesive the boot. Get rid of it all so you can have a fresh start. If you need help, you can always schedule a repair.
Tools Used