Asus Zenbook UX32VD Teardown
Duration: 45 minutes
Steps: 24 Steps
Feeling a bit off-balance? Take a breather and find your Zen. Or, better yet, sit back and watch as we break down this sleek Ultrabook into its simplest parts. Enjoy the calm of this teardown? Ready to dive back into the action and explore the web? Stay updated on all our upcoming teardowns by following us on Twitter!
Step 1
– Mastering Zen takes patience—or you could just pick up the Zenbook Prime.
– The UX32VD Zenbook Prime hit the scene in Q2 2012, stepping things up from the UX31E.
– Check out what makes the UX32VD so chill:
– 1.9 GHz Intel Core i7 that keeps things moving.
– Nvidia GeForce GT 620M for dedicated graphics muscle.
– Crisp 1920 x 1080 IPS display—hello, sharp visuals.
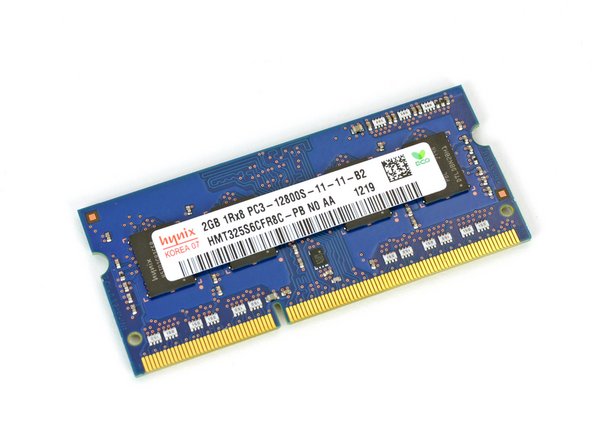
– 4 GB RAM (with 2 GB you can upgrade).
– 500 GB hard drive plus a speedy 24 GB SSD cache.
Step 2

– Asus doesn’t just deliver a slick Ultrabook, they’ve packed in a bunch of thoughtful extras with the Zenbook:
– Considering the laptop’s $1300 price tag, Asus definitely made sure these extras feel premium, not cheap.
– Envelope-style laptop sleeve for a snug fit.
– A stylish power adapter with a sleek machined finish.
– Mini VGA-to-VGA adapter for when you need to connect the old school way.
– USB-to-ethernet adapter for a wired connection when Wi-Fi just won’t cut it.
– A small pouch to keep all your adapters together so you don’t lose them.
Step 3

– While the Zenbook is a powerhouse of an Ultrabook, it does get a bit of flak for being on the thicker side.
– But hey, let’s keep it real—the Zenbook’s ‘bulging waistline’ isn’t really a big deal. When you line it up next to a MacBook Air, it’s just a smidge thicker at the spine. No need to stress!
Step 4


– The only clue that this is the latest Zenbook is the model number hanging out on the bottom panel.
– The UX32VD rocks a dedicated hotkey for ‘Super Performance Mode’—just tap Function + Space to kick things up a notch.
– That logo? It definitely gives off fast-runner-at-the-Olympics vibes.
Step 5


– Everyone loves a well-connected Ultrabook, and the Zenbook certainly lives up to expectations.
– Unfortunately, the display adapter isn’t the same as the mini display adapter Apple uses, so if you were hoping to reuse your old adapter, you’re out of luck. But don’t worry, Asus has got your back by including a mini VGA-to-VGA adapter in the box, so you can use that extra cash for some shiny new tools.
– Three USB 3.0 ports for all your fast-charging and data-transfer needs.
– A combo SD, SDHC, and MMC card reader – because why not keep all your files close by?
– Audio out for your favorite tunes or podcasts.
– Mini VGA port – a bit old-school, but hey, it gets the job done.
– HDMI out for easy connection to external displays, making presentations a breeze.
Step 6


Torx screws are our favorites! They have a generous surface area for torque transfer, making them less prone to slipping out compared to other screws, and guess what? They’re pretty common too!
– The sleek aluminum bottom cover is secured with twelve T5 Torx screws. While it may not be the same premium feel you’d expect from Apple, we appreciate Asus keeping things simple with non-proprietary screws.
Step 7


– Start by carefully removing the battery—it’s the first component to go! This step is a real win for repairability. Next, notice that while the outer case screws are Torx, the eight screws securing the battery are Phillips #0—an interesting choice by Asus. Finally, as you lift out the battery, you’ll find some bonus components: the left and right speaker assemblies glued to the sides of the battery. If you need help, you can always schedule a repair.
Step 8


– The 7.4 volt, 6520 mAh battery in the UX32VD weighs 280.5 grams, which makes up about 20% of the Zenbook’s overall weight.
– This Zenbook packs a 48 watt-hour battery, which is slightly smaller than last year’s model but still holds its own against other laptops of similar size.
– For a fun comparison, the 13″ MacBook Air has a battery that weighs in at 300 grams, around 22% of its total weight.
– 2011 Zenbook UX31A: 50 watt-hours
– Macbook Air: 50 watt-hours
– Acer Aspire S5: 34 watt-hours
Step 9

– Many PC makers partner with audio experts outside their own teams to give their laptops top-notch sound systems. Asus follows suit, teaming up with Bang & Olufsen to bring the Zenbook’s audio to life.
– Not familiar with Bang & Olufsen? They’re the go-to audio choice for some pretty fancy car brands, including Aston Martin.
– Rumor has it, the left speaker is Bang, and the right one is Olufsen. At least, that’s what we’ve heard.
– We’ll just say that’s the buzz going around.
– Stick with us, we’ve got more in store!
Step 10
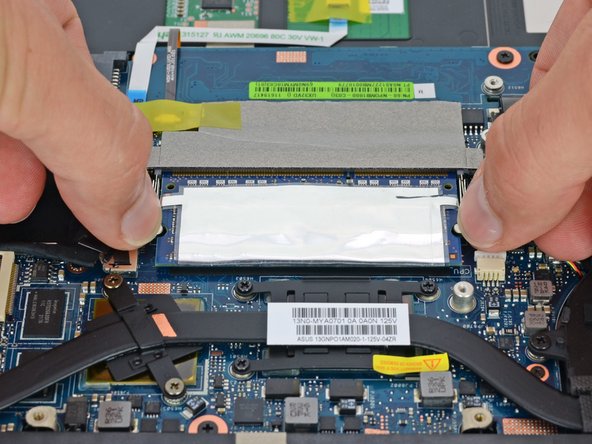
– To blur the line between Ultrabook and powerhouse laptop, Asus packed the Zenbook with both built-in RAM and a slot for extra RAM.
– Sure, the Zenbook might be having a bit of an identity crisis, but hey, it’s a smart move for Ultrabook evolution.
– Asus clearly wanted to give you upgrade and repair options, but with tight space inside this already-packed Zenbook, there’s room for just one removable RAM module.
– We’re on the lookout for the onboard RAM, but for now, let’s focus on removing that accessible RAM stick.
Step 11

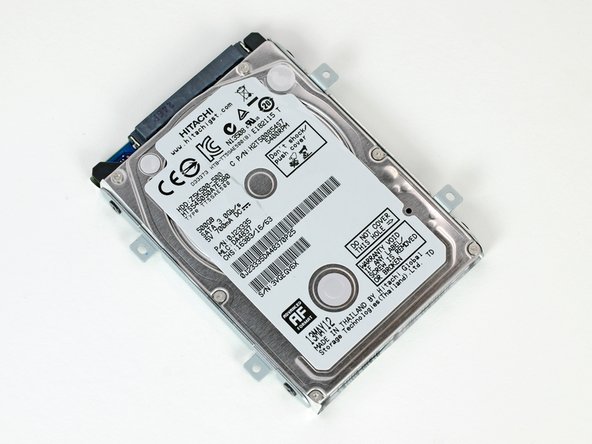
– The Zenbook rolls in with a 500 GB 5400 RPM 2.5″ hard drive and a speedy 24 GB of onboard SSD storage.
– Let’s line up this hard drive alongside what the other Ultrabooks are packing.
– Honestly, a 5400 RPM HDD feels a little slow for a laptop rocking a $1,300 price tag.
– 2012 Apple MacBook Air 13″ ($1,099.99 – $1,199.99): 128 GB SSD
– Dell Inspiron 14z ($899.99): 500 GB, 5400 RPM HDD and 32GB onboard SSD
– Acer Aspire S5 ($1,279.00 – $1,399.99): Dual 128 GB SSDs
Step 12

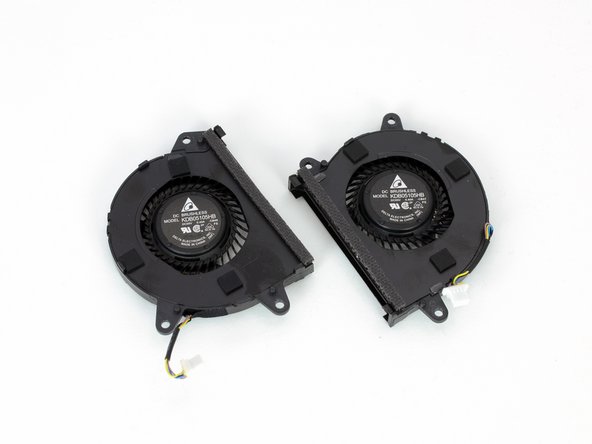

– These fans are definitely cool and super easy to get to!
– Since fans are the heroes of air circulation in your device, they tend to be the dust magnets. So, having easy access to them for a quick clean-up is key to keeping your gadget in tip-top shape.
– We’ll take a breather. Promise! Or maybe not—only time will tell.
Step 13


– There’s a certain satisfaction in peeling off a warranty sticker—maybe it’s the final step that makes the device feel truly yours. Asus didn’t make removing their warranty sticker complicated; it’s just a simple sticker, not a tricky residue or a disintegrating label. Even after removal, it sticks fairly well. Remember, we’re not encouraging anyone to cheat the system—just sharing the facts. If you need help with any step, you can always schedule a repair.
Step 14
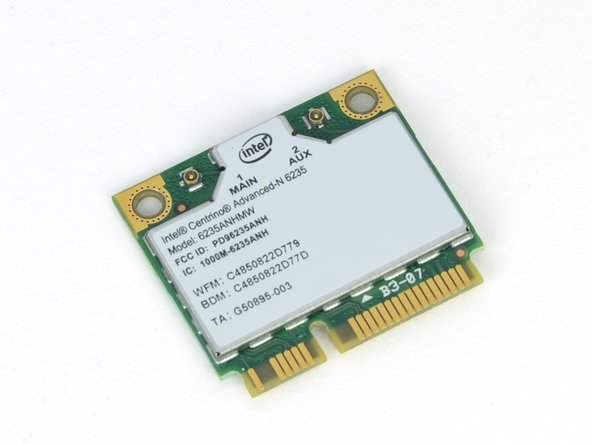
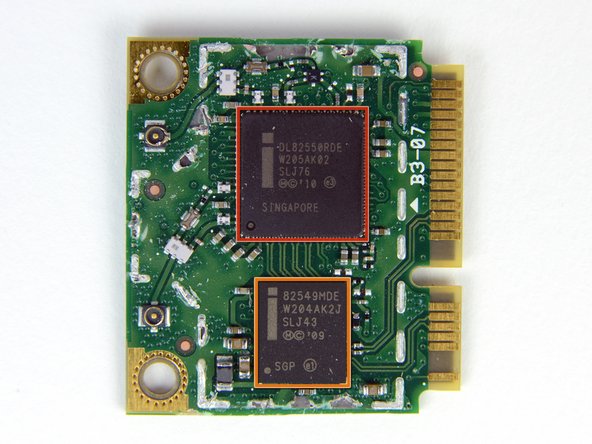

– With a bit of effort, the Intel 6235 Wi-Fi / Bluetooth 4.0 card pops right out of its mini PCI Express socket. Inside, you’ll spot two Intel chips:
– While other brands sometimes go for super-slim designs that make upgrades a pain, it’s great that these Wi-Fi cards still use the accessible mini PCI Express format.
– Intel 82550 Fast Ethernet Controller
– Intel 82549MDE Wi-Fi controller
Step 15


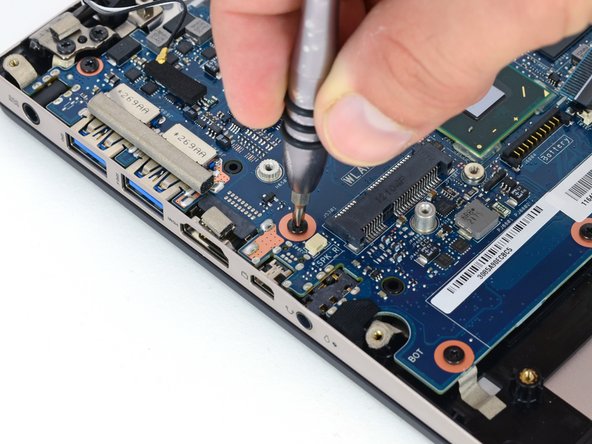
Labeling sockets and connectors might not be part of the official instructions, but trust us, it makes reassembling your device a whole lot easier. Thanks to Asus for the helpful heads-up!
– Removing and replacing the motherboard is a breeze, thanks to those handy labeled connectors on the board.
– Just pop off a few standard connectors and screws, and voilà—your motherboard is ready to come out!
Step 16

– Front of the motherboard lineup:
– Intel Core i7-3517U 1.9 GHz processor (4M cache, clocks up to 3.00 GHz) — the brains of the operation.
– NVIDIA GeForce GT 620M GPU — your graphics muscle.
– 4x Hynix H5TQ2G83CFR 2 Gb DDR3 SDRAM — main memory, four times the fun.
– 2x Hynix H5TQ2G63DFR 2 Gb DDR3 video SDRAM — extra memory dedicated to video tasks.
– SanDisk iSSD SDIS5BK 024G 24 GB SSD — where your speedy storage lives.
– Intel BD82HM76 platform controller hub — the traffic cop keeping things moving.
– ON Semiconductor NCP3218 synchronous buck controller — handling power duties like a champ.
Step 17

– The back of the motherboard hides some extra chips, including more onboard RAM for added power.
– So, if we’re counting right, the UX32VD comes with a total of 1 GB of onboard video RAM! (4 x 2 Gb = 8 Gb = 1 GB)
– 4x Hynix h5TQ2G83CFR 2 Gb DDR3 SDRAM
– 2x Hynix h5TQ2G63DFR 2 Gb DDR3 video SDRAM
– ITE IT8572G
– 3x Fairchild PC78T FDMC7696
– Richtek RT8168B PWM Controller
– Realtek ALC269 audio codec
Step 18

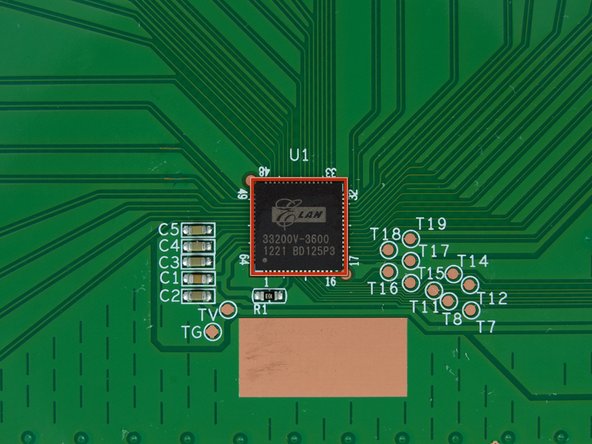

– The touchpad in the Zenbook likes to hang out underneath the battery, just like the MacBook Pro with Retina display. The good news? You can free this touchpad without upsetting the battery—unlike its MacBook cousin.
– All those smooth multi-touch gestures are handled by the Elan 33200V-3600 touchpad controller.
Step 19


Just to clarify, those hex nuts are not here to make your DIY dreams difficult; they’re just saving some precious space! Besides keeping the display assembly snug, each hex nut has a little secret – it’s drilled and tapped to also secure one of the motherboard screws. How cool is that?
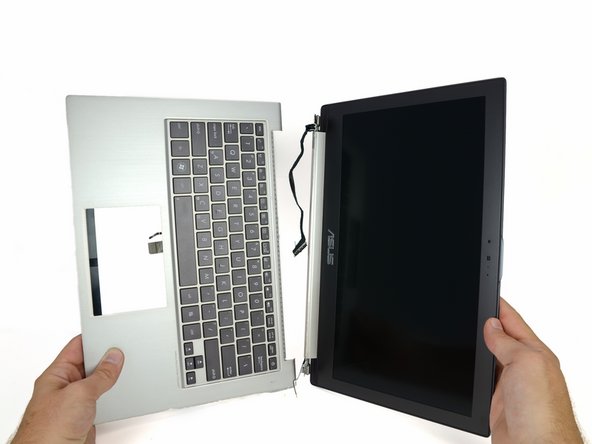
– Along with a couple of Phillips screws, each side of the display assembly is locked down with a 4 mm hex nut. Salvation Repair’s 54-bit driver kit? Yeah, those nuts don’t stand a chance.
– The display assembly comes off smoothly, leaving you with the upper case and its backlit keyboard.
– Much like the unibody MacBooks, the Zenbook’s keyboard is fused to the upper case. If you ever need to swap it, plan on replacing both parts together.
Step 20


– Time to tidy up the bottom of that display assembly! Let’s remove the clutch cover, hinges, and those sneaky wireless antennas.
– The main and auxiliary wireless antennas are hiding beneath the plastic clutch cover on the display assembly—one of the few non-metallic spots on the Zenbook’s exterior.
Step 21
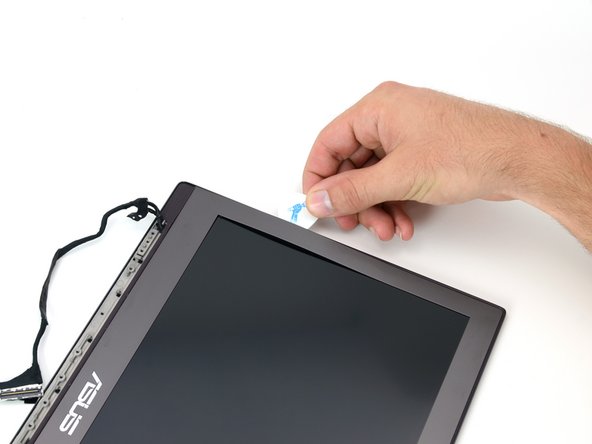

– The Zenbook display is free of that overly glossy front glass, and the bezel comes off smoothly after a little heat and a gentle strum of your guitar picks. Easy does it!
– Being able to access the display assembly is definitely a win. Once you pop open the Retina display, you’re looking at a display that’s easy to work with – a real treat for any repair enthusiast.
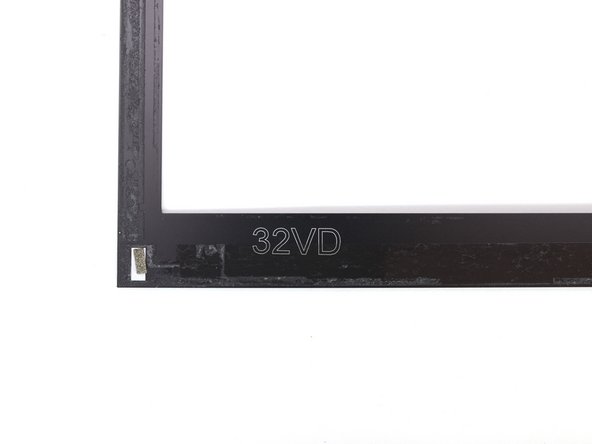
– Not only is the display bezel stylish and simple to remove, it’s also custom-designed specifically for the UX32VD. A perfect fit!
Step 22


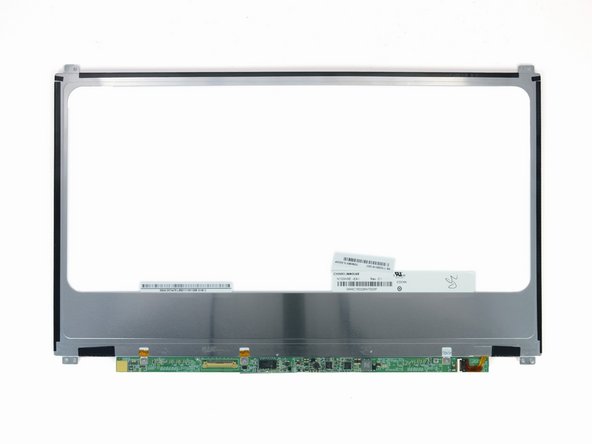
– Just when we thought this display was going to be a walk in the park, surprise! The LCD and camera cables are tucked right under the rubber display gasket.
– Normally, rubber gaskets don’t put up much of a fight, but these corners are locked down with some seriously stubborn adhesive. Grab your heat gun and channel your patience—it’ll take both to lift this up.
– Once the gasket is out of the way, remove the four Phillips screws, and the LCD is ready to come out.
– The Chimei Innolux 1920 x 1080 IPS LCD is known for its crisp visuals and gaming-friendly performance, all packed into an ultra-portable 13″ notebook.
Step 23

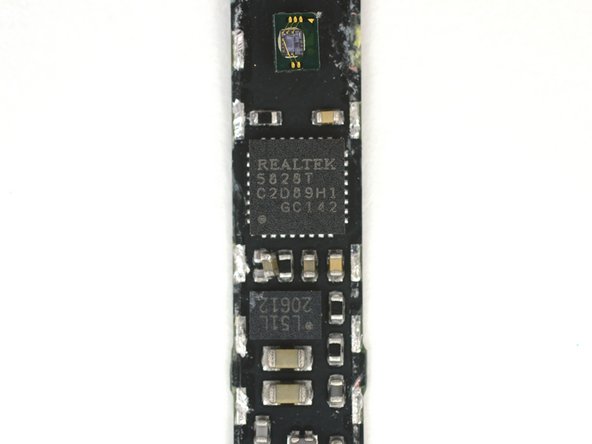
– Hey there! Yes, I see you, and so does the Zenbook’s 2-megapixel webcam! Say cheese!
– Thanks to the Realtek 5828T camera controller, all your recordings and video calls are in good hands.
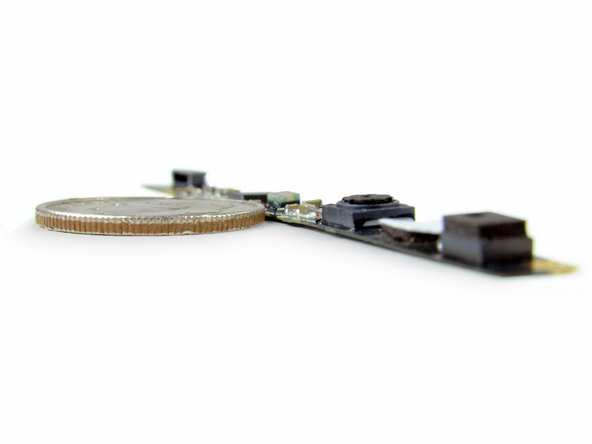
– Curious about the camera board? It’s super slim! Without its components, it’s only about 0.3 mm thick—imagine three pieces of paper stacked up!
– And just for fun, here’s a US dime for comparison. Yep, that’s right, a dime!
Step 24

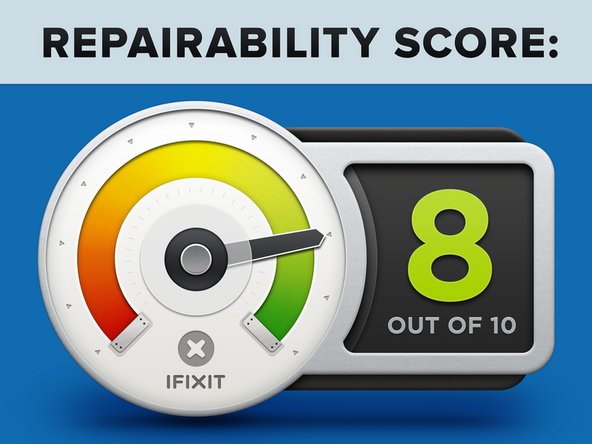
– Asus UX32VD Zenbook Repairability Score: 8 out of 10 (10 being a breeze to fix).
– All the parts are easy to reach, with no tricky proprietary screws standing in your way.
– The battery is not glued down, so with the right tools, you can swap it out in no time.
– Both RAM and the hard drive are upgradeable – feel free to boost your machine’s performance.
– The motherboard has clearly labeled sockets, making reconnecting those cables a whole lot easier.
– Some components are held down with a bit more adhesive than necessary, but nothing that should slow you down.
Success!