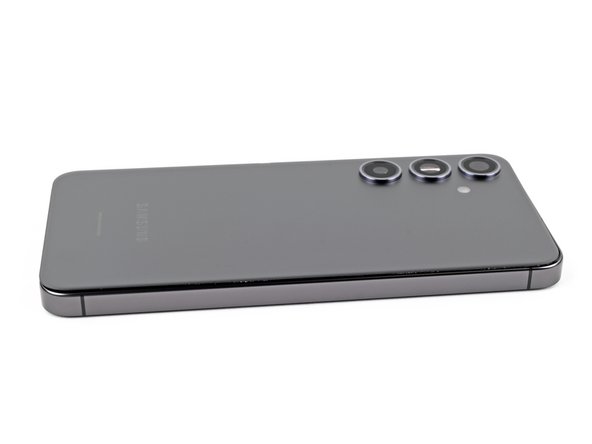
Samsung Galaxy S24+ Screen Replacement Guide
Duration: 45 minutes
Steps: 32 Steps
Get ready to say goodbye to your old screen!
Hey there, tech enthusiast! This guide will walk you through replacing the screen on your Samsung Galaxy S24+ like a pro. We’re focusing on replacing the screen itself, so if your replacement part includes a pre-installed frame, check out our other guide. This screen covers both the front glass and display panel. If your glass is cracked, you’ll need to replace both. Heads up, this process will send your old screen to tech heaven. But hey, that’s just part of the adventure! Don’t use this guide if you’re trying to salvage the screen from your old phone. If you need help along the way, you can always schedule a repair.
Step 1


– First things first, let’s give your phone a break! Unplug those cables. You’re almost there!
– Now, hold down the side key and the volume down button. Go ahead, press them together. Tap on “Power off” to shut down your phone. Easy peasy!
Step 2

When using heat to loosen things up, remember that a hair dryer, heat gun, or hot plate can be your best friend – just be gentle and avoid overheating, as your phone’s display and internal battery are sensitive to high temperatures. If you need help, you can always schedule a repair
– Warm up your iOpener and give it a cozy two-minute hug on the right edge of the back cover.
Tools Used


Step 3

Having trouble getting that gap started? No worries, just apply a bit more heat to loosen up the adhesive. Be sure to follow the iOpener instructions to avoid overheating. And if you need help, you can always schedule a repair
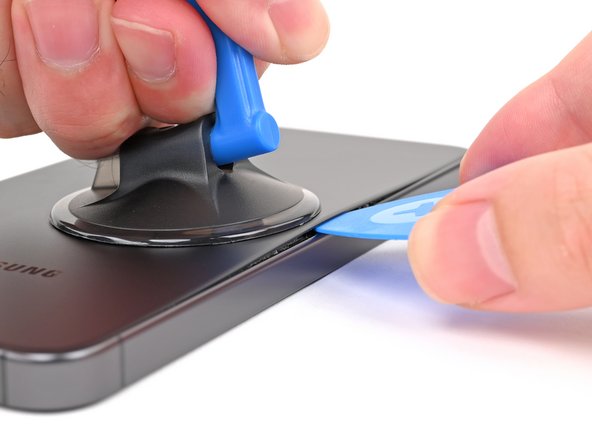
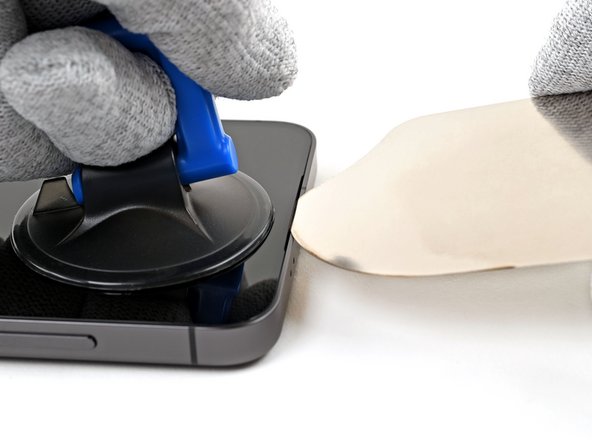
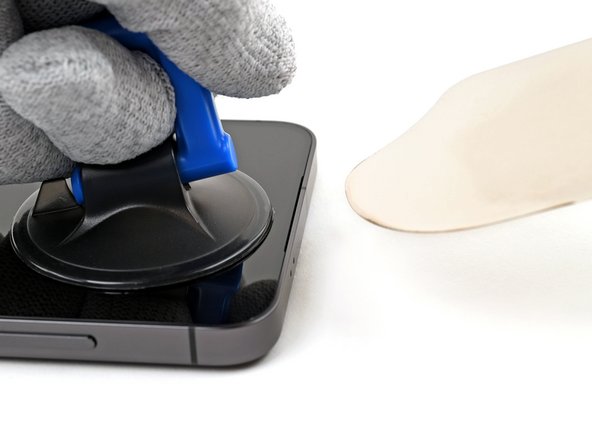
– First, attach a suction handle to the back cover, positioning it as close to the center of the right edge as you can.
– Now, pull up on the suction handle with a firm, steady force – you’re aiming to create a gap between the cover and the frame, so don’t be shy!
– Next, take an opening pick and carefully insert it into the gap you’ve just created. If you need help, you can always schedule a repair
Tools Used

Step 4


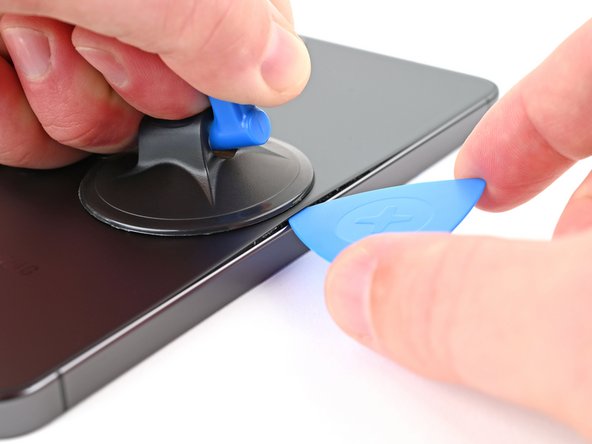
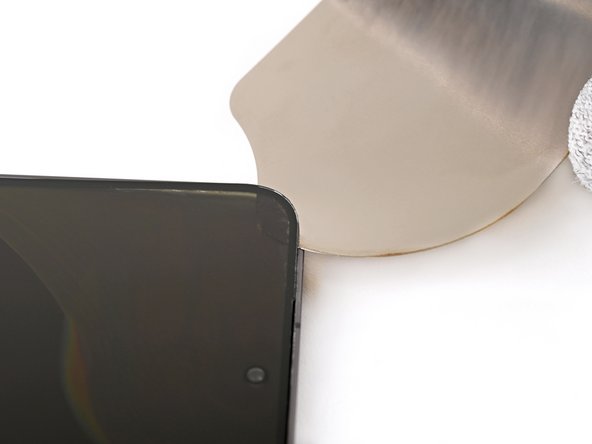
– Let’s slide that pick back and forth along the right edge to loosen up that adhesive.
– Leave the pick hanging out near the bottom right corner so that glue doesn’t sneak back in.
Step 5

– Let’s warm up that back cover! Apply a heated iOpener to the bottom edge for a couple of minutes. It’s like a mini spa day for your phone!
Tools Used
Step 6


– Swing the opening pick around the bottom right corner to loosen the adhesive. If you need help, you can always schedule a repair
Step 7

– Alright, let’s get this party started! Slide your trusty pick into the bottom right corner, like you’re opening a secret treasure chest.
– Now, scoot that pick over to the bottom left corner, giving the adhesive a little nudge to say ‘goodbye’.
– Keep that pick chilling in the bottom left corner to make sure that pesky adhesive doesn’t sneak back in. You’re doing awesome! If you need help, you can always schedule a repair
Step 8

– Warm up a cozy iOpener and gently place it on the left edge of your device’s back cover for a couple of minutes. Let the heat work its magic!
Tools Used
Step 9


– Let’s get this party started! Rotate the opening pick around the bottom left corner to get that sticky stuff outta there. You got this! If you need help, you can always schedule a repair
Step 10


– Now it’s time to add a third opening pick – slide it into the bottom left corner and get ready to loosen things up.
– Gently push the pick upwards towards the top left corner to break the adhesive seal – you’re making great progress!
– Leave that pick right where it is, near the top left corner, to keep the adhesive from sticking back together. If you need help, you can always schedule a repair
Step 11

– Now it’s time to get this repair started – apply a heated iOpener to the top edge of the back cover for about two minutes. If you need help, you can always schedule a repair
Tools Used


Step 13


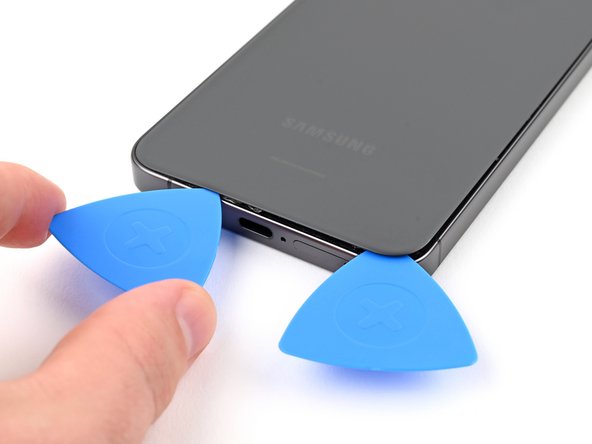
– Pop in a fourth opening pick at the top left corner, just like you’re starting a little party for your device!
– Now, gently slide that pick toward the top right corner—it’s time to break free from those sticky adhesives.
– Keep that trusty pick snug near the top right corner to make sure the adhesive doesn’t get any funny ideas about resealing.
Step 14


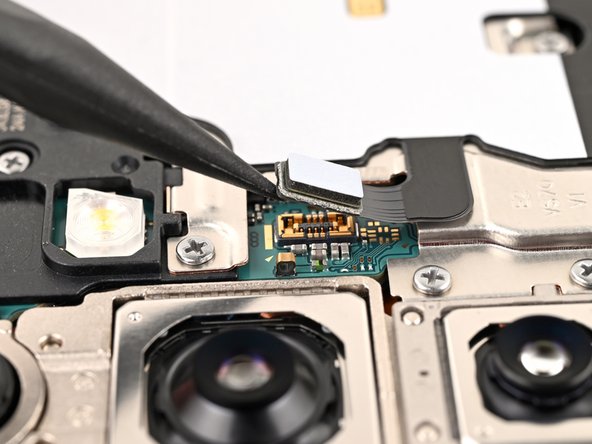
Notice the square of adhesive surrounding the rear microphone, conveniently located just above the flash. If you need help, you can always schedule a repair
– Position the tip of your trusty opening pick right at the flash.
– Gently slide that pick under the top edge of the back cover until you feel it start to catch on the adhesive.
– Keep gliding the pick down towards the bottom of the phone while lifting the cover ever so slightly until it breaks free from the adhesive.
Step 15


If the back cover is giving you a hard time, grab an opening pick to help break any adhesive that’s holding it down.
Now’s a great time to power up your phone and check that everything’s working like a charm before you seal it back up. Just remember to turn it off completely before diving back in!
Keeping that water resistance intact after your repair is all about how well you reapply the back cover adhesive. Just a heads up, your device will lose its IP (Ingress Protection) rating.
– First things first, let’s get that back cover off! Grab it and give it a good pull.
– Now, when it’s time to put everything back together:
– Feel free to use tweezers or your fingers to gently peel off any sticky adhesive left on the back cover and the phone. If things get tough, a little warmth or some isopropyl alcohol (90% or greater) paired with a coffee filter or lint-free cloth should do the trick to loosen things up.
– And if you’re using custom-cut adhesives, don’t forget to follow this guide.
Tools Used


Step 16

Look for a little arrow printed next to each press connector. That’s your prying location. It’s like a secret message from the board itself, telling you where to go. You’ve got this! If you need help, you can always schedule a repair
– Time to get started! Use a spudger to carefully pry up and disconnect the wireless charging coil press connector from the motherboard. Take your time and work gently to avoid any damage.
– Reconnecting press connectors is a breeze. Simply align the connector with its socket, and press down firmly with your fingertip – first on one side, then the other – until you hear it click into place. If it’s not cooperating, don’t force it. Just reposition and try again. If you need help, you can always schedule a repair with Salvation Repair.
Tools Used

Step 17


– Grab your trusty Phillips screwdriver and get ready to loosen those screws! We’re about to take off the wireless charging coil and loudspeaker. It’s a total of 13 tiny screws, 6 for the charging coil and 7 for the loudspeaker. Don’t worry, you got this! If you need a hand, you can always schedule a repair.
Step 18


– Let’s get that speaker out! Start by gently inserting the tip of your spudger into the notch at the top left corner of the loudspeaker (it’s marked with an arrow – you got this!).
– Now, gently pry up to release the loudspeaker from the frame. Think of it as giving it a little hug, then letting it go!
Tools Used
Step 19


– Let’s get that speaker out! Carefully lift it away from the frame using your fingers.
– Time to say goodbye to the wireless charging coil and loudspeaker. Gently remove them from the frame.
– Alright, almost done! When you’re putting things back together, make sure you press around the edges of the loudspeaker to secure it to the frame before you put the screws back in. You’ve got this!

Step 21
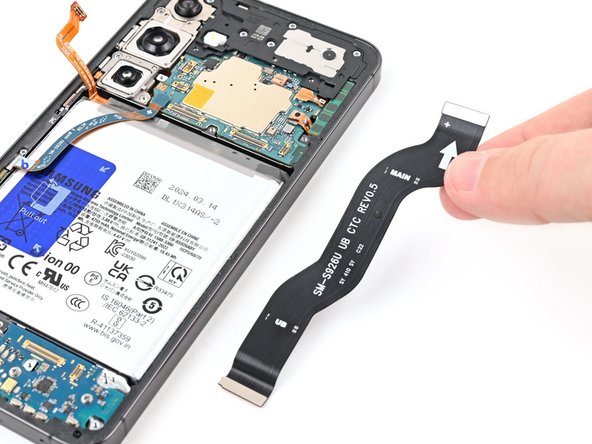
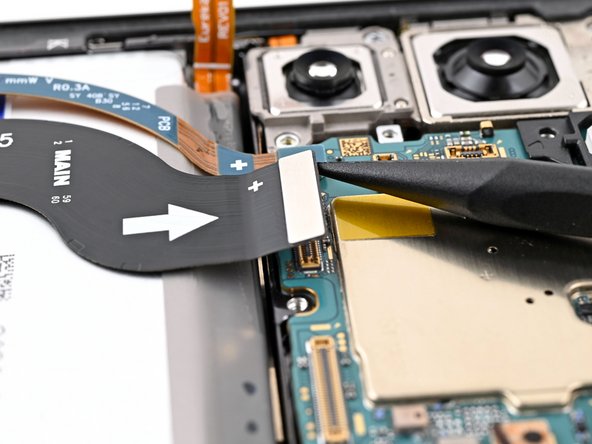

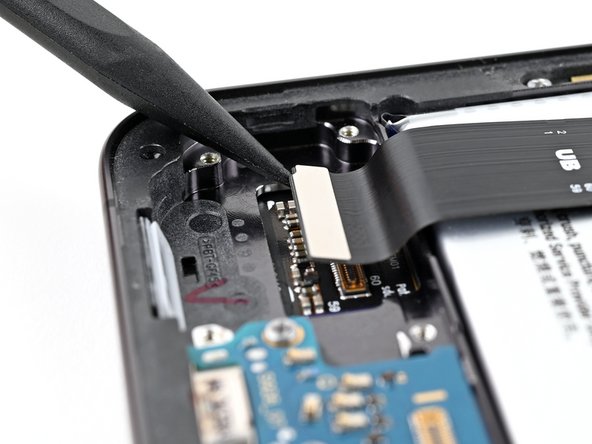
– Time to get those nimble fingers working! Use a spudger to gently lift and disconnect the display cable press connector from the motherboard. You got this! Next, carefully remove the display cable. Keep going, you’re doing great! If you need help, you can always schedule a repair
Tools Used
Step 22

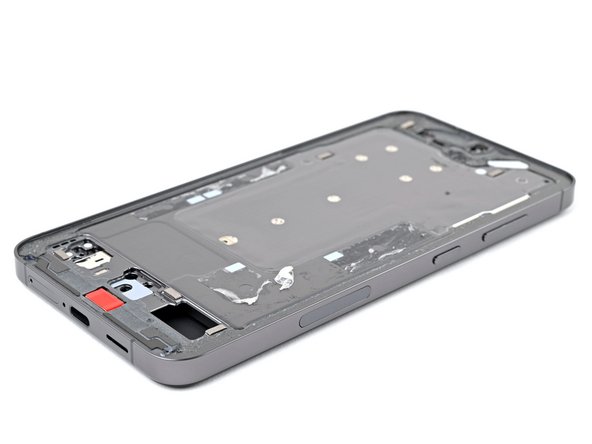
– Alright, time to put the back cover back on its throne. It’s protecting the battery and phone’s insides from any potential drama, so let’s make sure it’s secure. 😎
– Flip the phone over so that beautiful screen is staring right back at you! We’re almost done, hang tight. 🤘
Step 23

Just a friendly reminder: keep the heat in check while working on your phone—too much can be a bummer for the battery!
– Now it’s time to get this screen loose. Use a hair dryer or heat gun to warm up the top edge until it’s hot, but not scorching. If you’re not comfortable with this step, don’t worry – you can always schedule a repair and let the pros at Salvation Repair handle it.
Tools Used
Step 24

Find a nice, smooth spot near the top of your device that’s big enough for a suction cup to get a good grip.
– Hey there! If your screen is totally cracked, don’t worry, we’ve got you covered! Just lay down some packing tape over the glass, like a little shield, to keep you safe and make things easier when you’re taking everything apart. It’s like giving your phone a little hug!
Step 25


Be the hero of this repair story and take some precautions while removing the front glass. We’ve got your back!
The gap between the front glass and frame is super tight. To get started, you’ll need a thin, sturdy tool like an iFlex to pry it open. If you need help, you can always schedule a repair
– Hey, these iFlex tools (or similar ones) can be pretty sharp, so let’s be careful with those edges! Just use a good grip on the handle, you know what I mean? 😊
– Heads up! The front glass can be a bit fragile and might splinter, so we want to protect ourselves. Grab some gloves and safety glasses—you got this! 😎
Tools Used

Step 26

The iFlex or a similar tool just needs a gentle nudge to slip in and create a tiny little gap between the glass and the display panel. Remember, if you go too deep, that front-facing camera might get a bit cranky!
Don’t worry if the front glass starts to separate from the display panel and looks a bit discolored – that’s totally normal. You’ll be taking out the display panel in a later step, so just hang in there. If you need help, you can always schedule a repair
– Grab a suction handle and place it right in the center of the top edge of the screen, getting as close to the edge as you can.
– Slide the iFlex or a similar tool in at a slight angle into the gap between the top edge of the front glass and the frame.
– With a firm yet gentle touch, pull up on the glass using the suction handle while carefully nudging the iFlex between the glass and the display panel.
Tools Used
Step 27

To minimize the risk of shattering the glass, consider using a plastic tool like an opening pick for the next step. If you’re feeling handy, an iFlex will also work, but a plastic tool is your safest bet. And remember, if you need help, you can always schedule a repair
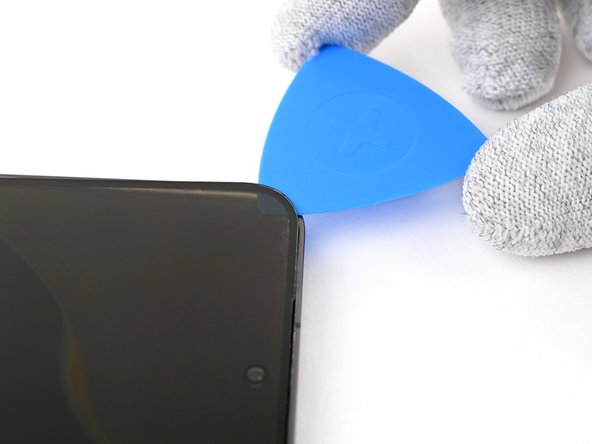
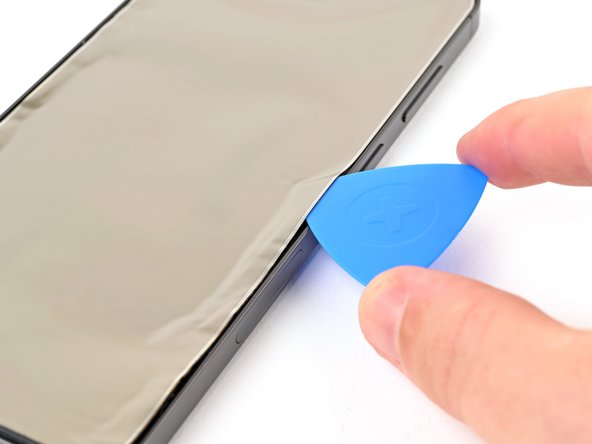
– Get ready to rock this repair! Take your iFlex (or a similar tool, like a guitar pick) and gently twist it around one of the top corners of the front glass.
– Keep twisting until you create a little gap, just big enough to slip in your opening pick. Then, remove the iFlex and give yourself a high five! You’re on your way.
Step 28

Don’t worry, sometimes that adhesive can be a little stubborn! Just grab your trusty hair dryer or heat gun and gently warm up those sides of your phone until they feel cozy and warm. That should make it a little easier to separate.
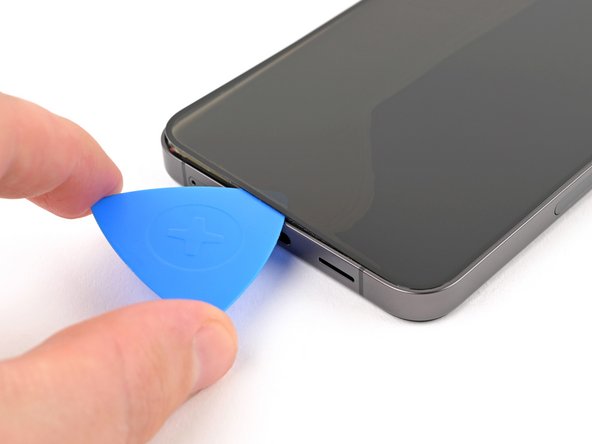
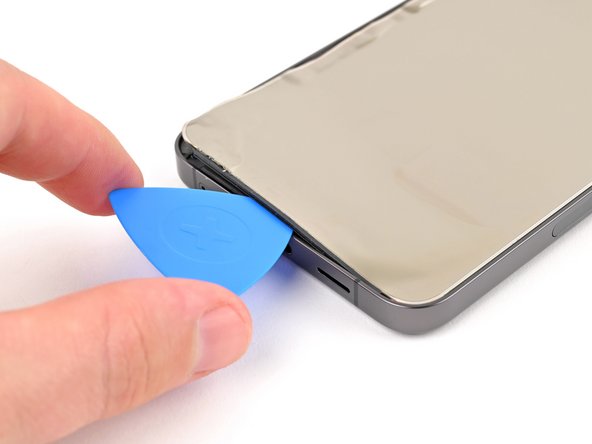
– Now it’s time to get this glass loose – carefully slide the opening pick around the edges of the front glass to release the adhesive that’s holding it in place. If you need help, you can always schedule a repair
Tools Used


Step 30

If you’re having a tough time getting that pesky adhesive to budge, grab a hair dryer or heat gun and give the display panel a little warmth. It’ll help soften things up and make your life easier.
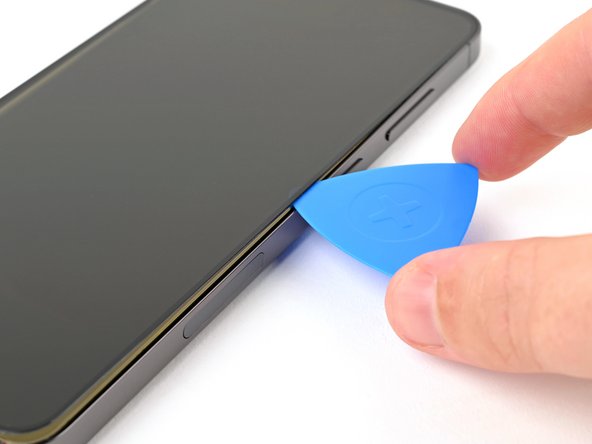
– Slide an opening pick beneath the display panel to get things started.
Tools Used
Step 31

At the bottom edge of the display panel, you’ll find components attached to the back. Slide the opening pick under these components with a little finesse.
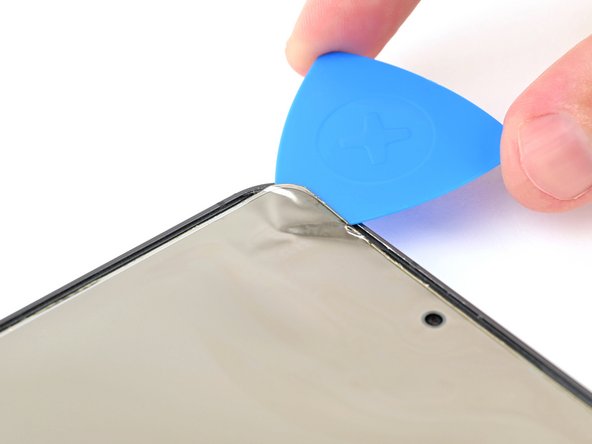
– Gently glide that opening pick around the perimeter of the display panel to break free the adhesive that’s holding it snugly to the frame.
Step 32
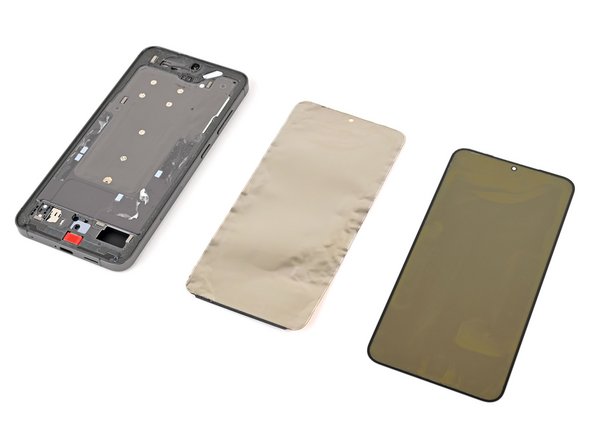

To make removing the display panel a breeze, use an opening pick to gently separate the adhesive underneath – just be careful not to accidentally damage the front camera. If you need help, you can always schedule a repair