Replace Samsung Galaxy S22+ USB-C Port: Step-by-Step Guide
Duration: 45 minutes
Steps: 25 Steps
Ready to give your Samsung Galaxy S22+ a fresh start with a new USB-C port and charging board? Awesome! Before you dive into the disassembly process, make sure your battery is completely drained. It’s all about safety, friend! This helps prevent any unexpected surprises (like a warm battery) during the repair. If you see that your battery has decided to do a little ‘bulging’ action, you know what to do – take extra care. And remember, reapplying the adhesive like a pro will help you keep that water resistance mojo, but your device will lose its official IP rating. No worries, though! If you need help along the way, you can always schedule a repair with us.
Step 1


No worries if you’ve accidentally poked the SIM eject tool into the microphone hole! Chances are, the microphone is just fine.
– Grab your trusty SIM eject tool, a handy bit, or even a straightened paper clip, and gently slide it into the SIM card tray hole located on the bottom edge of your phone.
– Give that SIM eject tool a little push to pop out the SIM card tray like a champ.
– Now, go ahead and pull out the SIM card tray with confidence!
Step 2

Before you start, make sure your phone’s battery is below 25%. This is a crucial safety precaution – a charged lithium-ion battery can be a fire hazard if it’s damaged. If you need help, you can always schedule a repair
You can also use a hairdryer, heat gun, or hot plate to warm things up. But be careful! Too much heat can be a bad thing for your phone. It might hurt the screen or the battery. If you need help, you can always schedule a repair.
– Get your iOpener warmed up and ready to go. Stick it on the bottom edge of the back cover and let it hang out there for three minutes. This will help loosen the adhesive underneath.


Step 3


If your back cover is sporting a crack, the suction handle might have its own ideas about sticking. Give it a whirl with some strong tape, or whip out the superglue – just stick it on and let it chill for a bit before you move on to the next step.
Having a tough time getting that gap going? No worries! Just add a little extra heat to help the adhesive loosen up. And remember to keep an eye on those iOpener instructions so you don’t accidentally turn it into a scorched masterpiece!
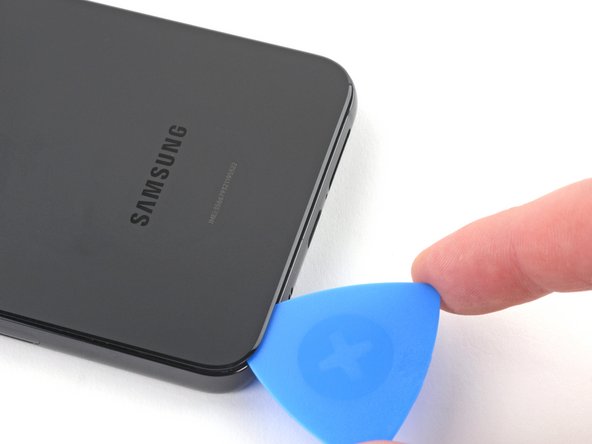
– Grab a suction handle and stick it to the bottom edge of the back cover, keeping it as close to the edge as you can.
– Gently pull up on the suction handle to lift the back cover, making just enough room for some magic to happen.
– Slide an opening pick into that lovely gap you just created and get ready to dive in!
Tools Used

Step 4


If the adhesive gets stubborn and hard to cut, it’s probably just feeling a little chilly. Give it a warm hug with your iOpener for two to three minutes to get it nice and pliable again. If you need help, you can always schedule a repair
– Alright, let’s get this phone up and running! First, unplug that pesky suction handle. Now, grab our trusty opening pick and slide it along the bottom edge like a pro – you’ve got this! Lastly, leave the opening pick near the bottom left corner, so it stops that stubborn adhesive from resealing on us. You’re doing great! If you need help, you can always schedule a repair!
Tools Used
Step 5

– Let’s get this phone feeling the heat! Apply the heated iOpener to the left edge for 3 minutes to loosen up that glue.
– Need to give the iOpener a quick reheat? No worries, just pop it in the microwave for 30 seconds and we’re back in action.
Remember, our Repair Guide is here to help! We care about keeping your device safe from any nasty surprises. Be cautious with the iOpener’s heating – no rush, take it slow to avoid a surprise burst. If you’re ever stuck, you can always hit us up to schedule a repair!
A warm iOpener should stay cozy for around 10 minutes. If you need help, you can always schedule a repair.
Tools Used
Step 6


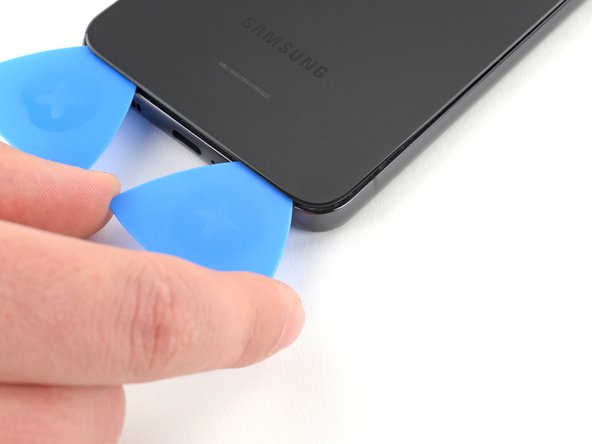
Woohoo! Don’t let that opening pick dive more than 5 mm deep, or you might poke something you didn’t mean to near the camera module. If you need help, you can always schedule a repair!
– Let’s get this party started! Slide your first opening pick into that gap near the bottom left corner. You’re gonna be a pro at this!
– Now, take your opening pick and gently glide it along the left edge. We’re cutting through that adhesive like butter.
– Keep that opening pick planted near the top left corner. We don’t want that sticky stuff sealing itself back up. You’re doing great!
Step 7

Don’t get carried away with the heat! Keep an eye on the iOpener. If it gets too toasty, it could get a little cranky. If you need help, you can always schedule a repair.
Once you’ve heated up your trusty iOpener, it’ll stay warm for up to 10 minutes. That’s plenty of time to get the job done right. If you need help, you can always schedule a repair
– Place your heated iOpener on the right side of the phone for a solid 3 minutes to get that adhesive nice and soft.
– If needed, give your iOpener a quick 30-second reheat.
Tools Used
Step 8

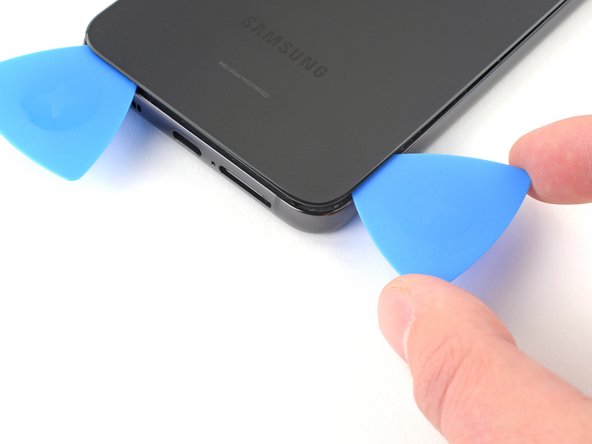
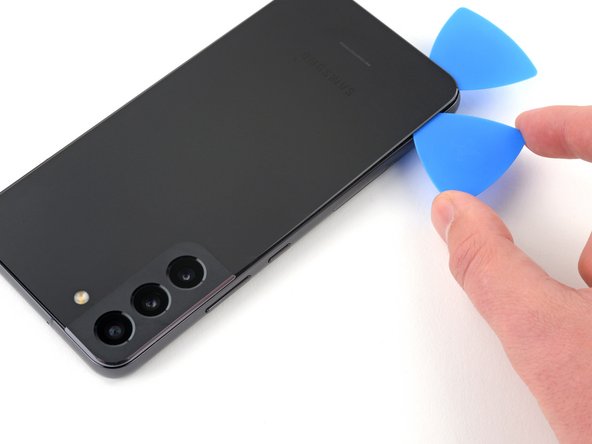
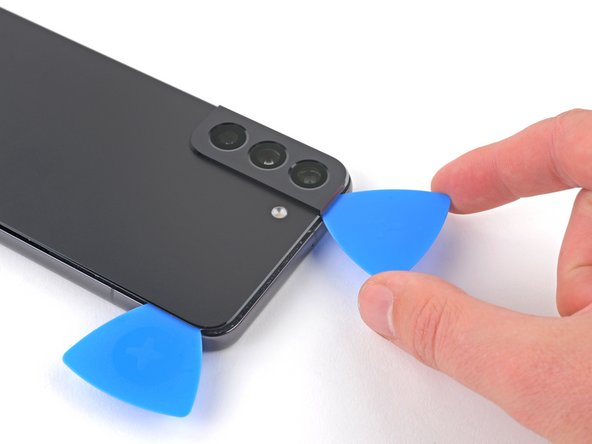
– Now it’s time to add a third opening pick to the gap you created along the bottom edge – you’re making great progress!
– Carefully slide the opening pick around the bottom right corner of the back cover to cut through the adhesive. If you need help, you can always schedule a repair
Step 9

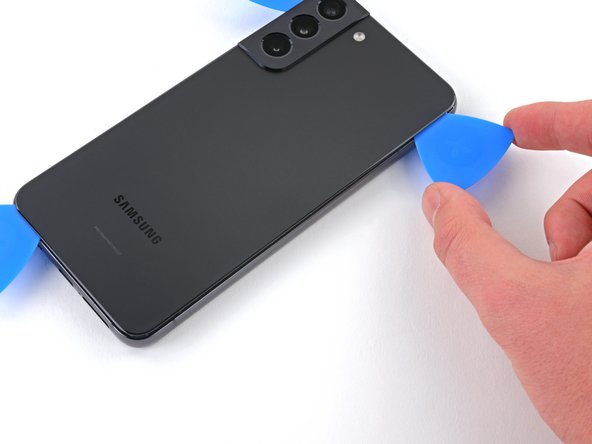
Hey there! Keep that opening pick chill and don’t push it in more than 5mm, or you might give those delicate internal components a little tickle. 😉 If you need help, you can always schedule a repair.
– Keep sliding that opening pick along the right edge of the back cover – you’re making great progress slicing through the adhesive.
– Leave the opening pick in place near the top right corner, so the adhesive doesn’t start to reseal. You’re doing fantastic, and if you need help, you can always schedule a repair
Step 10

Hey there! Keep it cool with the iOpener—overheating it might make it pop. If you need help, you can always schedule a repair.
A properly heated iOpener will keep you going for up to 10 minutes – plenty of time to get the job done. If you need help along the way, you can always schedule a repair
– Give that top edge of your phone a little love with your heated iOpener for 3 minutes, that’ll soften the adhesive right up.
– If you need to, warm up your iOpener again for 30 seconds.
Tools Used
Step 11
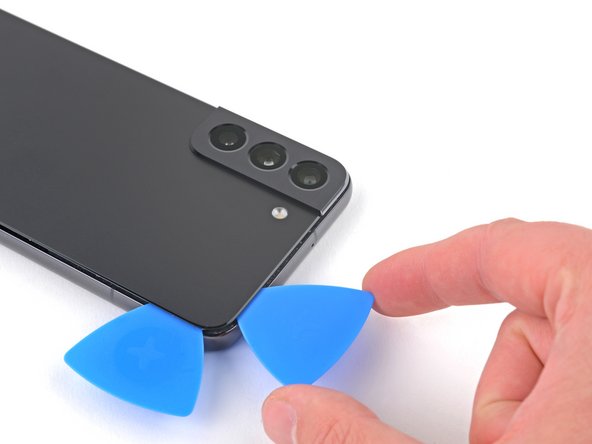

Keep that pick no deeper than 5 mm to steer clear of any mishaps with the rear cameras and flash. We want them shining bright, not blurry!
– Now, let’s get that top edge loosened up! Slide the opening pick across the top edge, starting at the top left corner, to break that adhesive bond. You got this!
Step 12


– First things first, let’s get that back cover off. No worries, it’s easier than it looks!
– During reassembly, it’s a good idea to power on your phone and give everything a test drive. Make sure to power it back down completely before moving on.
– Now, for those pesky adhesive chunks, use some tweezers or your fingers to gently remove them. If it’s being stubborn, you can apply some heat to help it along.
– If you’re using custom-cut adhesives, follow this guide .
– If you’re using double-sided tape, follow this guide .
– If you need help with any part of this, you can always schedule a repair
Step 13
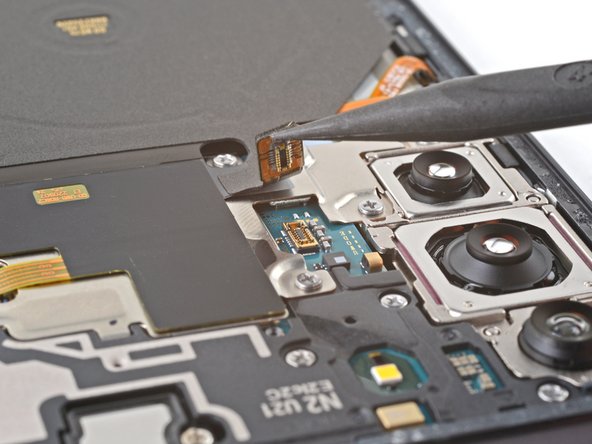

– Gently use the pointed end of your spudger to lift and disconnect the charging coil’s press connector from the motherboard. You’re doing great!
Tools Used

Step 14

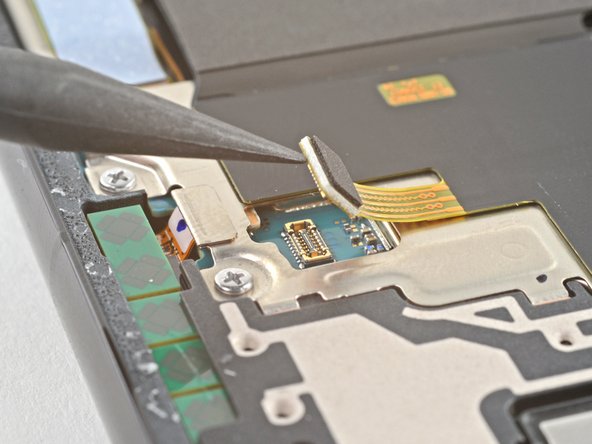
– Now, grab your trusty spudger and use the pointy end to gently pry up and disconnect the NFC antenna cable from the motherboard. It’s like a little dance!
Tools Used
Step 15

– Grab your trusty Phillips screwdriver and give those six 3.5 mm screws securing the charging coil a spin!
Step 16

– Let’s get started by removing the seven 3.5mm screws that hold the loudspeaker in place – simply use your trusty Phillips screwdriver to take them out. If you need help, you can always schedule a repair
Step 17


Hey, be cool and make sure you don’t separate the loudspeaker from the charging coil. It’s a delicate dance, so take it slow!
– Slide your trusty spudger between the left edge of the loudspeaker and the frame. It’s like giving the loudspeaker a little high five!
– Gently pry upwards to disconnect the clips holding the loudspeaker in place. You’re almost there!
– When you put everything back together, press the loudspeaker firmly into the frame until you hear those satisfying clicks. Think of it as a warm welcome back home for the loudspeaker!
Tools Used
Step 18

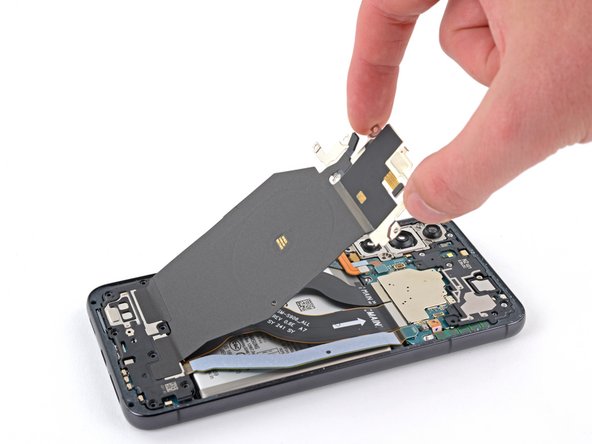

Keep the charging coil cozy with the loudspeaker—don’t try to split them up!
– Carefully take out the charging coil and NFC antenna assembly, like you’re unveiling a surprise gift!

Step 20

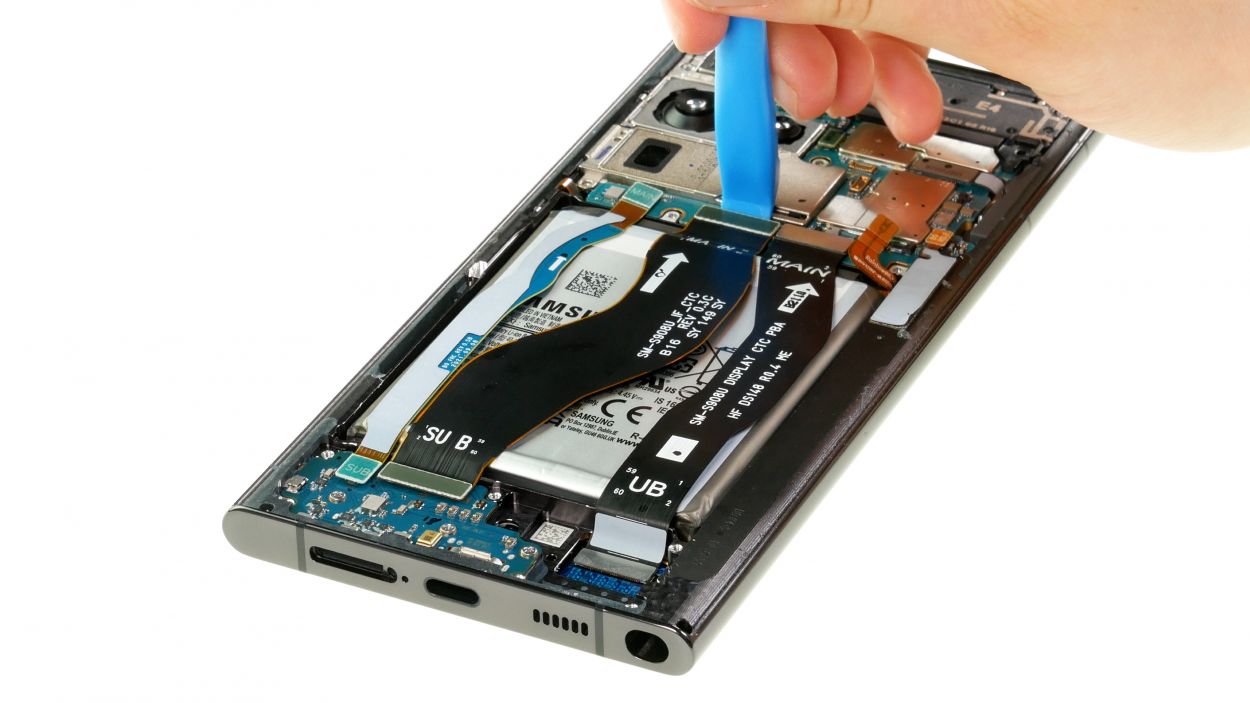
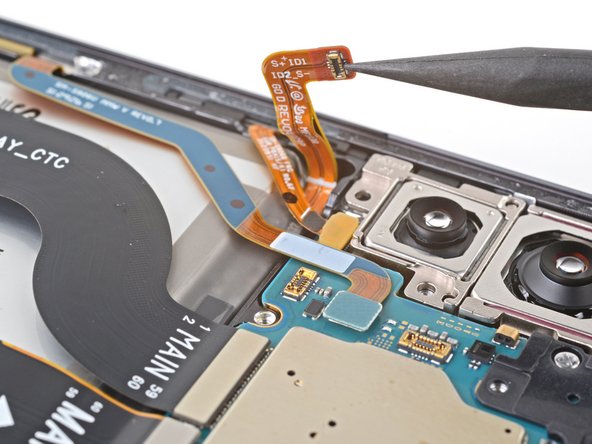
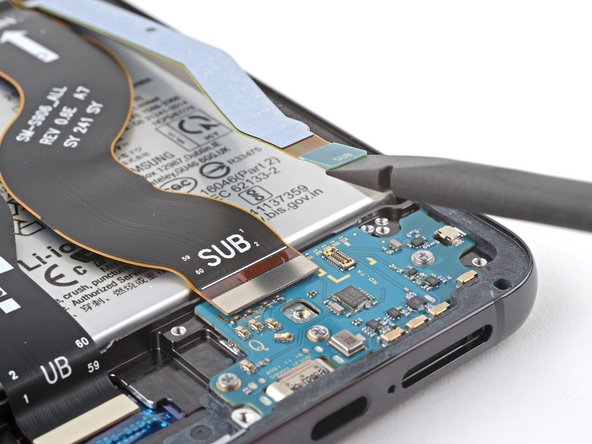
– Grab your trusty spudger and gently lift to disconnect the primary interconnect cable from the motherboard. You’ve got this!
– Now, give the secondary interconnect cable some love with your spudger and carefully pry it up to disconnect it from the motherboard. Keep up the great work!
Tools Used

Step 22
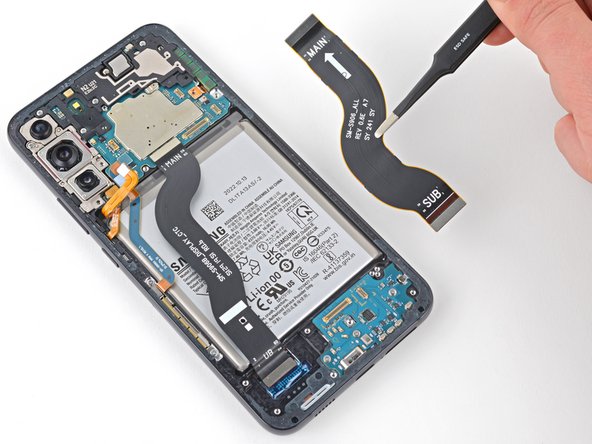

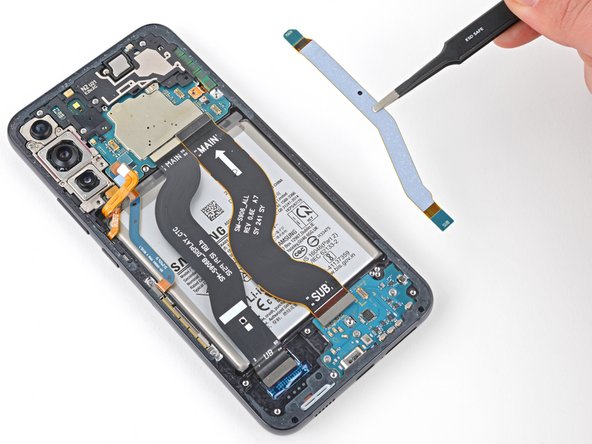
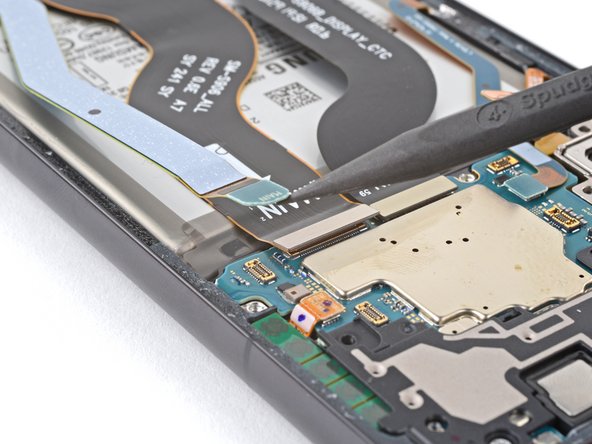
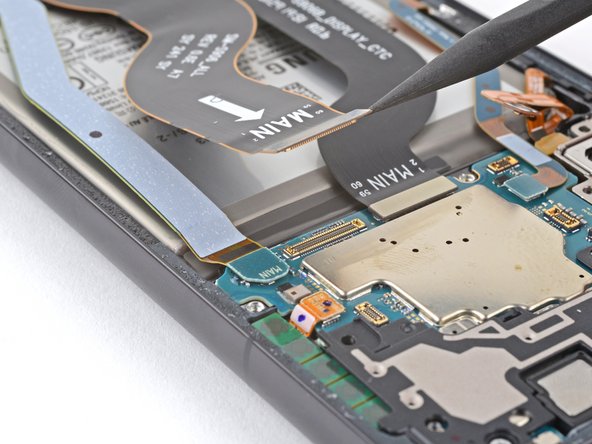
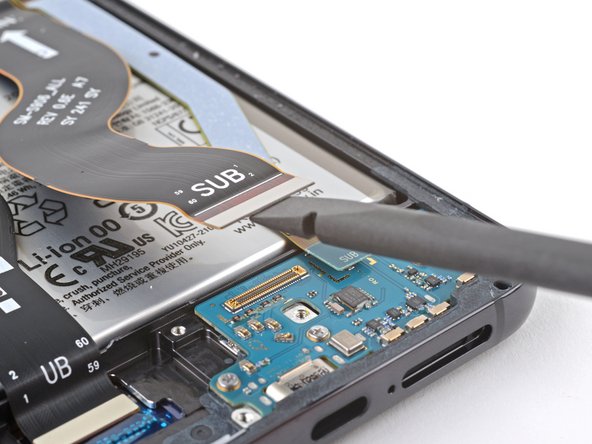
– Grab your trusty tweezers (or your fingers if you’re feeling confident!), and gently pull out those interconnect cables.
– When you’re putting everything back together, make sure the cable ends labeled ‘MAIN’ go to the motherboard, and the ‘SUB’ ends connect to the charging board. It’s like a little dance, just make sure they hold hands in the right places! If you need help, you can always schedule a repair
Step 23

– Time to get started with your repair. Use a Phillips screwdriver to remove the three 3.4mm screws that hold the charging board in place. If you need help, you can always schedule a repair

Step 25


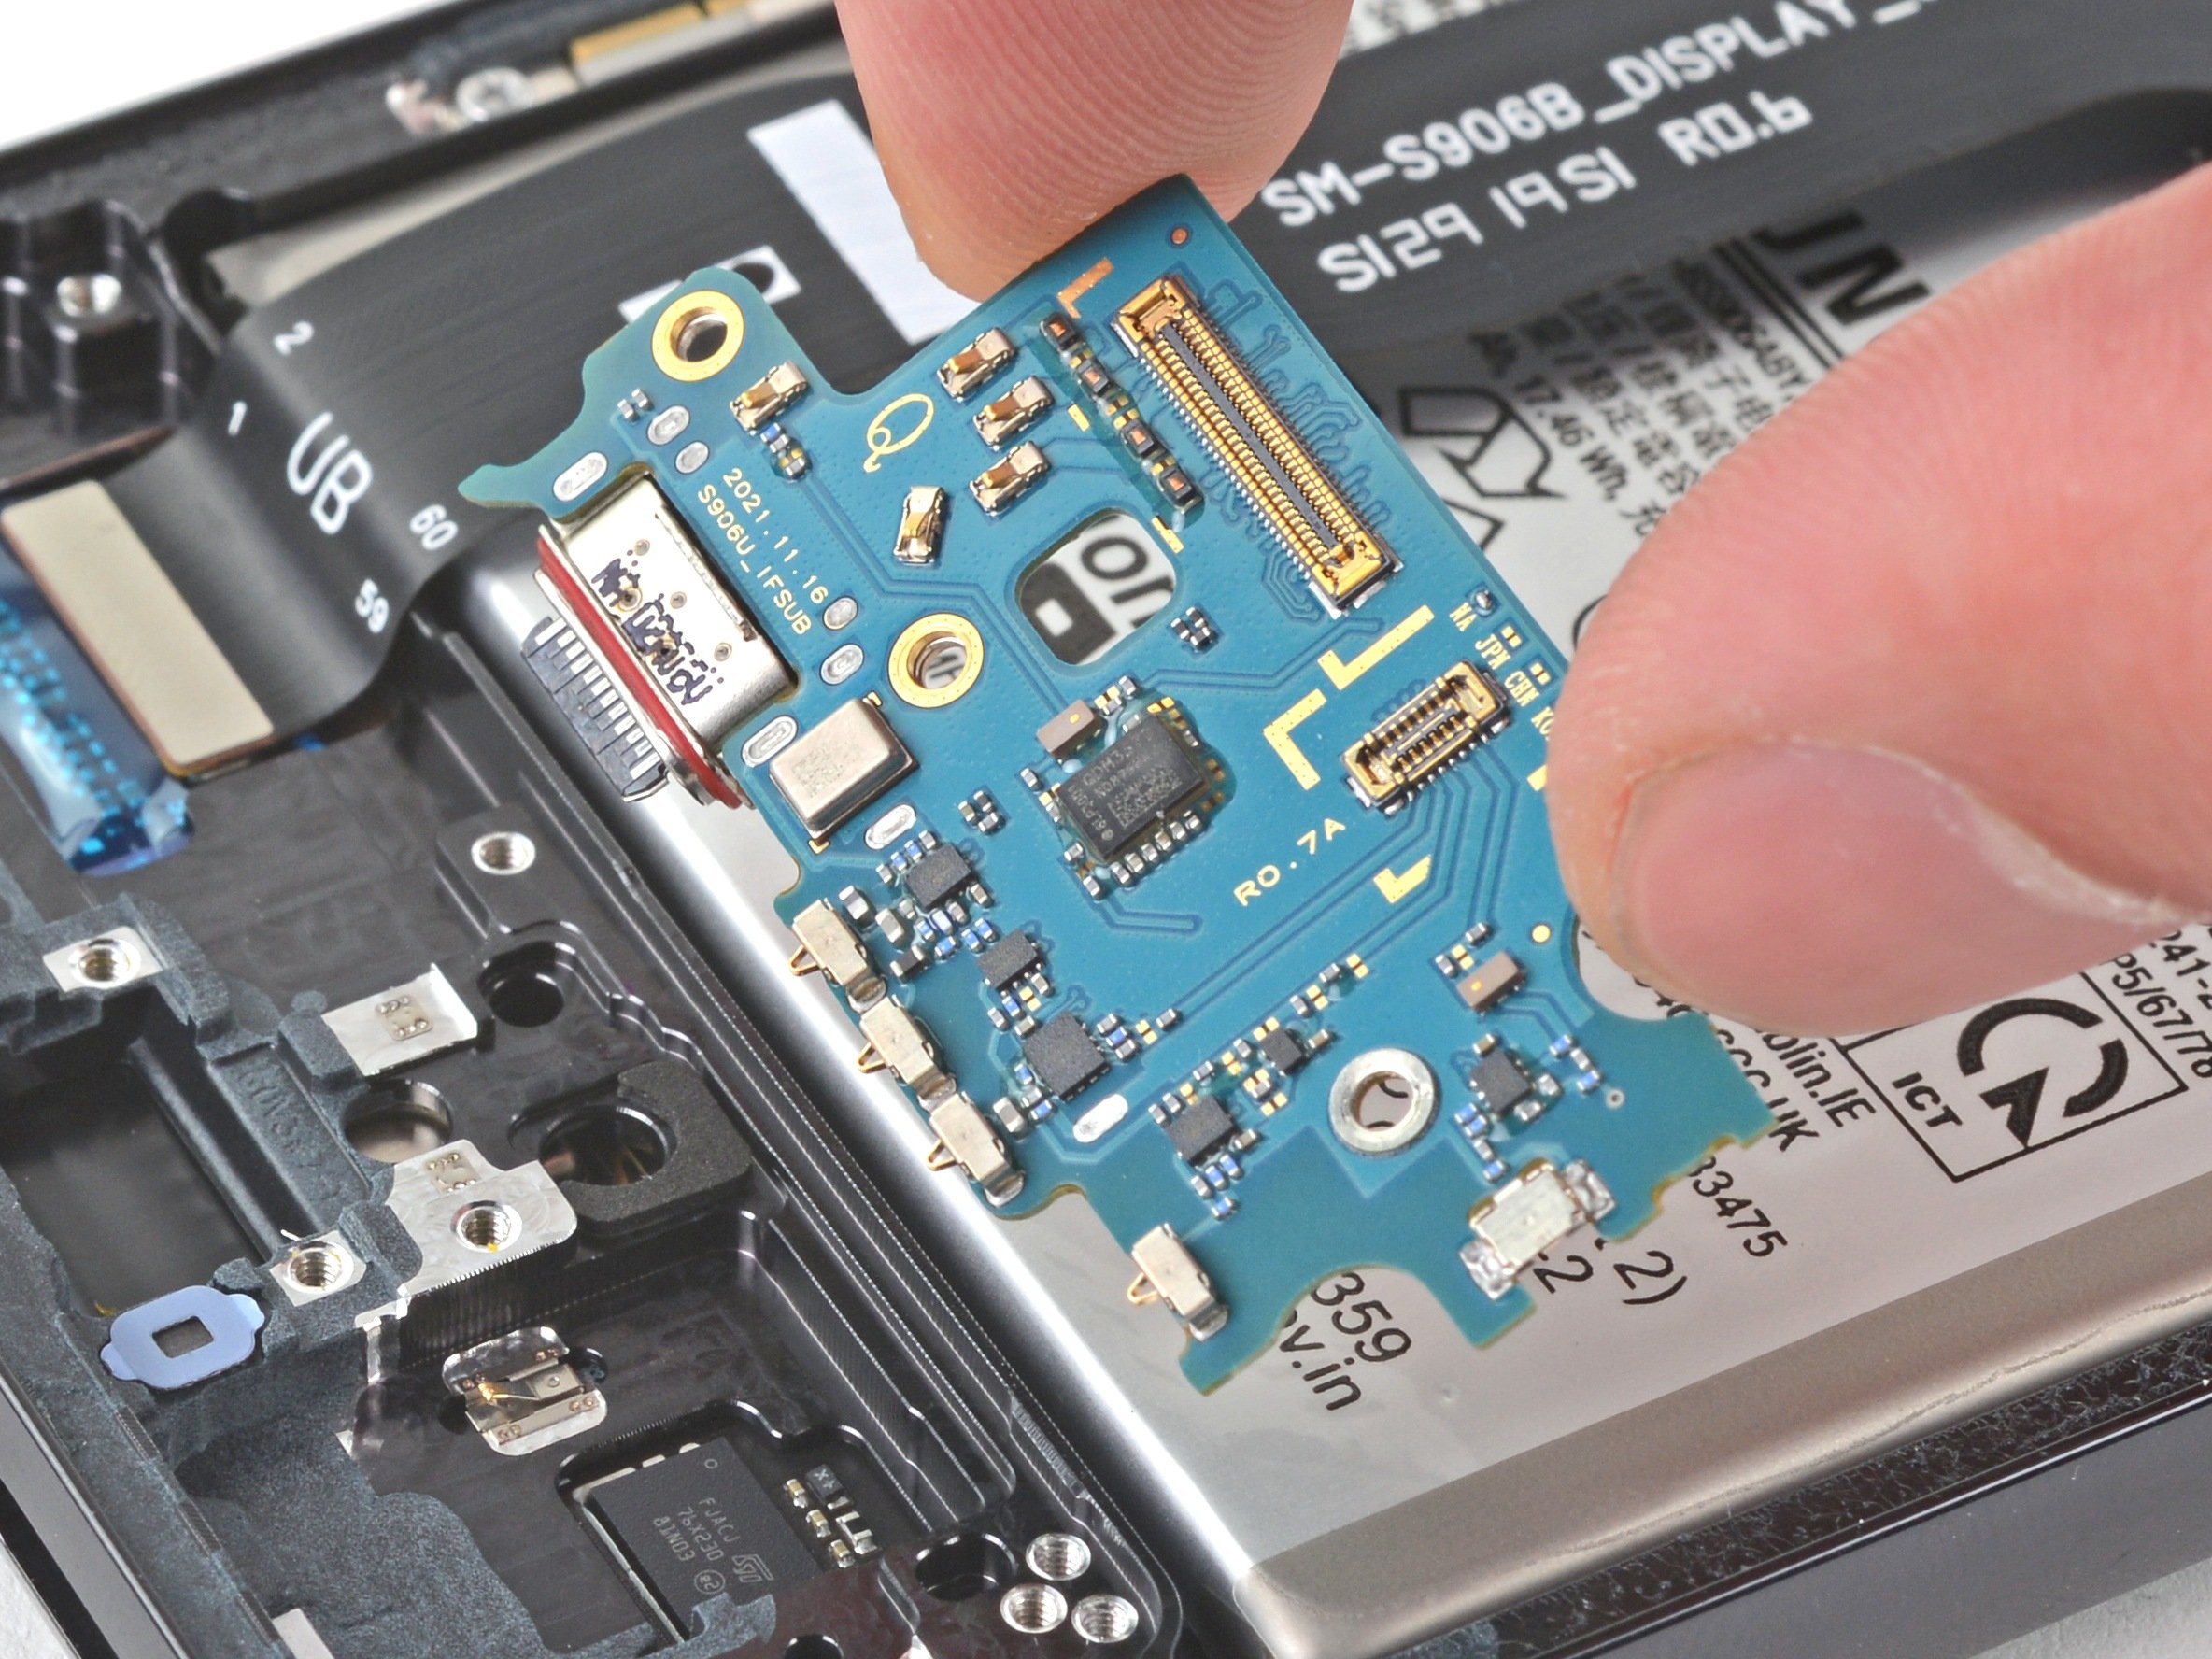
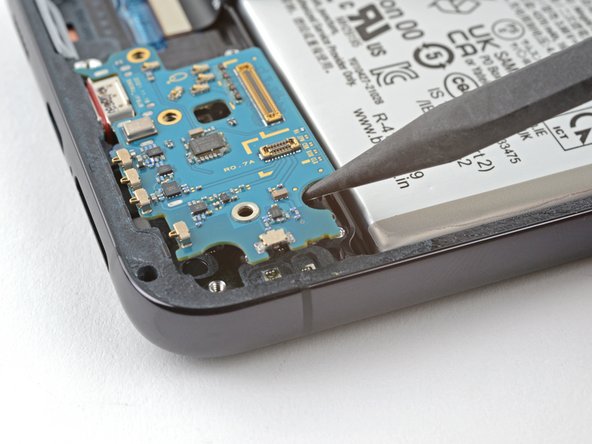
– Gently pull the charging board up and out of the phone at a 30-degree angle – it’s like a little puzzle piece coming out. Once it’s removed, set it aside safely.
– When you’re putting everything back together, make sure the red gasket around the charging port is snug against the phone’s edge. This helps keep things sealed up tight and protected from the elements. If you need help, you can always schedule a repair