Samsung Galaxy S22 Earpiece Speaker Replacement Guide
Duration: 45 minutes
Steps: 34 Steps
Ready to bring your Samsung Galaxy S22 back to life? This guide will help you take out or swap in the earpiece speaker with ease. Just follow along, and you’ll be rocking that sweet sound in no time! And remember, if you need help, you can always schedule a repair.
Step 1

Before diving into this repair, make sure your phone’s battery is below 25%. A charged lithium-ion battery might throw a fiery fit if it’s damaged. Safety first, folks!
A hair dryer, heat gun, or hot plate can also be used to warm things up. Just be careful not to get things too hot, your phone’s display and battery don’t like to be overheated. If you need help, you can always schedule a repair.
– Let’s get started by warming up that back cover. Heat an iOpener and apply it to the bottom edge for about two minutes. If you need help, you can always schedule a repair


Step 2


The strongest adhesive action is hanging out in the bottom right and top left corners.
– While the adhesive chills out and gets all nice and gooey, let’s chat about the back cover.
– There’s a bit of sticky stuff holding the back cover to the frame. It’s like a little hug all around the edge.
Step 3


If you’re having a tough time getting a gap started, a little extra heat can help loosen that pesky adhesive. Just be sure to check out the iOpener instructions to keep things from getting too toasty!
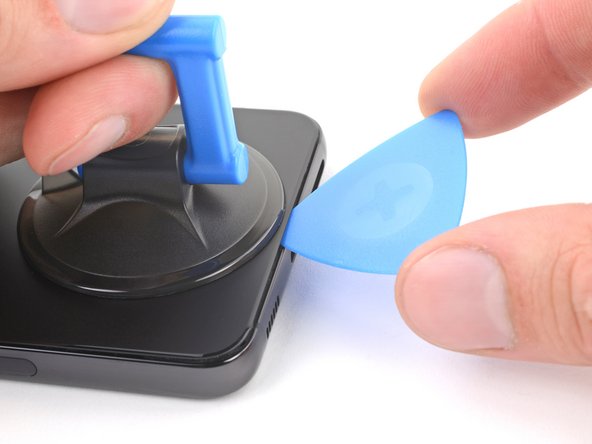
– Stick that suction handle onto the back cover, keeping it near the bottom edge.
– Give the suction handle a steady, strong pull to open up a gap between the cover and frame.
– Slide an opening pick into that gap.
Tools Used


Step 5

– Warm up that back cover! Use a heated iOpener on the left edge for a couple of minutes. Let’s get this party started!
Tools Used
Step 6


Don’t go overboard with the pick! Just a gentle nudge up to 5mm is all you need. You wouldn’t want to get too friendly with the antenna flex cable or the power button cable, right? If you need help, you can always schedule a repair.
– Now it’s time to add a second opening pick – insert it at the bottom left corner to get started.
– Gently slide the pick down to the bottom of the camera bezel, which will help you slice through the left adhesive.
– Leave that pick right where it is, so the adhesive doesn’t reseal and make your job harder. If you need help, you can always schedule a repair
Step 7

– Warm up that iOpener and give the right edge of the back cover a nice, two-minute hug.
Tools Used
Step 8


If the glue has made a comeback, gently slide the pick down to the lower edge.
– Pop in a third opening pick at the bottom right corner.
– Gently glide that pick up to the top right corner to cut through the adhesive.
– Keep the pick snugly in the top right corner to stop that adhesive from sealing back up.
Step 9

– Get that iOpener nice and toasty, and hold it against the top edge of the back cover for two minutes. We’re warming things up to make things a bit easier, you know? If you need help, you can always schedule a repair
Tools Used
Step 10


Only insert the pick up to 4mm, so you don’t end up accidentally messing with the rear cameras or flash.
– Let’s get this party started! Gently slide an opening pick into the gap at the top right edge.
– Now, slide that pick across the top edge and around the top left corner to loosen up that adhesive. We’re almost there!
Step 11


If the cover is still clinging to the frame, slide an opening pick around the edges until they’re completely separated. It’s like a little dance! If you need help, you can always schedule a repair.
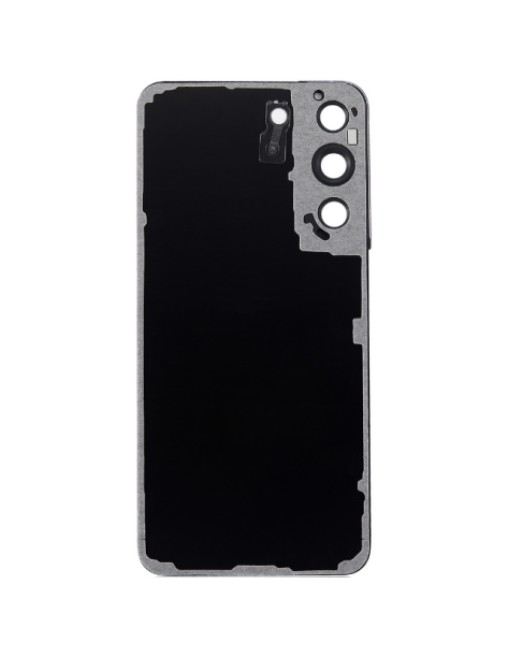
– Pop off the back cover.
– When putting it all back together:
– Take a moment to power on your device and test all functions before sealing it up. Don’t forget to power it back down completely before continuing.
– Remove any stubborn adhesive bits with tweezers or your fingers. Heat can help if you’re having trouble.
– To apply new adhesive, follow this guide.
Step 12


To reattach press connectors, carefully align and press down on one side until it clicks into place. Then, repeat on the other side. Avoid pressing down on the middle. Misalignment can bend the pins and cause permanent damage. If you need help, you can always schedule a repair.
– Now it’s time to carefully disconnect the wireless charging coil from the motherboard. Use the pointed end of a spudger to gently pry it loose – you got this! If you need help, you can always schedule a repair
Tools Used

Step 13

– Grab your trusty Phillips screwdriver and tackle those six screws that are 3.5 mm long, securing the wireless charging coil. You’ve got this!
Step 14

– Grab your trusty Phillips screwdriver and unscrew those seven 3.5 mm screws holding the loudspeaker in place. You got this!
Step 15


– Gently slide the sharp end of your trusty spudger into that little gap at the upper left corner of the loudspeaker and the frame. You got this!
– With a little bit of elbow grease, pry upwards to pop the loudspeaker free from its frame home. It’s like a game of Tetris!
– When it’s time to put everything back together, don’t forget to give the perimeter of the loudspeaker some love by pressing around it to make sure those clips snap into place. Teamwork makes the dream work!
Tools Used
Step 16


Hang tight! The charging coil and loudspeaker are best friends. Keep them together. 😊
– Alright, let’s get those wireless charging coil and loudspeaker out of there! Carefully lift them from the frame – no need to force anything. If you need a hand, you can always schedule a repair


Step 18


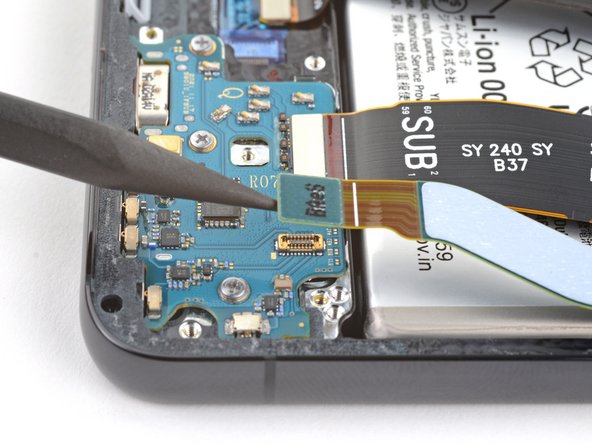
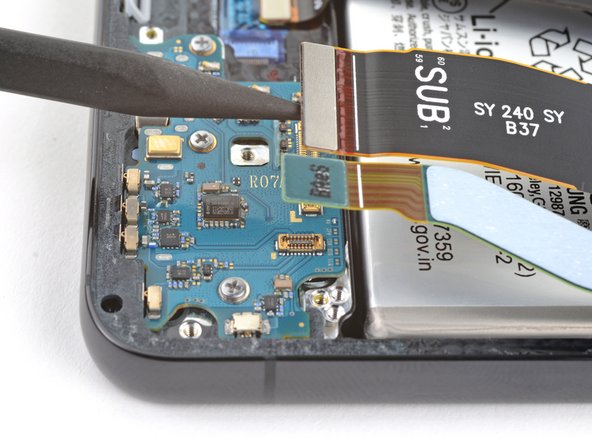
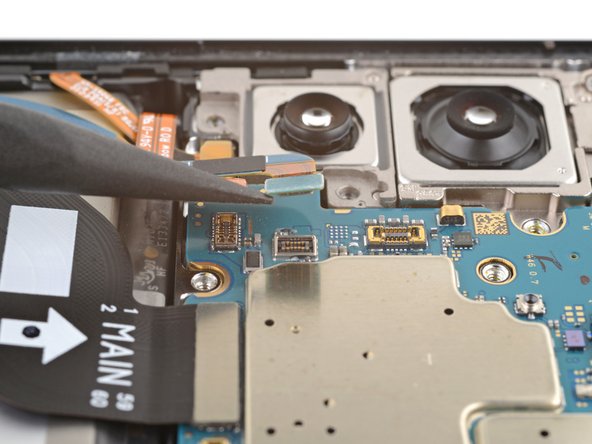
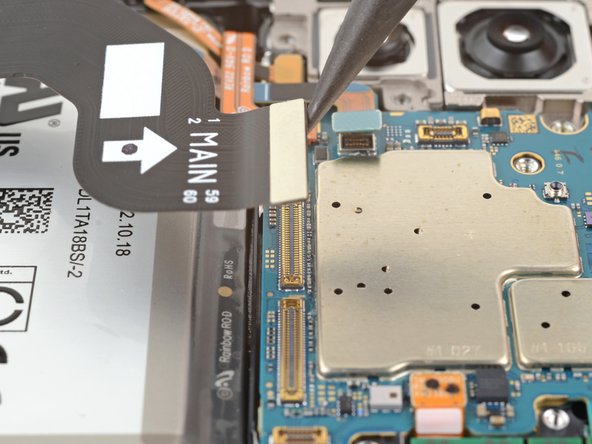
– Grab your trusty spudger and use its pointed end to gently nudge up and disconnect both interconnect cables from the motherboard. You’ve got this!
Tools Used

Step 20
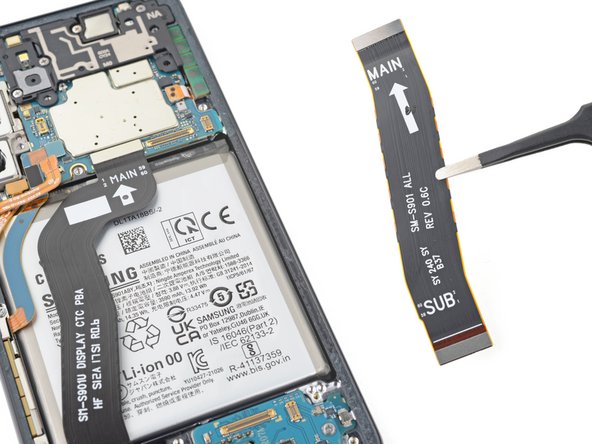
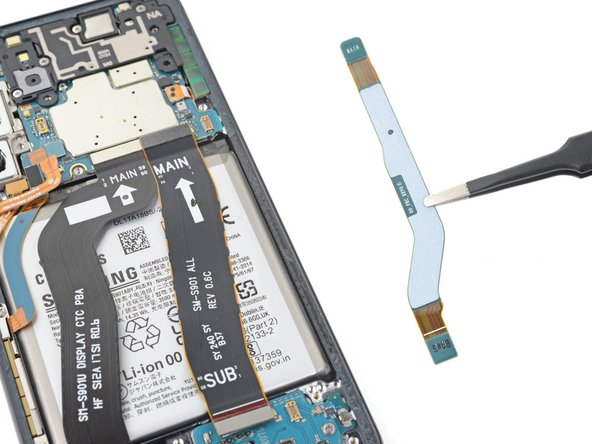

– First, carefully remove the two interconnect cables from the frame – it’s an easy step to get started with your repair.
– When you’re putting everything back together, just remember to position the cables so the ‘main’ ends are at the top of the phone and the ‘sub’ ends are at the bottom. If you need help, you can always schedule a repair
Step 21

– Grab your trusty Phillips screwdriver and take out those four 3.5 mm-long screws holding the motherboard cover in place. You’ve got this!
Step 22

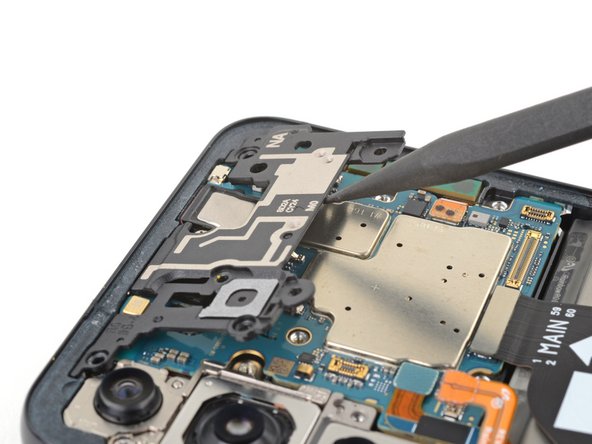
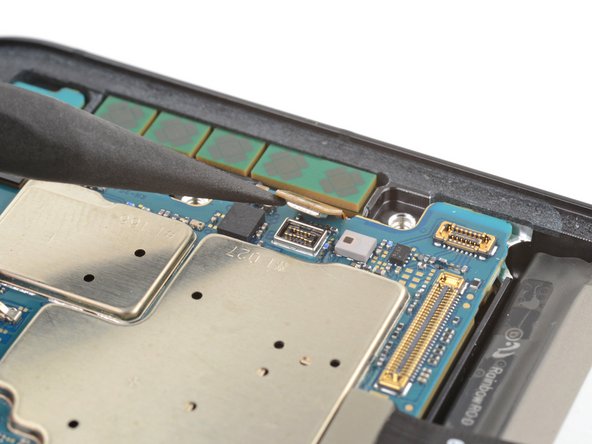
– Let’s pop that motherboard cover off! Slide the pointed end of your spudger between the cover and the motherboard.
– Now, gently pry up on the cover to unclip it from the frame. It’s like giving it a little high five!
Tools Used


Step 28

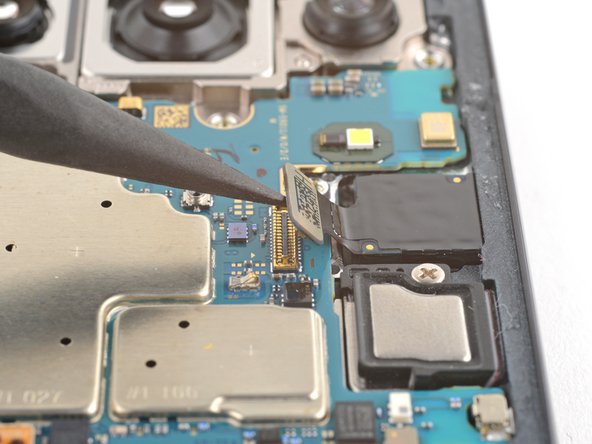
– Grab your trusty spudger and gently pry up the connection for the power and volume button. You’re almost there!
– When putting everything back together, be sure to tuck that cable under the battery cable so it’s nice and cozy.
Tools Used
Step 29

– Alright, let’s get this motherboard out! Grab your trusty Phillips screwdriver and give those 3.5mm screws a little twist. They’re holding the motherboard in place, so we need to give them a break.
Step 30


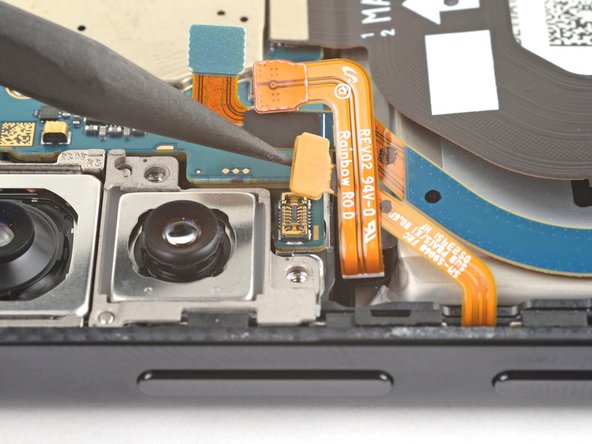
– Wedge the pointy end of your spudger between the lower right side of the motherboard and the frame.
– Lift the motherboard until you can get a good grip on it with your fingers.
Tools Used
Step 31

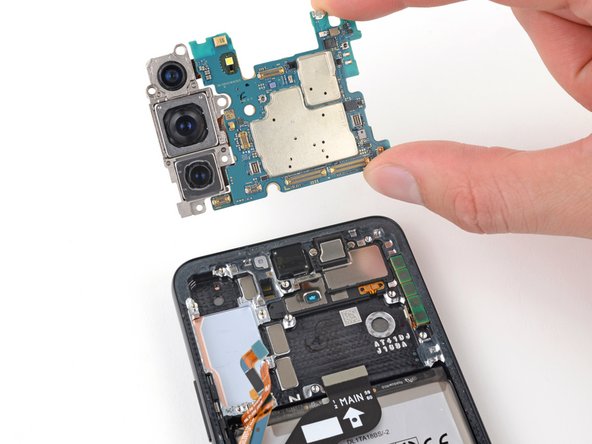
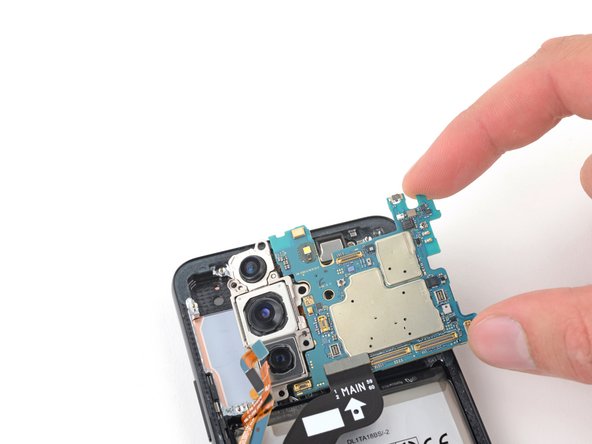
Hey, remember those wires hanging around? Try not to let the motherboard get tangled up in them. It’s like a mini-obstacle course for the motherboard! If you need help, you can always schedule a repair.
– Hold the motherboard by the right edge and lift it out of the frame.
– When putting it back together, make sure the cables are on top of the motherboard as you slide it in. If you need help, you can always schedule a repair.
Step 32

– Grab your trusty Phillips screwdriver and let’s get those two 2.9 mm screws out of the way that are keeping the earpiece speaker from joining the party!
Step 33

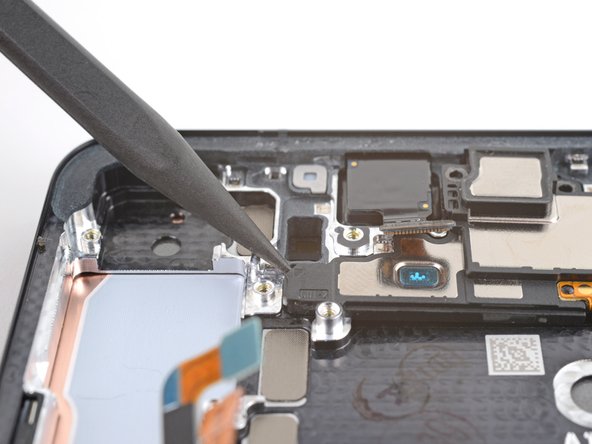
– Slide the sharp end of your spudger right under the left side of the earpiece speaker.
– Gently pry it up to release the earpiece speaker from the frame.
Tools Used
Step 34

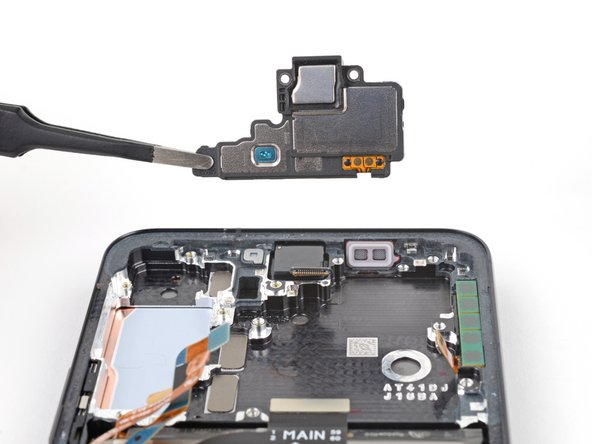
– Alright, let’s get this earpiece speaker out of there! Grab it and give it a gentle tug. It’s gonna come right off.