DIY Samsung Galaxy S22 Battery Replacement Guide: Step-by-Step
Duration: 45 minutes
Steps: 31 Steps
This step-by-step guide is for the battery itself, so you can power up your device and get back to what you love doing.
Step 1

Hey, before you start tinkering, let your phone’s battery chill out and drop below 25%. You wouldn’t want to accidentally spark a little lithium-ion party, right? If you need a hand, you can always schedule a repair.
C’mon, let’s not melt our phones here! But if you need some extra heat, be extra careful with hairdryers or hotplates – they’re our phones’ kryptonite.
– Let’s get started by warming up that back cover. Heat an iOpener and apply it to the bottom edge for about two minutes. If you need help, you can always schedule a repair
Tools Used


Step 2


The adhesive really loves to stick around in the bottom right and top left corners!
– While that glue warms up, let’s make a quick note:
– There’s a little bit of glue holding the back cover to the frame all around. Don’t worry, we’ll get it off in a jiffy!
Step 3


Having trouble getting that gap started? No worries, just apply a bit more heat to loosen up the adhesive. Be sure to follow the iOpener instructions to avoid overheating. And if you need help, you can always schedule a repair
– Grab your suction handle and stick it to the back cover, getting as close to the bottom edge as you can.
– Now, give that suction handle a good pull – you want to create a little gap between the cover and the frame. Be strong, but steady!
– Slide an opening pick into the gap you just made. You’re getting closer!
Tools Used


Step 5

– Let’s get this party started! Warm up that left edge of the back cover with a heated iOpener for two minutes. It’ll make things a bit easier, trust me.
Tools Used
Step 6


Just a quick heads-up, go easy on that pick! Only insert it about 5mm, or you might accidentally bump into some important cables. It’s all good, we’ve got your back! If you need help, you can always schedule a repair.
– Pop a second opening pick into the bottom left corner – go ahead, give it a little wiggle!
– Gently slide that pick down to the base of the camera bezel and cut through the left adhesive – you’re doing great!
– Keep the pick in place to stop the adhesive from sealing back up on you. Nice work!
Step 7

– Warm up your trusty iOpener and give some love to the right edge of that back cover for a solid two minutes.
Tools Used
Step 8


If the adhesive has resealed, just slide that pick in closer to the bottom edge. You got this!
– Alright, let’s get this party started! Grab a third opening pick and slide it in at the bottom right corner.
– Now, glide that pick up to the top right corner, like you’re cutting through butter. We’re slicing that adhesive.
– Leave the pick chilling in the top right corner to stop the adhesive from getting all cozy again. We don’t want that, right?
Step 9

– Warm up your trusty iOpener and place it on the top edge of the back cover for a cozy two minutes.
Tools Used
Step 10


Don’t go overboard with that pick! Just a little nudge, about 4mm, then back off. You don’t want to give those rear cameras or flash a fright, do you? 😉 If you’re feeling nervous, you can always schedule a repair.
– Slide an opening pick into the little gap at the top right corner. You’ve got this!
– Now, gently glide that pick along the top edge and around the top left corner to cut through any leftover adhesive. Nice and easy!
Step 11


If your cover is still clinging to the frame like it doesn’t want to leave the party, just grab an opening pick and gently glide it around the edges until the cover is happily separated from the frame.
– Let’s get started by removing the back cover. Take a firm grip and gently pull it off.
– When you’re putting everything back together:
– Now’s a great time to turn on your phone and make sure all the functions are working properly. Just remember to power it back down before you continue.
– Use a pair of tweezers or your fingers to carefully remove any leftover adhesive. If it’s being stubborn, try applying a bit of heat to help loosen it up.
– To apply new adhesive, follow our guide at schedule a repair for more information. If you need help or get stuck, you can always schedule a repair with Salvation Repair.
Step 12


To get those connectors back in place, gently line them up and press down on one side until you hear that satisfying click. Then, show the other side some love and do the same! Just a quick tip: avoid pressing down right in the middle. If things get a bit crooked, those delicate pins might bend, and we definitely don’t want any lasting damage. Remember, if you ever feel stuck, you can always schedule a repair.
– Let’s get that wireless charging coil unplugged! Take your trusty spudger (that handy tool with the pointy end) and gently pry it loose from the motherboard. You’ve got this!
Tools Used

Step 13

– Grab your trusty Phillips screwdriver and give those six 3.5mm screws holding down the wireless charging coil a good twist. You got this!
Step 14

– Grab your trusty Phillips screwdriver and let’s tackle those seven 3.5 mm screws holding the loudspeaker in place. You’ve got this!
Step 15


– Let’s get this loudspeaker out! Slide the pointed end of your spudger between the top left corner of the loudspeaker and the frame.
– Now, gently pry up to free the loudspeaker from its cozy home in the frame.
– When you’re putting things back together, give that loudspeaker a little love and press around its edges to make sure it’s snug in its spot.
Tools Used
Step 16


Be careful not to separate the charging coil from the loudspeaker – we want to keep everything connected and working smoothly. If you need help, you can always schedule a repair
– Alright, let’s get those wireless charging coil and loudspeaker out of the frame. Just grab ’em and give ’em a gentle tug. You got this!


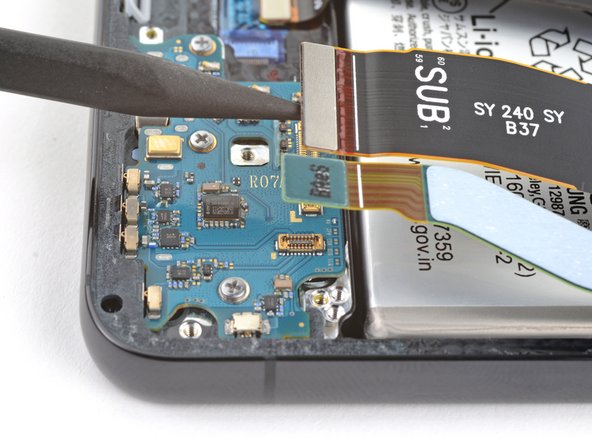
Step 18


– Now, grab that trusty spudger and give those interconnect cables a little nudge! Gently pry them up and disconnect them from the motherboard. You got this!
Tools Used
Step 19

– Grab the pointed end of your spudger and gently pop those interconnect cables off the charging board. If you need help, you can always schedule a repair
Tools Used
Step 20
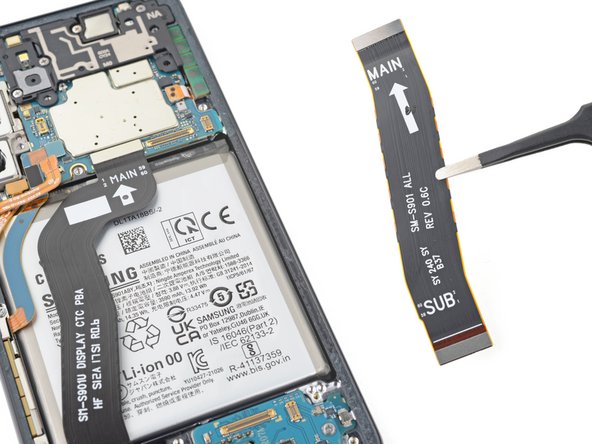
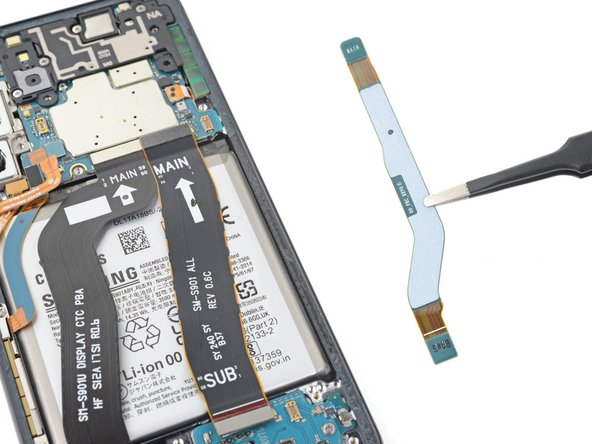

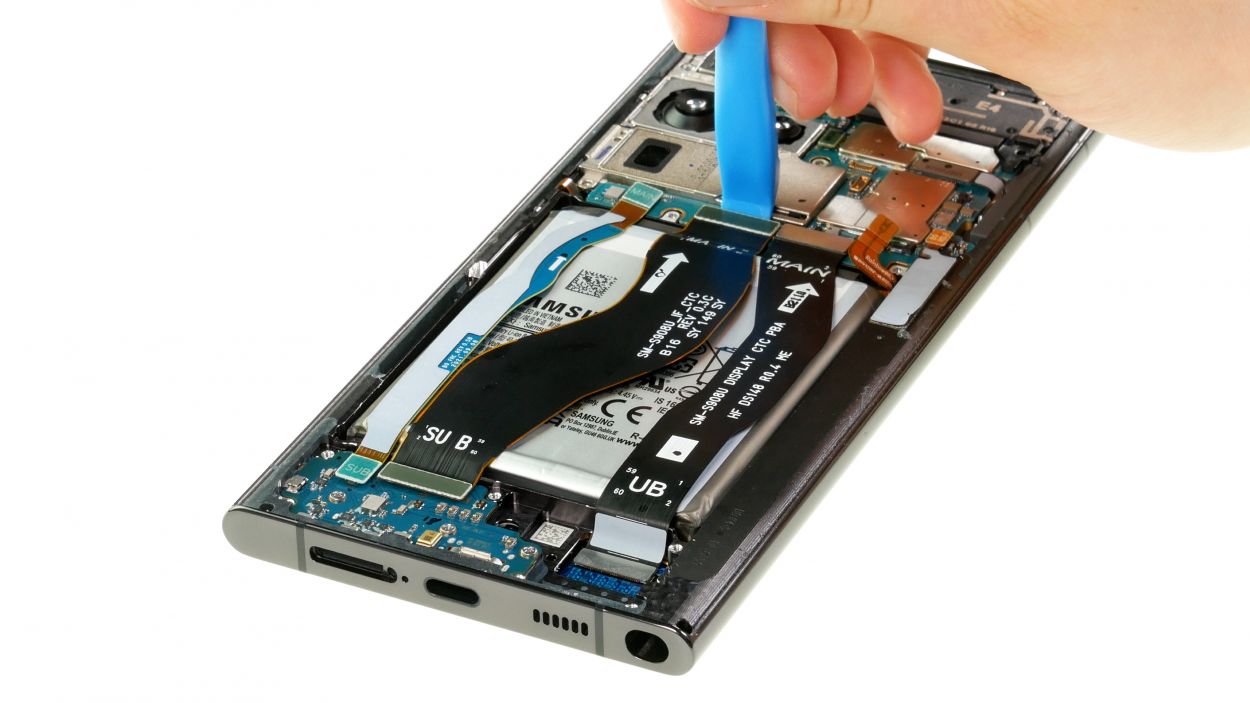
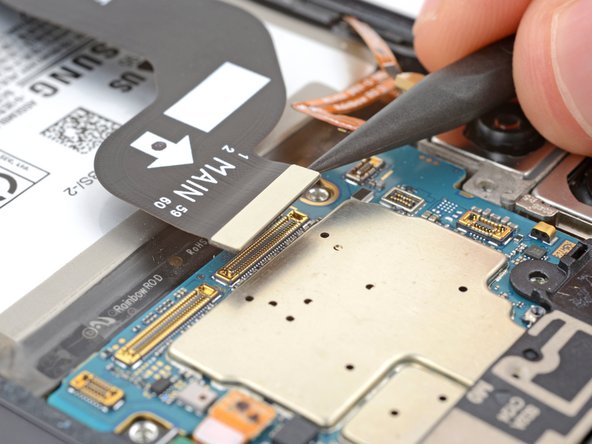
– Alright, let’s get rolling! First, gently detach the two interconnect cables from the frame. You’ve got this!
– When putting everything back together, make sure to position the cables just right; the ‘main’ ends should point towards the top of your phone, while the ‘sub’ ends hang out toward the bottom. Simple as that!
Step 21

– Grab your trusty spudger and gently pry up the power and volume button connector. It’s like giving it a little nudge to say ‘hi’ and let it know you’re ready to move on.
Tools Used
Step 22

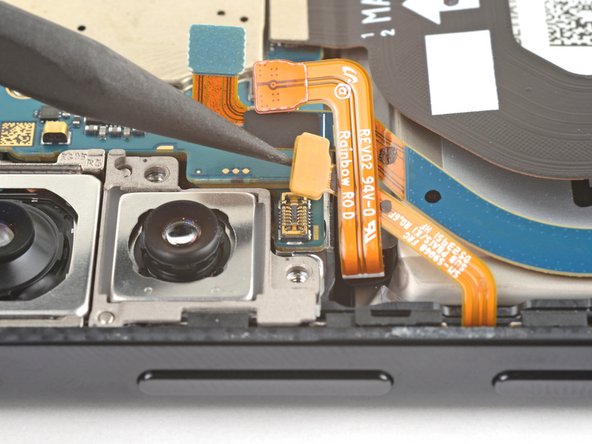
– Time to get started. Use the pointed end of your trusty spudger to carefully pry up and disconnect the left 5G mmWave antenna press connector – it’s a breeze.
– When you’re putting everything back together, just remember to keep this cable and the power and volume button cable nicely under the battery cable. If you need help, you can always schedule a repair
Tools Used
Step 23

– Now it’s time to get started – use your trusty Phillips screwdriver to remove the two 3.5 mm-long screws that are holding the left 5G mmWave antenna in place. If you need help, you can always schedule a repair
Step 24

– Let’s get that antenna bracket off! Use the pointy end of your spudger to slip between the bracket and the frame where the lower screw is.
– Now give that bracket a little pry up, and you’ll be able to grab it with your fingers or those handy blunt-nose tweezers.
– Time to remove the left 5G mmWave antenna. You’ve got this!
Tools Used
Step 25

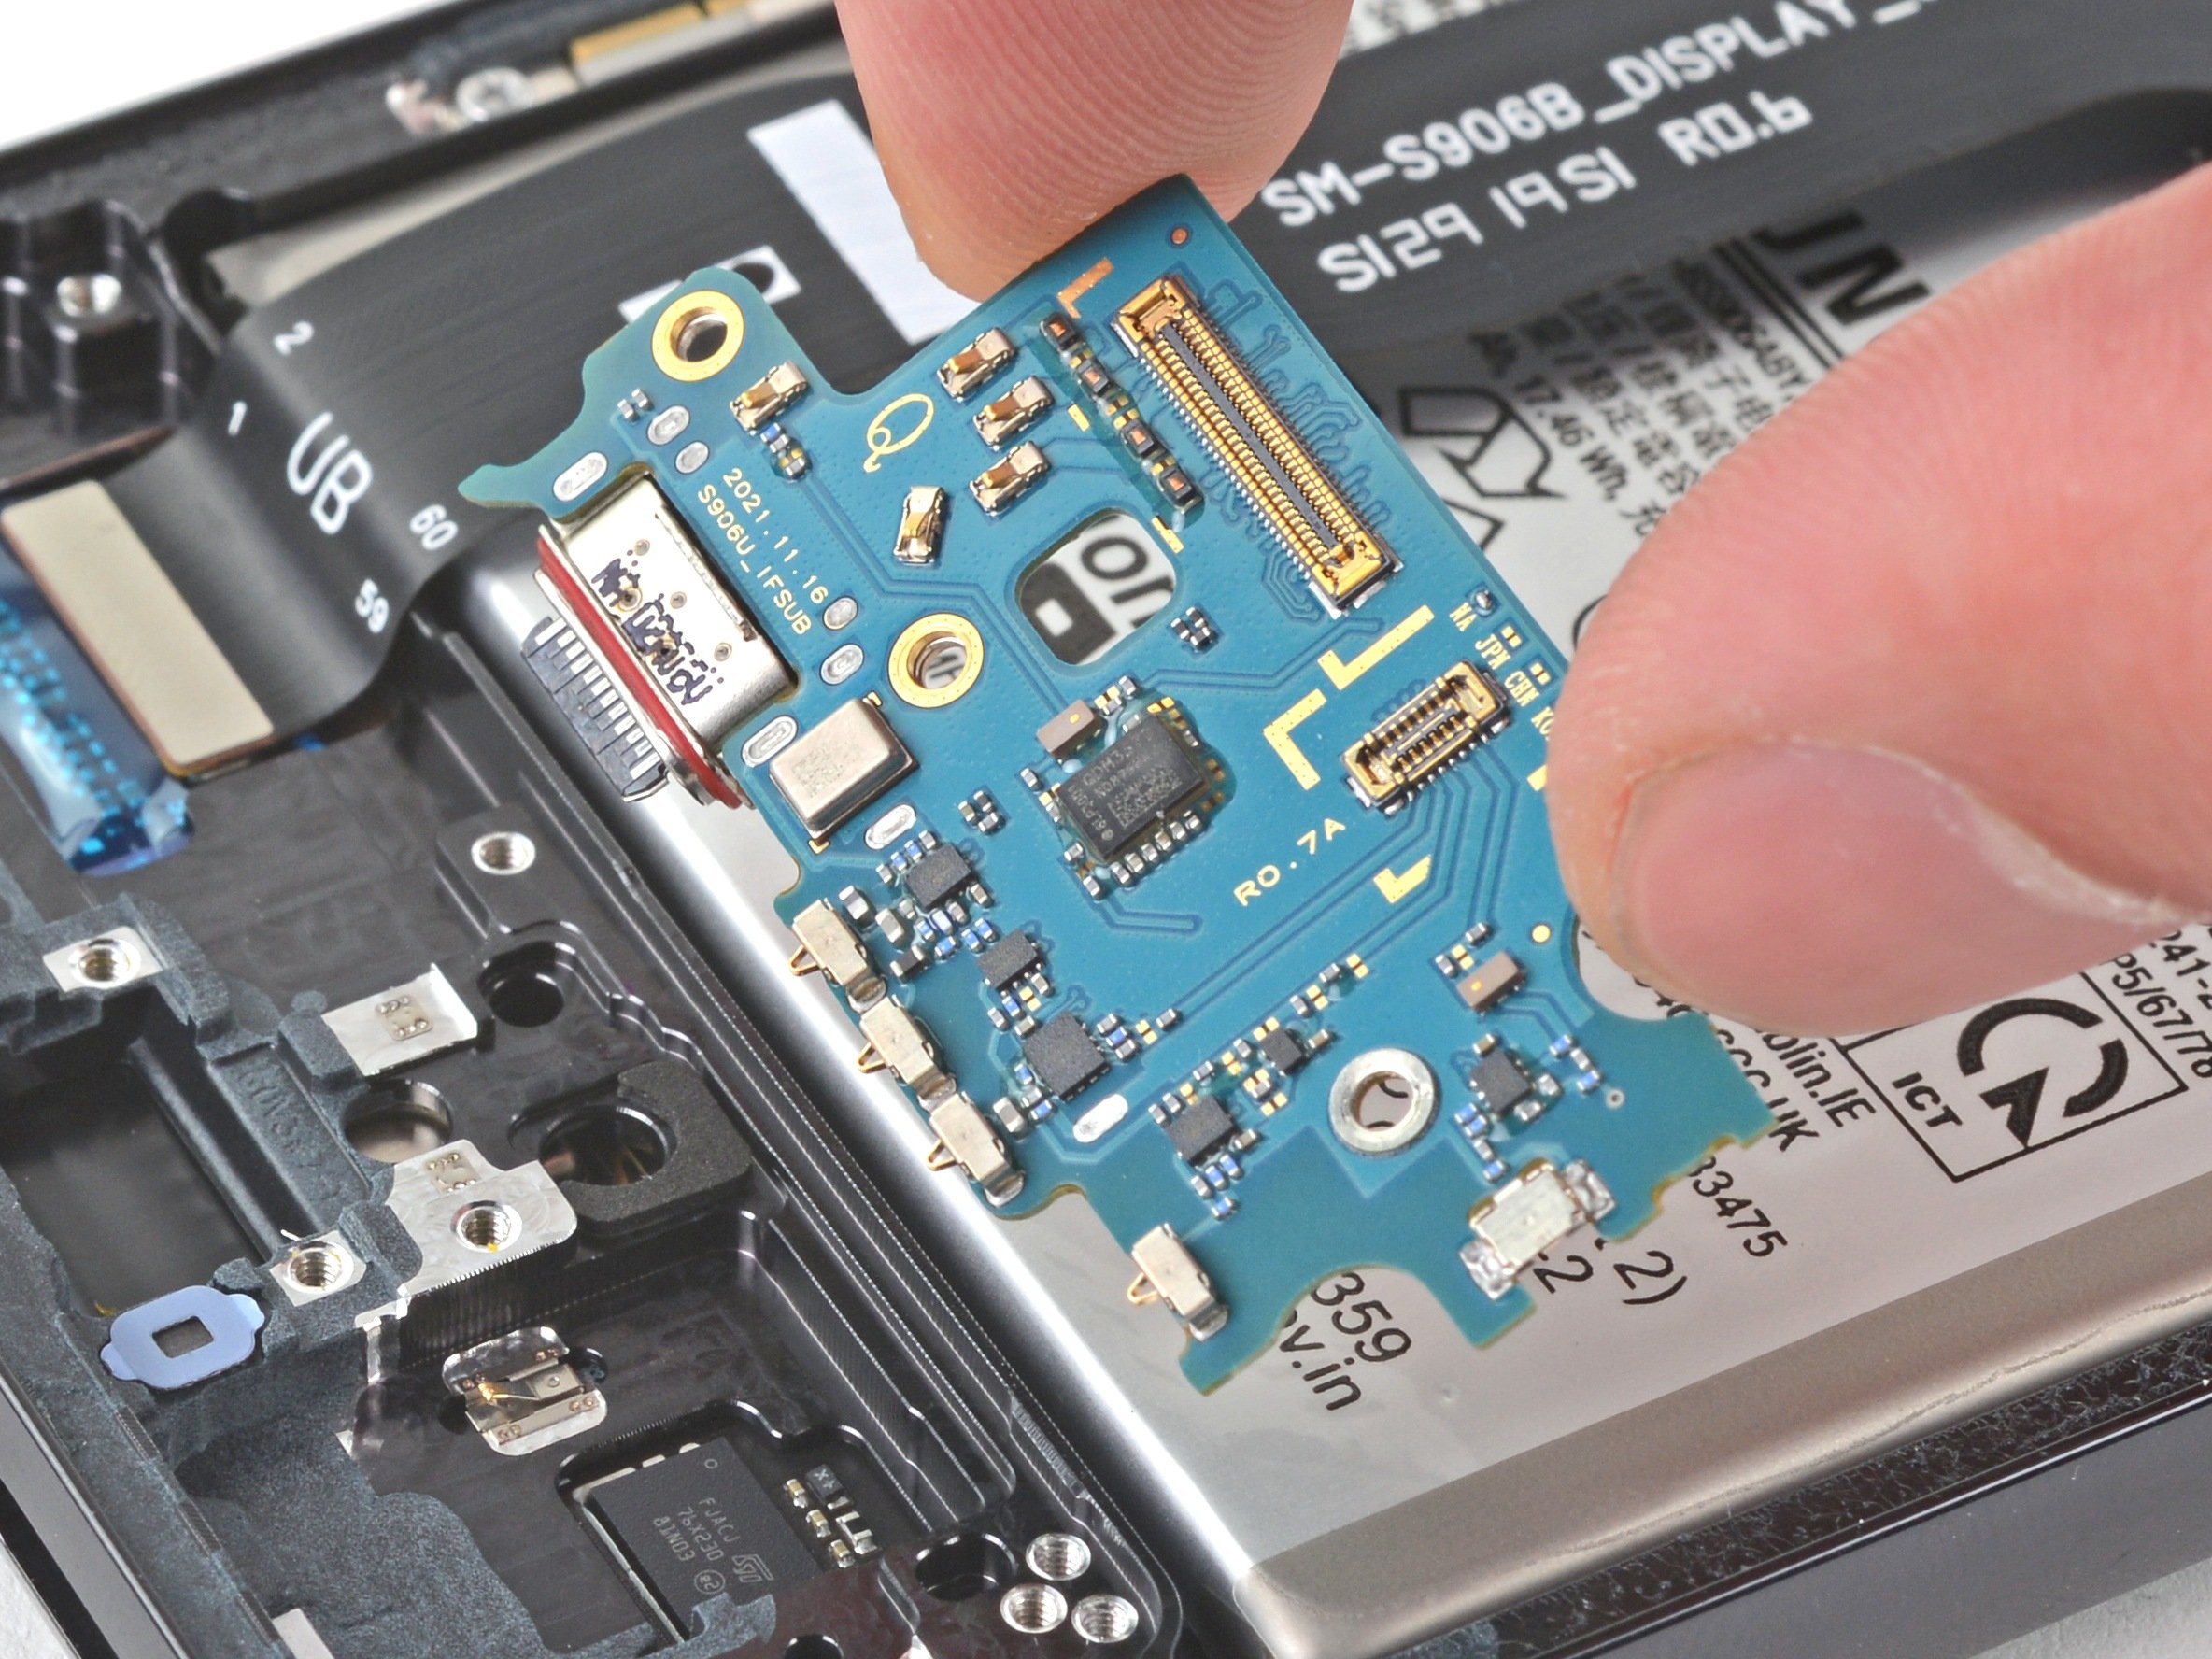
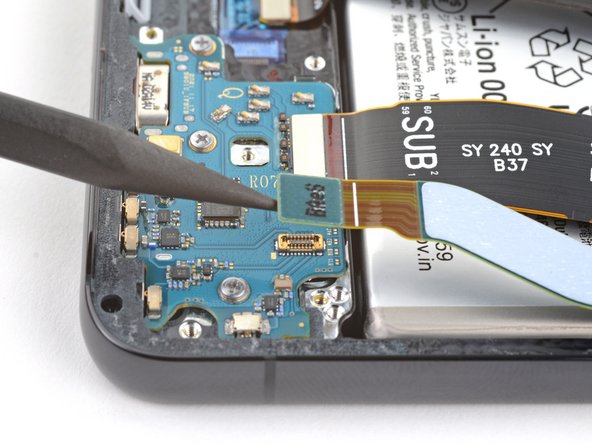
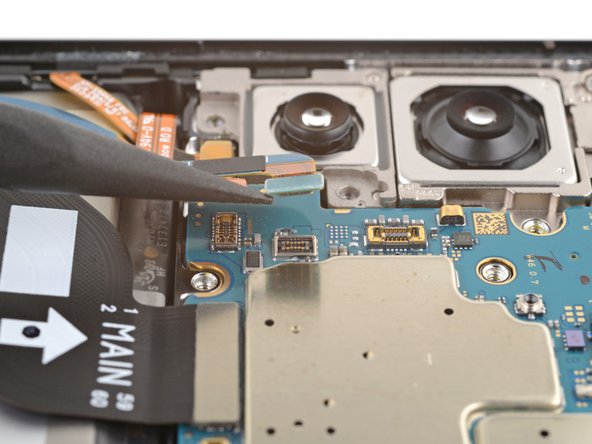
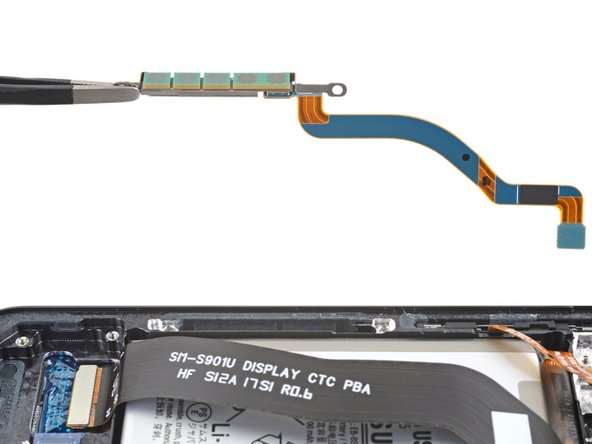
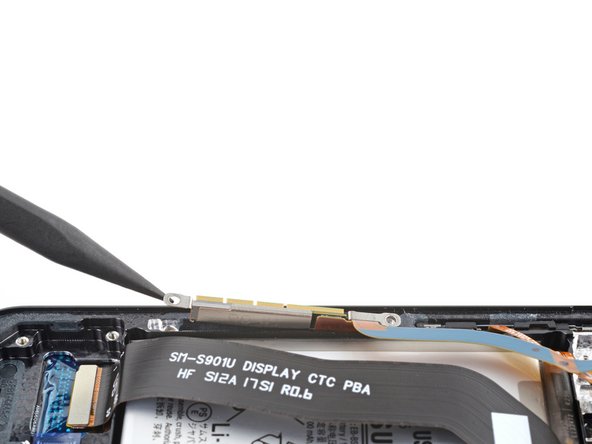
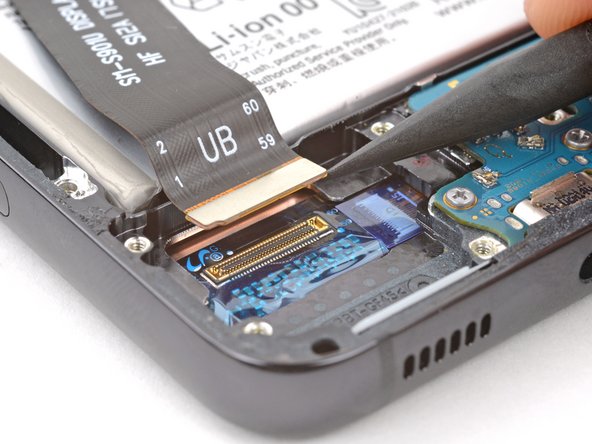
– Grab your trusty spudger and use its pointy end to gently lift up and disconnect that screen press connector from the motherboard. You’ve got this!
Tools Used


Step 28

Too much alcohol might just send your display packing!
– Grab a pipette or syringe and give a gentle squeeze to release 1-2 drops of high-concentration isopropyl alcohol (at least 90%) right between the battery’s right edge and the frame. Just a little splash goes a long way!
– Now, lift that right edge of the phone up for a minute. This little time-out will let the isopropyl alcohol sneak under the battery and work its magic on the adhesive!
Step 29


Hey, be careful not to poke holes in that battery! It could get grumpy and leak some nasty stuff, or even start a fire. No one wants that! If you need help, you can always schedule a repair.
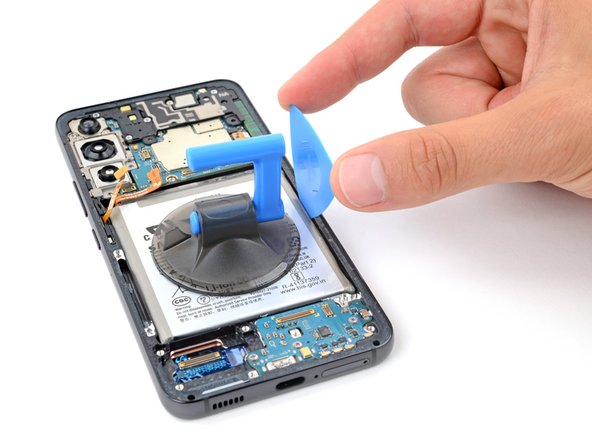
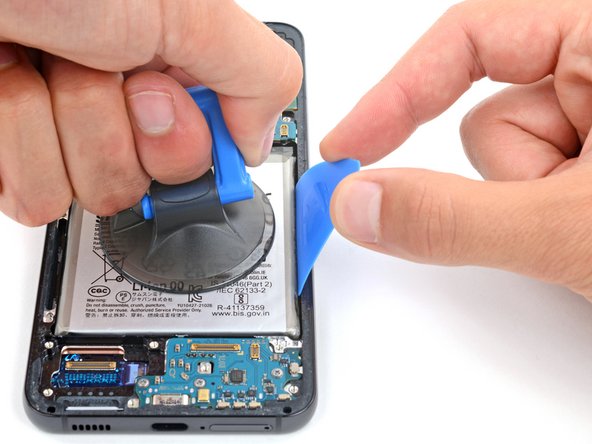
– Grab a suction cup and stick it onto the battery near the center of the right edge.
– Slide the tip of an opening pick between the right edge of the battery and the frame.
– Push the pick down and twist it so that the long end slips between the battery and the frame. If you need help, you can always schedule a repair
Step 30
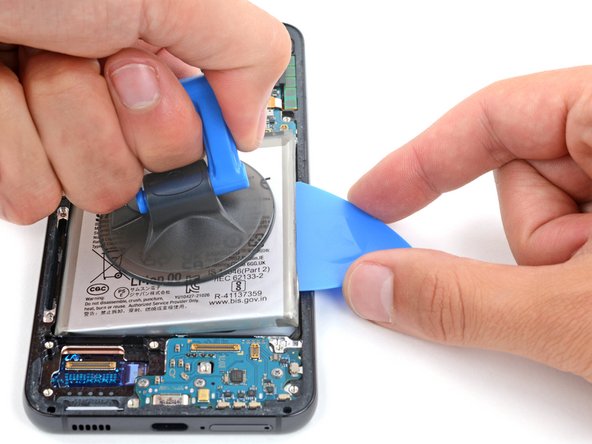

Handle the battery with care—no creases or bends! A little mishap could lead to leaks of nasty chemicals or even a fire. Let’s keep things safe and sound!
– Give that suction cup a firm tug while using the opening pick to gently nudge the battery upward. You’ve got this!
– Keep the pressure steady on both the pick and the suction cup until the battery decides to part ways with the frame.
Step 31
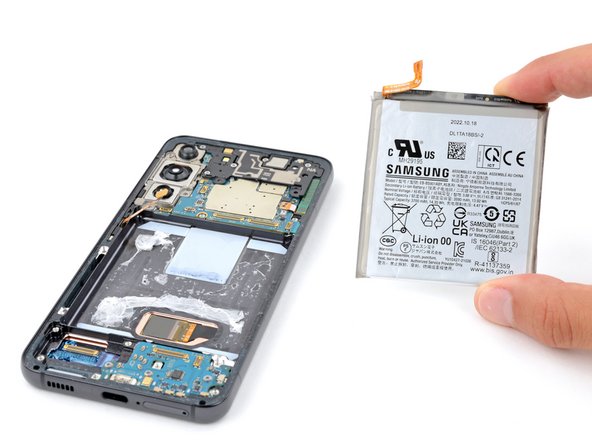

– First things first, let’s pop that battery out and give it a little farewell!
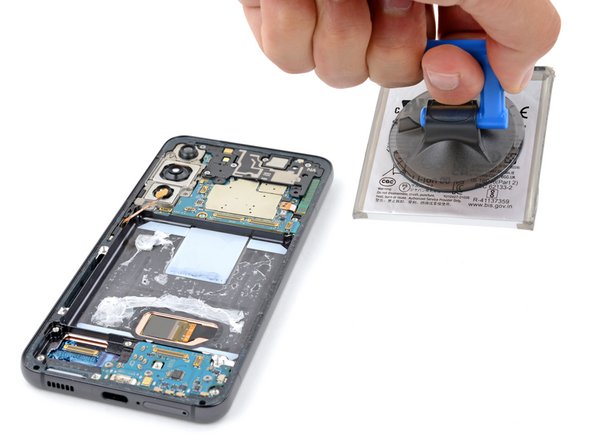
– If you’ve used isopropyl alcohol, hang tight for ten minutes! This allows the alcohol to vanish completely before you slide in that shiny new battery.
– Ready to bring your device back to life? Check out this guide to help you install your new battery!