Samsung Galaxy S10 Back Cover Replacement Guide – DIY Tutorial
Duration: 45 minutes
Steps: 7 Steps
Get ready to dive in! This guide will help you pop off that glass back cover, whether you’re looking to swap it out or just want to peek inside your Galaxy S10. If you need help, you can always schedule a repair.
Step 1


You can use a hair dryer, heat gun, or hot plate to help out, but remember to keep it cool! Overheating your phone can lead to some serious heat damage for the display and internal battery. So, let’s keep things chill! If you need help, you can always schedule a repair.
– Before you start, make sure to unplug and power off your phone – safety first!
– Now, grab your iOpener and heat it up. Apply it to the right edge of the back cover for about two minutes. Easy does it!
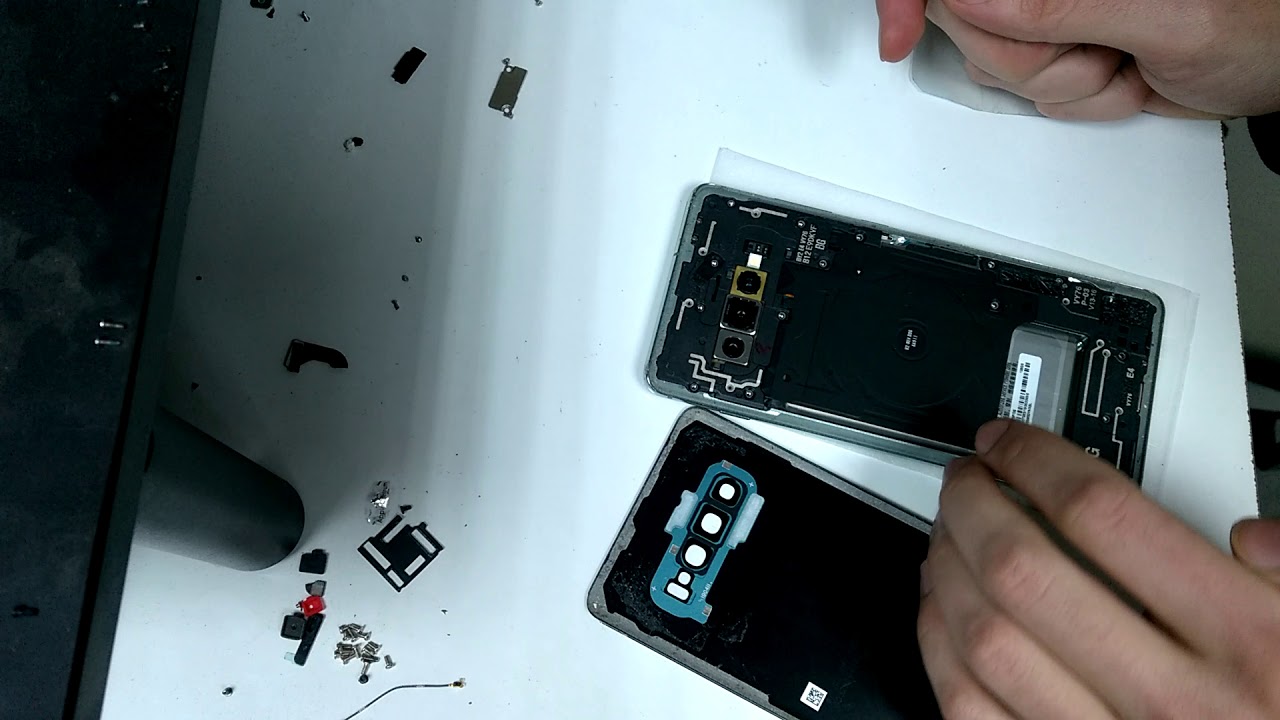
– While you’re waiting, take a sneak peek at the image of the removed back cover and note where the adhesive is hiding. If you need help, you can always schedule a repair
Tools Used

Step 2


– Alright, let’s get this phone open! First, find something about half an inch thick and rest the heated right edge of your phone on it. This’ll give us a bit of an angle for the opening tool to work with.
– Now, brace the left side of the phone with your fingers so it doesn’t slip away. Grab the suction cup and pull with a steady, firm pressure.
– Time to introduce our opening tool! Carefully slide the edge of the tool into the seam between the back cover and the frame.
– With the tool in place, wiggle it back and forth along the seam. We’re going to loosen up that back cover, making it easier to separate.
Step 3


Easy does it! Applying too much force with the pick might crack the back cover glass. If you need help, you can always schedule a repair.
Hey, sometimes those sticky parts can be a bit stubborn. You might need to wiggle that opening pick a few times to create a little space. No worries, you got this!
– Let’s get this party started! First, heat up an iOpener and press it against the edge of your phone for a couple minutes. You know, like a warm hug for your phone.
– Next, stick a suction cup on the back of your phone, close to the middle of the right edge. That’s where the adhesive is a little thinner, so it’s easier to get a grip.
– Pull on that suction cup with all your might! We’re aiming to create a tiny gap between the back cover and the frame.
– Now, slide the tip of an opening pick into that gap. Think of it like giving your phone a little nudge.
– If you’re having trouble creating a gap, it just means the adhesive needs a little more encouragement. Make sure you’ve heated that edge until it’s barely too hot to touch. Then try that step again.
– You could also try adding a few drops of high-concentration (over 90%) isopropyl alcohol to the seam. That’ll help loosen things up a bit. If you need help, you can always schedule a repair
Tools Used
Step 4


Hold up! Don’t go slicing that adhesive holding the corners down before you apply heat. It might make your back cover crack, and nobody wants that, right?
– Let’s get this party started! Slide that opening pick along the phone’s edge like you’re a pro, cutting through the adhesive.
– Keep that pick in the seam, so the adhesive doesn’t get all cozy and stick back together. We don’t want that, right?
Step 5


If you’re finding it a bit tough to cut through, don’t hesitate to warm things up again on that edge before moving forward!
– Grab your trusty iOpener and warm up that bottom edge of the phone for a cozy two minutes.
– Slide an opening pick into the right edge, right by that bottom corner – we’re getting in there!
– Gently work your magic with the pick as you navigate around the corner. Keep on cutting along that bottom edge and make your way around the left side.
– Once you’re in, leave that opening pick in the seam to keep the adhesive from sealing up again. You’re doing great!
Tools Used
Step 6


When you’re slicing around those corners, make sure to give them a good heat-up first!
– Keep heating and slicing around the rest of the phone. You’re doing great! Just a few more slices and we’ll be there.
Step 7


Feel free to pop that back cover on without swapping out the adhesive! Just make sure to clear away any big bits of sticky stuff that could stop the cover from sitting nicely. Once it’s on, give it a little heat and some gentle pressure to make sure it’s snug as a bug.
– Now that you’ve sliced around the phone, use an opening pick to gently pry the back cover away from the frame – it’s like opening a little door!
– Carefully lift the back cover, and don’t worry if it’s still stuck in some spots – just use your opening picks to slice through any remaining adhesive.
– You did it! The back cover is off. Take a deep breath and get ready for the next steps.
– Before you put everything back together, take a minute to turn your phone on and make sure all the functions are working properly. Then, power it back down before moving forward – we want to make sure everything is just right.
– When you’re ready to put it all back together, follow our guide to reinstall the back cover, transfer and install the camera bezel, and replace the adhesive. And if you need help, you can always schedule a repair with the experts at Salvation Repair.