DIY Guide: How to Replace the Back Cover on Samsung Galaxy M31
Duration: 45 minutes
Steps: 9 Steps
Get ready to tackle your Samsung Galaxy M31! This guide will walk you through the process of taking off the back cover and the fingerprint sensor. Just a heads up, you’ll want to grab some replacement adhesive to stick that fingerprint sensor back on when you’re putting everything back together. If you need help, you can always schedule a repair.
Step 1


– Time to get started. Insert a SIM card eject tool, a SIM eject bit, or even a straightened paper clip into the hole on the SIM tray, which you’ll find on the left side of your phone.
– Gently press in to eject the tray – it’s easier than you think. If you need help, you can always schedule a repair
Tools Used

Step 2


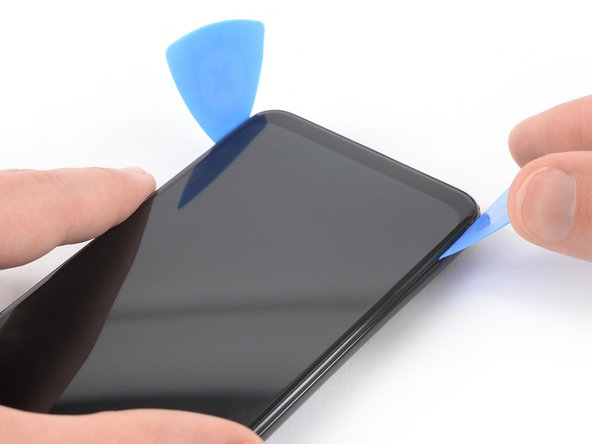
– Gently slide an opening pick between the phone assembly and the back cover at the bottom edge of your device.
– Carefully maneuver the opening pick around the bottom right corner to pop those clips free and let the back cover come off.
Step 3

– Time to get started. Insert a second opening pick between the back cover and phone assembly at the bottom edge of the phone – this will help you loosen things up.
– Now, carefully slide that opening pick around the bottom left corner. This should release the plastic clips holding the back cover in place. Easy does it.
Step 4
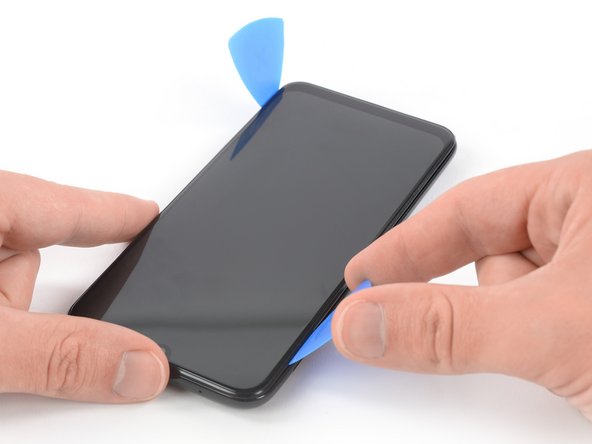

– Let’s get this phone open! Slide your opening pick along the left side of the phone. This will gently release the plastic clips holding the back cover in place.
Step 5


– Let’s get this party started! Slide the opening pick along the right side of your phone. It’s like a little dance for your phone’s back cover. This will release the plastic clips holding it in place.
Step 6
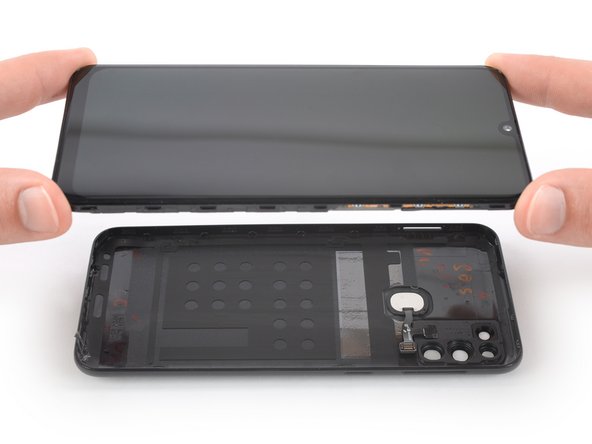


Hey there! The fingerprint sensor flex cable is a little shorty, so take it slow when you’re taking off the back cover. Don’t go too fast, or you might give the cable a little tug! Just be smooth and steady, and everything will be peachy.
– Gently pry the phone assembly out of the back cover – you’re making great progress!
– Now’s a good time to power on your phone and test everything to make sure it’s working smoothly. Just remember to power it back down before moving on. If you need help, you can always schedule a repair
Step 7

– Grab a heated iOpener and press it to the back of your phone right where the fingerprint sensor sits. Hold it there for a good two minutes to loosen up that stubborn adhesive. If you need help, you can always schedule a repair
Tools Used

Step 8

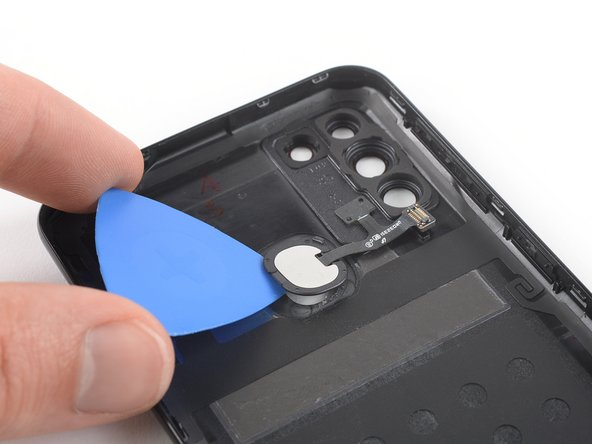
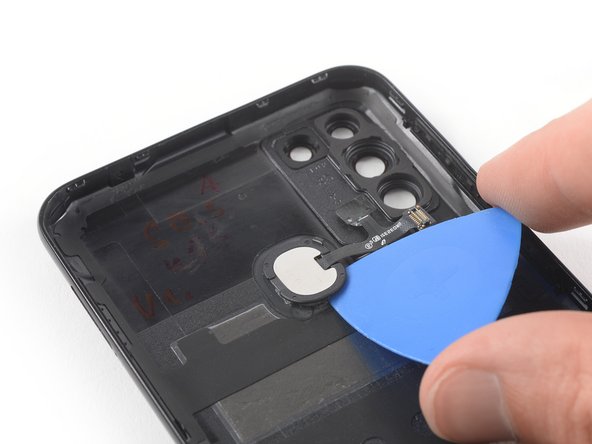
– Gently slide an opening pick under the edge of the fingerprint reader. You’re doing great!
– Now, carefully run that pick around the edge of the fingerprint reader to slice through the adhesive beneath. You’re almost there!
Step 9


– Time to say goodbye to the fingerprint reader! Go ahead and remove it with a gentle touch.
