How To Replace Samsung Galaxy J3 Emerge Motherboard
Duration: 45 minutes
Steps: 7 Steps
Ready to give your Galaxy J3 Emerge a brand new heart? This guide will walk you through replacing the motherboard, the phone’s main brain, and all its connections. This is the fix for when your phone just won’t cooperate, and it’s also a great way to get to some of the hidden components like the camera and speakers. Don’t worry, we’ll guide you every step of the way. If you need help, you can always schedule a repair.
Step 1


– Warm up the edges of the screen using a hair dryer to get things nice and cozy.
– Slide the iFixit Opening Tool into the gap between the screen and the body to start popping that edge open.
– Gently work the iFixit Opening Tools all around the screen to loosen up the glue and free your display.
Tools Used

Step 2


Hey there, be careful lifting that screen! It can be a little fragile, so take it easy. If you need help, you can always schedule a repair.
– Gently raise the screen from the bottom like you’re lifting a heavy book.
– Carefully pop open the gray cover like you’re unveiling a surprise!
Step 3


– Gently wiggle the connector free from the motherboard using a clean nail or that trusty iFixit opening tool. You’ve got this!
Tools Used
Step 4


If those pesky screws are giving you a hard time, grab some tape! Stick the sticky side onto the screws and give it a gentle pull. They’ll pop right out, and you’ll be back on track in no time!
– Go ahead and unscrew those eleven Phillips #00 3.5mm screws like a pro!
Step 5

You’ll hear a cheerful clicking sound when you apply some pressure.
– Flip the phone over and give that battery compartment a good push! You got this!
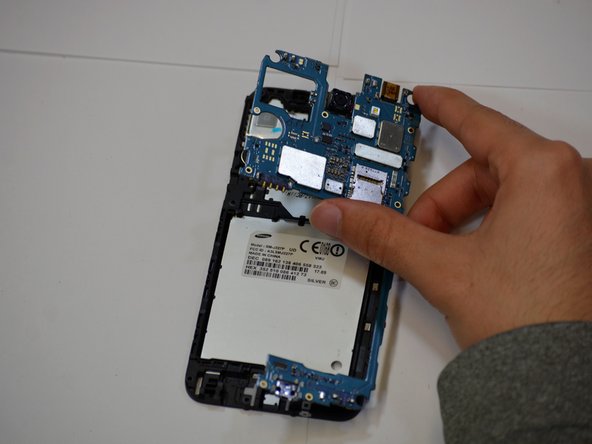
Step 6

– Slide the iFixit Opening Pick between the motherboard and the panel. Don’t worry, it’s like a little dance between the parts!
– Carefully wiggle the iFixit Opening Pick around the outside of the motherboard. It’s like a friendly tickle, but for your device!