Samsung Galaxy J3 Emerge Camera Replacement Guide
Duration: 45 minutes
Steps: 10 Steps
Hey there, camera-loving friend! If your Samsung Galaxy J3 Emerge (model SM-J327P) camera is looking a bit worse for wear, we’ve got you covered! This step-by-step guide will help you replace those cracked cameras. It’s a bit of a journey, though, because those cameras are hidden behind the motherboard. So, grab a screwdriver and get ready to dive into the heart of your device! If you need help along the way, you can always schedule a repair with us. Let’s get this camera back in tip-top shape!
Step 1


– Let’s warm up those edges! Use a hair dryer to gently heat the screen.
– Now, slip the iFixit Opening Tool between the screen and the body. We’re just getting things started, so go slow and steady.
– Time to break the glue! Work the iFixit Opening Tool around the whole screen. Think of it like a gentle massage for your device.
Tools Used


Step 3


– Gently pry the connector off the motherboard using a clean nail or the iFixit opening tool – it’s easier than you think, and you’re doing great so far. If you need help, you can always schedule a repair
Tools Used
Step 4


If the screws get stuck when removing, don’t worry – we’ve got a trick for you. Try placing the adhesive side of some tape on the screws and then pull the tape off. This should help loosen them up. If you need help, you can always schedule a repair
– Let’s get started by removing the eleven Phillips #00 3.5mm screws – don’t worry, it’s easier than it sounds. If you need help, you can always schedule a repair
Step 5

Get ready for a bit of a ruckus! When you press down, you might hear a cheerful clicking sound.
– Flip the phone over and give that battery compartment a little push. You got this!
Step 6

– Slide an iFixit Opening Pick between the motherboard and the panel. It’s like a little dance party for your tools!
– Now, gently work that iFixit Opening Pick around the outside of the motherboard. We’re almost there!
Step 7
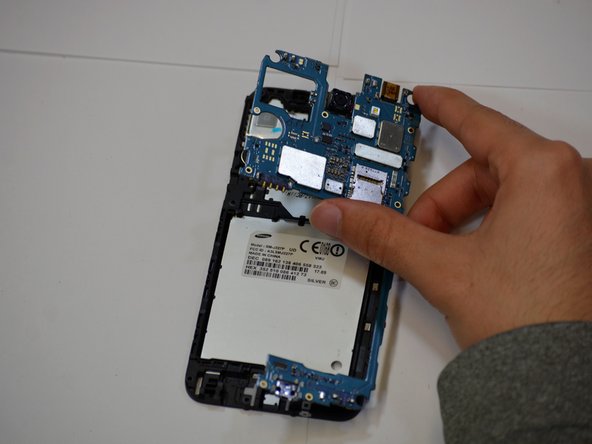

– Gently coax the motherboard away from the phone using your hand. Remember, a little patience goes a long way!
Step 8

– Now it’s time to remove the green tape covering the connectors. Gently pull it off to expose what’s underneath.
Step 9

– Time to get started – gently lift up the tabs to expose the ribbons underneath.