DIY Samsung Galaxy J1 Midframe Replacement Guide
Duration: 45 minutes
Steps: 4 Steps
Ready to dive into the heart of your device? This guide will walk you through the process of removing the midframe to access all the juicy bits like the motherboard, cameras, and daughterboard. It’s like a backstage pass to your tech’s inner workings! If you need help, you can always schedule a repair.
Step 1

– Slide a fingernail or a trusty plastic opening tool into the gap between the back cover and your device.
– With a gentle touch, lift that rear cover away from the phone like it’s a secret treasure waiting to be uncovered.
Step 2


The device in the picture is currently lacking its SIM card and battery.
– Gently use your finger to slide the SIM card down and out of its cozy little slot.
– Now, go ahead and lift that SIM card out like a pro!
Step 3

– Grab your trusty Phillips #00 screwdriver and let’s tackle those eleven 3 mm screws. You’ve got this!
Tools Used

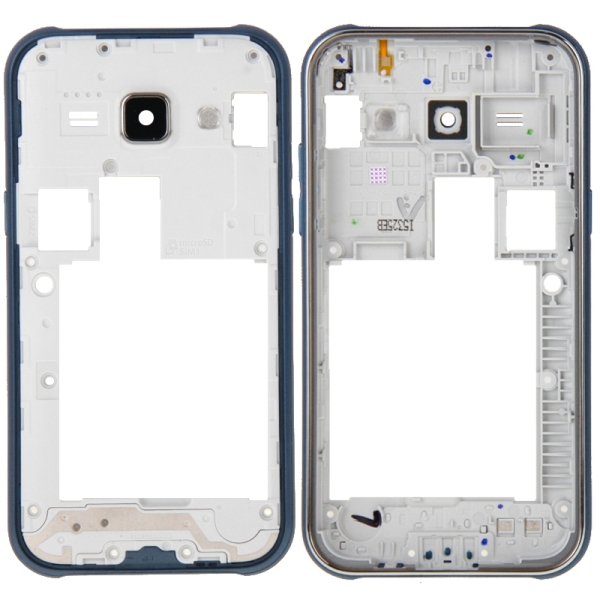
Step 4


When removing the main assembly, be careful not to apply too much pressure, which can cause the glass screen to crack or damage the internal clips. Take your time and gently pry it loose to avoid any damage.
– Let’s get this screen party started! Slide a plastic opening tool between the screen and the back of your device. It’s like giving your device a little hug.
– Starting at the bottom, gently glide the tool along the edges of the screen. Think of it as a dance, but with a tool instead of a partner.
– Time to give that main assembly some space! Gently pry it from the midframe. Remember, we’re all about being gentle, like a feather on a breeze. If you need help, you can always schedule a repair