DIY Guide: Samsung Galaxy A70 Battery Replacement Tutorial
Duration: 45 minutes
Steps: 21 Steps
make sure your battery is running low, below 25% to be exact, before you start this repair
Get ready to breathe new life into your Galaxy A70 by replacing that worn-out or dead battery. If you notice any swelling, be sure to take the necessary precautions to stay safe. Before you start disassembling your phone, make sure to discharge the battery to below 25% to minimize the risk of any thermal events. Don’t worry if you’re not sure where to start – we’ve got you covered. You’ll need some replacement adhesive to reattach components when you’re putting everything back together. If you need help or want some extra guidance, you can always schedule a repair with the experts at Salvation Repair.
Step 1


– Time to get started. Insert a SIM card eject tool, a SIM eject bit, or a straightened paper clip into the hole on the SIM tray – it’s located at the left edge of your phone. Give it a gentle push until you feel the tray start to loosen.
– Now, press down firmly to eject the tray. Once it’s out, you can remove it and take a look inside. If you need help along the way, you can always schedule a repair with Salvation Repair.
Tools Used

Step 2

Feel free to use a hair dryer, a heat gun, or a hot plate to warm things up a bit! Just keep an eye on it and don’t let that phone overheat—the AMOLED display and battery can’t handle too much heat. Be smart and take care while you’re at it!
– Start by switching off your Galaxy A70 – it’s time to get this repair party started!
– Now, grab your trusty iOpener and heat it up. Use it to loosen the adhesive under the back cover. Give it at least two minutes to work its magic – you might need to repeat this step a few times to get the cover off smoothly. If you need help, you can always schedule a repair
Tools Used

Step 3


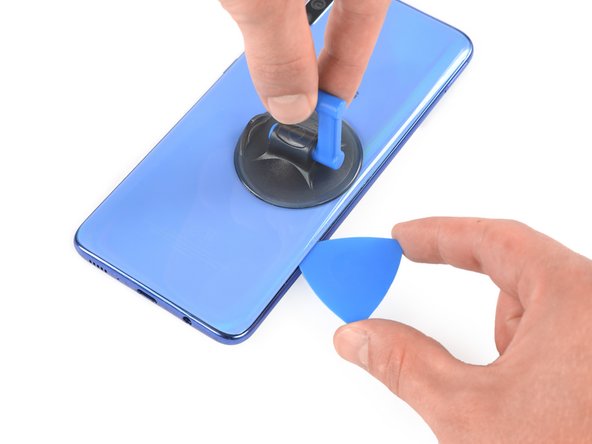
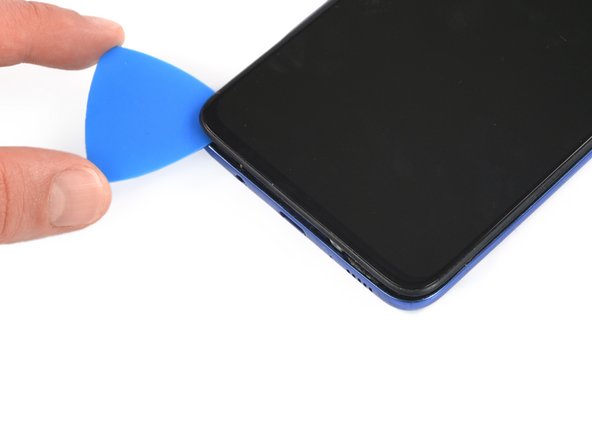
– Stick a suction cup to the back of your phone, right near the center of the right edge.
– Pull on the suction cup to create a little space between the back cover and the frame.
– Slide an opening pick into that gap. It’s like a little dance!
Step 4


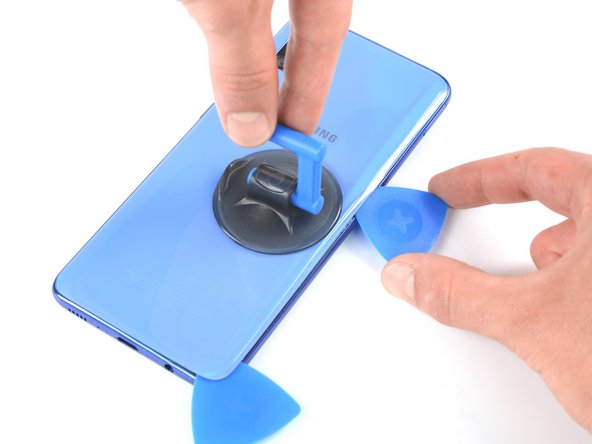
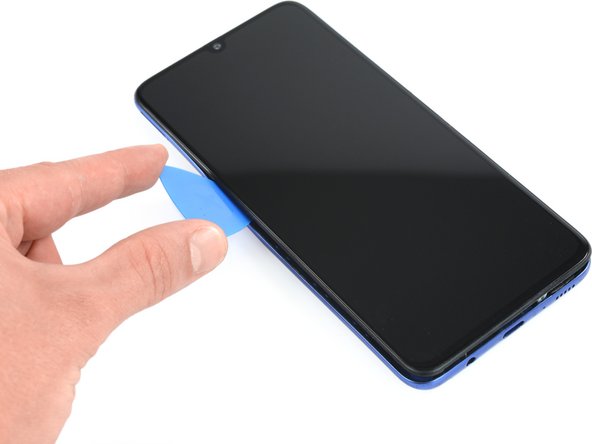
Once you’ve got that opening pick in place, you can ditch the suction cup or keep it there for a better grip while you pry things open. Your choice!
– Gently slide the opening pick along the edge until you reach the bottom right corner. Nice and easy!
– Keep that pick in place to make sure the adhesive doesn’t decide to stick again. You’ve got this!
Step 5


If you’re having a tough time with cutting, give the iOpener another go to warm up that adhesive and make your life easier.
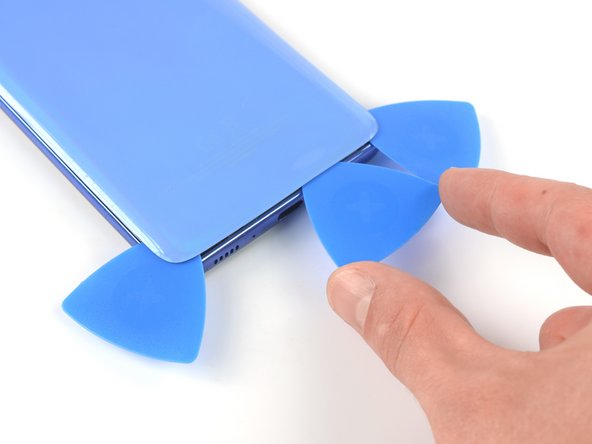
– Slide a second opening pick into the bottom right corner of the back cover, just like slipping a bookmark into a great book.
– Gently glide the opening pick along the edge all the way to the top right corner – think of it as a little road trip for your tool!
– Keep those opening picks in place to stop that pesky adhesive from sealing up again. You’ve got this!
Tools Used
Step 6


– Slide a third opening pick right under the top right corner of that back cover.
– Gently glide the tip of the opening pick along the top edge of your phone to slice through that pesky adhesive.
– Keep that opening pick snugly in the top left corner to stop the adhesive from sticking back down.
Step 7


– Alright, let’s get this party started! Take your trusty opening pick and slide it under the top left corner of your phone. That’s right, just like you’re giving your phone a little high five!
– Now, gently slide that pick along the left edge of your phone. Think of it as a little dance, cutting through that adhesive like a pro.
– Leave the pick in place, like a little dance partner, to make sure the adhesive doesn’t get back together. You’ve got this!
Step 8

– Slide a fifth opening pick right under the bottom left corner. It’s like giving your device a little hug!
– Now, glide it along the bottom edge to slice through that stubborn adhesive. You’re doing great!
Step 9

– Pop off that back cover like a pro! It’s time to get to the good stuff.
– Once you’ve snugly placed the back cover back on, give your phone a nice, firm hug for a few minutes. This helps the adhesive really stick — a pile of heavy books can do the trick. Just think of it as a bonding moment!
Step 10

– Grab your trusty Phillips screwdriver and let’s get to work! You’ll need to unscrew the fourteen 4.0 mm-long screws that hold that midframe in place. You’ve got this!
Step 11


The midframe is snugly secured by some handy plastic clips.
– Slide an opening pick into the gap between the midframe and the front panel on the right side of your phone, just by the volume button. You’ll be making some great progress here!
Step 12


– Gently glide that opening pick down to the bottom right corner to pop those pesky plastic clips loose!
Step 13


– Keep gliding that opening tool from the bottom right corner to the bottom left corner to pop those plastic clips free!


Step 15

– Let’s get started by removing the midframe. This is the first step in giving your device a brand new lease on life. If you need help, you can always schedule a repair


Step 17


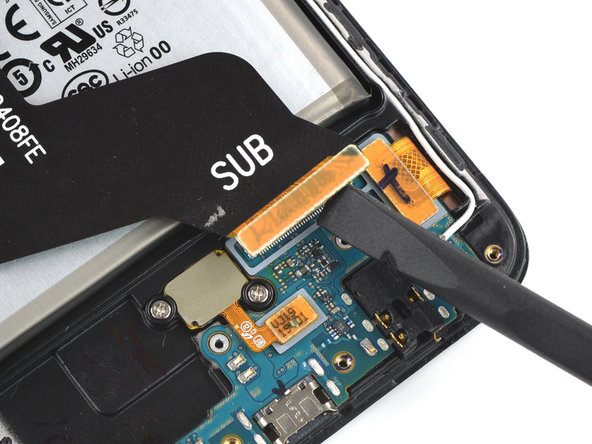
– Use a spudger to carefully release the interconnect cable from the motherboard – just gently pry the connector straight up from its socket. If you’re not feeling confident, don’t worry, you can always schedule a repair and let the pros at Salvation Repair handle it for you.
Tools Used