DIY Samsung Galaxy A70 Back Cover Replacement Guide
Duration: 45 minutes
Steps: 8 Steps
Get ready to swap out that shattered back cover on your Galaxy A70! Don’t forget, you’ll want some replacement adhesive to stick everything back together when you’re done. If you need help, you can always schedule a repair.
Step 1

A hair dryer, heat gun, or hot plate can be used to warm things up, but be careful not to overheat the phone. Remember, the AMOLED display and internal battery are sensitive to heat damage. If you need help, you can always schedule a repair.
– First things first, power down that Galaxy A70 of yours. We want it nice and chill before we dive in!
– Now, let’s get our hands on an iOpener and heat it up to work its magic on the adhesive under the back cover. Give it a good two minutes of warmth! Feeling adventurous? You might want to repeat this step a few times to make the back cover removal a breeze!
Tools Used

Step 2


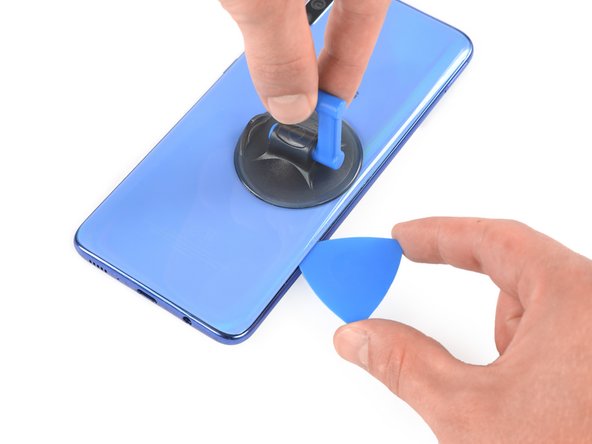
– Stick a suction cup onto the back of the phone, pretty close to the middle of the right edge.
– Give the suction cup a firm pull to create a gap between the back cover and the frame.
– Slide an opening pick into that gap.
Step 3


Once you’ve got that opening pick in place, you can ditch the suction cup if you want. Or keep it there, it’s your call. Either way, you’re rockin’ the removal procedure!
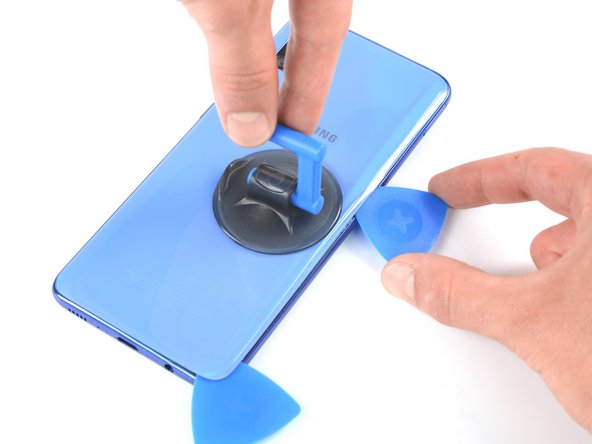
– Glide the opening pick along the edge to the bottom right corner.
– Leave the pick in place to keep the adhesive from sticking back together.
Step 4


Need a little extra help getting that cut just right? No worries! Just pop that iOpener back in the microwave and give the adhesive a little more love. You’ve got this!
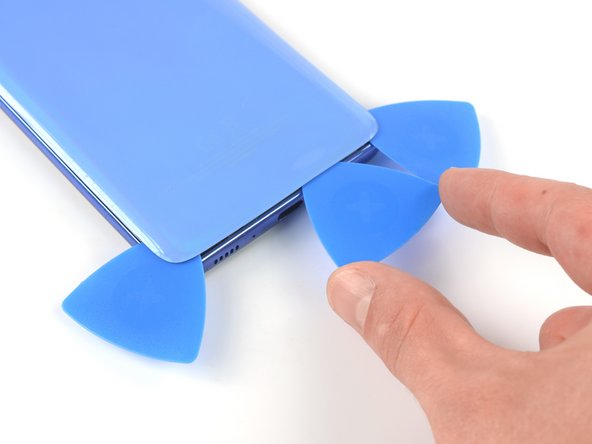
– Slide a second opening pick under the bottom right corner of the back cover, just like a pro!
– Now, gently glide that opening pick along the edge all the way to the top right corner.
– Keep those opening picks in place; we don’t want that adhesive getting cozy again!
Tools Used
Step 5


– Pop a third opening pick right under the top right corner of that back cover.
– Gently glide the tip of the opening pick along the top edge of your phone to slice through the adhesive.
– Keep that opening pick wedged in the top left corner to stop the adhesive from sticking back together.
Step 6


– Slide a fourth opening pick under the top left corner like a pro.
– Gently glide the opening pick along the left edge of your phone to slice through that pesky adhesive.
– Keep the opening pick in place to ensure the adhesive doesn’t get any funny ideas about resealing.
Step 7

– Let’s get that bottom left corner loosened up! Slide an opening pick underneath that corner and gently wiggle it along the bottom edge to separate the remaining adhesive. You’re doing great!
Step 8

– Time to take off that back cover! Pop it right off and get ready for the next step.
– Alright, now that you’ve got the back cover on, give your phone a little love tap! Press down firmly for a few minutes to help the adhesive stick like glue. A stack of books will do the trick, or maybe a really heavy cat. 😉
