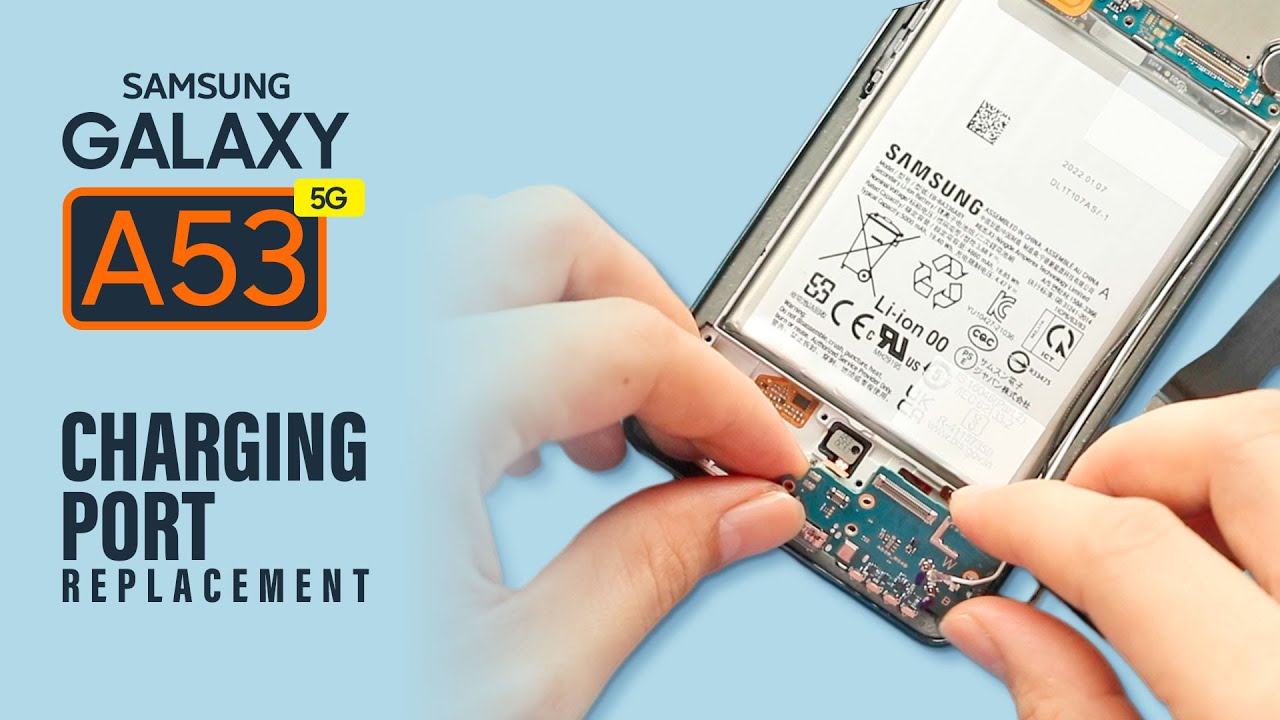
Samsung Galaxy A53 5G Loudspeaker Replacement Guide – DIY Tutorial
Duration: 45 minutes
Steps: 14 Steps
For your own safety, make sure to drain that battery to below 25% before diving into the disassembly of your phone. Let’s keep things safe and sound!
Alright, let’s get this speaker swap party started! First things first, make sure your phone’s battery is chillin’ at 25% or less. It’s just a safety thing – we don’t want any surprises during our tech adventure. If you’ve got a puffy battery, be extra careful and maybe give us a shout if you’re unsure. Oh, and remember, when you’re putting everything back together, those adhesive seals are your phone’s water protection heroes. Keep them in place, or your phone might get a little too cozy with a splash. Don’t worry though, if you need a hand with the adhesive, we’ve got your back. If you need help, you can always schedule a repair. Now, let’s get this speaker swap show on the road!
Step 1

When using heat to loosen the adhesive, be careful not to get too aggressive – your phone’s display and battery aren’t fans of extreme temperatures. A hair dryer, heat gun, or hot plate can be used, but keep it gentle to avoid any damage. If you’re not feeling confident, don’t worry – you can always schedule a repair and let the pros handle it.
– Grab your trusty iOpener and give it a warm hug on the back cover for at least two minutes. This will help loosen that pesky adhesive hiding underneath!


Step 2


If you’re having trouble creating a gap, don’t worry! Just give it a little more heat to loosen up that sticky stuff. Follow the instructions for using the iOpener to make sure you don’t overheat anything. If you need help, you can always schedule a repair
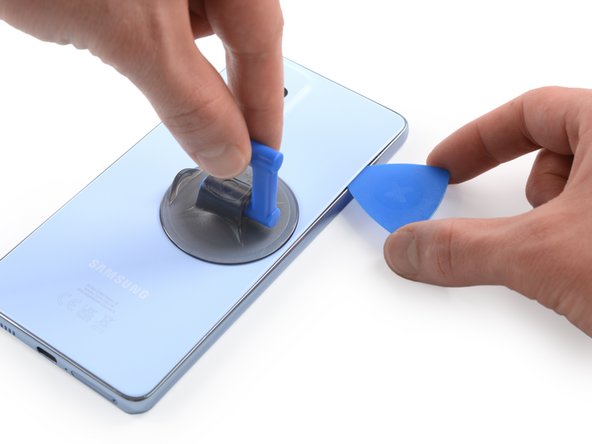
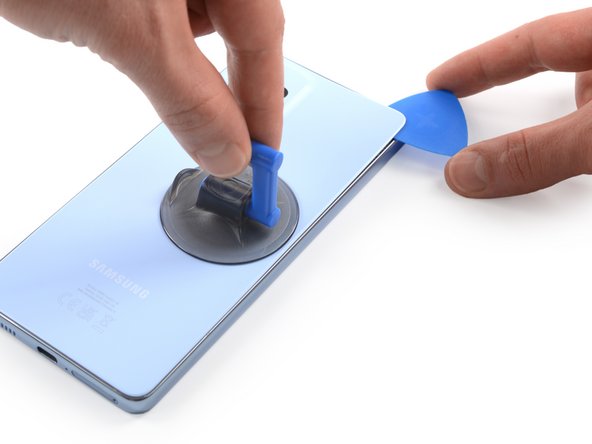
– Grab your trusty suction handle and stick it firmly to the right edge of the back cover – the closer to the edge, the better!
– Now, give that suction handle a gentle lift to create a teensy-weensy gap between the back cover and the frame.
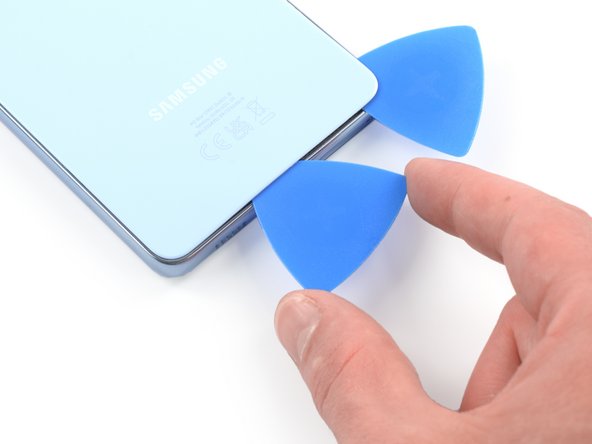
– Slip an opening pick into that gap you just made – like a tiny, helpful friend sliding into a party.
Tools Used

Step 3

– Gently slide that opening pick into the top right corner and give a little nudge to slice through the adhesive like a pro.
– Keep that pick right where it is to stop the adhesive from getting all clingy again.
Step 4

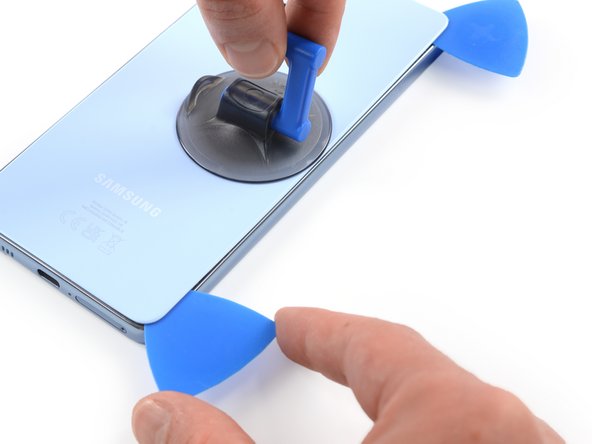
– Pop in a second opening pick at the top right edge of your phone.
– Gently slide that opening pick down to the bottom right corner to cut through the adhesive like a pro.
– Keep those opening picks right where they are to stop the adhesive from getting all clingy again.
Step 5

If the adhesive is putting up a fight and getting tough to slice through, it’s probably cooled off a bit. Give your iOpener a quick one to two-minute warm-up to get things back to business.
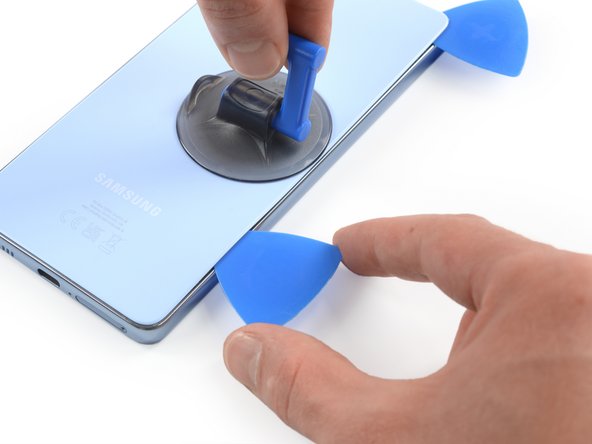
– Pop in a third opening pick at the bottom right corner of your phone, just like a pro!
– Gently slide that opening pick along the bottom edge to cut through the adhesive like butter.
– Keep the opening pick snug in the bottom left corner to stop that adhesive from getting all clingy again.
Tools Used
Step 6
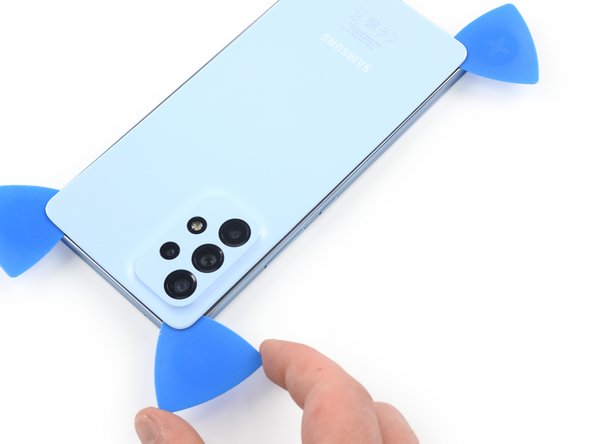


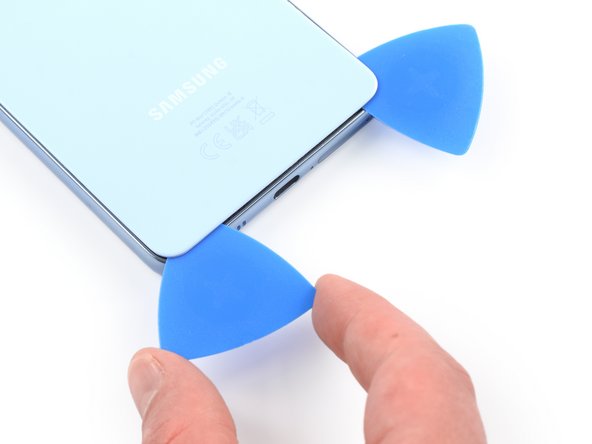
– Now it’s time to add a fourth opening pick – slide it into the bottom left corner of your phone and get ready to make some progress.
– Gently slide the opening pick along the left edge to cut through the adhesive. You’re doing great!
– Leave that opening pick right where it is, up in the top left corner, to keep the adhesive from sealing back up. If you need help, you can always schedule a repair
Step 7
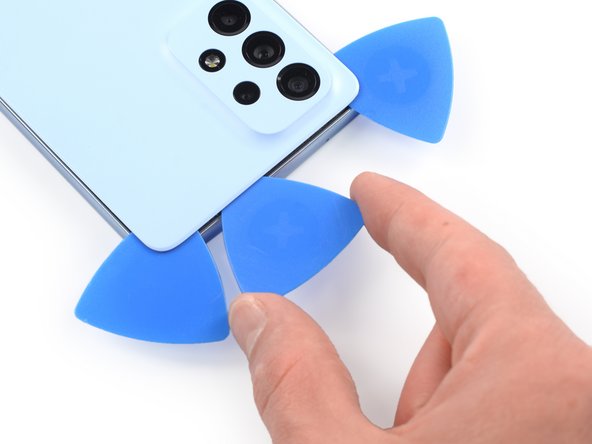

– Let’s slip a fifth opening pick into the top left corner, like we’re opening a treasure chest!
– Now, slide that pick along the top edge of the back cover. It’s like a magic wand, slicing through the remaining adhesive!
Step 8

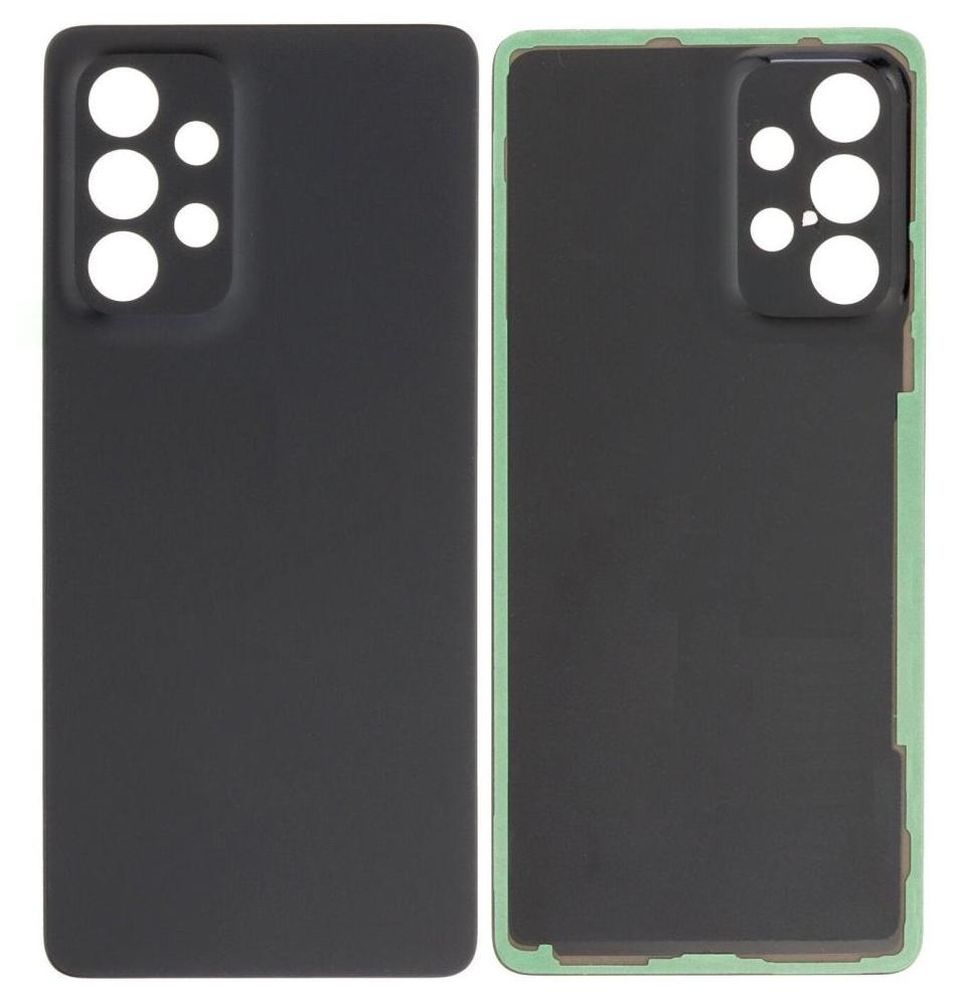
– First, let’s get started by removing the back cover – it’s time to get up close and personal with your device.
– Next, give the relevant areas a good clean with some isopropyl alcohol (make sure it’s over 90%!). Then, apply new adhesive where needed – this will help everything stick together nicely.
– Now it’s time to secure the new back cover. Use pre-cut adhesive or double-sided adhesive tape to get the job done. Once it’s on, apply some strong, steady pressure to your phone for a few minutes to help the adhesive bond – a stack of heavy books works like a charm. If you need help, you can always schedule a repair
Step 9

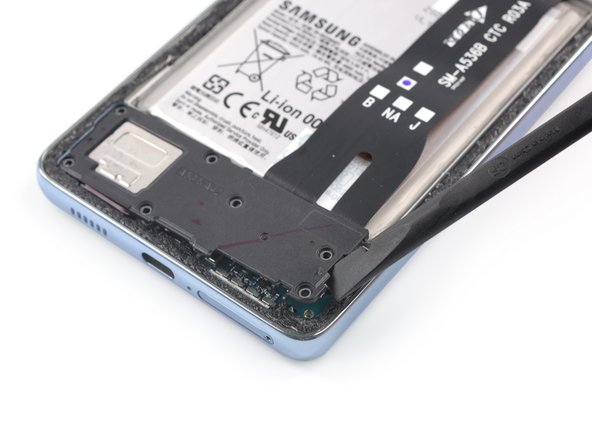
– Grab your trusty Phillips screwdriver and unscrew those eight 3.9 mm screws holding the motherboard cover. If you need help, you can always schedule a repair
Step 10

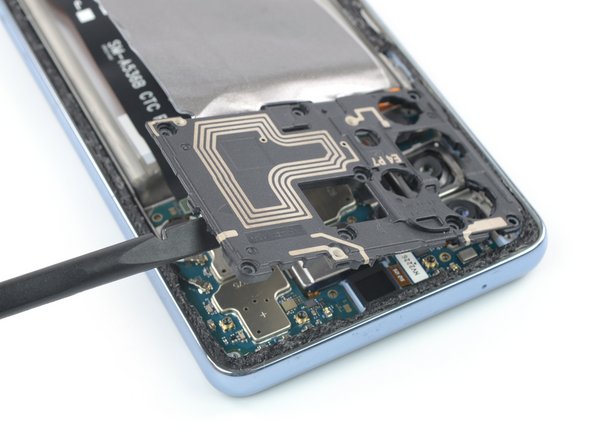

– Gently slide the flat end of your trusty spudger into the little gap between the frame and the motherboard cover on the right edge. It’s like giving your device a little tickle!
– Now, use that spudger to carefully lift up the motherboard cover. You’re doing great—keep it up!
Tools Used

Step 11

– Let’s get started by removing the motherboard cover. This is the first step in giving your device a brand new lease on life. If you need help, you can always schedule a repair
Step 12
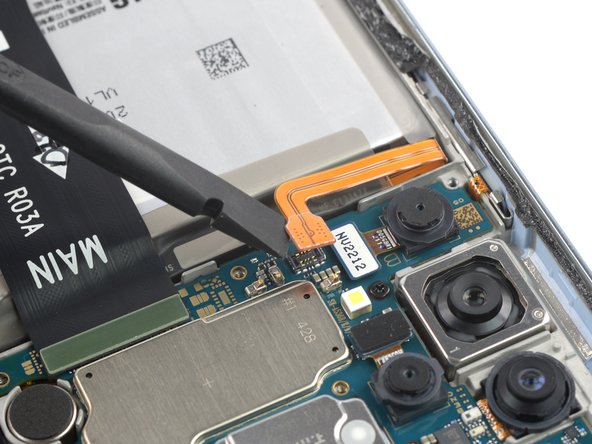

– Time to get started! Use a spudger to carefully disconnect the battery cable by gently prying the connector straight up from its socket. If you need help, you can always schedule a repair
Tools Used
Step 13

– Grab your trusty Phillips screwdriver and give those seven 3.9 mm-long screws securing the loudspeaker assembly a good twist to loosen ’em up. You got this!