Samsung Galaxy A52 Back Cover Replacement Guide – DIY Tutorial
Duration: 45 minutes
Steps: 8 Steps
Ready to give your Samsung Galaxy A52 a fresh new look? This guide will walk you through replacing that worn-out back cover. Just a heads up: if you skip replacing the adhesive seals during reassembly, your device will still work like a champ, but it might lose some of that sweet water protection. Make sure to grab some replacement adhesive to keep everything snug and secure when putting your device back together. If you need help, you can always schedule a repair.
Step 1

You can use a hair dryer, heat gun, or hot plate, but keep an eye on the temperature! Overheating your phone can lead to some serious heat damage for both the display and the internal battery. So, let’s keep it cool and make sure everything stays in tip-top shape! If you need help, you can always schedule a repair.
– Grab your trusty iOpener and give it a warm hug against the back cover for a solid two minutes. This will help loosen up that stubborn adhesive hiding underneath, making your repair journey a breeze!


Step 2


Hey, sometimes that back cover can be a bit stubborn! If it’s damaged, the suction handle might not want to stick. No worries! You can try giving it a lift with some strong tape or get creative and superglue the handle in place. Just let it dry completely before moving on.
If you’re having trouble getting a gap, don’t give up! Just give that adhesive a little more heat to soften it up. Just follow the iOpener instructions carefully, to avoid making things too hot.
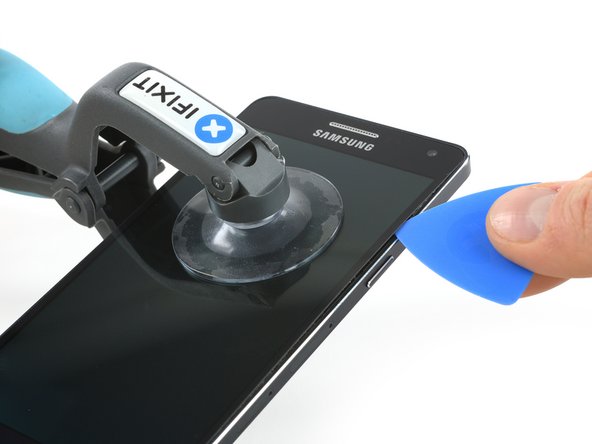
– Grab your trusty suction handle and stick it to the right edge of the back cover, as close to the edge as you can get.
– Now, give that suction handle a gentle lift to create a teensy gap between the back cover and the frame. You’re basically giving it a little nudge to start the separation.
– With that gap open, slide your opening pick into the space you just created. You’re like a little ninja, slipping in there!
Tools Used

Step 3


– Gently glide your opening pick to the top right corner to break that adhesive seal.
– Keep the opening pick right where it is to stop that adhesive from making a comeback.
Step 4


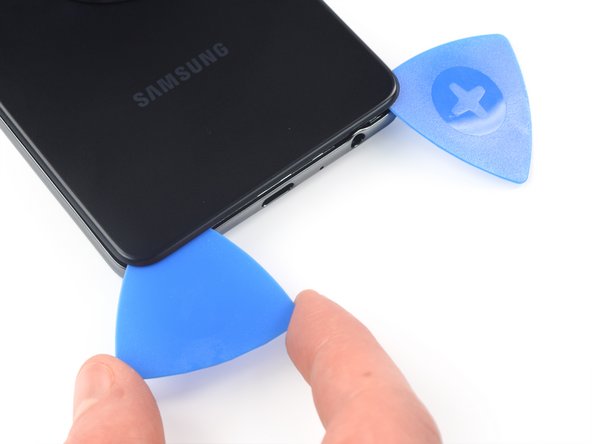
– Let’s get this party started! Slide a second opening pick underneath the top right corner of your phone. You’re in control, so feel free to move it around.
– Now, gently slide that opening pick towards the bottom right corner. It’s like you’re giving the adhesive a little nudge to say ‘Hey, let’s get this show on the road!’.
– Leave that pick in place so the adhesive doesn’t try to play any tricks on you. You’re the boss!
Step 5

If the adhesive is giving you a hard time and feels tough to slice through, it’s probably lost its warmth. Grab your trusty iOpener and give it a little heat up to get back in the game!
– Pop in a third opening pick at the bottom edge of your phone.
– Gently glide that opening pick along the bottom edge to cut through the adhesive like a pro.
– Keep the opening pick snug in the bottom left corner to stop the adhesive from making a comeback.
Tools Used
Step 6


– Let’s get this party started! Slide a fourth opening pick under the bottom left corner of your phone. Yep, just like that.
– Now, carefully slide the pick along the left edge, slicing through that sticky adhesive. You’re doing great!
– Leave the opening pick in the top left corner. This will keep the adhesive from resealing itself. You’re almost there!
Step 7


– Let’s get this back cover off! Slide a fifth opening pick under the top left corner.
– Now, scoot that opening pick along the top edge of the back cover, carefully slicing through that sticky stuff holding it down.
Step 8

– First things first, let’s get that back cover off! It’s like peeling a banana, but for your device.
– Now, grab some isopropyl alcohol (>90%) and clean the areas where you’ll be applying new adhesive—time to make things nice and tidy!
– Once that’s done, it’s time to secure the new back cover! Use some pre-cut adhesive or double-sided tape to stick it down. After you’ve placed it, give your device some love by applying steady pressure for a few minutes. A stack of heavy books works like a charm for this part!